Thursday, April 10th, 2014

If you always start a new page for a particular type of heading – include the page break in the style
When you always start a major heading item on a new page in a Word document you can configure your heading style so it has the page break built into it – saving you having to insert it manually.
To do this, select some text with formatted with the style that is to include the page break and locate the style in the Style gallery. If it does not appear there, display the Styles and Formatting task pane by clicking the dialog launcher in the bottom right of the Styles area in the ribbon.
Right click the Style name, choose Modify and then Format.
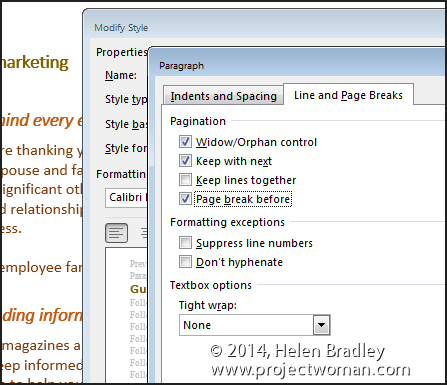
Click the Paragraph option and then click the Line and Page Breaks tab.
Enable the Page Break Before checkbox and click Ok twice.
The page break is now part of the style so a new page will be started each time you use that style. The style will also update and effect any text already formatted using that style in the current document.
Helen Bradley
Labels: heading style, Page Break, style, style tips, Tutorial, Word
Categories:office
posted by Helen Bradley @ 3:52 pmNo Comments links to this post
Tuesday, June 18th, 2013

Modify a Style’s Font Color to help find missed formatting
Quickly determine which paragraphs in a document have been formatted using one style, rather than another, by changing the colour of the formatted text.
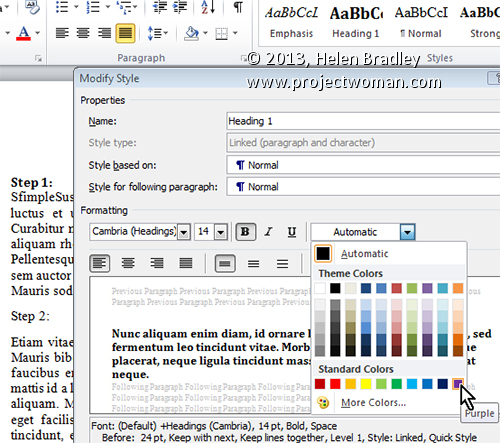
To do this, click the Home tab on the Ribbon, hover over the style’s name you want to edit in the Styles gallery. Now, right click it and select Modify. In the Modify Style dialog, change the Font Color to something that will stand out on the page (such as purple) and click OK.
Now scroll through your document to see if the style has been applied everywhere you wanted it applied. Remember, if you don’t make any changes at this point, you can quickly undo the colour change by selecting Undo.
Otherwise, when you are done formatting the document, set the colour back to the original Font Color by repeating the above steps.
Helen Bradley
Labels: 2010, 2013, color, colour, font, Font Color, format, Home, Microsoft Office, Microsoft Word, miss, mistakes, modify, Modify Style, style, Styles Gallery, tip, trick, Tutorial, Word, Word 2010, Word 2013
Categories:office
posted by Helen Bradley @ 5:44 amNo Comments links to this post
Saturday, January 26th, 2013

You can easily change your default font settings in Google docs using styles.
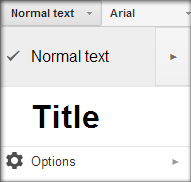
To change your default text style for all future documents, you must first update the Normal text style. Highlight some text with the formatting you want to adopt as your default, open the styles dropdown menu, and click the arrow next to Normal text. In the resulting menu, select Update ‘Normal Text’ to match. This redefines the Normal text style to match the selected text. To make this change permanent, open up the style menu again and select Options > Save as my default styles. This means that the new Normal text style will be used for all future documents. In this way you can set, for example, 12-point Times New Roman as your default font for Google docs.
If you ever want to undo all style changes, return to the options menu and select Reset styles. This will reset them to the original default settings, but only within that document, so you must then choose Save as my default styles again if you wish to make the reset permanent.
Helen Bradley
Labels: default, font, formatting, google docs, style, styles, text
Categories:hunter, office
posted by Hunter Delattre @ 9:00 am2 Comments links to this post
Tuesday, October 16th, 2012

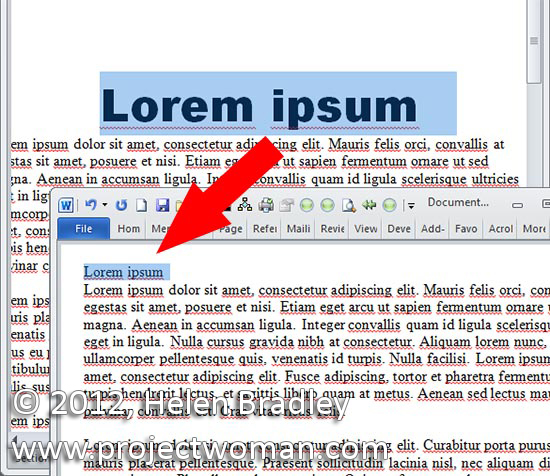
If you are having second thoughts about the look of your document you can remove the formatting. Select the text that you want to strip of its formatting and and press Ctrl + Space Bar to remove its formatting. If you press Ctrl + Shift + N you’ll apply the default Normal style to the selected text.
Helen Bradley
Labels: formatting, Microsoft, remove formatting, style, trevor office, trevor payne, Word
Categories:office, trevor tip
posted by Trevor Payne @ 8:00 amNo Comments links to this post


