Monday, May 13th, 2013
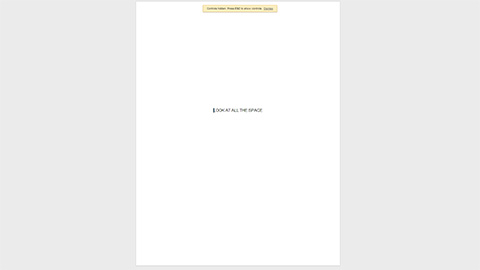
If you like working with the cleanest view possible, Google Docs makes it easy for you. First select View > Full screen. This will remove all menus from the screen, so make sure you don’t need to access any buttons while using this view. Now you can make your browser itself full screen. In most browsers you can accomplish this by pressing F11. With these options you will see absolutely nothing but the page you are typing on.
To undo these options, press F11 again to eliminate the browser full screen, then esc to eliminate Google Doc’s full screen mode.
Helen Bradley
Labels: full screen, google docs, maximum, space
Categories:hunter, office
posted by Hunter Delattre @ 9:00 amNo Comments links to this post
Friday, March 15th, 2013
Gadgets allow you to do things with Google Docs that would be time consuming if not beyond most people’s skills to create in a program like Excel. In this article I’ll demonstrate how to create a motion chart in Google Docs spreadsheet.
Prepare the data
In the first column of a new worksheet type the name of the item you’re charting such as office locations – we’ll use City and Bayside. In the next column, type the period that the data is for – this needs to be a time field such as year, week or quarter. The data needs to conform to ISO8601 so use 2011 for a year, 2011W08 to enter week eight of 2011 or 2011Q2 for second quarter 2011.
In the next column, type the data to plot such as Profit. The next columns are optional but we’ll add one which records units sold. To have some data to work with, add at least five years of data for the two offices.
Add the Gadget
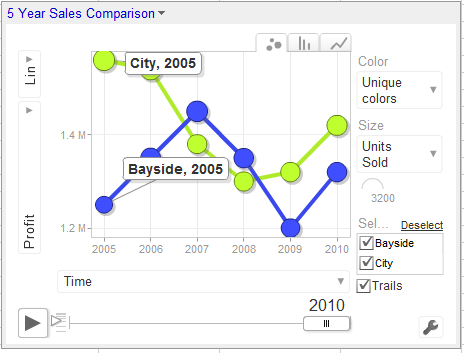
Select over the entire range (including headings), and choose Insert > Gadget > Charts and scroll to find the Motion Chart and click Add to Spreadsheet. In the dialog which appears, the range should already cover the selected range, leave the Default State empty for now and type a title for your chart such as 5 Year Office Comparison and click Apply & Close.
The chart appears on the screen but requires some customisation to work. From the fly out menu of Y axis options on the left select Profit and then from the X axis dropdown list select Time so you plot Profit against Time.
From the Color dropdown list, select Unique Colors and from the Size dropdown list, select Units Sold.
Click the Play button and the chart will play showing the change in your data over time. The Y axis movement shows movement in Profit and the size of the bubble shows change in Units Sold.
The tabs change the chart from a Bubble to a Column or Line (this is not a motion chart).
If you click the office checkboxes and Trails you will see additional labels on your data and to the right of the Play button is a slider which controls playback speed.
Save the default
Wind the play button back to the beginning. Click the Settings button and click Advanced and Advanced again. Double click the state string to select it, right click and choose Copy. Click the chart title to display the chart menu, click Edit Gadget and paste the string into the Default State textbox. Save the worksheet and the chart will appear whenever the worksheet is viewed and it will be configured as you set it up to look.
Helen Bradley
Labels: animated, charts, default, Excel, google docs, motion, save, spreadsheet
Categories:office
posted by Hunter Delattre @ 9:00 amNo Comments links to this post
Thursday, February 21st, 2013
Google Docs has the ability to use data validation to automate and manage data entry into cells in a spreadsheet. One way to do this is to limit the data that can be entered into a cell to a selection from a list that you create.
To see this at work, open an existing spreadsheet or create a new one. Select the cells into which the data will go and choose Data > Validation. From the Criteria dropdown list, select Items From a List and then click Enter List Items. Type each item for your list into the box separating entries from each other with a comma. Make sure the “Show list of items in a drop-down menu” is checked and if you don’t want a user to select anything that’s not in the list, then disable the “Allow invalid data, but show warning” checkbox. Click Save to save the validation options.
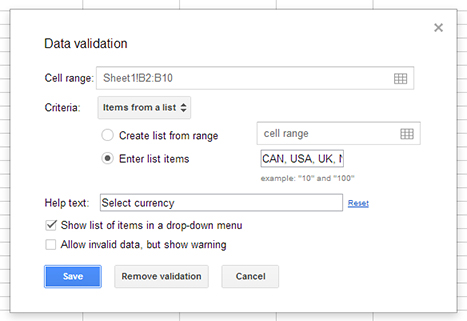
Now, when you enter data into any of the cells in the range you have configured this data validation rule for, you will see a dropdown indicator appear to the right of the cell. Click this and you can select an item from the list that is displayed below the cell. This data is entered into the cell in the same way as any data would be entered so you can, for example, use it in calculations by referring to the cell contents. In the example worksheet shown, a formula is used the cells in column C to calculate the converted value by checking what currency has been chosen and then multiplying the value in column A by the appropriate conversion rate.

It’s also possible to use other validation options using the Data Validation dialog. You can limit a cell entry to a number which meets certain criteria or to a text entry that contains or does not contain certain text or which is a valid email address or URL. You can also require that a date is entered within a certain range of dates or before or after another date.
You can force a user to comply with the data validation rules that you have created or allow them to enter an “invalid” value but warn them that they are about to enter data that doesn’t comply with the rule.
These data validation tools available in Google Docs are similar to those that you’ll find in other spreadsheet applications such as Excel.
Helen Bradley
Labels: data validation, google docs, items from a list, list, spreadsheet
Categories:hunter, office
posted by Hunter Delattre @ 9:00 amNo Comments links to this post
Wednesday, February 6th, 2013

If you’re having trouble positioning images in a document, Google provides an easy solution.
By default, all inserted images are placed inline with the text, which means it is treated just like another character and will move with the text around it. To change this, simply click on your image and select Fixed position. This places the image “above” the text so that the text moves to accommodate it; the image remains in any location you move it to while text wraps around it. This also permits images to overlap.
Helen Bradley
Labels: fit, fix, google docs, images, place
Categories:hunter, office
posted by Hunter Delattre @ 9:00 amNo Comments links to this post
Saturday, February 2nd, 2013
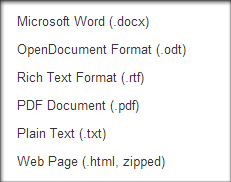
Google Docs provides a neat way of turning any document into a simple HTML web page, perfect for any novice interested in building a basic website. To do so, simply open the desired document and select File > Download as > Webpage (.html, zipped). The file will be compressed in a .zip file so you’ll have to extract it, but it will be instantly ready for use. This functionality can also be used with spreadsheets.
Helen Bradley
Labels: .html, create, download, easy, google docs, website
Categories:hunter, office
posted by Hunter Delattre @ 9:00 am1 Comment links to this post
Thursday, January 31st, 2013
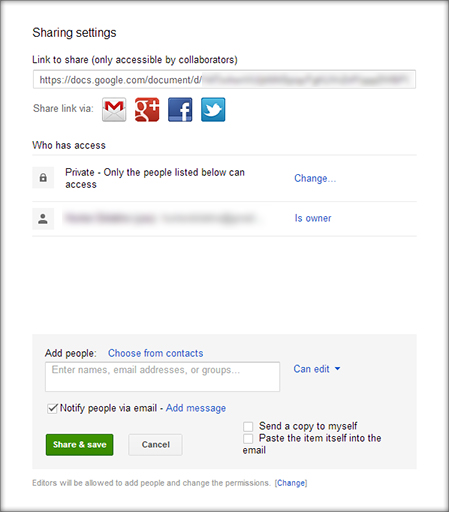
Google docs makes shared viewing and editing of documents easy and neat.
To begin sharing a document, click the blue Share button in the top right corner. You will immediately be given a share link, but there are a few important options to consider before you hand it out.
In the Who has access section you can change the privacy settings for the document. By default it is set to private; you must give explicit permission to anyone you want to access the document by entering their email or some other contact detail, such as their name. You can also set the privacy to public on the web and anyone with the link. The only difference between these options is that your document will be viewable through Google searches and other public indexes using the public option, while viewers will have to receive a specific link to view the document using the latter option.
It is also important to set exactly how much access others have to your document. When you add a contact to your share list, they have editing capabilities by default. To change this, click can edit while adding the contact and select their preferred capabilities. You can allow them to simply view, comment, or have full editing power. But you’re not quite done yet. If you click the [change] button at the very bottom of the share window, you can decide whether editors can give access too. By default, editors are allowed to do anything that the document’s owner can except to delete the document. If you want to keep for yourself the right to decide who can view the document, make sure to set this to only the owner can change the permissions.
Once you are done configuring your share settings, simply click Done. Everyone you added to the share list will receive an email notifying them of their ability to view the document.
Helen Bradley
Labels: editor, google docs, link, owner, permissions, privacy, public, share, share list
Categories:hunter, office
posted by Hunter Delattre @ 9:00 amNo Comments links to this post
Saturday, January 26th, 2013
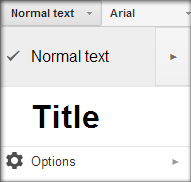
You can easily change your default font settings in Google docs using styles.
To change your default text style for all future documents, you must first update the Normal text style. Highlight some text with the formatting you want to adopt as your default, open the styles dropdown menu, and click the arrow next to Normal text. In the resulting menu, select Update ‘Normal Text’ to match. This redefines the Normal text style to match the selected text. To make this change permanent, open up the style menu again and select Options > Save as my default styles. This means that the new Normal text style will be used for all future documents. In this way you can set, for example, 12-point Times New Roman as your default font for Google docs.
If you ever want to undo all style changes, return to the options menu and select Reset styles. This will reset them to the original default settings, but only within that document, so you must then choose Save as my default styles again if you wish to make the reset permanent.
Helen Bradley
Labels: default, font, formatting, google docs, style, styles, text
Categories:hunter, office
posted by Hunter Delattre @ 9:00 am2 Comments links to this post
Saturday, January 19th, 2013
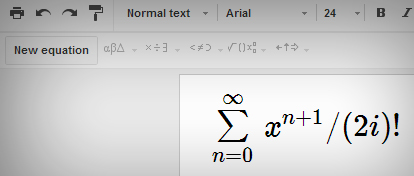
It can often be difficult to represent more complex mathematical equations in a word processor. Google Docs makes it easy with the equation toolbar. To activate it, select View > Show equation toolbar.
To create your equation, simply click New equation and begin filling it in with operations from the insert function dropdown menus. Even if you require none of the special operations provided, the New equation feature will also neatly format simple equations that can be entered using the keyboard.
Helen Bradley
Labels: create, document, equation, google docs, insert, math
Categories:hunter, office
posted by Hunter Delattre @ 8:00 amNo Comments links to this post
Monday, January 14th, 2013
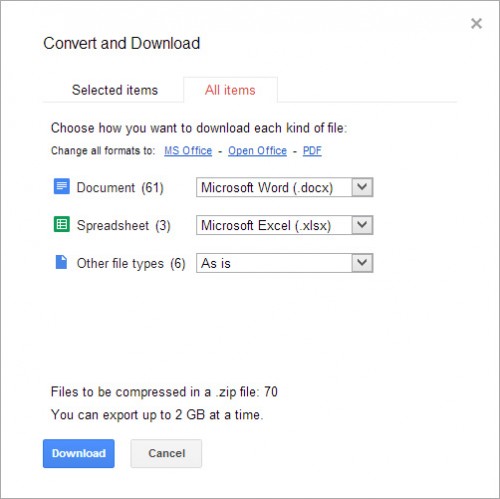
You can quickly save all of your Google documents to your hard drive by Right Clicking on any one of your documents and selecting Download…. In the popup window select the All Items tab along the top. Google Docs will display the quantity of each document type and allow you to select the format you want to download each type in. Click Download and all of your documents will downloaded as a zip file.
Google compresses the files into a zip file for you, which can take some time. If you have many documents, you can have Google email you the download link once it finishes the zipping process so that you don’t have to sit and wait.
Helen Bradley
Labels: all, download, export, files, google docs, quick
Categories:hunter, office
posted by Hunter Delattre @ 8:00 am2 Comments links to this post
Friday, December 14th, 2012
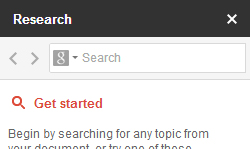
Google Docs has a handy research tool built right into the page that utilizes Google’s massive information database. It can provide a useful catalogue of information on almost any topic.
To open the Research module, go to Tools > Research. Alternatively, you can highlight some text from your document, right click, and select Research ‘[your text]’ from the context window. This will automatically research the highlighted text.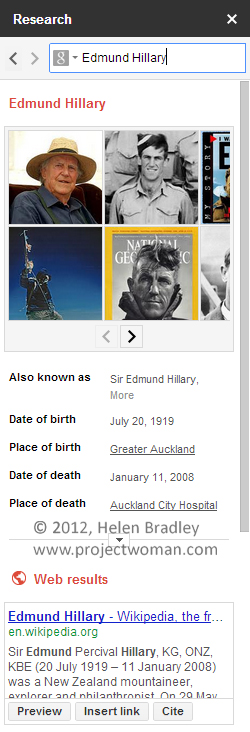
If your topic has any specially indexed information, it will be shown in a summary at the top of your results. It may also show relevant images and published papers on the topic. When Google has exhausted all the information it can find itself, it will simply display a list of search results. Yet these results also contain a useful set of tools unique to the Research module: Preview, Insert Link, and Cite.
Preview provides a quick look at the web page to help you determine if it will actually be useful to you. Insert Link automatically creates a link to the web page in your document. If you used highlighted text to open the Research module, it will turn that text into your link. Cite creates a neat citation for that web page, which is in MLA format by default.
If we take a look at the main page of the Research module again, we’ll find search filters for different needs.
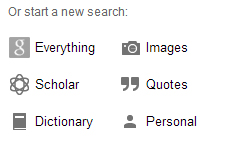
Everything provides the results we initially saw, with as much information as Google could provide. Images narrows your search to just that, a sidebar of topical images which can be easily dragged and dropped into your document. Scholar provides a list of published research papers for your topic, although it does not provide direct links to those papers. These can be easily cited the same way web links can.
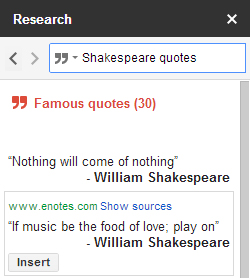
Quotes provides a list of relevant quotes which can also be inserted into your paper. Google also highlights the most famous quotes for you. Dictionary provides a fast and light way to check words’ definitions. Finally, Personal simply shows any files you already have on your Google account that fit the query.
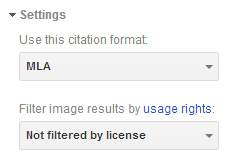
You can also make two important changes in the Settings dropdown menu. The citation format can be swapped between MLA, APA, and Chicago, depending on your need. If you’re using your document for commercial purposes, or if you simply hate unlicensed imagery, you can filter your image search results to show only those which grant a commercial licence.
Overall, the Research module is an excellent tool to help you quickly collect information and content for your document and is worth checking out.
Helen Bradley
Labels: apa, chicago, citation, dictionary, google docs, images, mla, quotes, research, tool
Categories:hunter, office
posted by Helen Bradley @ 9:00 amNo Comments links to this post


