Monday, September 29th, 2014

Learn a handy keyboard shortcut to merge two layers in Photoshop
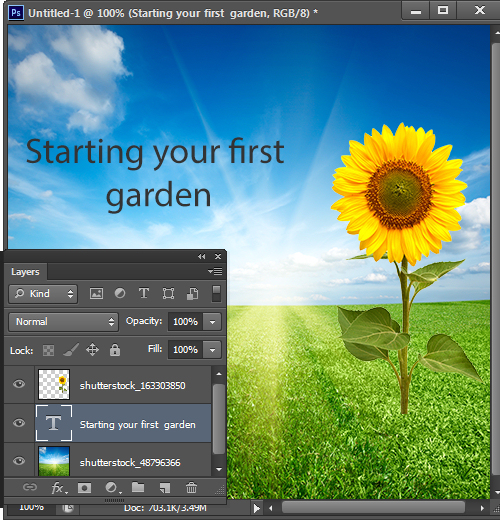
One simple trick but one that comes in handy constantly for me is merging two layers into one in Photoshop. This trick can save your life with so many Photoshop projects that require two images to be merged to a single layer.
Make sure the layers you wish to merge are on top of each other in the Layers palette. Click on the thumbnail of the top most layer of the two you want to merge.
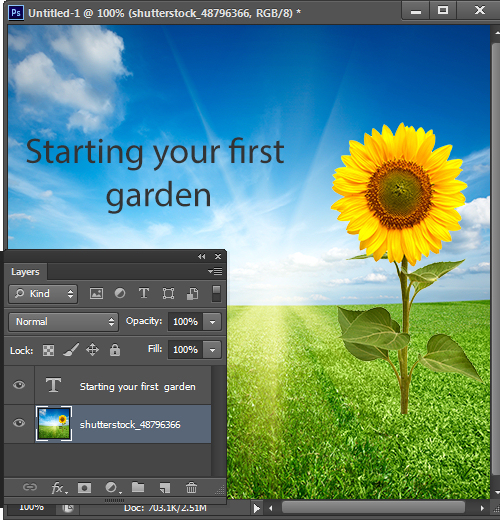
Press Control/Command + E.
Now your layers are merged.
Something to keep in mind is the new layer when it does merge will take the name of the layer on the top.
Labels: images, keyboard shortcut, Layers, merge, merging layers, Photoshop, tips
Categories:Mackenzie Tip, photoshop
posted by mackenzieerb @ 2:44 pmNo Comments links to this post
Friday, September 19th, 2014

Image Credit: © 2014 freeimages.com, anitab0000
Help! How to center a layer’s contents in Photoshop
Whether you’re making a simple document, newsletter or editing a photo a necessity is being able to center your layers. This task took me by surprise as to how challenging it was but in a few steps it can easily be done.
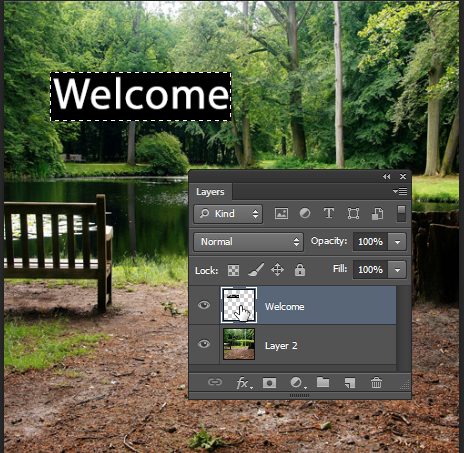
First press Control + click (Command + Click on the Mac) on the layer thumbnail for the layer you want to center in your Layers panel.

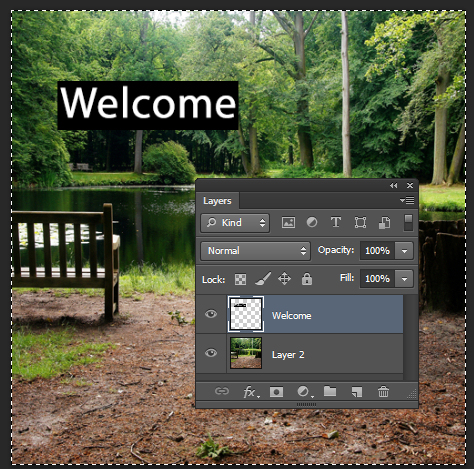
Click Select > All (Control/Command + A). This selects the entire image. You can tell this is done by the marching ants around your full image.

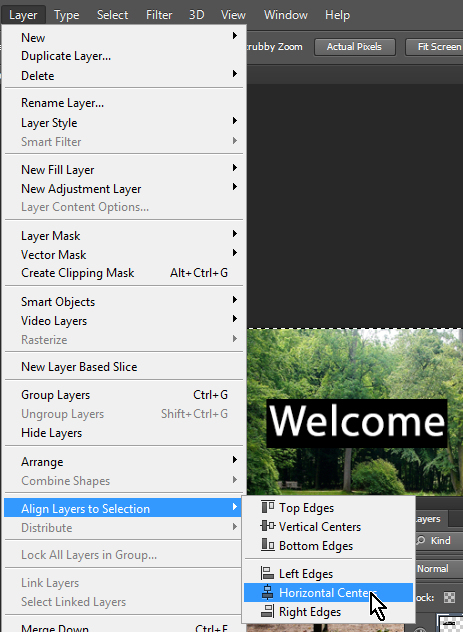
Click Layer >Align Layers to Selection > Horizontal Centers.

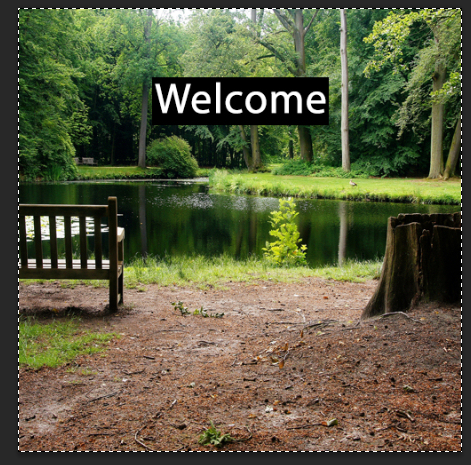
Notice that your layer is now centered horizontally. You can do the same vertically by choosing Layer >Align Layers to Selection > Vertical Centers.

Press Control/Command + D to deselect your layers.
Now your layer content is deselected and aligned horizontally (and/or vertically) and you’re free to continue editing.
Labels: alignment, center layer, Center text, Layers, Photoshop
Categories:Mackenzie Tip, photoshop
posted by mackenzieerb @ 1:22 pmNo Comments links to this post
Saturday, September 13th, 2014

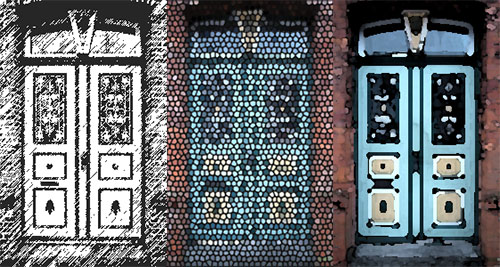
Despite their existence in earlier versions of Photoshop some categories of filters are mysteriously missing from the menus in Photoshop CS6, Photoshop CC and Photoshop CC 2014. This is the default behavior so you won’t find the Artistic, Brush Strokes, Sketch, Stylize or Texture category of filters in the Filters menu. This is a problem if you use these filters so luckily you can bring the filters back when you know how.
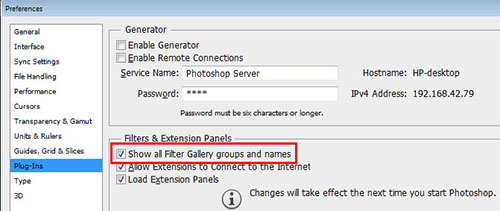
It turns out that an option in the Preferences menu acts as gatekeeper for displaying the missing filter categories. To re-enable them, select Edit > Preferences > Plug-Ins…. Then check the box that reads Show all Filter Gallery groups and names. Click OK and restart Photoshop. This will put the filter categories back in the Filters menu.

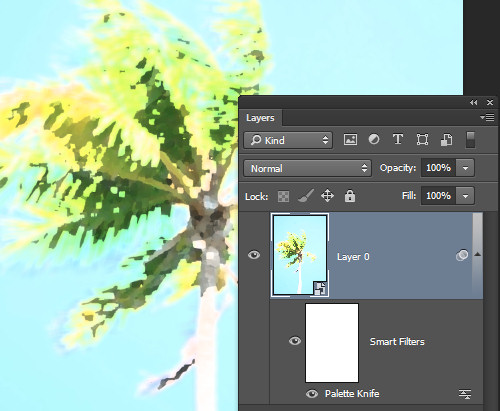
Now you could have accessed the missing filters from the Filter Gallery but the way the filters are named in the Layers palette is different if you access them from the Filter Gallery rather than from the menu itself. So, if you use Convert for Smart Filters to create a smart object before applying the filters and if you start a filter from the menu then the filter name appears below the layer so you can tell the name of the filter you are applying. This image shows this situation:

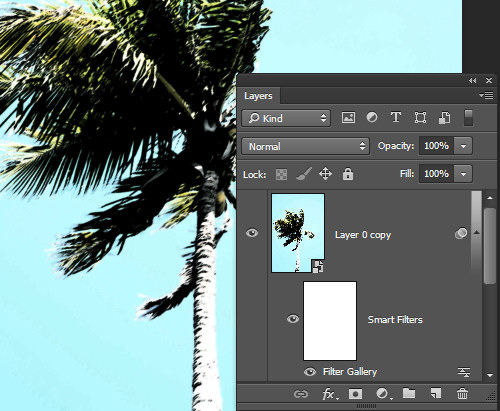
If, on the other hand, you start your filter from the Filter Gallery the Layers palette simply shows Filter Gallery – with no indication of which filter you applied. This is what the Layers palette looks like – not very helpful at all.

In short, having the filters back on the menu and selecting them from there is the better option.
Be aware too that the Oil Paint filter was removed from Photoshop CC 2014 so it is gone for good.
Labels: categories, filter, filter gallery, filter menu, full, groups, Layers palette, list, missing filters, oil paint filter, photo, Photoshop, Photoshop CC, photoshop cc 2014, Photoshop CS6, restore
Categories:photoshop
posted by Hunter Delattre @ 10:00 amNo Comments links to this post
Wednesday, July 30th, 2014
Recently I made a post giving thanks to the wonderful font creators who distribute their work for free. Today I’d like to thank the image and texture artists who are doing the same and making my life in Photoshop so much easier. If you are looking for texture resources then I cannot give any higher recommendations than these. The links provided will take you to specific textures, but each author’s entire portfolio is worth exploring.
Skeletal Mess – A brilliant independent image and texture author.

FreeImages.com – A massive archive of free images and textures.


TextureKing.com – Another great texture resource.

Mayang.com – Many useful day to day surface textures.

Labels: backgrounds, creative commons, credit, free, images, textures, thank you
Categories:photoshop
posted by Helen Bradley @ 3:10 pmNo Comments links to this post
Saturday, July 26th, 2014
Find Free Brushes Online to use in Photoshop
Learn how to find and download free and for fee brushes for Photoshop. See how to install these brushes into Photoshop and use them in your work.
This video covers all the steps in downloading and installing the brushes so you can ensure they are always available to you.
Helen Bradley
Labels: brush settings, brushes, download, free brushes, install, Photoshop, Photoshop brushes
Categories:photoshop, video
posted by Helen Bradley @ 8:37 amNo Comments links to this post
Thursday, June 26th, 2014

It’s not easy to find, but you can strip away the camera raw edits from a photo
Sometimes I look at the edits I’ve made to a photo a few months later and I think – What was I thinking? I simply hate what I did to the photo. I want the original image back so I can work on it again. But how to do that? You see there is no reset button in Adobe Camera RAW that matches the Reset button in Lightroom. It’s easy to do in Lightroom but not obvious how to do it in ACR.
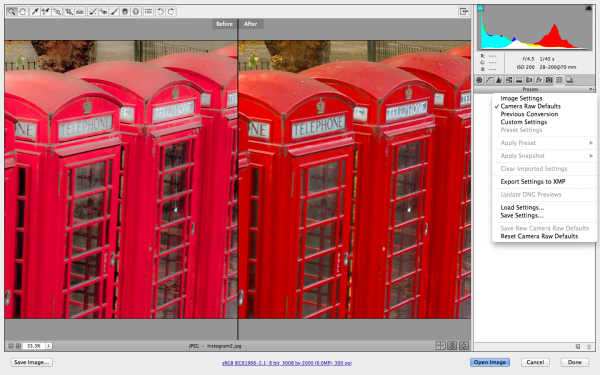
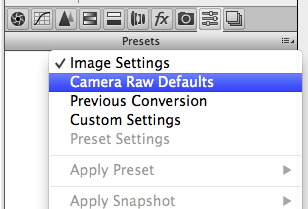
If you get stuck like this and you want to reset an image in Camera RAW, first open the image in Camera RAW and then go to the Presets panel:

Open the flyout menu and choose Camera RAW Defaults. Instantly all your fixes will be removed from the image – whether they were applied in Camera RAW or Lightroom and the image will be back to how it looked out of the camera – Yeah!
Labels: ACR, Camera Raw, reset, reset a raw file, undo changes
Categories:Lightroom, photography, photoshop
posted by Helen Bradley @ 6:54 amNo Comments links to this post
Thursday, June 12th, 2014
Free fonts for commercial use – thank you!
I’m making this post in celebration of the wonderful typographers who have made their fonts available for use in my projects. Creating an elegant and legible font can be very difficult; giving it away for free must be even harder. I would like to present some of my favorite fonts to help give them the exposure they deserve and pay the authors back for all of their hard work (and so you can enjoy them too!). These fonts are all free and take seconds to install. They’re also really really great.
Chalk Hand Lettering Shaded Font

Scrappy Looking Font

Cutie Patootie

Labels: favorite, fonts, free, list
Categories:photoshop
posted by Helen Bradley @ 10:00 amNo Comments links to this post
Sunday, April 20th, 2014

Find all the resources you need to create and print your own chalkboard designs.
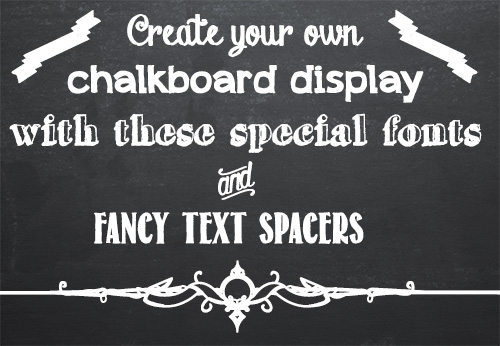
Grocery stores and cafes seem to be chock-full of hand drawn chalkboard menus these days. Of course, who can blame them when they look so great? While most of us are not skilled enough artists to reproduce the fancy flowing chalkboard fonts, our computers certainly are. Recently the chalkboard craze has come online, and font artists across the internet have given us dozens of wonderful chalk-like fonts to choose from. I’ve compiled a list of my favorites of these fonts, including some special symbol fonts for text dividers and flourishes. I’ll step you through the process of finding these fonts so that you can get to work on your own chalkboard designs.
Chalk Board Backgrounds
To create a chalkboard you’ll need a background. I have a couple of recommendations here. There are some nice backgrounds available from foolishfire.com – these are available in black, blue, and green: foolishfire chalkboards. If you wish, you can do a search and find your own. I like to use Compfight (www.compfight.com) – it’s an easy way to find images with commercial and creative commons licences and many of them are a good size. Just be sure to check the licence for any image you download. If you want a fast solution, lots of choices and you’re prepared to shell out a few bucks, then buy a chalkboard background from shutterstock.com.
Of course, if you’d like to make a chalk board design for commercial purposes you’ll have to ensure the image owner has given you the right to do so – in this situation cases using a Shutterstock stock image might be the prudent choice.
Chalk Board Fonts
Fortunately there are many great fonts available for free on the web. The following list contains only free fonts (although some charge for commercial use) that I think look great on a chalk board. If you don’t know how to add new fonts to your computer check out my font installation tutorial first. It’s really easy and once you do it a couple of times you’ll be an ace at doing it!
Chalk Hand Lettering Shaded

Appleberry

Grutch Shaded

Return to Sender

Drawing Guides

These two fonts are comprised of symbols that are perfect for breaking up text and adding some extra flair to your design.
Adhesive Nr. Seven

From this Moment

And that’s it! With these wonderful fonts and a chalkboard background the possibilities for your chalkboard designs are endless. If you find yourself wanting more, a quick Google search for chalkboard fonts should turn up lots of fun fonts to use.
Helen Bradley
Helen Bradley
Labels: background, chalk board, chalkboard, font download, fonts, free chalkboard fonts, free chalkboard images, menu, print
Categories:photoshop
posted by Helen Bradley @ 3:04 pmNo Comments links to this post
Saturday, March 1st, 2014
Learn to paint graffiti without a risk of being arrested
See how easy it is to create a graffiti effect on a wall in Photoshop. The video shows you how to use a graffiti font to create graffiti writing and how to use styles and colors to format the test to make it look like real graffiti. Then see how to use the Vanishing point filter to place the graffiti text onto a wall in a photo. Finish the effect by blending the text with brushes, blend modes and textures all created using layers and masks so that the effect can be edited in future.
Helen Bradley
Labels: blend modes, blending, brushes, copy, decal, graffiti, graffiti font, masking, new layer, perspective grid, photo editing, Photoshop, texture, Vanishing Point Filter, video, wall
Categories:photoshop, video
posted by Helen Bradley @ 5:08 pm1 Comment links to this post
Wednesday, February 19th, 2014
Adjust Color and Contrast to make your Image Pop
by Helen Bradley
The threshold filter in Photoshop lets you turn an image into a black and white image where pixels are either black or white. It is a great tool when combined with some color for creating artistic effects with your photos.
The only issue with this filter is that you have no fine control over how the conversion takes place. This video solves the problem by showing you how to work with the image to give better results with the conversion.
Here you will learn how to use the threshold filter to adjust the image to make a black and white and how to pick out areas of the image to adjust them separately so you retain the details in it.
You will use masks and adjustment layers to lighten and darken those areas of the image that you wan to keep and highlight.
You will also learn how to create a reusable noise layer to give the final image a more grainy look.
You will also learn why using a fill layer makes better sense than filling a layer with color.
In all, this video is jammed full of handy Photoshop tips as well as showing you how to create a great color effect.
Helen Bradley
Helen Bradley
Labels: burn, color threshold art, contrast, curves, dodge, fill color layer, lighting, monochrome, photo edit, Photoshop, photoshop techniques, threshold, video
Categories:photoshop, video
posted by Helen Bradley @ 3:40 pmNo Comments links to this post
