Tuesday, March 19th, 2013

Improve your photography today with apps

image credit: © istockphoto.com, Yuri Arcurs

Learn how you can improve your photography with handy apps

Among the thousands of new apps and programs we’ve seen in the last couple of years, there are many that are ideal for photographers, both amateur and professional. Whether you’re a professional looking for a way to edit and share your photos, or someone who simply wants to do more with photos with your phone or tablet, there are dozens, if not hundreds of apps and programs designed to help you out. What you choose to use will depend to some extent on how serious a photographer you are, but ultimately there is something for everyone.

Here is a look at how to improve your photo taking and editing through 5 simple apps and programs.

Photoshop Express

This is a fairly self-explanatory app – from the makers of Photoshop and Photoshop Elements which most photographers will be familiar with. This app is by no means as complete or effective as the full version program, but the interface is simple and easy to use, and for basic effects on the go it is a handy app. It is free in its basic form, but has additional features available for purchase.

Camera+

If you’re looking for an app that improves the quality of your photos without any complicated editing, this is the one for you. Basically, Camera+ is a better version of the basic camera in your smart phone, and has the ability to take clearer, more sharply focused photos. You can apply basic effects such as contrast, color schemes and retro effects as well as crop and rotate the photo to improve the quality of photos that your phone’s camera captures.

Dynamic Light

This is a great app for manipulating the lighting in your photos. The end result can look more artistic than natural, so if that’s something that interests you as a photographer, this is definitely an app for you. You can select a photo and an effect, then adjust the “dynamic light” dial to control how the effect is applied to the image or you can shoot the image using the app. It’s a great way to turn an ordinary image into a striking one.

Filterstorm

A great app for photo editing, Filterstorm essentially takes the best features of Adobe Photoshop Lightroom and puts them in a simple app. It’s more about adjustments than filtering, but does allow you some simple effects for manipulating lighting, colour, and brightness among other things.

This is a guest post by Dylan Bailey. Dylan is a freelance writer and keen amateur photographer.

Helen Bradley

Sunday, March 17th, 2013

Add images to your iPad & iPhone photo stream from your Mac

See how to upload images from your Mac to your iPad or iPhone

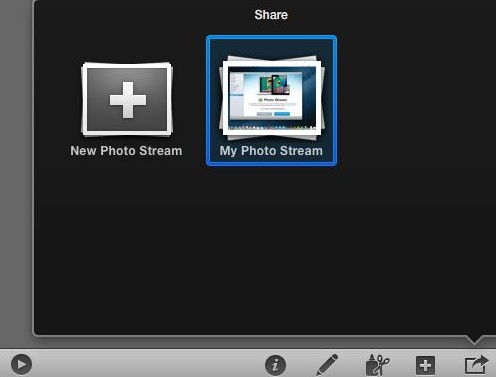
Sometimes you will get images on your Mac that you want to share with your devices such as your iPad or iPhone. To do this you can add them to your photo stream and they will be synced automatically next time you are connected using a wifi connection.

To do this, from inside iPhoto, click the image(s) to add to the photo stream then click the Share option on the toolbar, click Photo Stream > My Photo Stream. The images will be uploaded to your photo stream and then downloaded to other devices when they next update via a wifi connection.

Of course, for this to work the images have to be in iPhoto. If an image is not, for example, it is on the desktop – you can add it to iPhoto by dragging and dropping it into iPhoto and then add it to your photo stream.

Of course if you have your iPhoto set up to automatically send all new images to your photo stream the very process of adding images to iPhoto will add them to your Photo Stream. To do this in iPhoto, choose iPhoto > Edit Preferences > Photo Stream and, under My Photo Stream (which should already be enabled), check Automatic Import.

Helen Bradley

Wednesday, March 13th, 2013

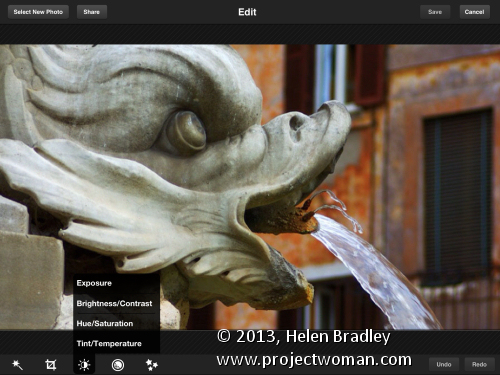
Updated review – Photoshop Express for the iPad

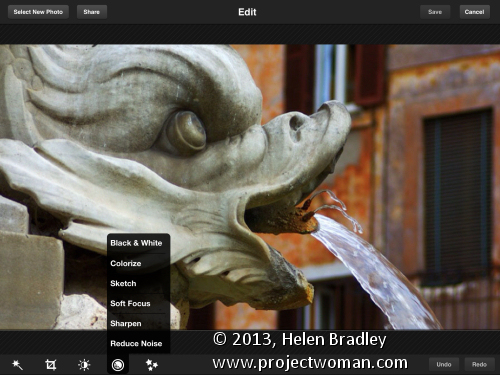
I’ve been revisiting some of the apps I’ve previously reviewed to see what changes have been made to them recently and how they have developed. One of these apps is Adobe Photoshop Express for the iPad. This app is free but it does have some in app purchases – one of which – the Camera pack that includes Noise removal – you can safely ignore. I think it is expensive and not worth the $4.99 that Adobe charges for it. However, ymmv.

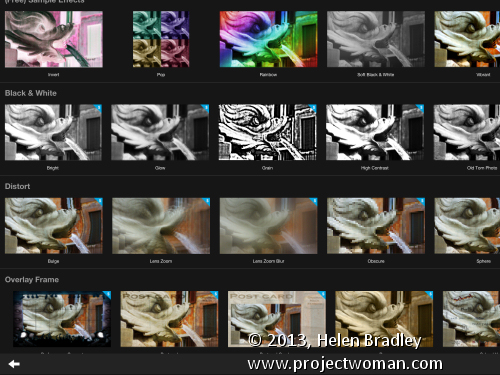
The free Effects in Photoshop Express are pretty limited and there are just nine of them so unless you buy the add on Effect Pack ($2.99) you won’t have a lot of creative options. That said, the Effect Pack has a lot of fun effects in it. You could get access to similar effects for free in other apps, but if you want everything in one place you might consider this pack worth shelling out for. There is also a Border pack for 99¢.

Like many free apps the add on borders and effects are shown in the app so you can see them but not use them unless you buy them. You can’t hide them either so this might be a bit off putting – personally I’d rather not see what I don’t own, but that’s my take on it.

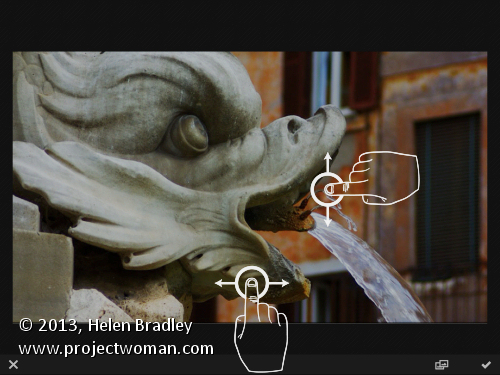
One change to the app that I like is the on screen prompts showing you how to use the app. This was a huge complaint that I had initially with the app as it had no indication as to how you made your adjustments. I thought at the time that this made it very hard for inexperienced users to use the app as it wasn’t clear how to do so. In a free tool aimed at beginner users I thought this was inexcusable.

Now the first time you choose an option like Brightness and Contrast an overlay appears showing you how to adjust these options. It’s much less confusing and a whole lot easier to work with. So much so that I’d wholeheartedly recommend this app for beginner to intermediate users.

In Photoshop Express you can edit images from your Camera Roll or capture images using the app. What you cannot do is upload images to Adobe Revel – the new online replacement for photoshop.com (and which was previously called Adobe Carousel – have I confused you yet?). You can also not download images from Adobe Revel to edit them in the app. Since Adobe owns all these sites and apps it would be nice if all its apps and storage locations talked to each other instead of operating in isolation.

Other changes I noticed is that the feature for adding effects and borders has been revamped allowing you to see the full range of effects and borders in one large screen already in place on a small version of your images. Those that are not enabled have a blue mark on the corner and there is a shopping cart link in the bottom right of the screen that you can use to buy add on packs, if desired.

So far as sharing is concerned, Photoshop Express is light on options when compared with some other apps. You can share to Facebook, Twitter, Tumblr and email images but that is all. You can also save images to your Camera Roll.

In all, the changes to Adobe Photoshop Express are welcome and make the app a lot more usable for its target audience. I now actually like this app and would heartily recommend it particularly for beginner to intermediate users looking for a simple and easy to use photo fixing tool.

Helen Bradley

Thursday, February 28th, 2013

HDR Presets in Lightroom


Processing an image with HDR presets in Lightroom

As I mentioned in a previous post I am loving working with Trey Ratcliff’s HDR Presets for Lightroom. These presets really rock and for more than just images with great skies.

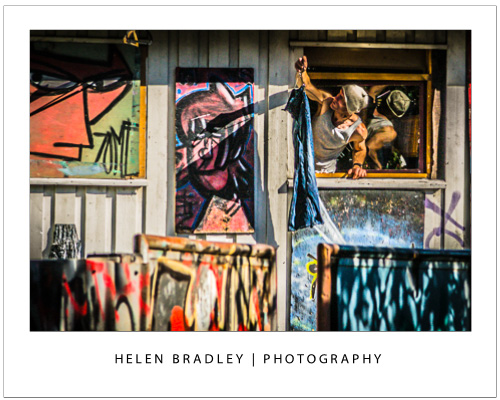
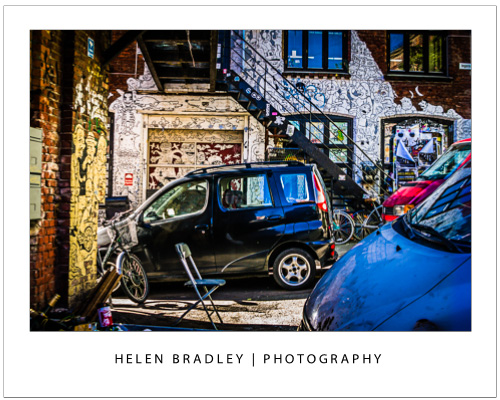
I have been sorting through a few thousand images I shot in Norway, Sweden and the UK last year and just seeing what is there. I tripped across these two images yesterday and something about them just screamed HDR.

This is the result and I have to say, these images totally rock. In the first, the intensity of the scene is enhanced by the  HDR treatment – it makes this back alley really come to life.

In the lead image for this post, repeated here, I saw something in the HDR version I missed in the original – the guy’s reflection in the window. I  checked back at the original – the reflection is there but it’s not obvious. In this version it is unmistakable and it takes the image from ho hum to wow – it makes it so much more than it was as an unprocessed image.

Now, as with all Lightroom presets there is nothing in the presets that you could not achieve if you adjusted the sliders in Lightroom yourself. However,  these presets are single click fixes – they are quick to apply and they are great.

For me they’ve been an eyeopener and they are helping me to see my images in an entirely new light.


Helen Bradley

Friday, February 15th, 2013

Setup and Wait – the secret of great shots

Often the secret to a great shot is to stop and wait

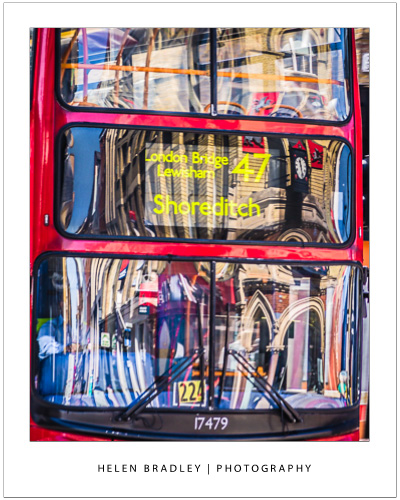
I shot this image in London recently. I had stopped at a busy street corner waiting for the lights to change and I saw a double decker bus go past and I caught the reflection in the front window. It was bright and colorful – but before I could do anything the bus motored past.

I had a choice, keep walking or stop and wait. I waited. I stood on that street corner waiting for the next double decker bus to come past in a position where the reflection hit the window nicely and without any distracting vehicles between the bus and me. I also wanted a clean bus so the window would reflect well.

It took a while and I shot quite a few buses until I got this shot. It’s a lucky shot in part because I saw the possibilities, the rest of the shot is pure patience – waiting long enough for the situation to occur again.

Do you stop and wait for things to happen or do you just keep moving on?

Helen Bradley

Monday, February 11th, 2013

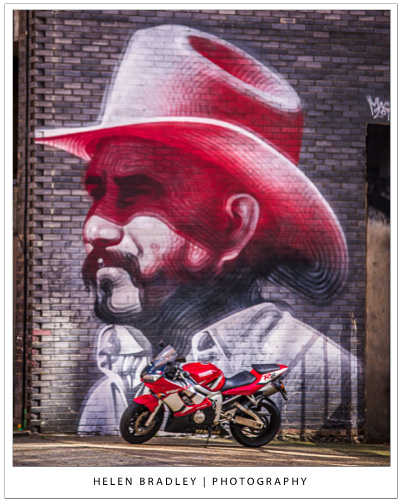
Are you lucky or do you make your luck? Brick Lane street art

Are you lucky or do you make your luck – photographing street art in Brick Lane, London

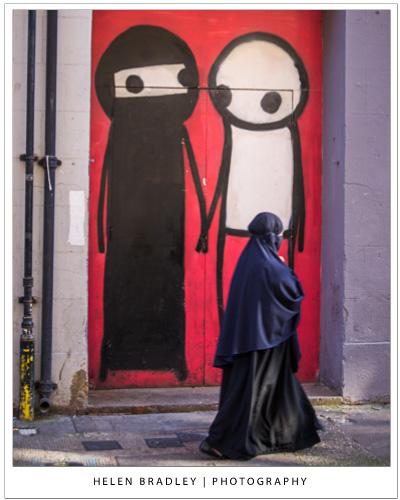
I have been going back over some images I shot in Brick Lane area in London recently. Brick Lane if you don’t know it is probably one of the best known areas in London for graffiti and street art and I spent an entire day there and didn’t cover all of it by any means. It is a fantastic area of London as it quite ethnically diverse with graffiti artists existing alongside members of the local  Bangladeshi-Sylheti community.

The art here is amazing and very diverse. It varies from stencil and sticker art to full size painted images. I met one of the local artists Stik when I was there. Someone knew him and saw me photographing his work and introduced me which was amazing. I also managed, later in the day, to get the image below of one of Stik’s pieces of work.

This is where I ponder the luck or make your luck question. This image has an element of the unusual  – there weren’t many women around the street and few in traditional clothing so that was unusual and that she walked past this particular piece of art the moment I was standing there – well that was very serendipitous. But lucky? I’m not sure. I think to an extent as photographers we make our luck when we open our eyes.

You see – cool stuff is all around but you have to see it and you have to be there with a camera in hand and that isn’t lucky – that’s work. You carry a camera through days of taking ho hum shots and getting rained on and seeing nothing that works for you and then occasionally you are rewarded with a result you’ve earned through . I think this image was, in many ways, earned. So too was the one above. I saw the art and then the bike and then I had my picture.


Helen Bradley

Tuesday, January 29th, 2013

Make time to Photograph – the only thing holding you back is yourself

If you think you have to ‘go’ somewhere to get great pics, you don’t – you just need to look around you and start shooting – every day

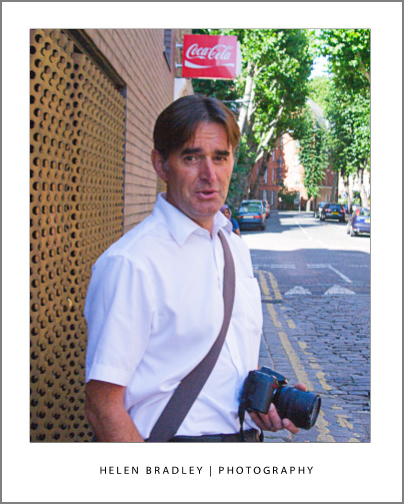
I met this guy in London recently when I was photographing around Brick Lane. That area of London is famous for its graffiti and I had the rare pleasure of meeting some of the graffiti artists there including Stik. But I digress. The reason this guy is so interesting is that he photographs – nearly every day. He works in the area and he heads out at Lunchtime to take photos.

You might be prepared to shrug off his enthusiasm for his craft because of where he lives and works. Let’s face it –  he gets to shoot some pretty awesome stuff. But so do any one of us if we look around us. Anywhere you live will give you fodder to shoot – you just have to go looking for it. Some of my best images have been shot within a mile of my house and sometimes just a few hundred feet. I know that because I walk the same route most mornings from Starbucks to my office. I carry my camera and I shoot whatever I see that captures my eye. So too does this guy.

If you feel frustrated you can’t get out to shoot often enough, I challenge you to go out during lunch time. Spend half of it eating and half photographing and you will end up with an hour or more shooting time each week. It’s not hard, it just takes commitment. So that’s why I take my hat off to this nameless London worker/photographer. He’s working a 9-5 but he’s still indulging his passion!


Helen Bradley

Tuesday, January 15th, 2013

Five Photoshop setup tips

When you install a new version of Photoshop the first thing you’ll need to do is to set things up so that they work properly for you. Here are settings I make in the Preferences panel every time I upgrade.

1. Set your History States

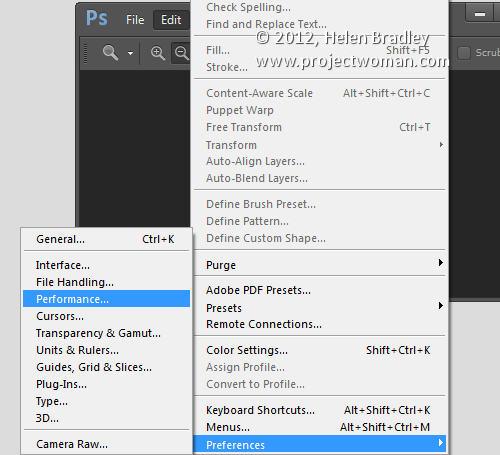
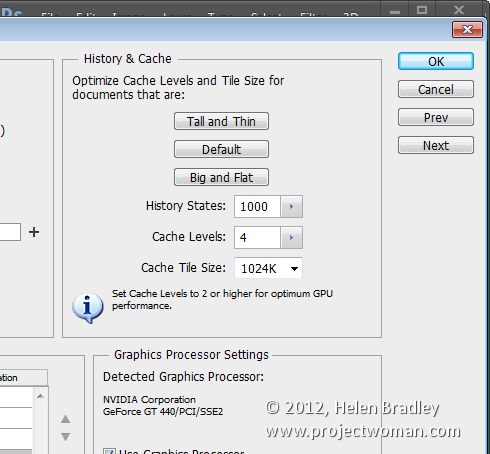
Choose Edit > Preferences > Performance or Photoshop Preferences > Performance on a Mac and set the number of History States. Having a high setting for History States ensures that you can undo changes that you make to your image. By default it’s set to a paltry 20 so this is the first change to make.

I set my History States to the maximum value 1,000 – but even a quarter of this would be a good setting.

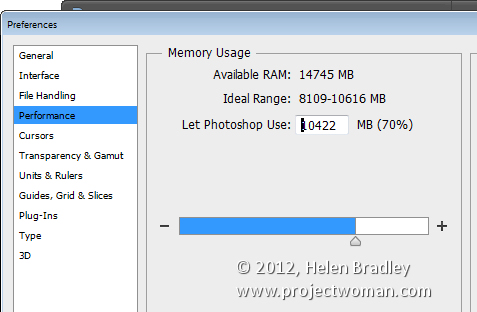
Here too I ensure that Photoshop can use plenty of the available RAM so I’ll crank that up to a large value – what you use will be dependent on the amount of memory you have installed.

2. Set Cursor Shape and Size

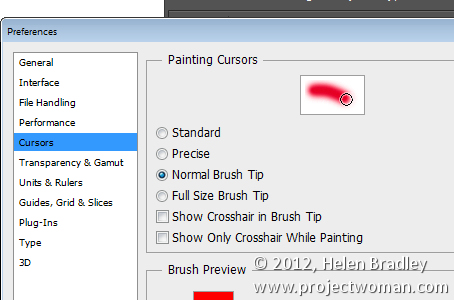
Still in the Preferences panel I like to use a Normal Brush Tip for my Painting Cursor and Precise for my Other Cursors. This can be set in the Cursors area.

You may want to use something different but it pays to look at these options and decide how you want your cursors to look as you work with them.

3. Opening Files My Way!

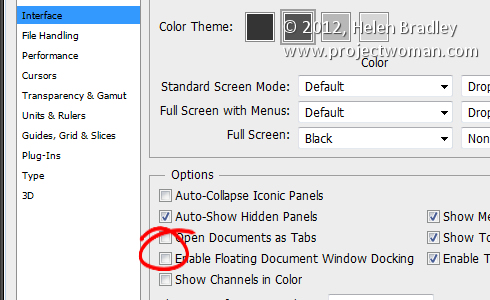
I dislike that Photoshop opens documents as tabs and that they are docked to the toolbar. This behavior really grates on me. If you’re like me and you prefer your documents to float you can set this in the Preferences Panel.

Choose Interface and disable Enable Floating Document Window Docking and disable Open Documents as Tabs.

In this panel you will also find the new Photoshop Color Themes in Photoshop CS6 so if

the dark gray look is not to your liking you can return to a more “CS5” look by selecting the lighter gray color.

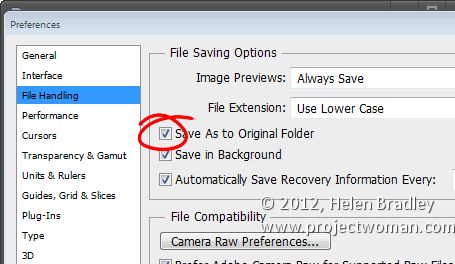
4. Control Where Files are Saved to

Photoshop can be set either to save images back into the original folder when you choose File, Save As or to the folder that was last used for saving files. You can choose which of these behaviors you prefer Photoshop to default to in the File Handling area of the Preferences panel.

To save back to the original folder, enable the Save As to Original Folder option. To default to the last folder you saved to disable this checkbox.

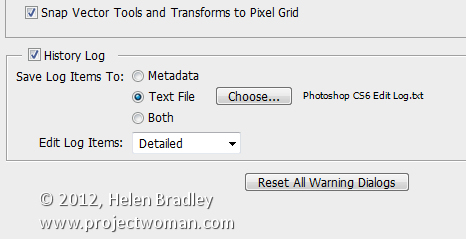
5. Write your own History

So I can go back and retrace my steps in a large project I like to store a History of all that I do in Photoshop. To do this, click the General tab and enable the History Log checkbox. I save to a Text file (rather than inside the file itself) and I save a Detailed history as that stores the richest data. Choose a filename and place to save it and Photoshop will keep a log file of everything you do to every file.

So, now it is over to you. What preferences do you set up when you first install a new version of Photoshop?

Helen Bradley

Saturday, December 29th, 2012

Photography tip of the day – Hand holding a lens

This simple calculation shows how slow you can shoot and still hand hold your lens

There are some simple calculations you can make to determine the optimal length of time you can hand hold a lens for.

This is important information to know because managing a 70-200mm lens at 70mm is very different to managing it at 200mm. Increasing the zoom reduces the length of time you can handhold the lens because any movement in the lens will be exaggerated at full zoom.

The rule of thumb for calculating the length of time to handhold a lens is to take the inverse of the focal length. So, with a 70-200mm lens at full zoom the calculation gives you a handhold time of 1/200 sec, at 70mm  it is 1/70 sec.

For a 70-300mm lens at full zoom, your limit is around 1/300 sec.

You can improve these times with Image Stabilization or anti shake features if they are built into your lens or camera but these values give you a rough guide to help you avoid capturing blurry photos.

Helen Bradley

Saturday, December 22nd, 2012

Wedding Photography – How to

 photo credit: arki www.sxc.hu

Here’s what to do when a friend asks you to photograph their wedding.

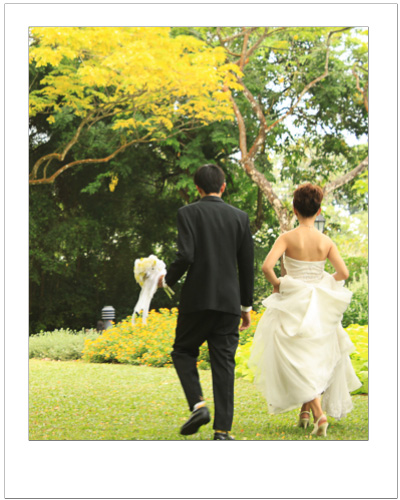
If you’re even a passable photographer, chances are that one day, someone will ask you to photograph their wedding. Before you take the plunge, here are some things to think about when shooting a big event like a wedding.

The demands of wedding photography

Photographing a wedding is different to just about any other photography you’ll do. You only get one chance at it and you run the risk of severely disappointing everyone if you don’t pull it off.
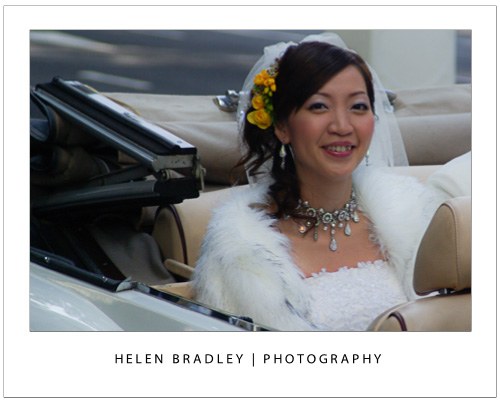
Wedding photography is a job that professional photographers charge a lot of money to do and, for good reason. So, it’s not a task you should take on lightly – if you really don’t feel up to the task say no rather than doing a bad job of it.

However, that said, it can be a rewarding experience if you get it right. And the key to getting it right is preparing well and having a well thought out and practiced plan.

Scoping the job

Talk to the bride and groom well before the wedding. Ask how many photographers there will be, if there are a few, determine who will be responsible for what so you aren’t tripping over each other on the day and missing out on key shots because you thought someone else was taking them.
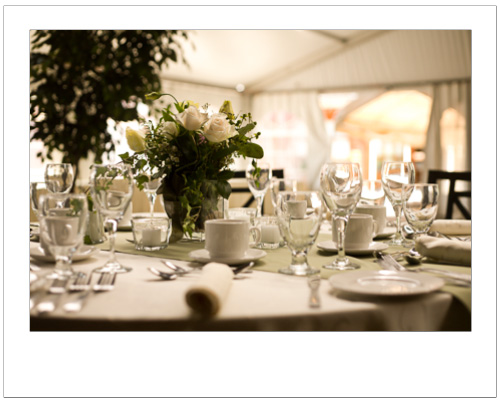
photo credit: Mike Clarke
Wedding photography involves photographing everything from reception guests to decorated tables.

Make a list of the photographs that the couple want taken. Have a detailed checklist printed up with the images they want you to capture. If you order this in the approximate order of the ceremony and reception it will be easier to make sure you get everything you need.

There are some good web sites that have information on wedding photo lists including this one: http://spreadsheets.google.com/pub?key=ppuF_0dv6H8zTjdPjs4D4MQ
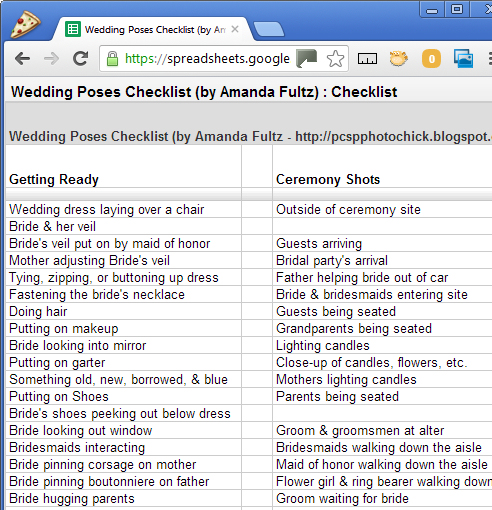
Enlist the help of a skilled assistant. You need someone to help you organise group pictures and run around getting batteries and holding things for you. Your assistant can also double check to make sure you don’t miss any photos on your list.

Before the wedding visit the locations that will be used such as the church and the venue for the reception. Check these at around the same time of the day as the wedding will take place so you can get an idea as to what lighting will be available.
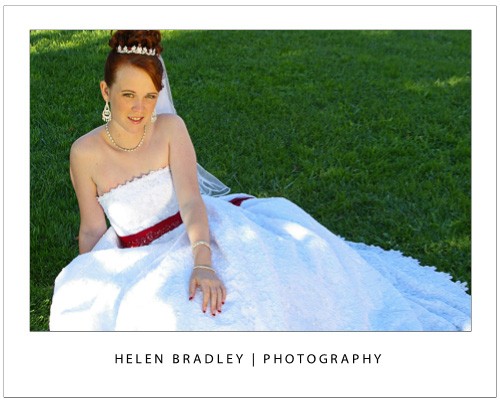
Finding a location in the shade saves the effort of having to diffuse the sunlight when it is very bright.

If possible, place your assistant where the bride and groom will stand and shoot some sample images to check the lighting and your camera settings.
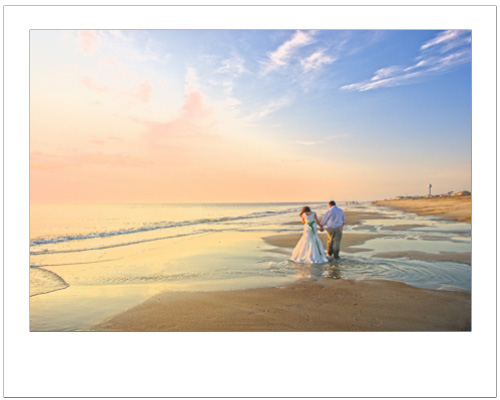
Photo credit: theswedish www.sxc.hu

Also check locations inside the church and the reception venue where you can take photos, particularly places with clean or interesting backgrounds. If you can’t find clean backgrounds to work with, plan to use a wide aperture lens so the background won’t be in focus.

If you’re not able to use a flash such as in a church, you will need to use a fast lens and you will need to know how to use it before the day. If you don’t have a lens, consider borrowing or renting one but test it thoroughly before the big day.

You need to be very familiar with how it performs and how to configure it for best results. However, that said, avoid changing lenses too often as you risk getting dust into the camera which can ruin your photos or cause you a lot of work cleaning them up.
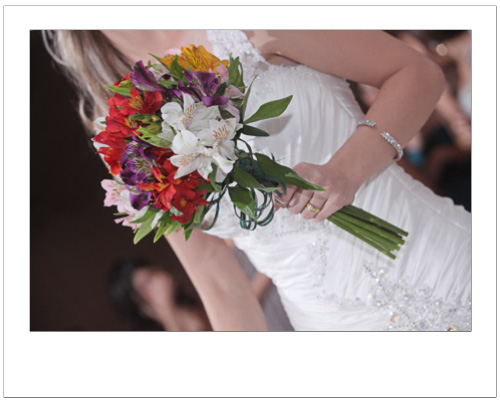
Photo credit: www.sxc.hu

Checklist of kit

Make a checklist of the kit that you will need. This includes cameras, batteries, memory cards, tripod, computer, diffusers and so on. If you will be shooting out of doors a diffuser will help to control bright light and your assistant can hold it for you.

If you’re shooting indoors you’ll need an off-camera flash if not a special lighting rig. Make sure that both you and your assistant know how to use every piece of equipment. A second camera body is essential as a backup if something happens to your main camera.
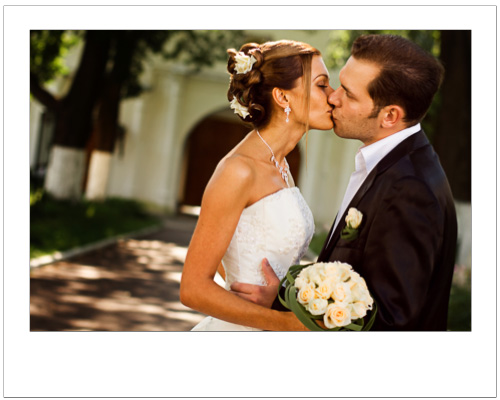
photo credit: Alexey Ivanov

A large aperture lens throws the background into soft focus minimising its impact.

Photographers are never late!

Arrive in plenty of time to set up before the wedding. In many cases you will be expected to photograph the bride as she and her attendants get ready and leave her house.

You may also be asked to photograph the groom and his groomsmen before the ceremony. Make sure you have scouted an appropriate location and you have sufficient time to do everything required of you.

If you’re the sole photographer, don’t expect to see any of the ceremony or to enjoy the reception – you’ll be working pretty much full time capturing images. Carry plenty of bottled water if it is a hot day and some energy bars too.

At the reception, move around the guests capturing a good range of photographs both candid and posed images as well as small detail images such as those of the table settings and the cake and so on.

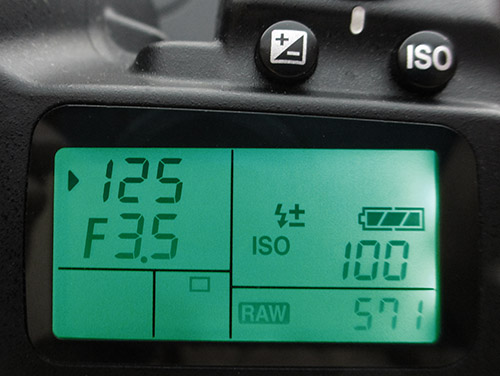
Check your camera settings regularly throughout the day and every time you change locations. Check the camera’s white balance setting, check the image size and compression and exposure compensation and ISO to make sure nothing has altered.

If possible, shoot RAW and process the images into JPEGs later on. Take lots of photos – it’s too late at the end of the day to realise you should have shot more ‘film’. Count on taking anywhere between 500-1000 photos so you have plenty of images to choose from. Avoid setting any fancy in camera settings and shoot in colour knowing you can always convert to black and white later on.
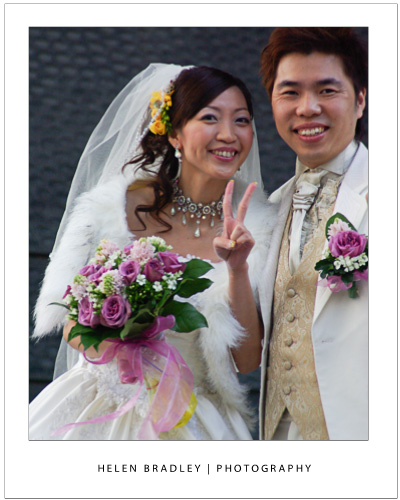
Post Processing

After the wedding download all the photos to your computer and, if possible, don’t delete them from the camera cards until you have them checked and backed up. If you are giving the photos to the bride so she can print her own album, you should still perform some basic image editing tasks.

Check each image and only give the bride the best of them culling the bad ones. If the images need lightening or contrast enhancement, do this. Rotate the photos so they are so all in the correct rotation, and crop away any obvious problems.

Burn the images to a DVD and make a backup copy of these disks too. Do this before removing the images from your PC or from the original memory cards, if possible just to be safe.

If you’re well prepared and focused on the task at hand you have a good chance of doing a good job.

Helen Bradley