Thursday, June 28th, 2012

Bulk delete photos from the iPad


I’ve been taking a lot of screenshots lately and I have over 1,200 photos on my iPad – a lot more than I really want to store there.

When I went to delete the photos in bulk, I banged my head pretty quickly up against a problem with the iPad. It’s not immediately apparent how you delete a lot of images at one time and deleting them one at a time will get very cumbersome very quickly.

Here’s how to do it:

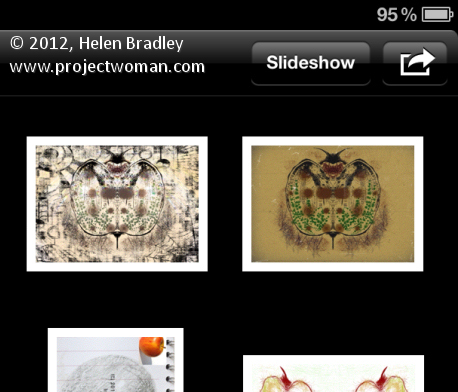
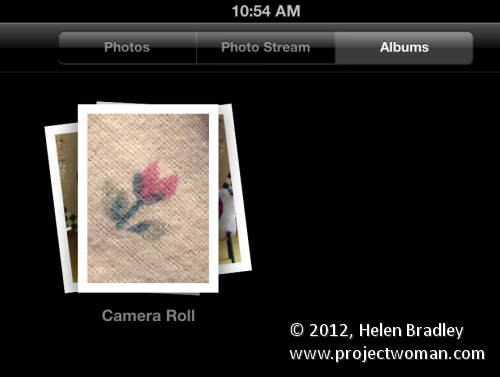
To begin, launch the Photos app, tap the Albums link and then make sure you’re viewing the Camera Roll or the place where your image are stored. I wanted to remove them from the Camera Roll so I tapped that.


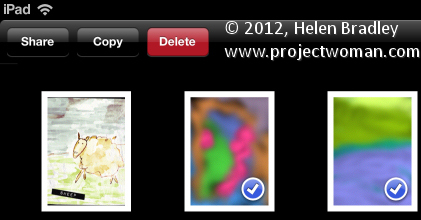
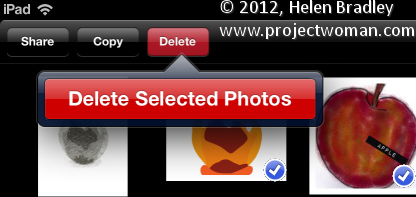
Now press the bent arrow icon in the top right corner of the screen and you’ll see options on the left for Share, Copy and Delete.


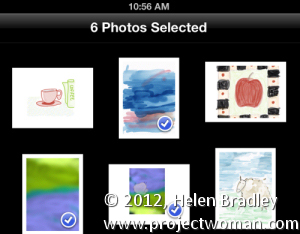
Tap an image to select it and then go ahead and select each of the images to delete – they’ll get checkmarks on them to show they are to be deleted. To undo the setting, tap the image again.


Then when I you have those you want to delete selected, tap the Delete button and choose Delete Selected Photos to remove them.


It is, as you might have expected this is ridiculously simple once you know how to do it but difficult until you do.

The good news is that the images aren’t removed from your iCloud download folder on your PC. So, for example, if you’ve previously had the images synched so they appear on your PC in a folder of iPad downloads, the images will still be on your PC at the end of the process – they’re just removed from your iPad.

Helen Bradley

Thursday, June 28th, 2012

Trevor’s tip of the Week – 100% zoom

(photo by: Luis Gustavo)

A quick tip for Photoshop that will save you some time.  To see an image at 100% size all you have to do is double click the zoom button in the tool bar.

Helen Bradley

Wednesday, June 27th, 2012

Excel fill intermittently empty cells

Often when you’re working in Excel you won’t enter all the data because it is repetitive.

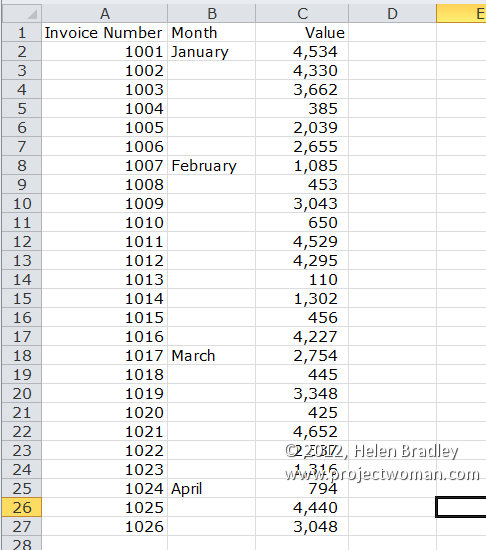
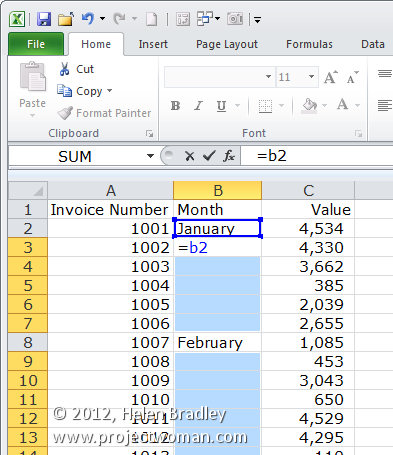
In this example, the cells in column B really should be filled with the months but because the month only changes periodically I have only typed it when the change occurs. If I need to work with this data such as in a PivotTable it may be necessary to fill the data down column B.

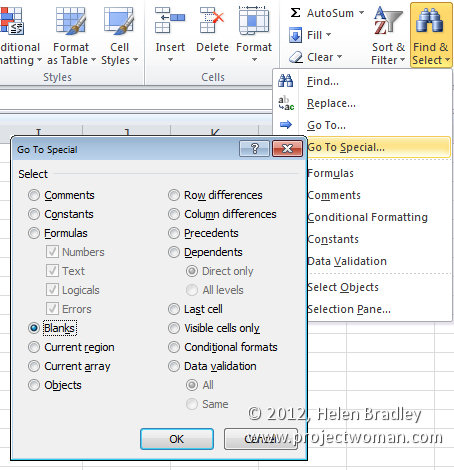
This can be done easily by selecting the cells in column B and choose the Home tab  on the Ribbon, click Find & Select > Go To Special > Blanks to select the blank cells.

Type =B2 in the cell, this represents the first cell in column B with the data in it.

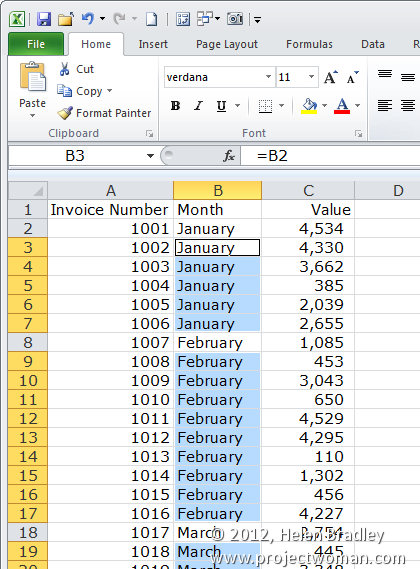
Press Control + Enter.

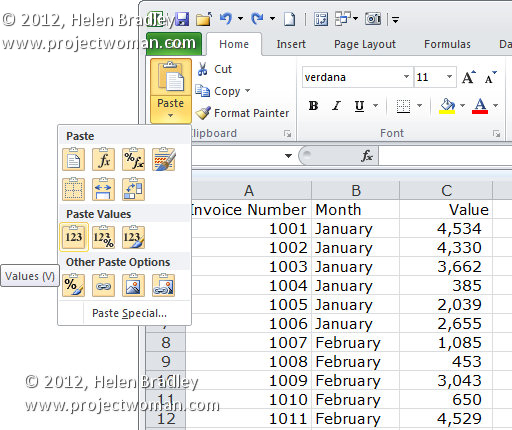
Now, to fix the cells so they contain words and not cell references, select all the filled cells in column B, choose Edit > Copy and then Paste > Values and click Ok.


Helen Bradley

Tuesday, June 19th, 2012

Transparency and the Gimp


One of the most confusing things for Photoshop users will be the concept of a transparent layer in Gimp.

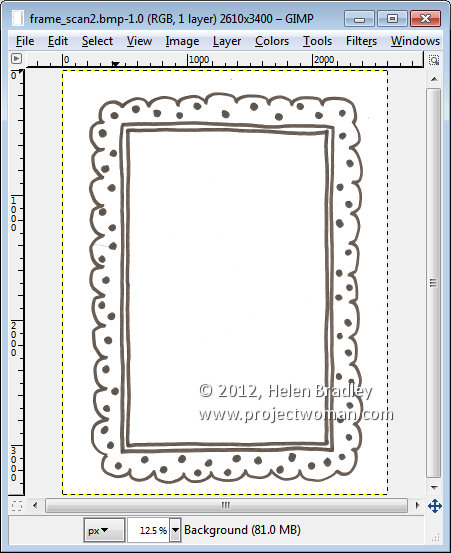
Consider the situation where you open an image such as this hand drawn frame here. The image is a BMP image and what I want to do is grab the middle out of the frame so that I can put something behind it.


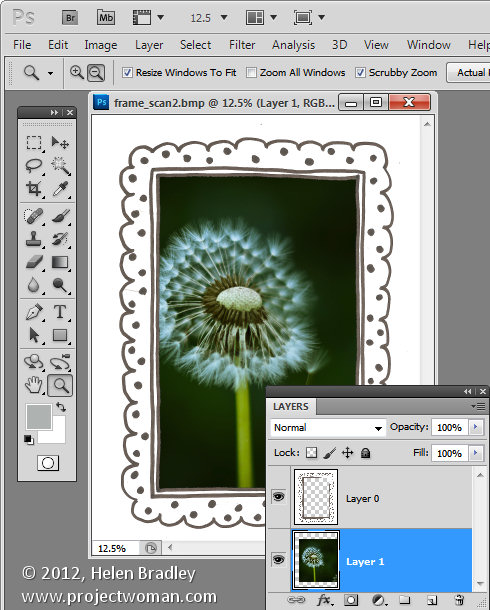
If this were Photoshop, I would convert the background layer to a regular layer by double clicking on it and press Ok. Then I would target the Magic Wand tool and click in the middle of the frame to select the middle area then press Delete to make it transparent so I can drop an image in behind it.


If you try this process in Gimp, all you get is an extreme level of frustration as nothing seems to work. Select and delete does absolutely nothing !

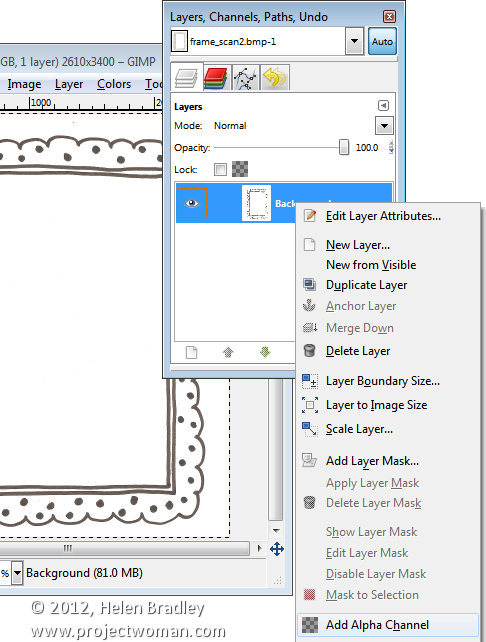
Here’s the solution. With the layer with the image on it selected, right click and choose Add alpha channel. This then allows you to select an area on the image using the Fuzzy Select tool, and press the Delete button. Then choose Select none and you will have a transparent middle to your image. It’s an easy process once you understand what’s happening but an extremely frustration one until you do.


Helen Bradley

Thursday, June 14th, 2012

Shoot right at night – Tip #9 Shoot from Hotel Windows

If you’re travelling for work or pleasure, ask for a room on a high floor in the hotel and shoot the night skies from your hotel window. There’s always something of interest happening in the streets below even if you have a totally awful view in daytime, the nightlights can offer photographic opportunities you don’t get in the daytime.

When you’re shooting from a hotel or office window at night, turn out the room lights so you minimise the reflections in the glass. Look for interesting buildings and light effects, jam your lens up against the window and start shooting. A table or windowsill can be used to steady the camera for long exposures too.

Helen Bradley

Wednesday, May 9th, 2012

Lightroom – flagging in the Develop module

As you probably already know you can flag an image in the Library module in Lightroom using the Toolbar options.

But did you know you can also do it in the Develop module?

Check for the toolbar in the Develop module, if it is not visible press T to display it. Here you will find a series of options including some for flagging the image.

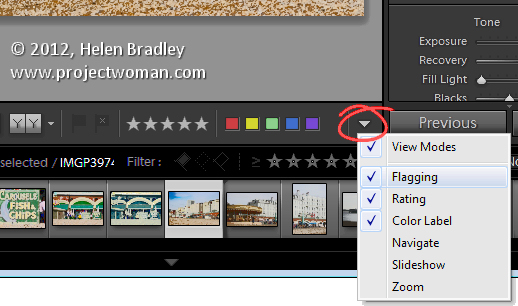
If the flags are not visible, click the down-pointing arrow at the far right of the toolbar and select Flagging from the menu. Click a flag to flag an image from here without having to go to the Library to do so.

The toolbars in the other modules: Slideshow, Print and Web while partially don’t have this same feature but it is a customizable option in the Library and Develop modules.

Helen Bradley

Monday, April 16th, 2012

Making Groups in Windows 8

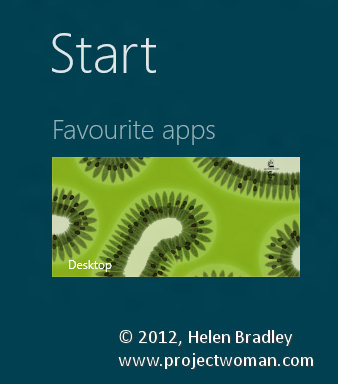
In Windows 8 Metro you can name groups of tiles so they have headings on the Start screen and you can drag groups around. Pity that nothing on the screen makes it clear that this is something you can do.

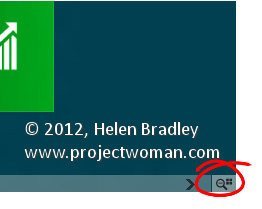
To do this, first use the semantic zoom to shrink the start menu tiles so they are very small.

step 1

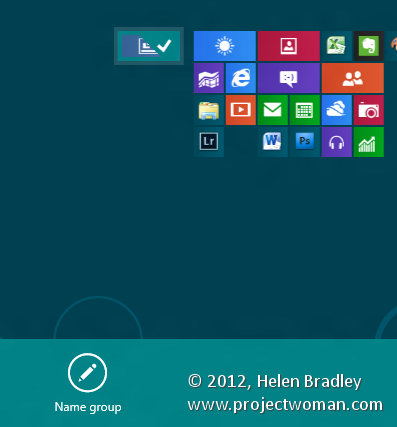
Then right click a tile in the group of tiles you want to name.

step 2

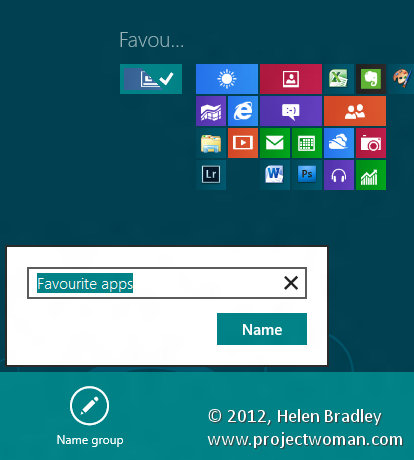
A dialog pops up where you can type the group name. This only appears when you are zoomed out making it hard to find.

step 3

When you’re done, zoom out and you’ll see the group named. You can now drag and drop tiles into the group to help keep things nicely organized on the Windows 8 Metro Start screen.


Helen Bradley

Monday, April 9th, 2012

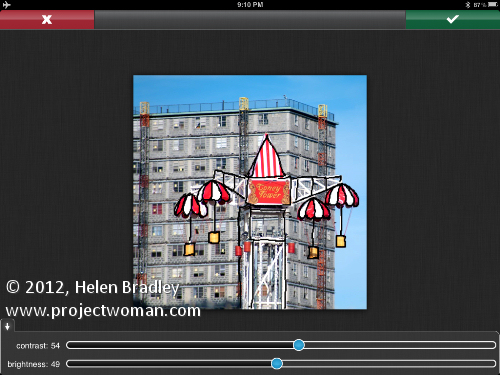
Grunge an image with Pixlr-o-matic on the iPad

Download: Pixlr-o-matic on the iPad free

I love this app but wish it worked in landscape and didn’t force me to work in portrait. It is from Autodesk who are the unsung heroes of the iPad photo editing app world. They do great stuff – way better in general than Adobe when it comes to iPad stuff.

Not only that but this app is also available online so you can use it on your desktop in a browser or download a standalone version – all cool and all free! You can buy extras if you like so you can buy extra frames and effects and you get lots for your money.

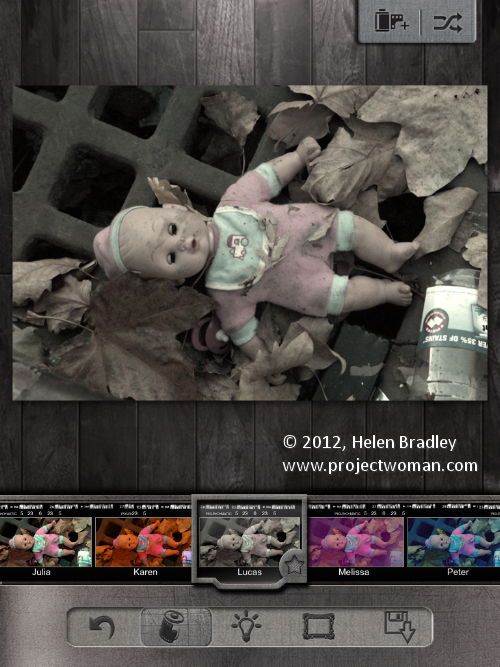
Start by capturing an image or import one from your gallery. Then click the first of the options across the foot of the screen – these are filters. Here you can browse the gallery of options – you can instantly view the filter on the image or keep scrolling to try something out if you don’t like the result of your first choice. I chose Lucas for this image:

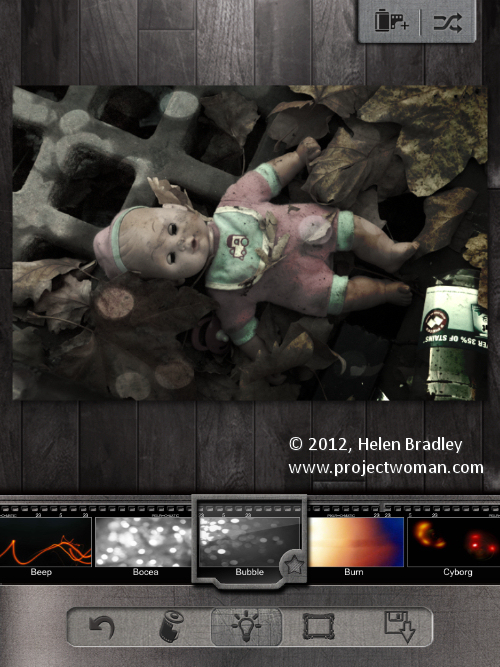
Then select the Lightbulb icon and apply a lighting effect to the image. I added Bubble to this image.

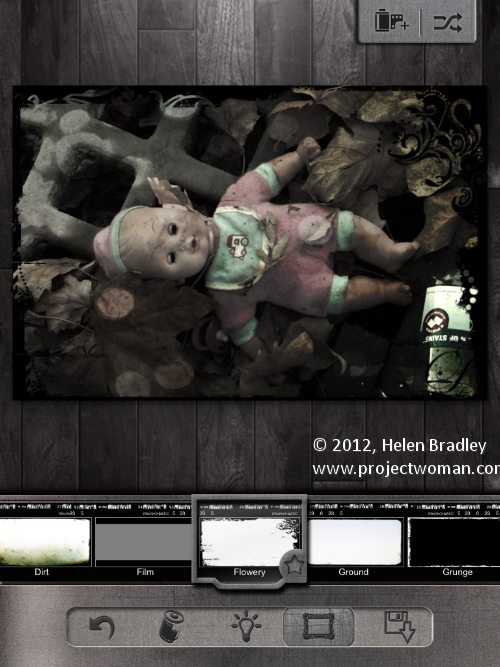
Then click the frame option and add a frame – I chose Flowery.

I would like a tool for cropping the image as I really prefer to use square images for these types of effects and you cannot do it in Pixlr-o-matic so you  have to do it before you come to this program.

The icon in the top right of the screen lets you apply a random mix of settings to your image – it’s a sort of “I feel lucky solution” – worth trying if you just want to see what the program can do.

Your save options are to the Photo Gallery or iTunes – it would be nice to see some integration with, say, Facebook or Twitter too?

I love Pixlr-o-matic on the desktop and the iPad. I have bought all the extras because you can never have too many cool features and I am willing to overlook some minor frustrations like no crop and portrait mode for the sake of art!

Helen Bradley

Thursday, April 5th, 2012

Photo fixing and painting with PhotoPad

Download: PhotoPad by Zagg for the iPad free

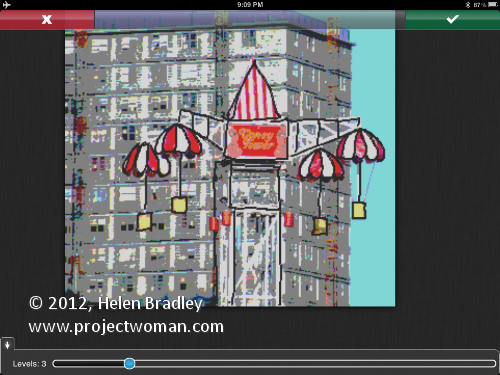
This app is interesting and would be useful if it were more functional. It has a few problems and most annoying is the inability to preview changes on the image before you select them. So you have to apply the effect and then undo it if you don’t like it. It just seems a whole lot more cumbersome to use than many other apps of this genre.

The rotate tool has no grid so lining up a rotation is total hit or miss. And worse still the program adds a colored matt background around the rotated image – wtf? Most photographers won’t want an image on an angle with a colored background showing up just what you did to the image. In reality what we need and want is the option to rotate the image and, at the same time to crop or resize the image to get rid of this skewed background.

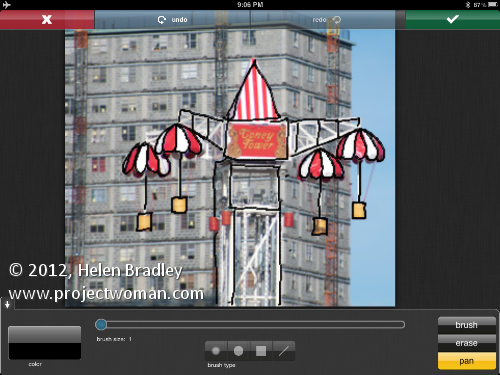
There are a range of paint tools which let you sample colors from the image or select your own color and paint onto the image. This paint goes on a layer above the image so you can erase it if desired. There are 4 brush types – soft, hard, square and line but they’re not really different enough or a wide enough range to do much – you’d go to another program if you were serious about doing real painting of an image. Here I just did some fun brush lines.

The fixing tools are limited to color levels, saturation and hue, contrast and brightness and things like redeye.

There are a few filters but the thumbnails don’t indicate well enough what they do so you have to apply them to the image to test them. Basically they’re a pretty lacklustre range of filters which just about sums up this app – lacklustre and hardly worth bothering with – there are far better apps out there which do all this does and more and way more to boot.

Helen Bradley

Friday, March 30th, 2012

Print Contact Sheets in Lightroom

By Helen Bradley

Historically a contact sheet was a page of images each printed at the same size as the film negative – they were used as a reference for the images on the film roll. They were called contact sheets because the film was placed in close contact with the paper when printing them.

These days the term contact sheet loosely means an arrangement of multiple, small, same size images on a single page usually with some identifying information such as the image filename placed under the image. The purpose is to provide reference to a larger number of images. You may print them to keep or give to a client as a catalog of the images from a shoot, for example.

You can create a contact sheet inside Lightroom and here’s how to do it:

Select a template

Start by selecting the folder or the collection that contains the images that you want to add to the contact sheet.

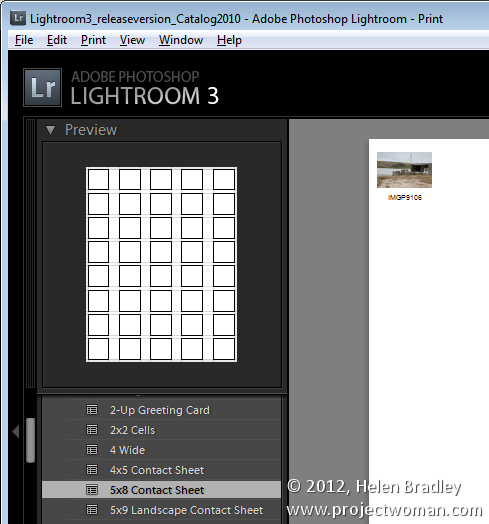
Launch the Print module and, from the Template Browser, select one of the contact sheet options. There are a few grid layouts including two with square image cells – a 4 x 8, and a 5 x 8. There are two with landscape orientation cells – one 5 x 9, and one 5 x 11.

I chose the 5 x  8 one.
Set up the print job

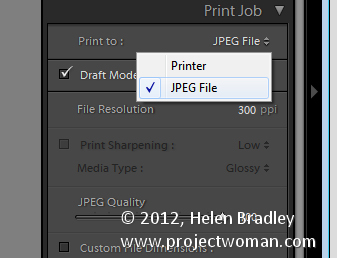
If you plan to ‘print’ the contact sheet to a jpg file, from the Print Job panel on the right of the screen, choose Print to JPG File. As contact sheets are just that – a contact sheet and not full scale images – select to use Draft Mode Printing to speed up their creation.

The page dimensions will be preset for 8.5 x 11in. You can set your own Custom File Dimensions but increasing the size of the page simply changes the page size not the size of the cells – you have to adjust them separately.
Adding images

If you have only one image selected in the Filmstrip then the contact sheet will only display one image.

You’ll need to select all the images on the filmstrip to add them to the contact sheet. To do this, either click on the first image and Shift + Click on the last or select All Filmstrip Photos from the Use: list on the toolbar. If the Toolbar is not visible, press T to display it. You can also select Flagged photos, if desired.

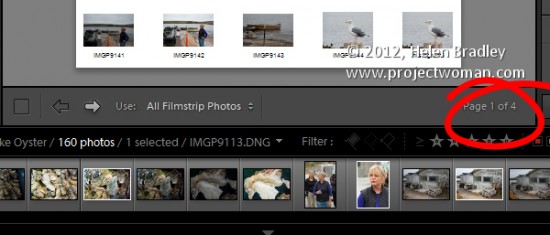
The Toolbar shows you how many pages you will use and you can click the arrow keys on the toolbar to navigate the pages.
Add image captions

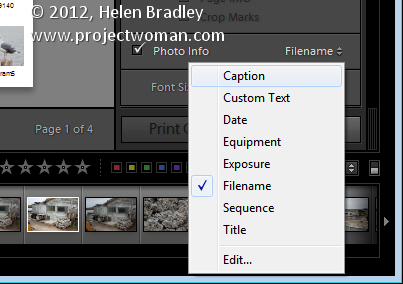
To add information below the images, from the Page panel on the right, select the Photo Info checkbox and choose the field to display. You can use one of the preset options such as Caption, Date, or Filename or click Edit to create your own field.
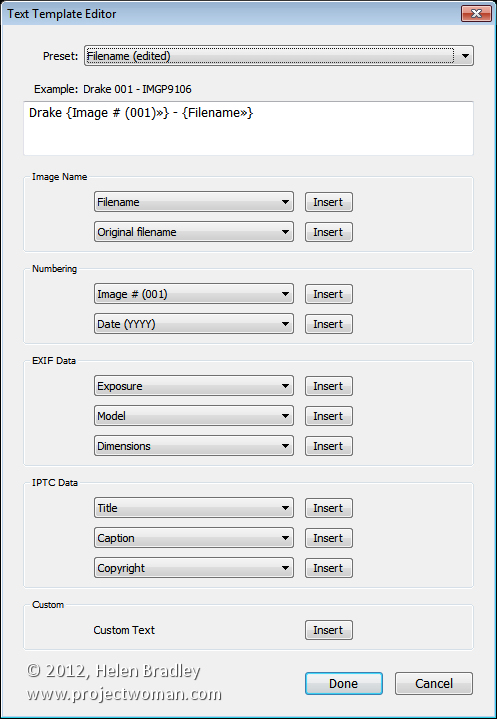
In the Text Template Editor, you can access to fields such as the filename, a sequential numbering or date as well as EXIF and IPTC data. You can also type your own custom text to create detailed photo info to add to the contact sheet. Here I typed some text, added a sequential number and the filename.
Customize the Contact Sheet

The template contact sheets are a starting point but you do not need to strictly adhere to their design if you don’t want to and they can be easily customized.

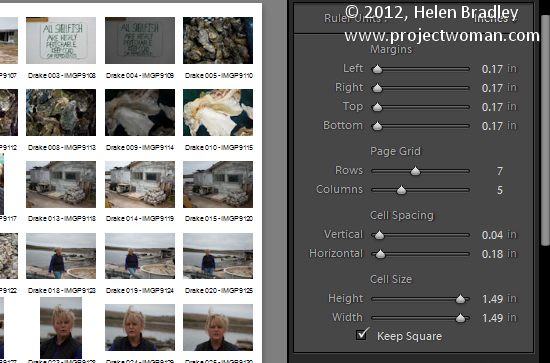
For example, from the layout panel if you click the Keep Square checkbox you will find that in some layouts your images may change orientation so the page will be a mix of portrait and landscape images.

You can adjust the maximum cell size and width using the Cell Size Height and Width sliders in the Layout panel. As you adjust the cell size, notice that the Cell Spacing values will change.

You can decrease the number of rows and/or columns using the Page Grid options. By decreasing the number of rows or columns, you can increase the cell size.
Adjusting margins

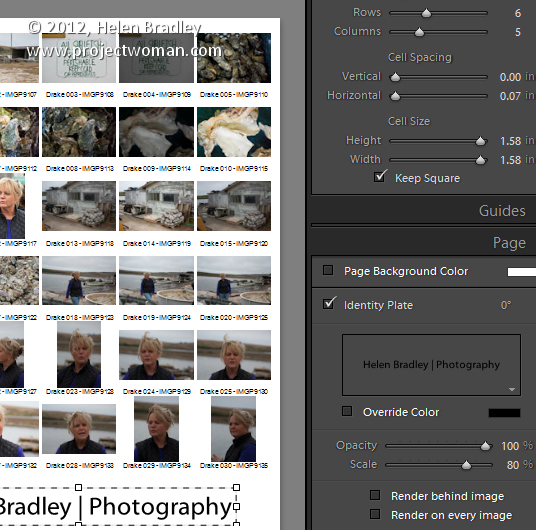
If you increase the Bottom or Top margin you can give yourself room to, for example, place an Identity Plate on the page.

Here I’ve reduced the number of rows and increased the bottom margin and added an Identity Plate from the Page panel options. In the Page panel, select the Identity Plate checkbox and then select the Identity Plate to use.

The Identity Plate will appear, by default, in the middle of the page so drag it into position on the page. Adjust its scale by dragging on the Scale slider.

You can adjust its Opacity if desired and, if it is a text identity plate (rather than a graphic), you can also select Override Color to make it any color you like.
Print the result

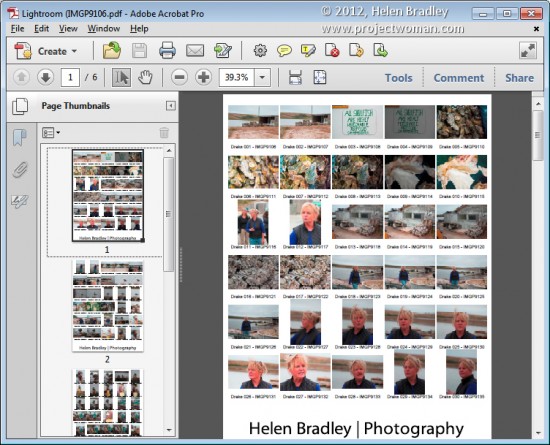
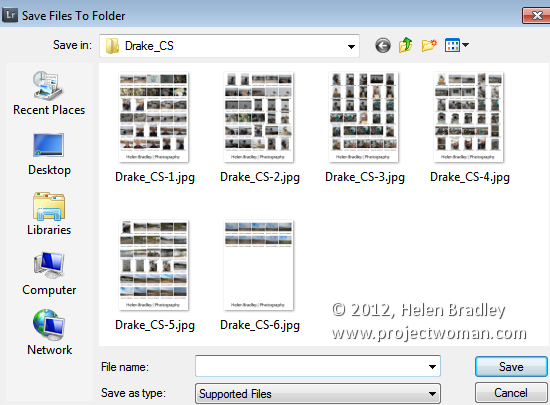
When you’re done, you’re ready to output the result. If you selected to print to a JPG file click Print to File and type a name for the file and select a location for them. The pages will be printed to a JPG file and if there are more than one they will be sequentially numbered.
Print to PDF

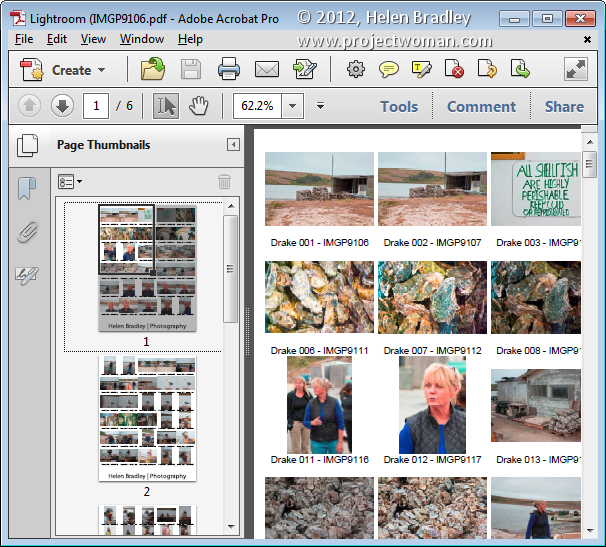
If you want to print to a PDF on a Windows machine you will need to have a PDF printer driver installed such as Adobe PDF or one you have downloaded from the web.

Select Page Setup, select the pdf printer driver and configure the page size so it matches the template size – such as letter paper portrait orientation. Then set the Print to: option in the Print Job panel to printer and click Print to print to a pdf.
Save the Template

If you have customized a template and want to be able to use it again in future, save the design as a new template.

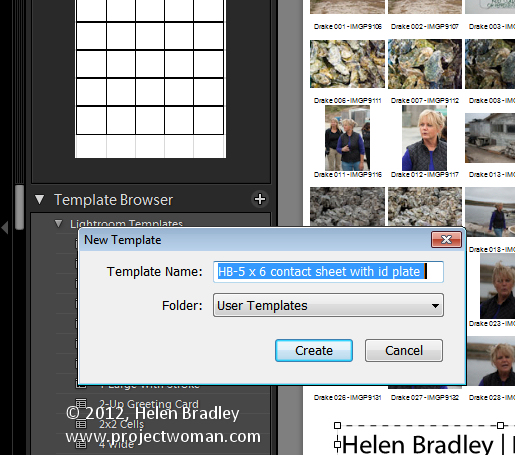
Click the plus symbol opposite the Template Browser panel header and type a name for your template. You can store it in User Templates or create a new folder for it. Click to create it.

In future you can save yourself the time setting up the template by starting with your customized version.
Helen Bradley
Page 14 of 15« First1112131415