

If you’ve ever wanted to create a special font character for your company logo or a favorite shape you can create it using the Windows Private Character Editor utility which is available in Windows XP and Vista.
To run it, choose Start > Run > type eudcedit and click Ok.
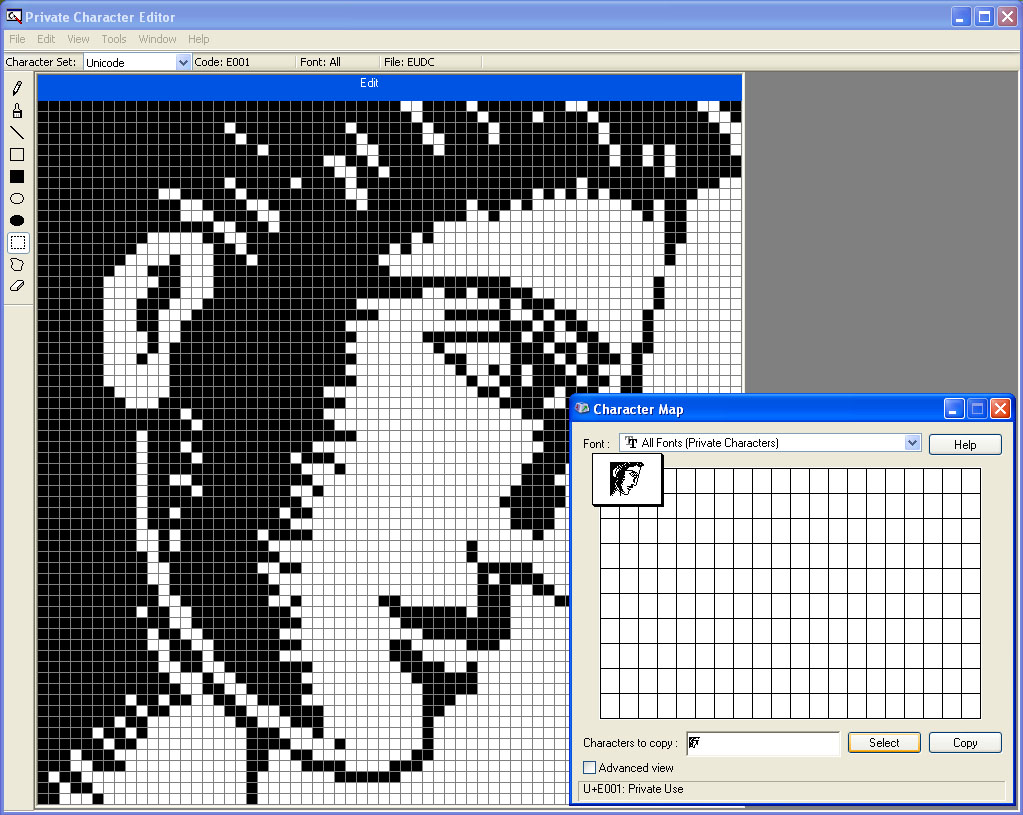
When the character grid appears, double click any one of the empty boxes to open up a 64 x 64 pixel grid where you draw your character.
You can also copy an existing font character and edit that by choosing Window > Reference > Font and choose a font to copy a character from. Select the character, make a selection around the it and drag it onto your work area. You can now edit it using the tools on the toolbar.
You can also import any black and white image. Open your graphics software, open an image and size it down to 64 x 64 pixels in size and convert it to black and white.
Now copy and paste it into the Private Character Editor.
When you’re done editing, choose Edit > Save Character to save your character to your font collection.
To use your new character, open the Character Map tool by choosing Start > All Programs > Accessories > System Tools > Character Map. Choose All Fonts (Private Characters) from the font list.
To use your new character, click it, then click Select and then click Copy. Switch to your application, for example, a Word document and choose Edit > Paste.
Made an ugly little font-thing!