Monday, February 21st, 2011

Replacing skies in Photoshop

Reader Michael P. recently sent me an image he’s been working with – his challenge was to replace the sky in the image. The problem was that in replacing the sky the image had ended up with a lot of halos around the edges making the sky replacement look less than believable.

Kindly Michael sent me some of the images he wanted to work on to explain how to fix them more realistically.

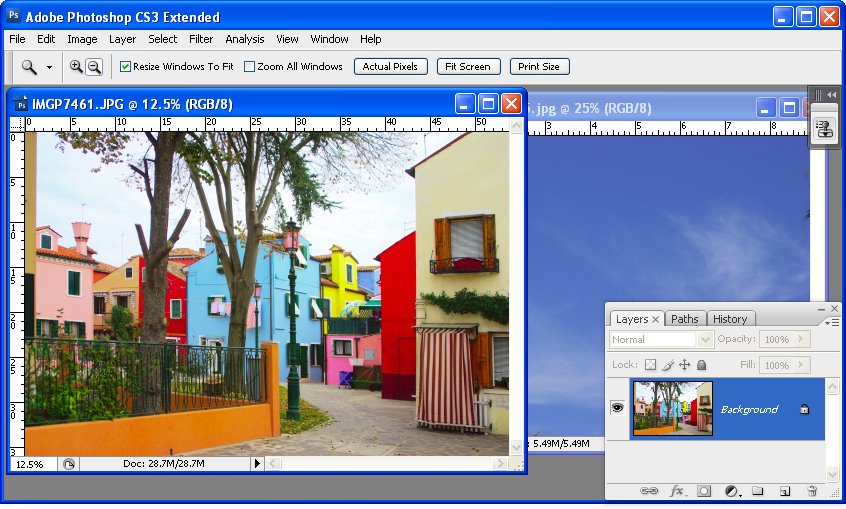
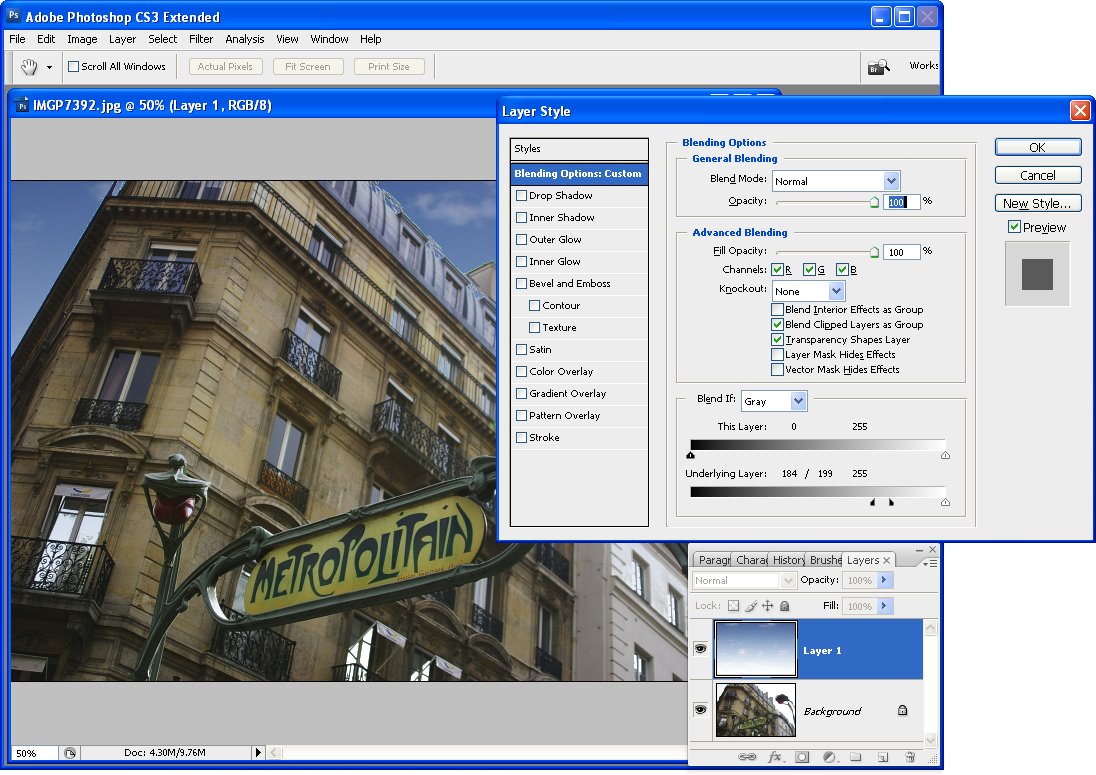
This is the building we’ll work with:

Here’s what I did:

Start by duplicating the background layer.

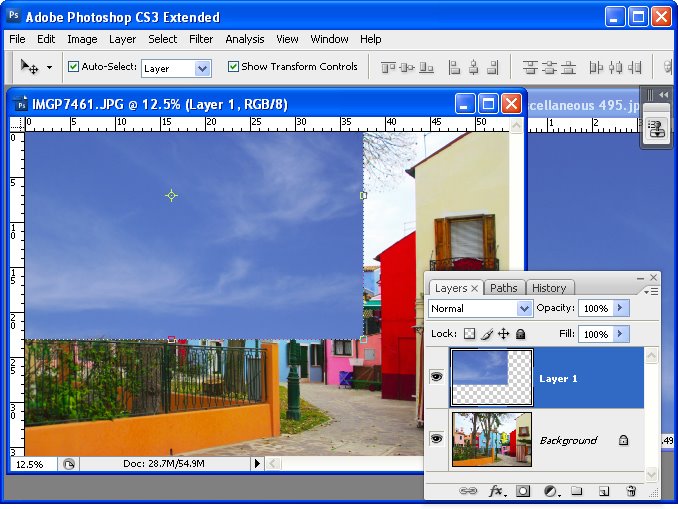
Drag the background layer from your sky image into your image – if you hold Shift as you do this it  will be positioned in the middle of the image.

Move this layer so it is over the blown out sky.

Move the sky layer so it sits between the two image layers.

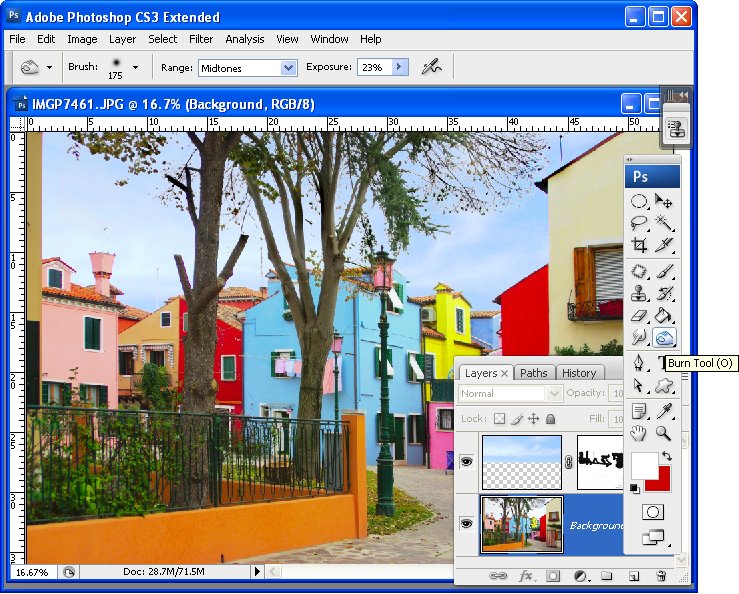
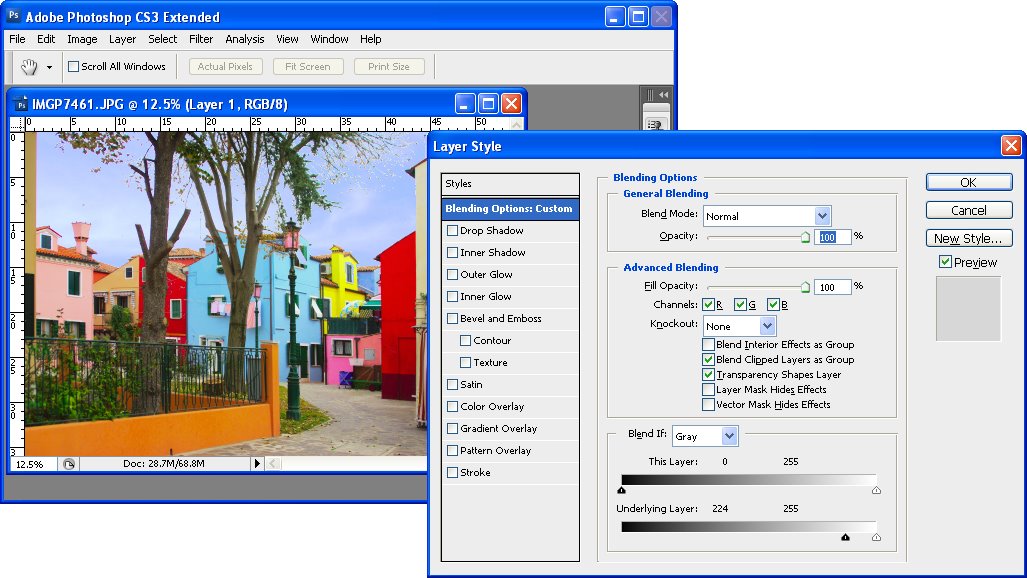
Select the topmost layer of the image, select the Add a Layer Style icon at the foot of the layer palette and select Blending Options.

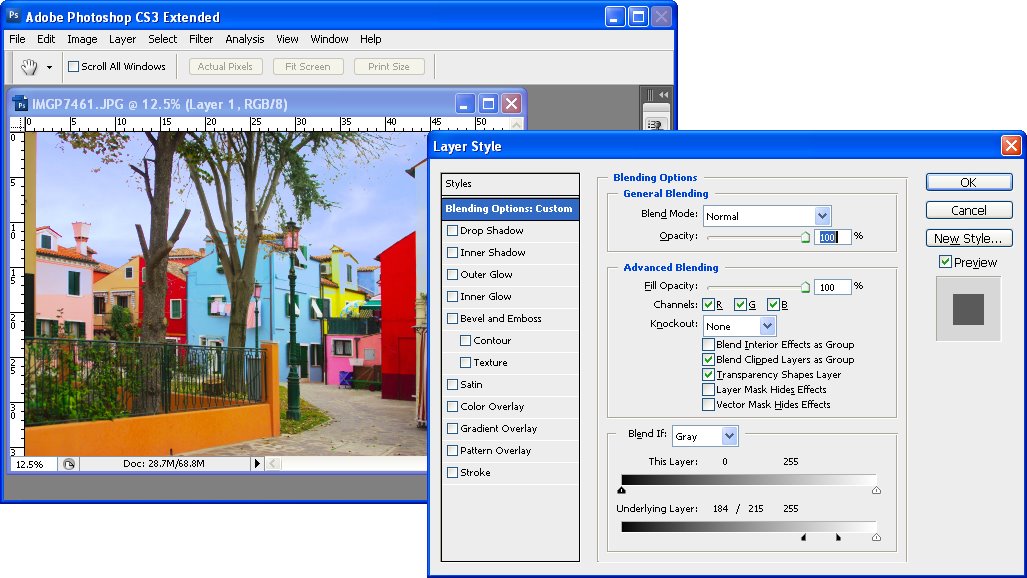
In the Blend If  area locate the This Layer bar and drag in from the right hand side of the bar. To split the adjuster in two, hold the Alt key as you drag one marker away from the other.

If you have a really blown out sky set the right side of the marker at 255 and the left side at a value that gives you a good blend effect for the sky – such as 248 or so.

Each image will require different settings.

Look at the result and see if the sky that you’ve brought in really suits the image.

Unfortunately I don’t think this sky works particularly well for this image and the image needs something a lot less dramatic.

Here is a sky from my own collection which I think will work better.

I dragged it into the image above the first sky layer but under the second image layer. The original Blend If adjustment settings work just fine with this sky so there is nothing more to do there.

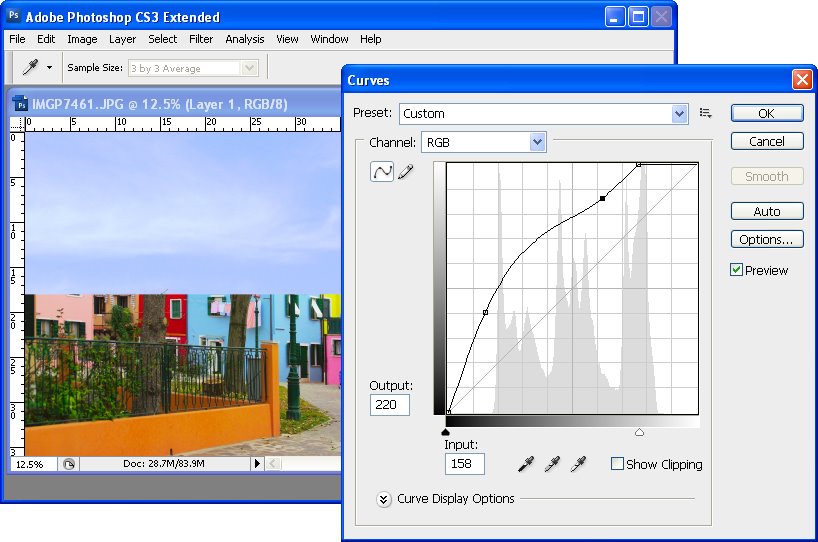
However, there are still problems along the skyline. These can be easily fixed by lightening the sky which I think is still way too dark for this image.

Select the sky layer and choose Image > Adjustments > Levels. What I am looking for here is to lighten the sky so that it blends in more with the image and looks more like it belongs.

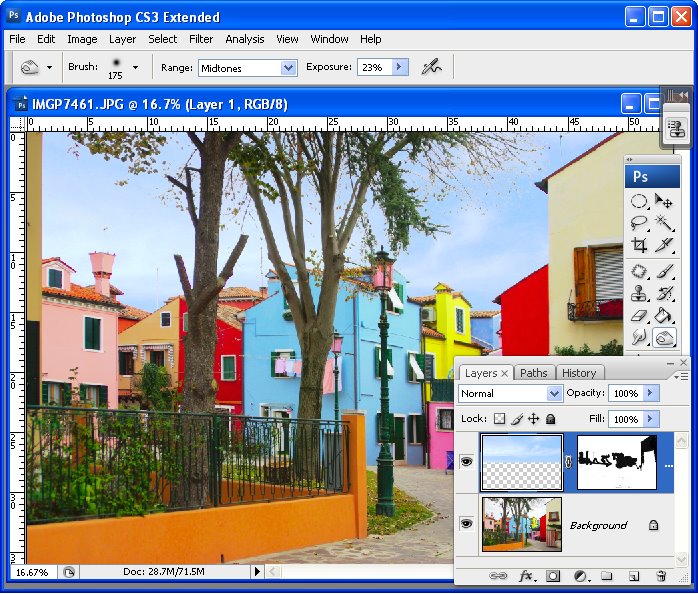
Having lightened the sky, you’ll can further blend it into the image by adjusting the opacity of the sky layer down a bit.

Because the original image is underneath the sky as well as on top of it the effect of reducing opacity is to blend the sky into the underlying image.

If you find some bleeding of the sky into the buildings you can add a mask to the sky layer by selecting that layer and click the Add Layer Mask icon at the foot of the layer palette.

Paint with black on the mask to remove any blue sky in lighter areas of the building.

Typically if you find that you’re getting distinct over-lapping of sky around the edges where the blown out sky meets buildings or other elements in the image, the problem will be that you’re trying too hard to replace the blown out sky with something that is too much sky for the image.

You’ll get a better result if you work with a much lighter but still interesting sky.

If you find that you have some very light elements in the original image that are showing white fringing over the blue sky you can avoid these by placing a portion of the sky with white clouds in it under these areas to minimize the obvious white edges.

Helen Bradley

Wednesday, April 29th, 2009

Replace a sky in Photoshop


One of the most disappointing things that can happen to you as a photographer is to have a once in lifetime chance to take a photograph of something and to have the weather let you down. So, instead of luscious blue skies you’ll get grey or dull skies in your image.

You can replace a dull sky in an image in a number of ways. One method I like to use involves the Blend If tool because it avoids the need to make a detailed selection around the area of sky to replace. This is particularly handy if the skyline has trees or other wispy elements along it. The principle of this tool is you blend two layers together conditional on the overall lightness or darkness of the top or bottom layer or you can do it conditional on the lightness or darkness of a color on the top or bottom layer.

For this purpose I keep a file of blue skies. Anytime I’m photographing, I’ll swing the camera upwards and shoot a few new sky images for my collection. Then, when I need a sky, I have plenty to choose from.

Here’s how to seamlessly change the sky color in Photoshop:


Step 1
Open both the image which needs a new sky and an image of some sky.


Step 2
Drag the background layer from the sky image into the main image. It will appear at the top of the layer stack.


Step 3
Move and size the sky layer so it overlaps the problem area.

If the sky is too dark or light for the image, use a tool like the Curves tool to lighten it so it blends in better with the target image.


Step 4
Click the sky layer so it is selected in the layers palette and click the Add a Layer Style icon at the foot of the Layers palette. Click Blending Options to open the Layer Style dialog.

Locate the Blend If area at the foot of the dialog. You will use Blend If to blend this layer with the layer below. To do this, drag the slider at the far left of the Underlying Layer panel in to the right – almost all the way to the right edge of the slider.

As you do this, you reveal the underlying layer in all areas except the lightest – the areas which contain the blown out sky.


Step 5
To smooth the transition between the sky and the remainder of the image, hold the Alt key and drag away one half of the small slider to split it in two. Drag the two pieces apart. The area to the left of the markers delineates where the effect is applied 100% and between the two pieces is where the effect transitions from 100% through to 0%. Click Ok when you’re done.


Step 6
To fix any problems where the sky has blended into the original image in an inappropriate place, either move the sky further up the image so it doesn’t overlap that area of the image or, if this can’t be done, use a layer mask. With the sky layer selected, click the Add a Layer Mask icon at the foot of the Layer palette. Paint on the mask in black to reveal the original image underneath.


Step 7
Now is the time to look at the image and determine what it needs to finish it. You might need to tweak the sky color and lightness using a Curves adjustment on the sky layer now that the sky is actually in place in the image.

In some cases you may see a halo effect around the tree branches and leaves or along the edges of buildings where the two images are blended. You can remove these using the Burn tool by painting over these areas with a low Exposure brush and with the Range set to Midtones or Shadows as necessary.

Note:
The Blend If tool can also be made to work on a single channel which can give better results in some situations. Select Blue, for example, from the Channel list in the Blend If area (rather than the default Grey) and adjust using that.

Helen Bradley

Sunday, May 20th, 2007

Photoshop – Replace a sky

It seems to be one of those things that people are least satisfied with – the sky in their photos. It’s all too easy to shoot a wonderful image on a sunny day, there’s not a cloud in the sky and it’s blue, blue, blue. However, when you return home the sky in the photo you took is dingy blue white – yuck, yuck, yuck. It’s disappointing and it doesn’t have to happen.

If you’re shooting with a digital SLR invest in a polarizing lens and use it! It will make your skies deliciously blue. You can also get these lenses for many point and shoot cameras, I have an adapter and a polarizer on my Canon 3S IS and it all just snaps into place.

If all else fails, take a series if good photos of just sky when it’s not so bright and keep these in a “spare skies” folder. Then, when your sky isn’t all you want it to be, like my old car, you simply search out a spare part – replacement sky for it. To use it, visit my new Photoshop skies tutorial – don’t be fooled by the title, there’s a great 6 step by step solution at the foot of the page.

Helen Bradley