

 While Photoshop comes with a series of custom shapes, they don’t have to look the way that they were designed to look.
 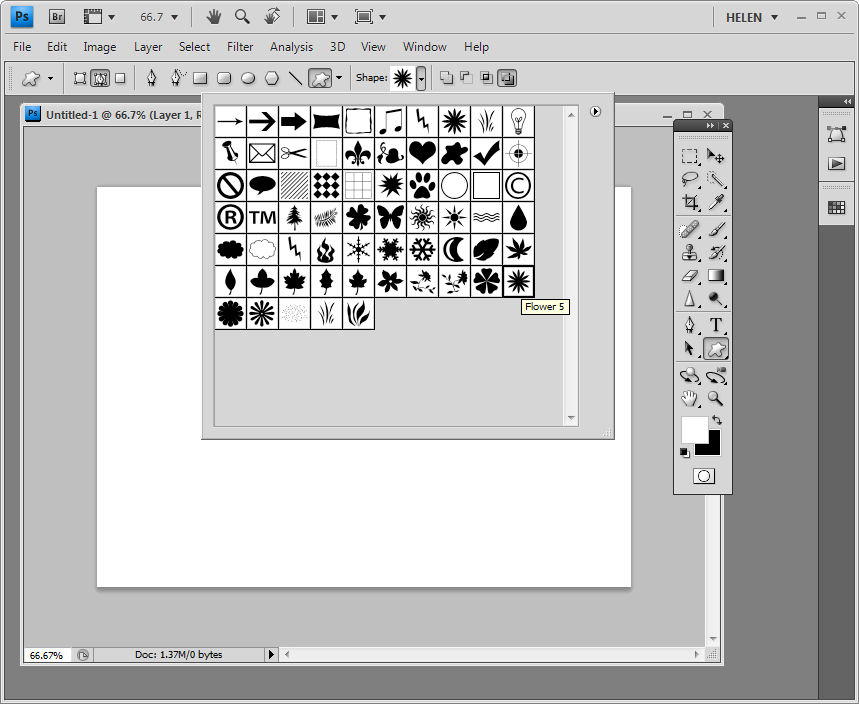 Step 1
To see this at work, click the Custom Shapes button on the toolbar, make sure that you have Paths selected on the Tool Options Bar and select a shape such as a Flower5 from the Nature shape collection.  Step 2
Hold the Shift key as you drag the shape into your image.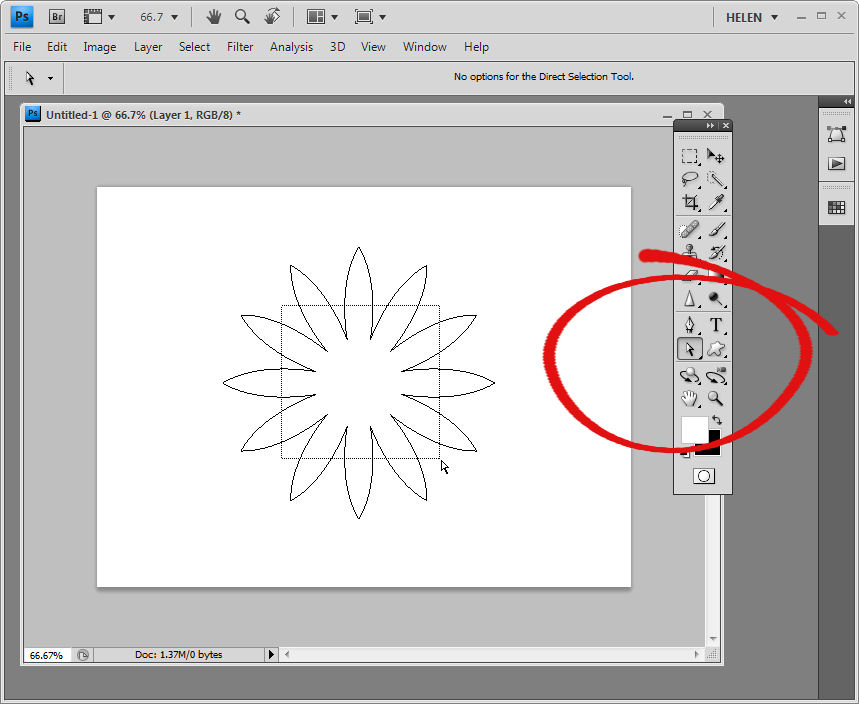 step 3
Select the Direct Selection Tool and drag over just the middle points of the flower inside the outside edges. This will result in nodes showing on all the flower points but you need to just concentrate on those in the middle. 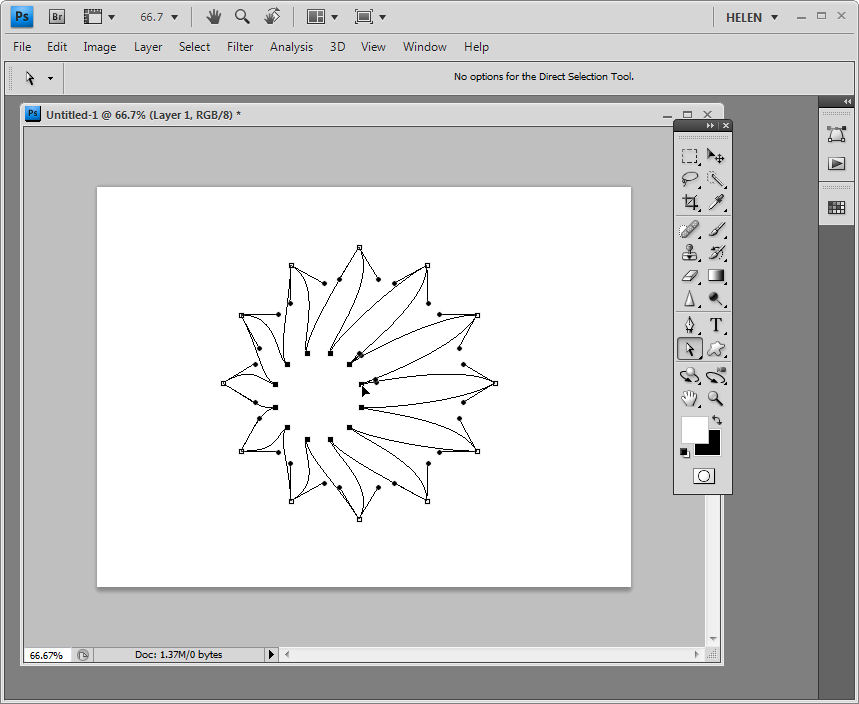 Step 4
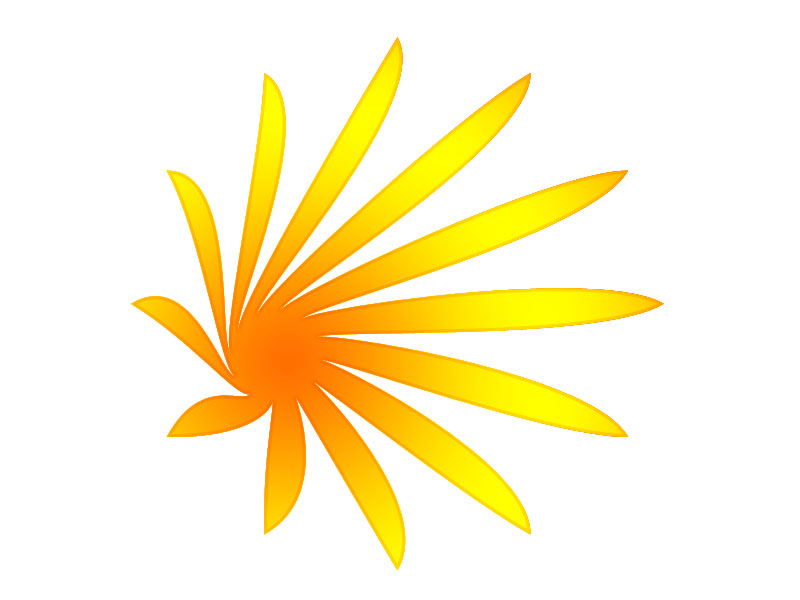
With all the nodes selected, click and drag on one of the middle nodes. Notice that all the middle nodes travel together and that you can pull on them to distort the flower shape in all sorts of ways. When you have the flower distorted as you want it to look, let go the mouse button. 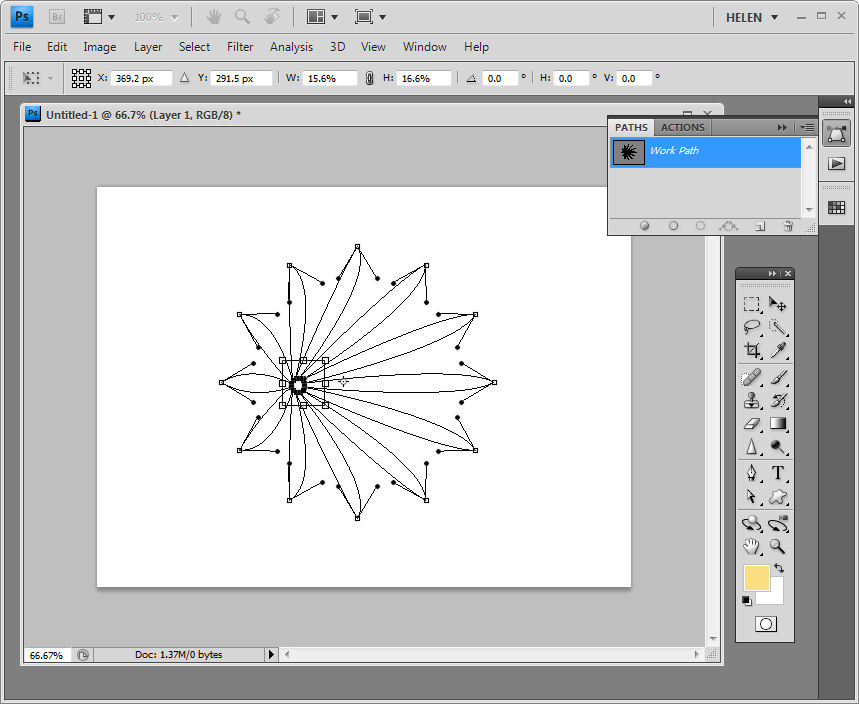 step 5
To drag all the points in or out around a fixed point, choose Edit > Free Transform Points then hold the Alt key as you drag on the outside handles which appear. You can then let go the Alt key and move the selected area into position or reshape it. Select the Commit button or press Enter when you are done.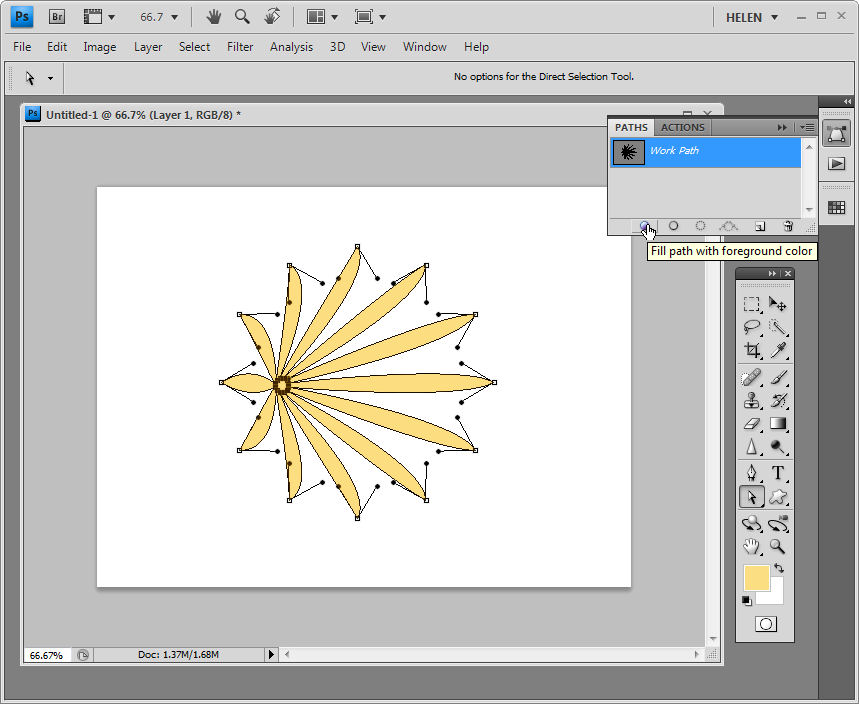 Step 6
On the Paths palette you can now click the Fill Path With Foreground Color button to fill the path with the current foreground color. You can also select the Load Path As A Selection option, return to the Layers palette and, for example, fill the selection with a gradient fill by selecting a gradient and dragging across the shape to fill it.
Shapes that respond particularly well to this treatment are those with a definite center point such as the flower shapes, some stars and snowflakes.