

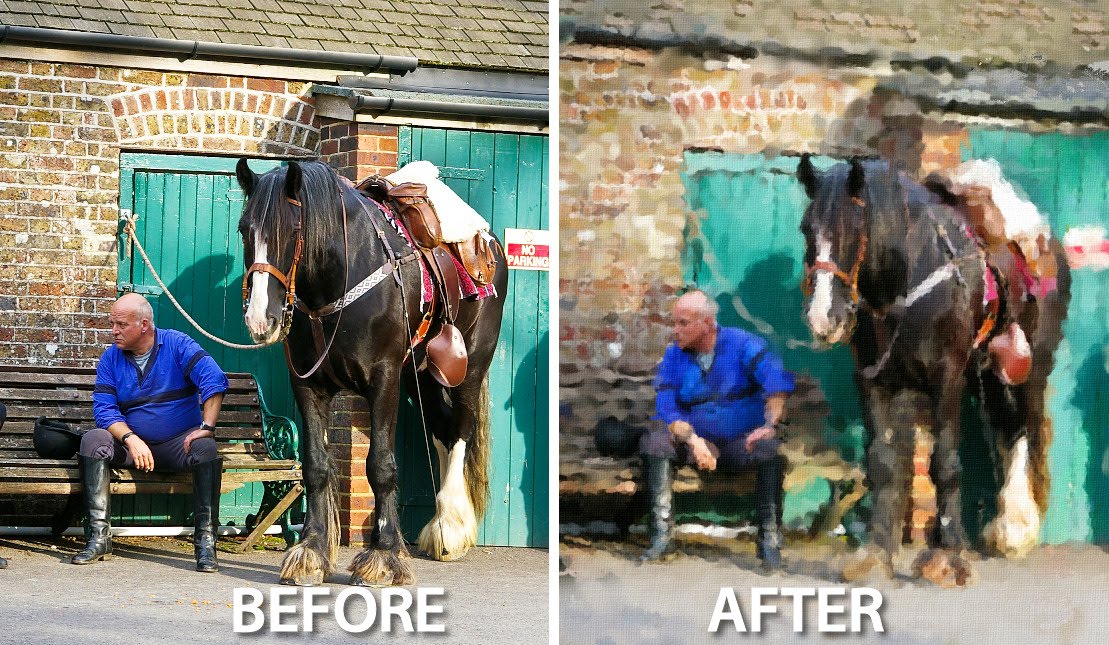
While Photoshop includes some filters you can use to apply a painted effect on your photos, you can also paint them yourself very easily. This way you can achieve a custom look as you paint.
The process involves using the little known Art History brush in Photoshop to do the work, here’s how:
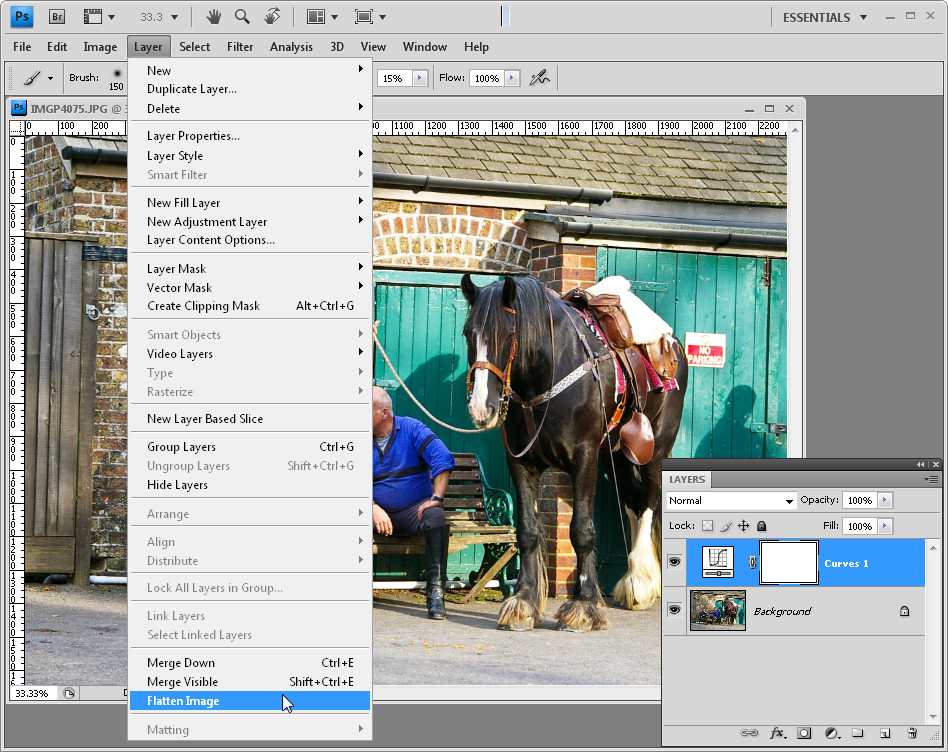 Open your image in Photoshop. You don’t need an image that is in sharp focus (which makes this process a good one for dealing with a slightly soft image), but it should be well exposed and have a good range of tones. If necessary, apply a Curves, Levels or Exposure adjustment to the image. Flatten the image.
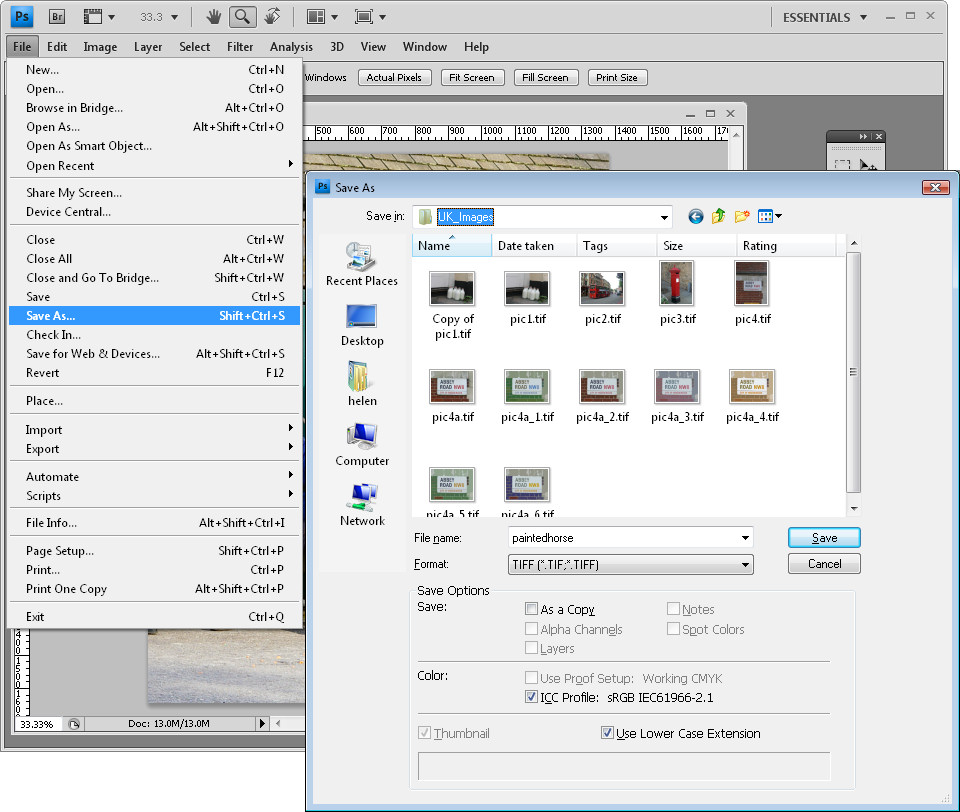 If you resize or crop the image, you must save it and reopen it – the Art History Brush won’t work if you don’t. Ditto, if you’re working in 16-bit mode you’ll get a program error if you try to use the History Brush so use Image > Mode and select 8-bit then save and reopen the file.
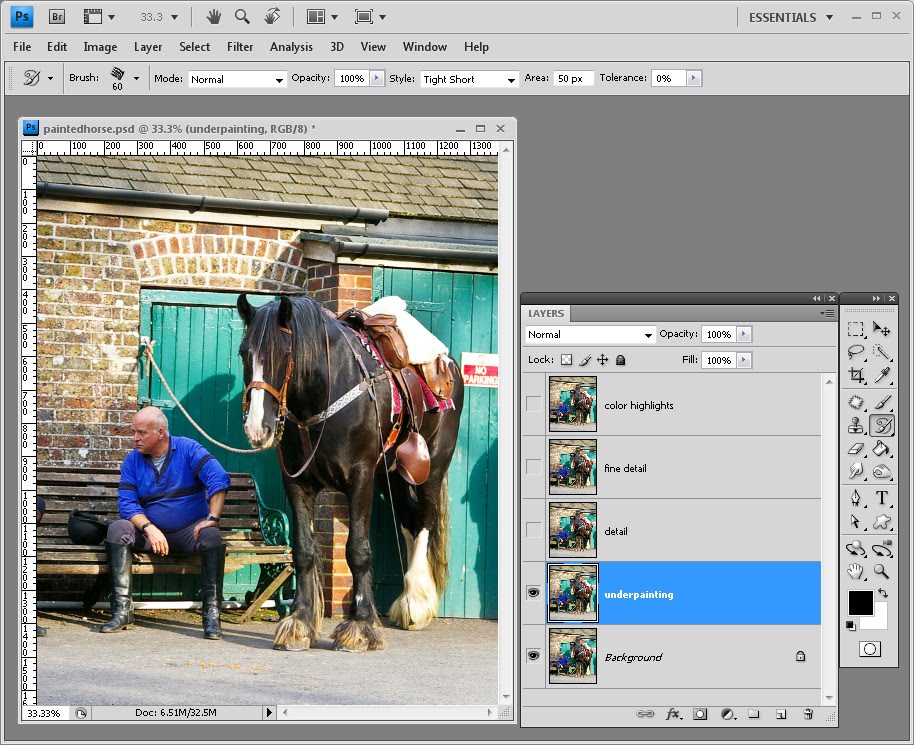 Duplicate the background layer of the image 4 times. Name your layers (from the bottom up): underpainting, detail, fine detail and color highlights. Hide the three top layers and select the underpainting layer.
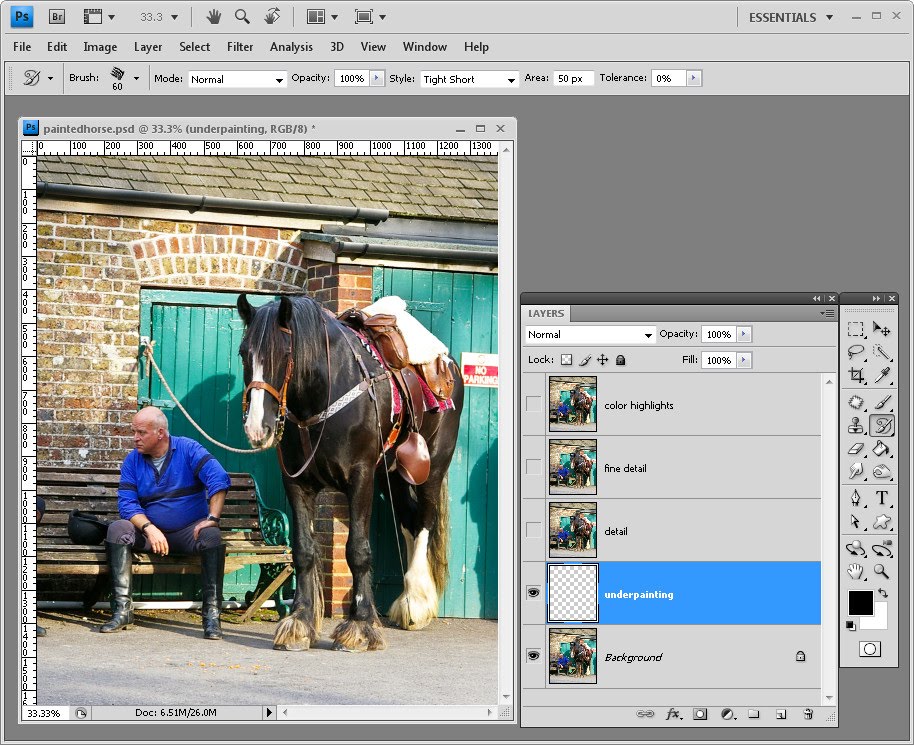 Select the underpainting layer’s contents by Control + clicking on the layer thumbnail (Command + Click on the Mac) and press the Delete key to remove everything from this layer. Deselect the selection by choosing Select > Deselect.
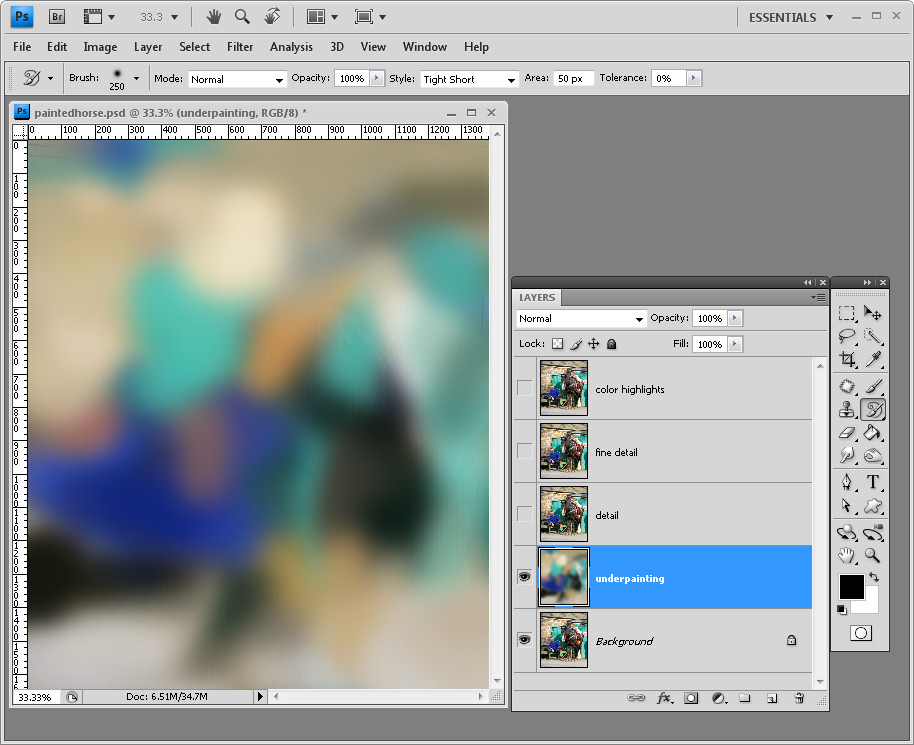 Click the Art History Brush (it shares a palette position with the History Brush Tool), select a brush shape to use and make it a fairly large size. Choose a Style such as Tight Short and an area value of around 50px and paint all over this layer. All you want right now is some general color but no detail at this stage.
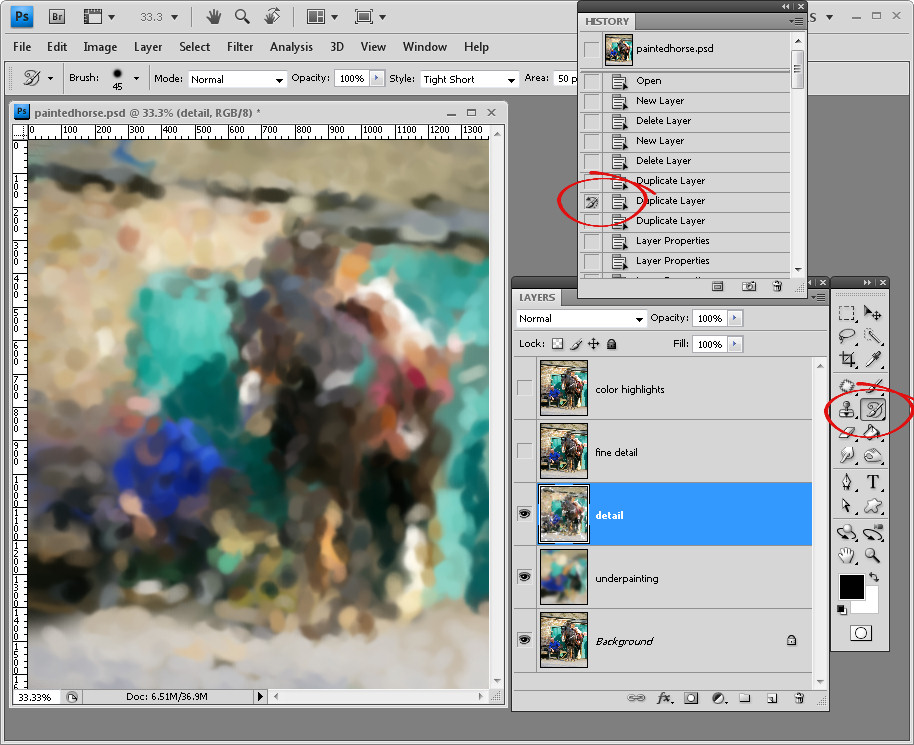 Click the detail layer and turn its visibility on. Select its contents and delete them. Make your brush smaller in size and now paint on this layer to bring back some of the image detail. Experiment with different settings in the Art History Brush toolbar such as Dab, Curl and Tight. If you get an error stating that the brush won’t work because the history state doesn’t contain this layer, view the History palette using View > History and click in the left column opposite one of the Duplicate layer states to make it the one to paint from.
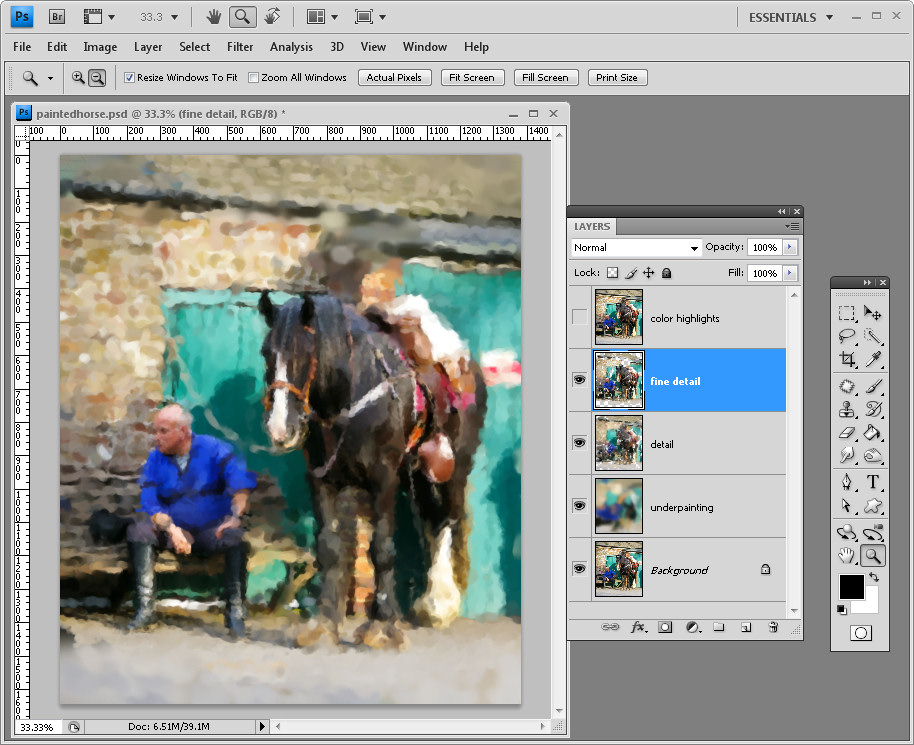 Once you have some detail in the painting, click the fine detail layer, delete its contents and paint on this layer using a very small brush. This time focus on the elements you want to see in some detail such as the horse.
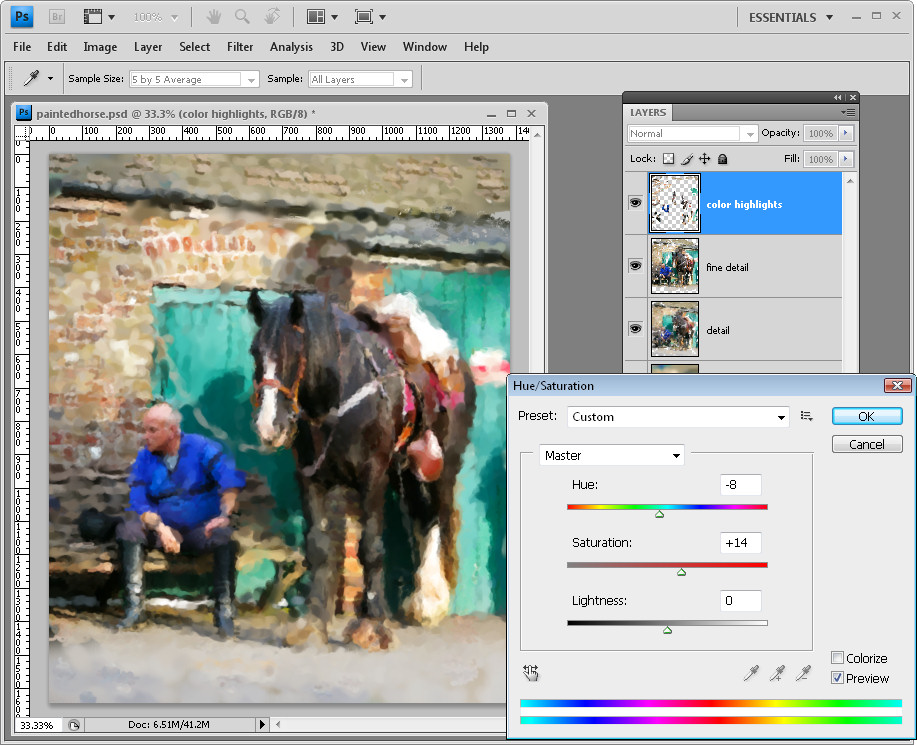 Select the color highlights layer, make it visible, delete its contents and using a slightly smaller brush, this time just dab a few small scattered brush strokes on the image, you want a smattering of detail but not much at all. With the layer selected, choose Image > Adjustments > Hue/Saturation and drag the Hue slider a little to the left or tight and adjust the Saturation to a little higher value. This changes some of the color and detail in the image to give it a more painterly look.
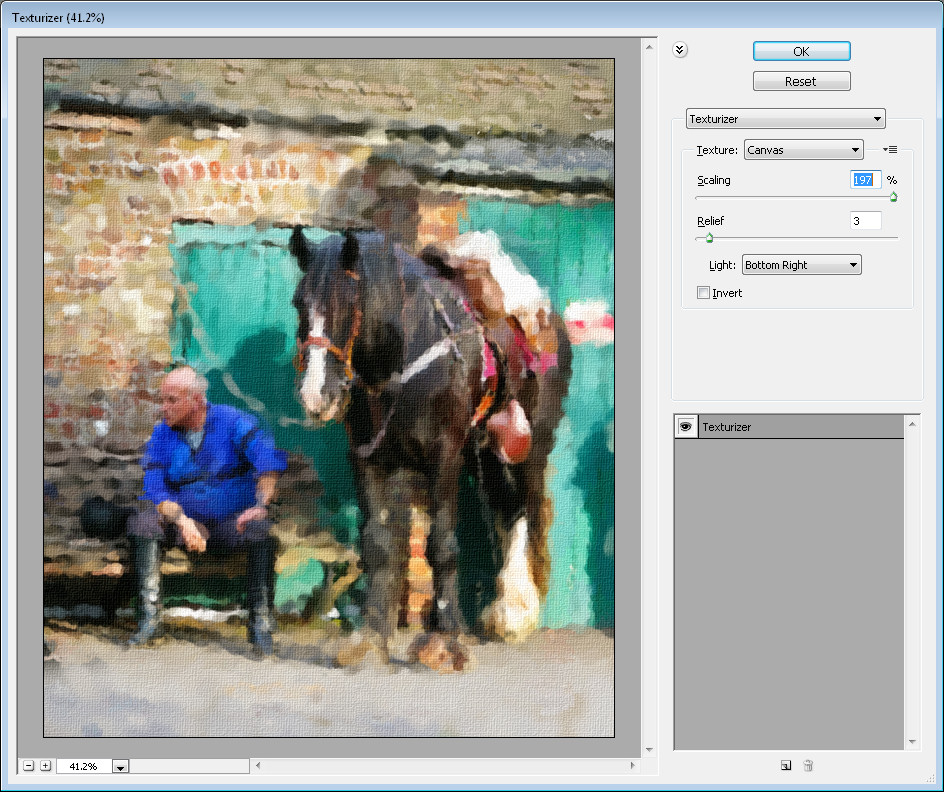 When you have a result you like, select the top layer of the image and press Ctrl + Al + Shift + E (Command + Option + Shift + E on the Mac) to create a new layer with a flattened version of the image on it. Choose Filter > Texture > Texturizer and apply a Canvas texture to the image.
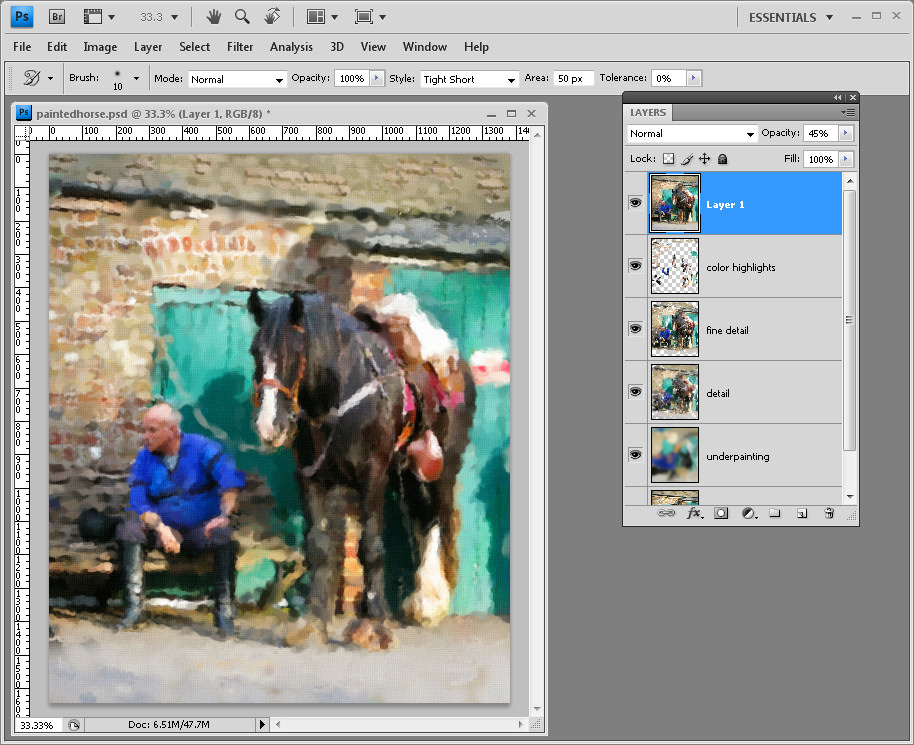 You can back off the effect by decreasing the Opacity of the top layer to reveal some of the detail from the layers below.
Next time you’re looking to create a painting from an image, consider by passing the filter menu and use the Art History brush to make your own custom painting.