

By Helen Bradley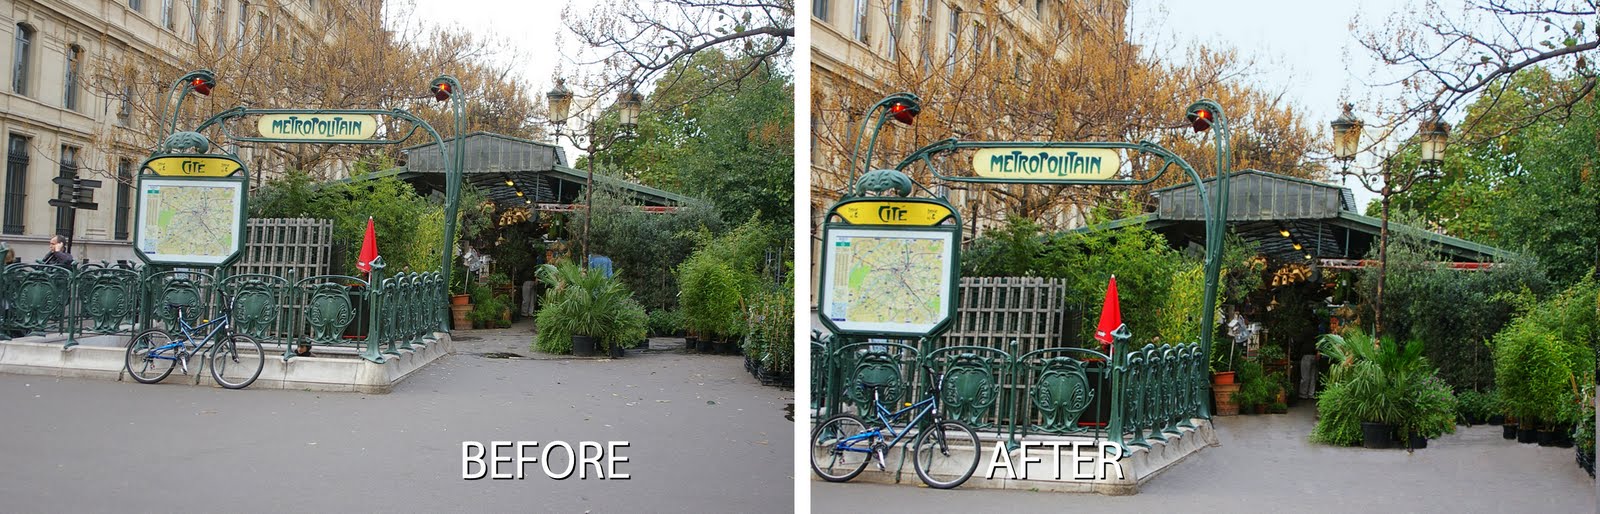
Many of the images that you take particularly cityscapes, like most portraits, can do with some spot fixing. I’ve been traveling through Europe a lot lately and because it’s considered almost de rigeur to smoke there, many of the photos that I have are littered with cigarette butts and assorted garbage.
And although you may not realize it, even small cigarette butts will detract from an image. A few minutes spent cleaning up an image can result in it having a way more polished look. Here are my top techniques for cleaning up litter and unsightly blemishes.
A word of advice before you begin: make a duplicate of the original image and work on this. Then you have the original image to look back at and see just how much improved the image is after the spot fixing is complete.
Step 1
Spot Healing Brush
For simple spot fixes the Spot Healing Brush cannot be beaten. It doesn’t require you to make a selection of a source area to use for the fix so you can get to work fixing the image straight away.
Ensure your brush is large enough to cover the problem area but not any bigger – the idea is to spot fix just the problem area and to leave as much of the original image intact around it. Zoom in close to where the flaws are and paint over each flaw one at a time.
The Hand tool is useful here as you can press and hold the spacebar as you drag on the image to reposition and when you let go the mouse and spacebar the Spot Healing Brush will be still selected.
It can take five minutes or more to spot a really bad image, but the overall result will be significantly improved.
When you’re using the Spot Healing Brush tool, make sure that you have the Proximity Match option enabled, not Create Textures. Proximity match gives a better result with most spotting tasks.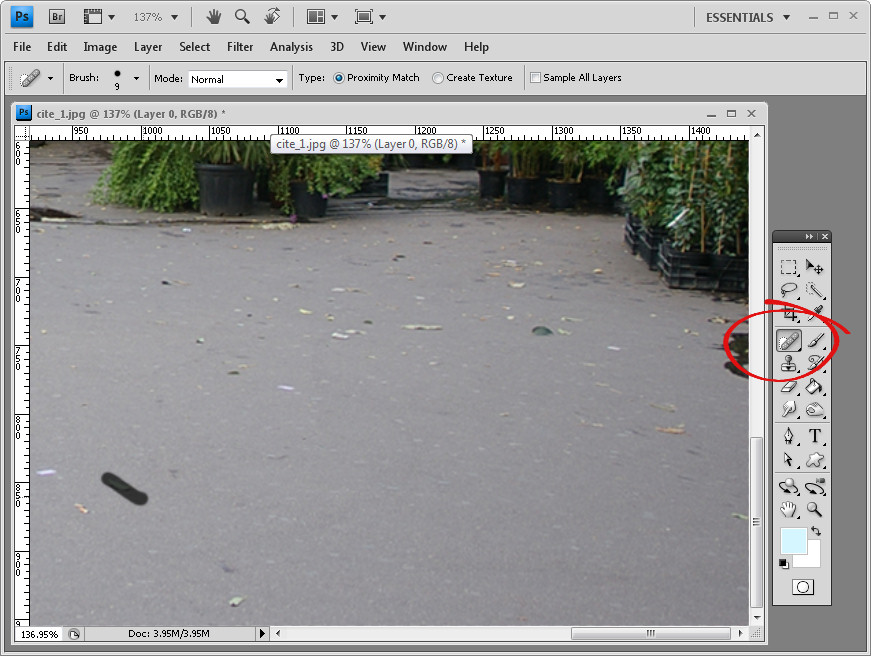
Step 2
Patch Tool
For larger jobs where, for example, the Spot Healing Brush won’t fix the problem because it’s too close to something with different texture or it’s such a large problem that it really needs a bigger solution, use the Patch Tool or the Clone Tool.
With the Patch Tool you make a selection around the area that is the problem, making sure that the Source option on the toolbar is selected. Now drag the marquee away to find an area to use as the fix. Sometimes you may need to apply this fix a couple of times, and you may need to clone around the edges of the area later on to improve the overall appearance and to add some texture back into the image. 
Step 3
Clone tool
To use the Clone Tool, select the tool, locate an area of the image that you want to clone from – this is your source image area – and Alt + Click (Option + Click on the Mac) on that area to sample it. Then start painting on the image – typically this works best if you click repeatedly rather than painting as painting tends to introduce repeated patterns into the fix which scream “Look! I tried to fix this in Photoshop!”
In Photoshop CS4, the Clone Tool has a preview so you can line things up neatly making it a very handy tool for fixing elements where there are lines or other things that need to be matched up in the fix.
You can also use the Clone Tool to add some texture back into areas that the patch tool has removed texture from even after the fix has been applied.
Step 4
Healing Brush
The Healing Brush tool works similarly to the clone tool, but it has a healing ability built in so it’s a handy tool to use too.
With the Healing Brush tool you need to again Alt + Click (Option + Click on the Mac), to sample the area of the image to use as the fix, and then click over the area that needs fixing.
The healing aspect of this brush blends the solution over the problem so you could, for example, have quite a dark solution area in your brush, but when you paint over a lighter area to fix it, the fix will lighten as it is blended in.
In the example above we couldn’t use the Healing Brush to fix the water running out from under these plants as it would tend to want to blend in and darken the area being fixed when we need it to be lighter. In the case of the water, the clone tool is the best option because it lets us paint over the water area with lighter pixels without trying to blend in the result which would simply darken it again.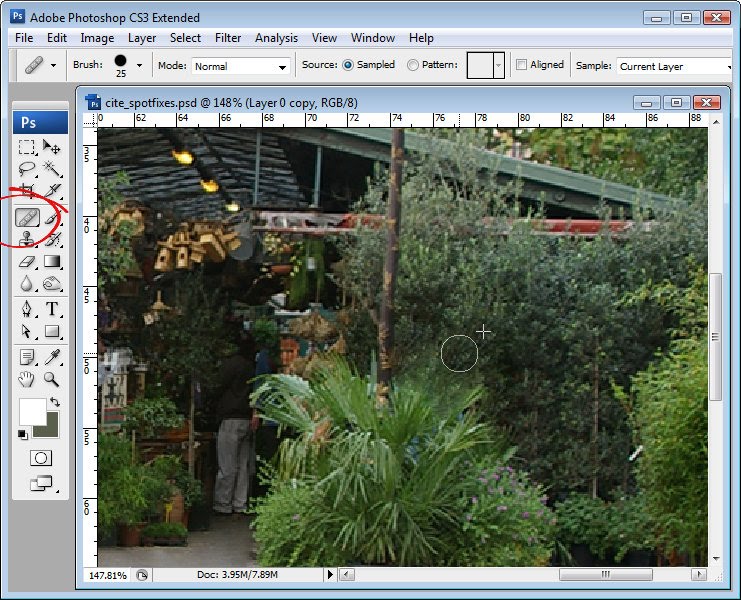
Step 5
Take a good look
Once you’ve fixed the obvious problems take a good look at your image at 100% and see if there are things that are distracting to your eye that you may want to fix. These will generally be things that are lighter, brighter or in sharp focus as they are things our eyes are attracted to. If these are ugly and not really central to the image itself, then get rid of it. I removed some of the tree labels at this point.
To finish the image I added some color to the sky, adding some saturation and a curves adjustment and then cropped in a little closer.