If you’re not around to read your email you can configure Outlook to automatically reply to incoming messages to tell senders that you’re out of the office and when you’ll return.
There are two possible scenarios, either you’re using Microsoft Exchange Server at work or you’re using a standalone version – most likely at home.
If you’re using Outlook 2003 with Microsoft Exchange Server service you’ll find in your profile that you have an Out of Office Assistant you can use to manage replies to your emails when you’re out of the office. To do this, choose Tools, Out of Office Assistant and click the I am currently Out of the Office option. In the AutoReply only once to each sender with the following text area type the message. It is usual to indicate that you are out of the office and the time you anticipate returning.
You can also create a rule so that only certain types of messages receive this reply. To do this, choose Tools, Out of Office Assistant and click the Add Rule option to specify the types of messages to which the reply will be forwarded. For example, you may create one reply for external mail and one for internal mail.
If you don’t have the Out Of Office Assistant available (this will be the case if you’re using a standalone version of Outlook), you can mimic the solution using a template reply email and a rule. Ensure you are using Outlook as your email creating software – this won’t work if you’re using Word. To check this choose Tools, Options, Mail Format tab and ensure Word is not selected here and ensure Plain Text is selected. Now follow the instructions in the previous tip to create a reply template message.
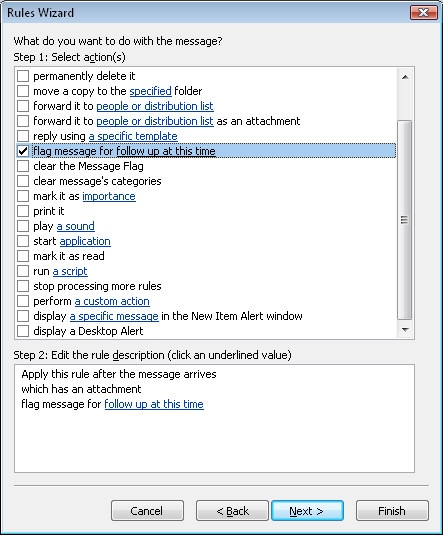
Now choose Tools, Rules and Alerts and click the E-mail Rules tab and click New Rule to start the Rules Wizard. Click Start from a blank rule and select Check messages when they arrive, and click Next. When prompted with Which condition(s) do you want to check? select a box describing the type of message to apply it to – such as emails received through the specified account or Sent Only To Me. Click Next. When prompted with What do you want to do with the message?, click the Reply using a specific template option. In the second panel, click the specific template option and select your reply template and click Open. Click Next, add any exceptions and click Next. Name your rule and set it to run and click Finish.
Outlook tracks who has received the replies and won’t send multiple replies even when it receives multiple messages from the same person.
Helen Bradley


 When you delete an Outlook email you’ll also delete any attachments which are included in it.