I’ve seen adults brought almost to tears over printing worksheets. Big worksheets consume lots of paper and when things go wrong they do so in a spectacularly wasteful way. Sometimes the best you can do is hit the printer Off switch to at least achieve a short term solution to the problem. A longer term solution is to understand how you can control what is printed and that’s what I’ll cover this month. I’ll look at the basics of printing a worksheet and then explore some more advanced options which offer better control over your printouts.
Troubleshooting problems
When you choose File > Print or click the Print button in Excel, the program determines what to print and does so. By default it prints everything on the currently active sheet. So, if you have a small set of data in the top corner of the worksheet and have accidentally typed something into a cell way below this (even if it is just a single space), you’ll get your data and everything else between this and the one cell with the mistaken entry printed. It could be pages and pages of blank paper – or lined paper if you have gridlines enabled and it’s perilously hard to track what went wrong.
You can see ahead of time that you’re about to have problems if you use the Print Preview tool. When the Next button is visible there are more pages to print than the one you can see. Of course, you should take care to never place a space in a cell. If you need to remove the cell’s contents, click in the cell and press Delete never use the spacebar.
If you can’t find the problem cell to delete it, you can try to fix the problem by deleting all the rows below your data and all the columns to the right of it and try again. In the long term this will avoid the problem happening when you print the workbook again next time. If this is a one off worksheet, you can select the area to print before printing it. Drag over the area to print and choose File > Print (don’t click the Print button on the toolbar as it prints the entire sheet regardless of what is selected). When the Print dialog appears, click Selection so only the selection will be printed.
Adding Page Breaks
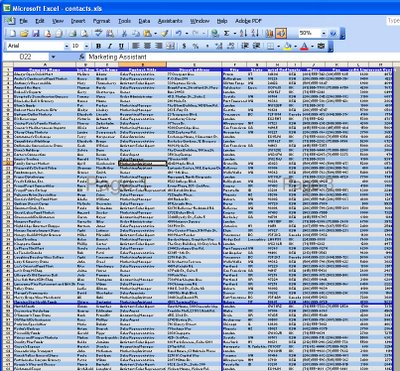
To preview the page breaks on the worksheet to see where the data will be broken up into individual pages, choose View > Page Break View. Lines will appear on the screen indicating where the page breaks are. You can change these by adding your own manual page breaks but you have to do this inside the current page breaks – for example you can add a break inside a page but you can’t configure a page to be longer or wider using this method.
To add a manual page break, click to select the entire column or row where the break should appear and choose Insert > Page Break – the page break will be added to the immediate left of this column or immediately above the row. You can also click a cell and choose Insert > Page Break and a page break will be added above and to the left of that cell. When in Page Break View, not only are page breaks visible on the screen, you can also move them by dragging on them with your mouse.
Headings on all worksheet pages
Another issue when printing is that as soon as a sheet prints on more than one sheet of paper, the column headings or row headings appear on the first page but won’t appear on the other pages. This makes the data on the second and subsequent pages almost impossible to understand unless they’re taped together to form a single large sheet.
To avoid this, configure Excel to print column and row headings on every page of your printout. Choose File > Page Setup > Sheet tab and click in the ‘Rows to repeat at top’ box – type the row letters in the form $1:$1 (to print only the first row) or $1:$2 for the second etc.. If preferred, you can click the Collapse Dialog button to hide the dialog while you select the rows to use. Likewise you can set the columns that contain the row titles – generally these are in column A and you specify it in the ‘Columns to repeat at left’ box with an entry like $A:$A to use just the first column or $A:$B for the first two, etc..
More printing controls
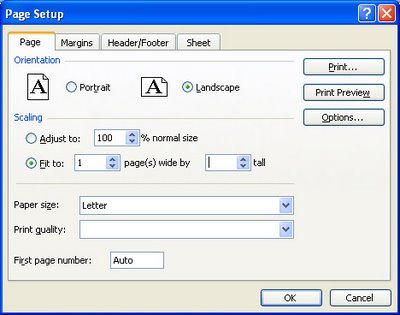
When printing a worksheet that is wider than it is tall, you can print onto paper in landscape orientation to take advantage of the dimensions of the paper. To do this, choose File > Page Setup > Page tab and select Landscape. At the same time, make sure you’ve selected Letter or A4 paper depending on what you’re using as each has different dimensions.
Shrink to fit
When you have a worksheet that is just too large to print on a single piece of paper you can shrink it to fit on a single sheet by choosing File > Page Setup > Print tab and click the ‘Fit to 1 page(s) wide by 1 page tall’ option and it will be reduced to fit on a single sheet.
If your data is very long and you want to print it one page wide but on many pages long you can use the same option – in this case set it so it reads ‘Fit to 1 page(s) wide’ and delete the entry in the second box – Excel will constrain the width to a single page but print on as many sheets as are needed length-wise.
The same can be done for a worksheet that is wider than it is tall – remove the entry from the first box so it reads ‘Fit to
When a worksheet will print over multiple sheets in both directions the order in which the sheets are printed may be important. You have two choices – you can have Excel print down the left side of the worksheet first and then across to the next series of pages to the right or you can have it print the width of the worksheet first then the pages below this. This order can be controlled using File > Page Setup > Sheet tab – and select either ‘Down, then over’ (the default) or ‘Over, then down’.


Uhh, it's 2009 and you are still posting "how-to's" on excel 2005?
lame.
the first row in my database repeats on subsequent pages. what to do?
Actually, it is Excel 2003 and since so many folks are still using Excel 2003 because it was a great release, it seems sensible to me. – Helen
Hi Helen I wonder if you can help me. For some reason I am no longer able to print labels from word docs into the mailings, labels in Word. All I want is to be able to print a single label from a letter onto a label sheet. If you are able to help me out with this one I’d be very grateful as I’m about to climb the walls!! Kind regards Helen
Thanks so much. In spite of anonymous’ comment, I’m working with Office 2013 with the excel print problem. With a little adjusting, this article (after about 15 others I checked) did the trick. 2 hours later, have my spreadsheet. Great column – will add to Faves.
Hello Helen,
I have created a spreadsheet with a drop down list inserted in a column of cells. when I go to print out the spreadsheet it does not show the information in the preview window and prints out a quantity of blank pages.
can you help on this one?
Many thanks in advance.
Daniel
Daniel, what happens when you start a new worksheet, type a few numbers into it and try to print that. Does it work? I wonder if the problem is the printer/Excel connection and not the worksheet per se?
Helen
I have a printing issue with Excel 2010. Please help!! my grids show in print preview but only some print. I’ve read numerous articles and nothing fixes the glitch….
Frustrated
Jodi
i want to print my excel sheet but when preview a highlight pop in saying print titles must be contiguous and complete row or columns