

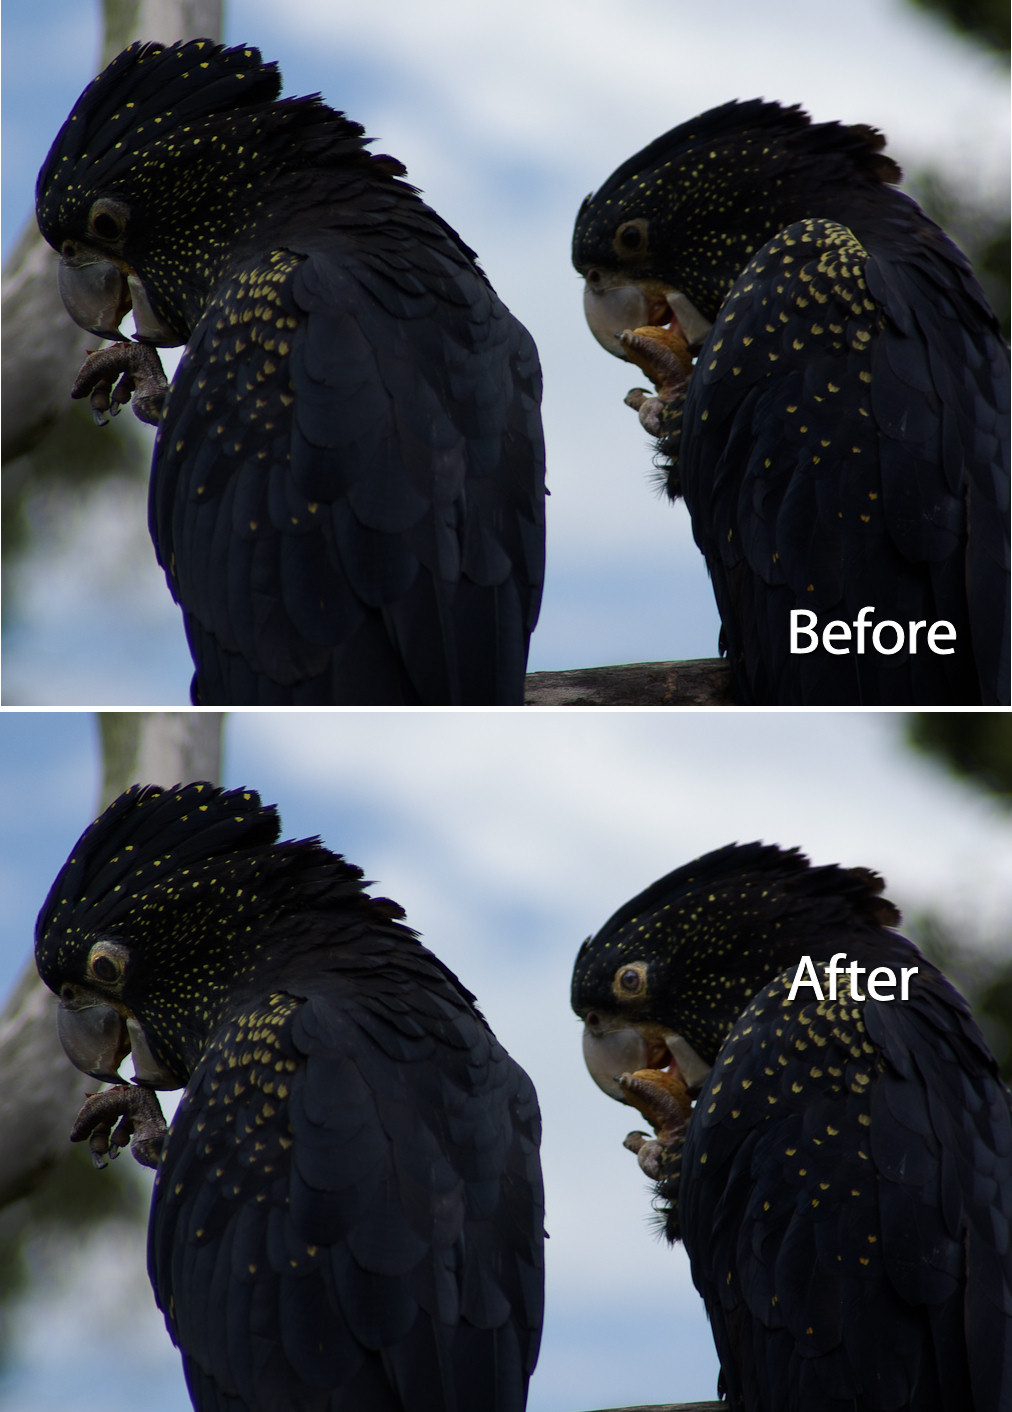
Often when I look at the photographs that I’ve taken at the zoo, for example, the animals’ eyes are underexposed and lifeless.
To fix animals’ eyes in Lightroom so that they look compelling and still realistic, here is my fixing “animals eyes” workflow:
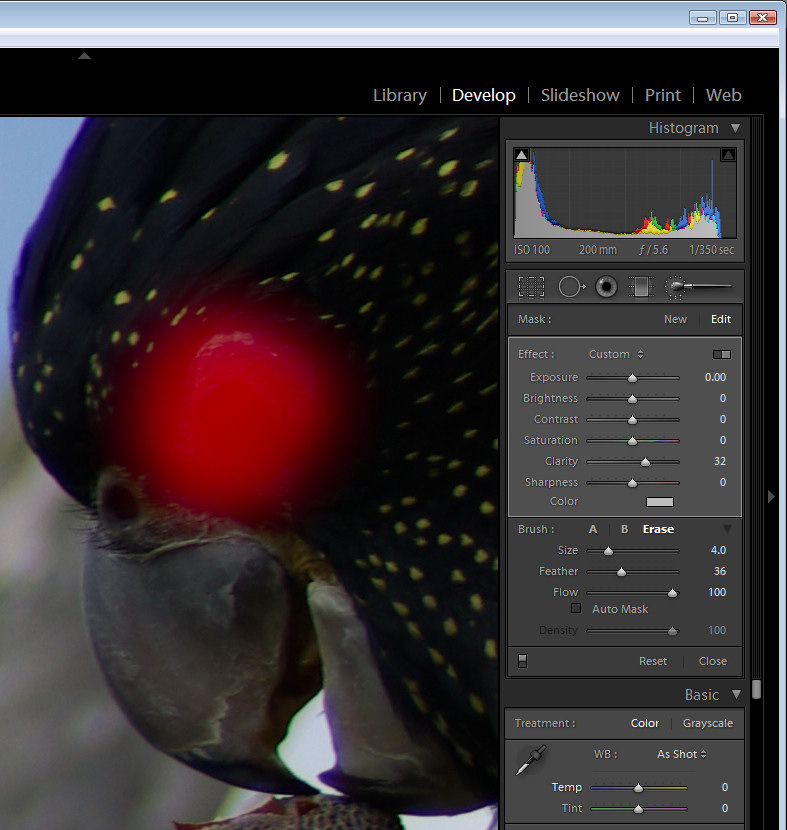
Step 1
Display the image in the develop module in Lightroom. Zoom in using the zoom tools so that you can see the area that you’re working in very clearly.
Click the Adjustment Brush in the top of the Develop module panel and size the brush so that it is the right size to work on the animal’s eye. Click once on the eye and then paint over the area that you want to affect. If you can’t see your paint and want to see it, press the O button to enabled and disable the ruby overlay.
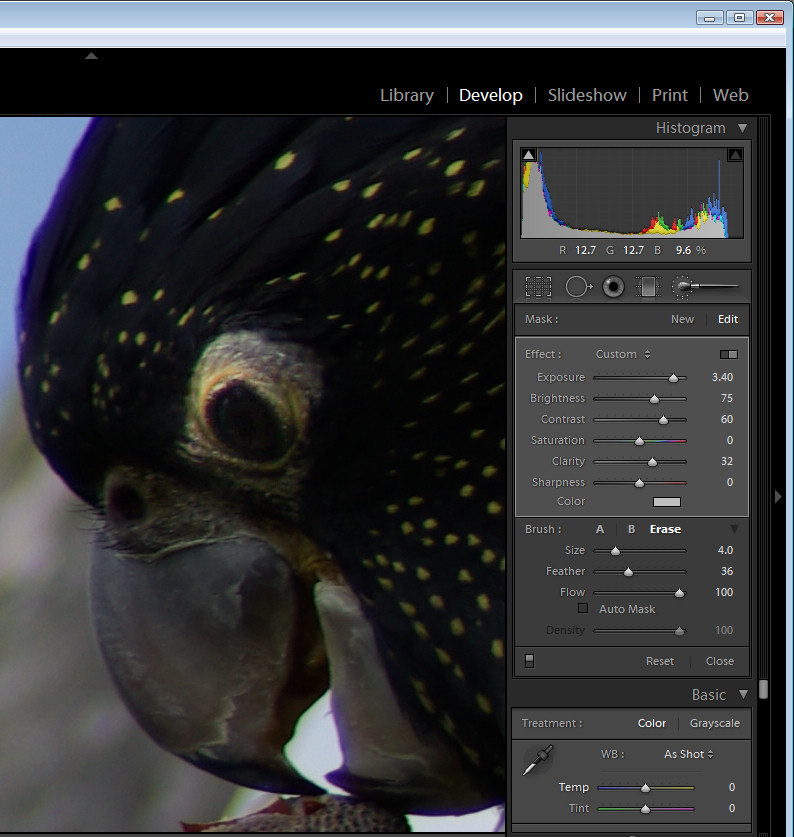
Step 2
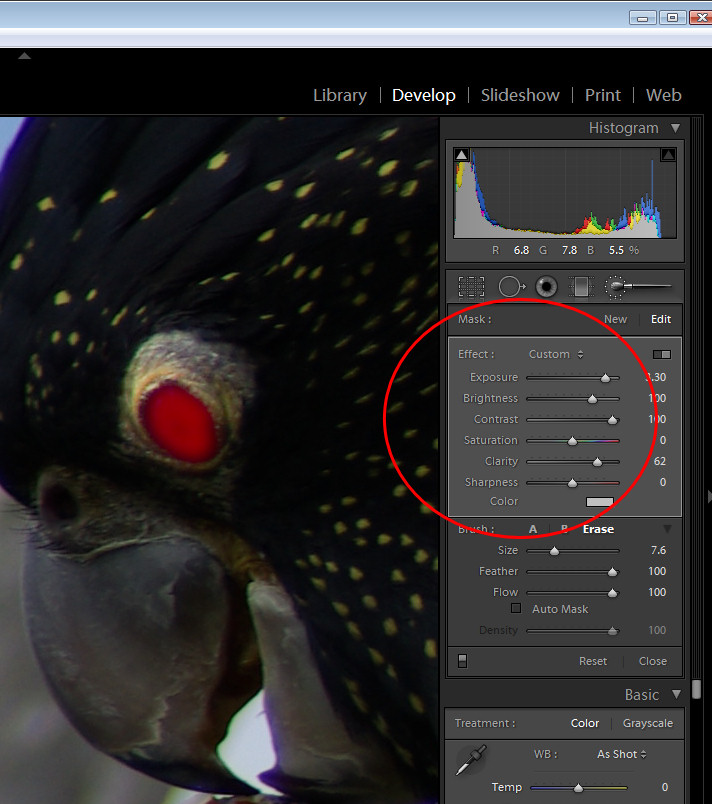
Once you’ve painted over the eye, adjust the Exposure and Brightness upwards until you have a highly unrealistic and over fixed solution.
Adjust the Contrast so that you build some contrast back into that area of the eye – this actually darkens some of the areas you have just lightened.
Adjust the Saturation and Sharpness if required.
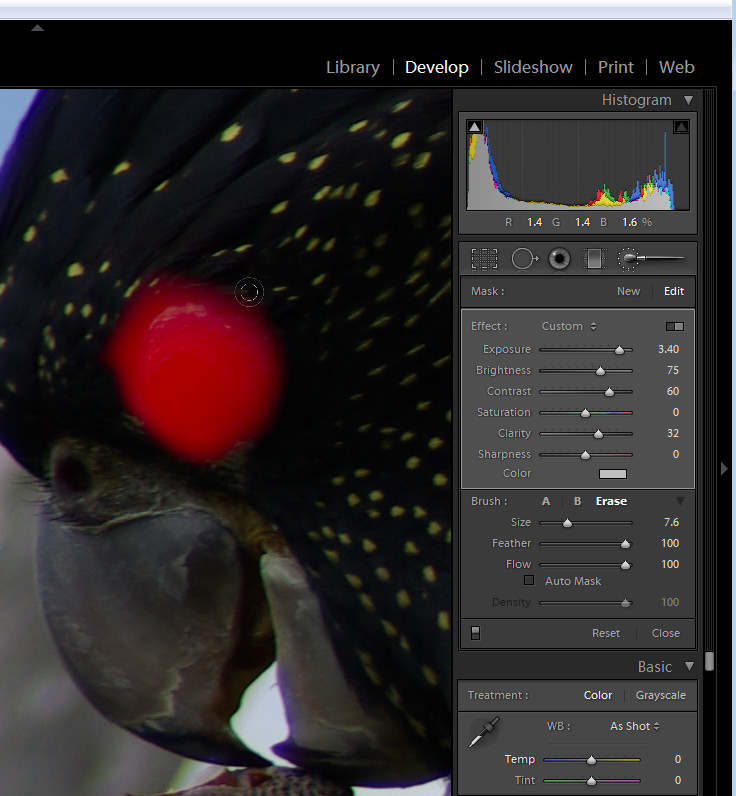
Step 3
If the effect is too strong around the edges of the eye, click Erase, set the Feather to a high value and paint around the edges of the selection to erase the effect.
Step 4
In this image, I tacked both eyes separately and I did both in two steps. The first fix solved the overall eye problem including the surrounds and then I repeated the process this time focusing only on the pupils to ensure that there was good contrast where the pupil would be expected to have caught the light.
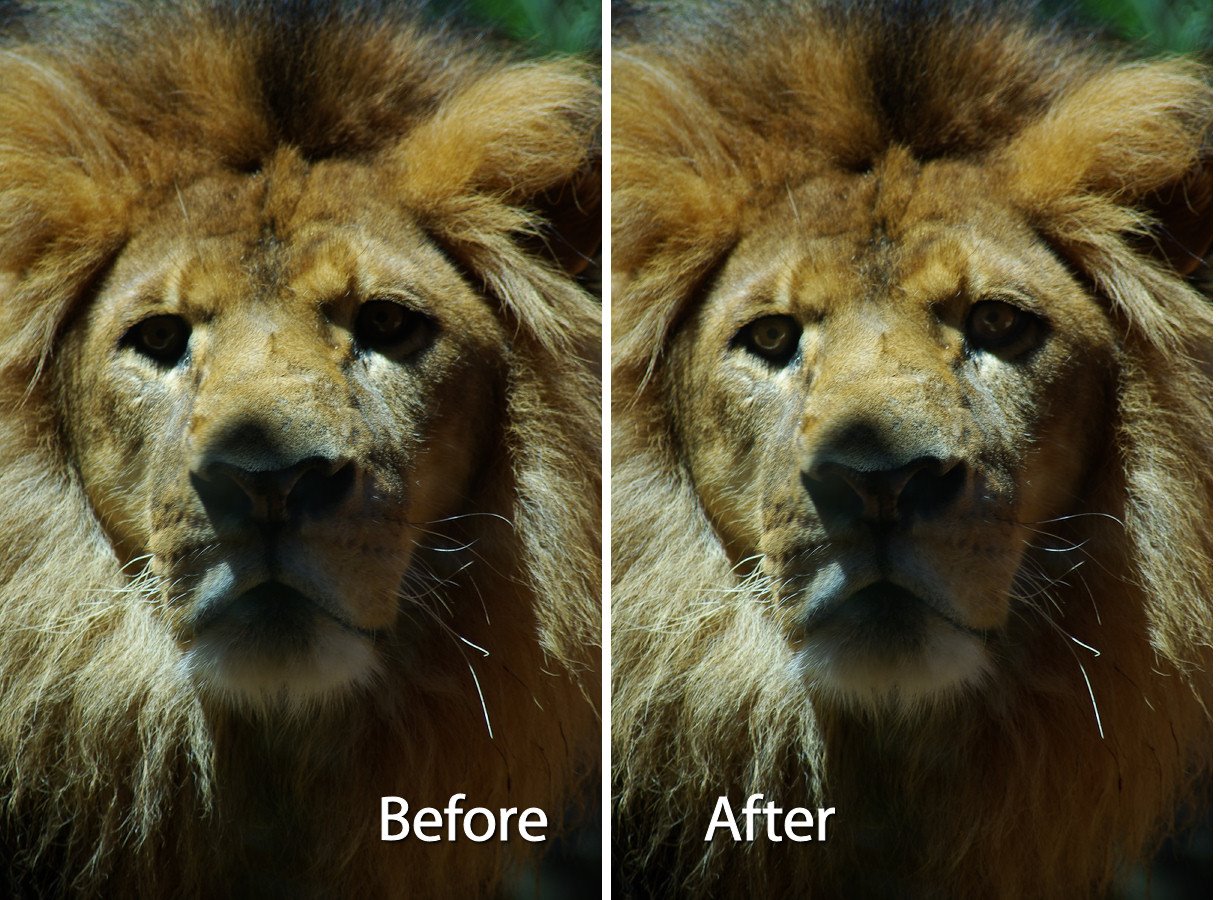
Here you can see the result when steps 1-3 were performed in Lightroom on the lion’s eyes.
Nice tip!
thanks, great tips.