

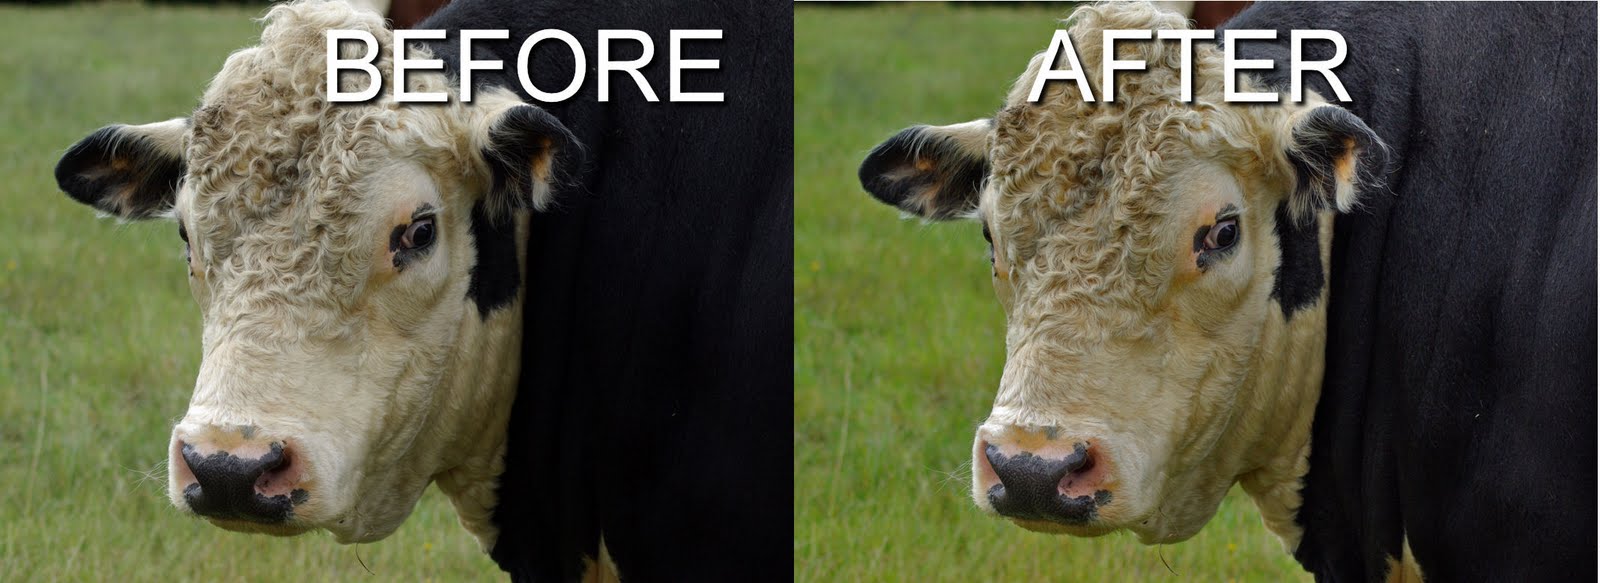
Sometimes a photo needs its tonal range fixed but some areas of the image may not need the same fix as others. Here’s how to limit the fix to a selected portion of an image using a mask. Look at this photo and noticed that on the left are the light and highlight areas and on the right are the dark areas. The camera has exposed primarily for the light areas in the image and the darks are very black. I need to fix each side of the image independently of the other.
 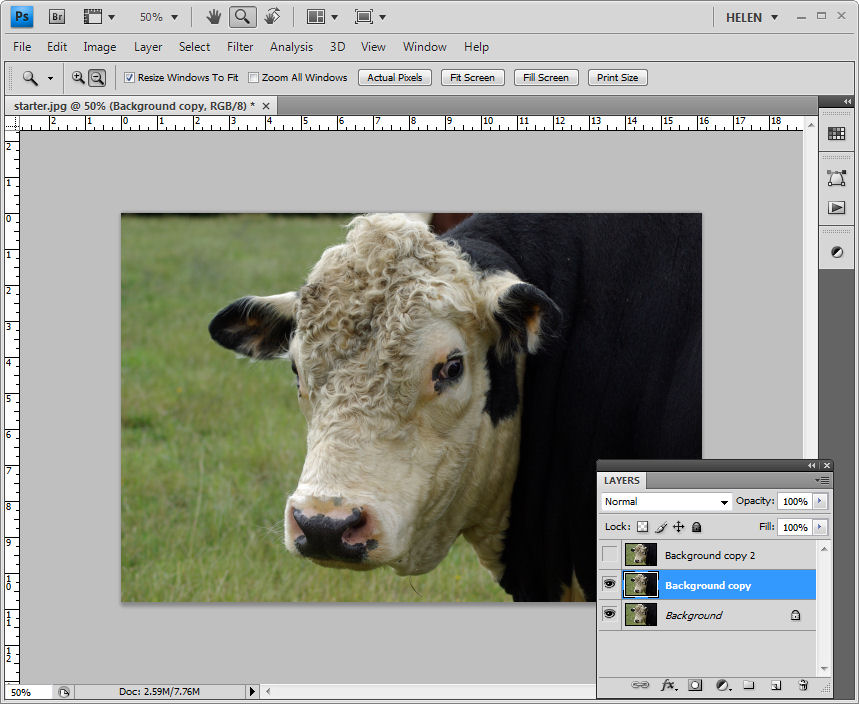 Step 1
To fix the image make two copies of the background layer so that you do your work on duplicate layers. To do this, right click the Background layer in the Layers palette and choose Duplicate Layer and then repeat this step once more. Disable the visibility icon on the topmost layer and select the middle layer. Step 2
To bring detail out of the shadows, choose Image > Adjustments > Shadows/Highlight and adjust the Shadows but leave the highlights untouched. Typically the default setting will be all you need. Ignore any effect this fix has to the lighter areas of the image. 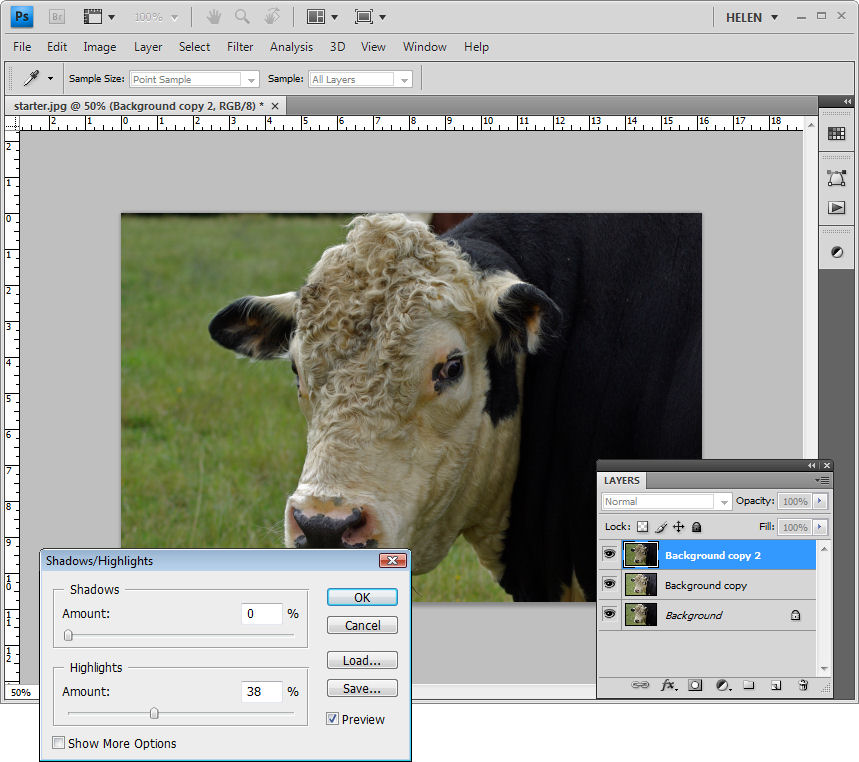 Step 3
Now enable the visibility icon on the top layer and select it so you are working with this layer. Choose Image > Adjustment > Levels and adjust the levels to improve the contrast in the lighter areas of the image – ignore the darker areas as they have already been fixed. You can also adjust the saturation using Image > Adjustments > Hue/Saturation if desired. 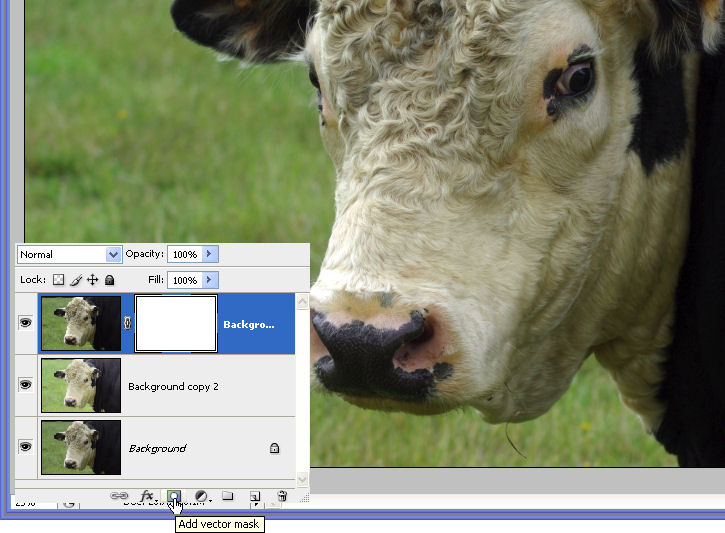 Step 4
The top layer contains the adjustment for the light values and the middle layer contains the adjustment for the dark values. To blend these layers, use a layer mask to selectively adjust the opacity of a layer.
Unlike the layer opacity slider which sets every pixel to the same opacity value, a mask lets you adjust the opacity selectively so one area can be 100% opaque and others can be partially or fully transparent.
To do this, click to select the topmost layer and click the Add Layer Mask button at the foot of the layer palette to add a white layer mask to this layer. When working with masks, “black conceals and white reveals” so the white mask reveals everything on the top layer and the image is unchanged. 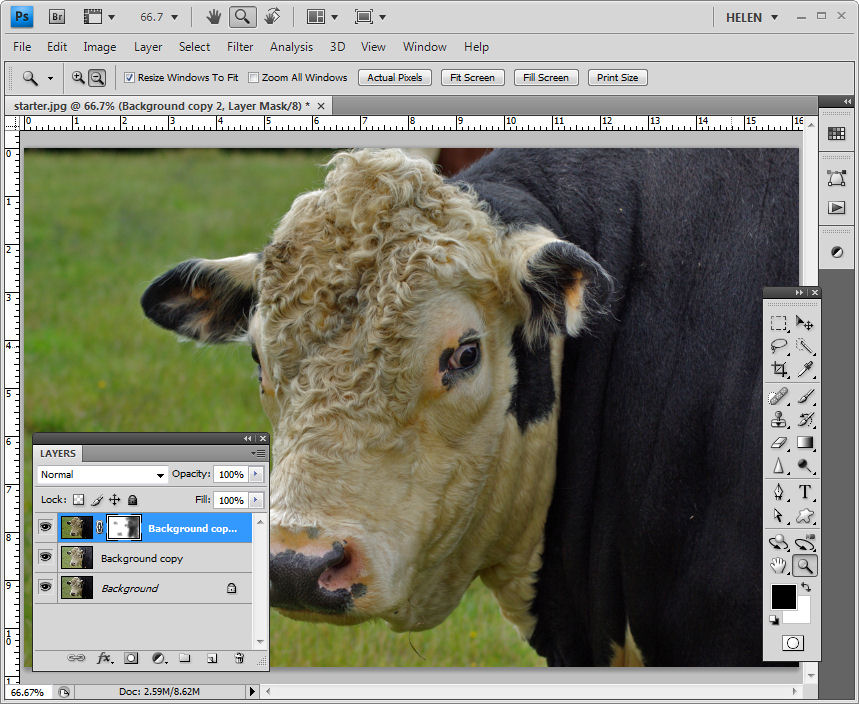 Step 5
Set the foreground colour to black, select a round brush and set its Opacity to approximately 20%. Click in the mask to select it and paint over the dark areas of the image to reduce the layer opacity and to allow detail from the layer below to show through. Using a low opacity brush lets you reduce the opacity gradually.
Continue and paint over the area to make more transparent. It may help to turn the visibility of the top layer on and off to see what detail is available on the layer below that you may want to recover. Make sure to select the layer mask again before painting to reduce the layer opacity.
Post a Comment
Please feel free to add your comment here. Thank you!