

By Helen Bradley
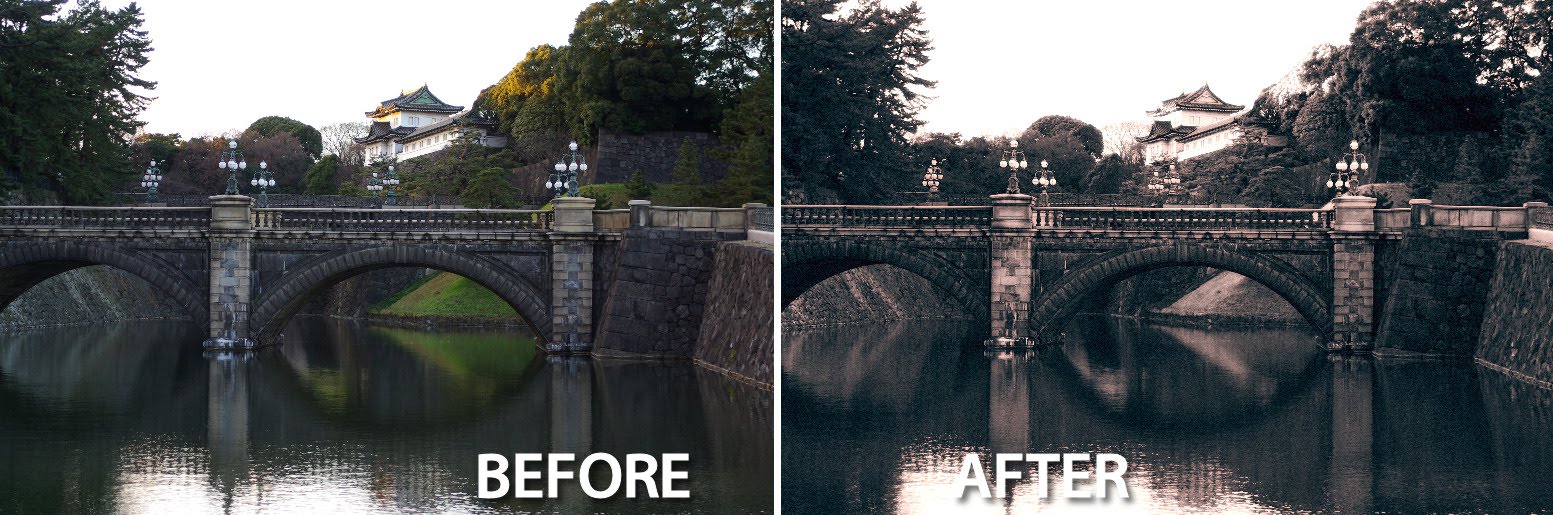 Split Toning is an effect which has its origins in the days of film and it involves tinting the highlights in a black and white image one color and the shadows another color. The best results are where you use opposite colors for each, such as yellow and blue, green and magenta and so on.
If you are a Lightroom user you’ve probably experimented with the very cool Split Toning tool in the Develop module. However, you can achieve a similar effect in Photoshop with just a little more work.
Here’s how to create the effect in Photoshop:
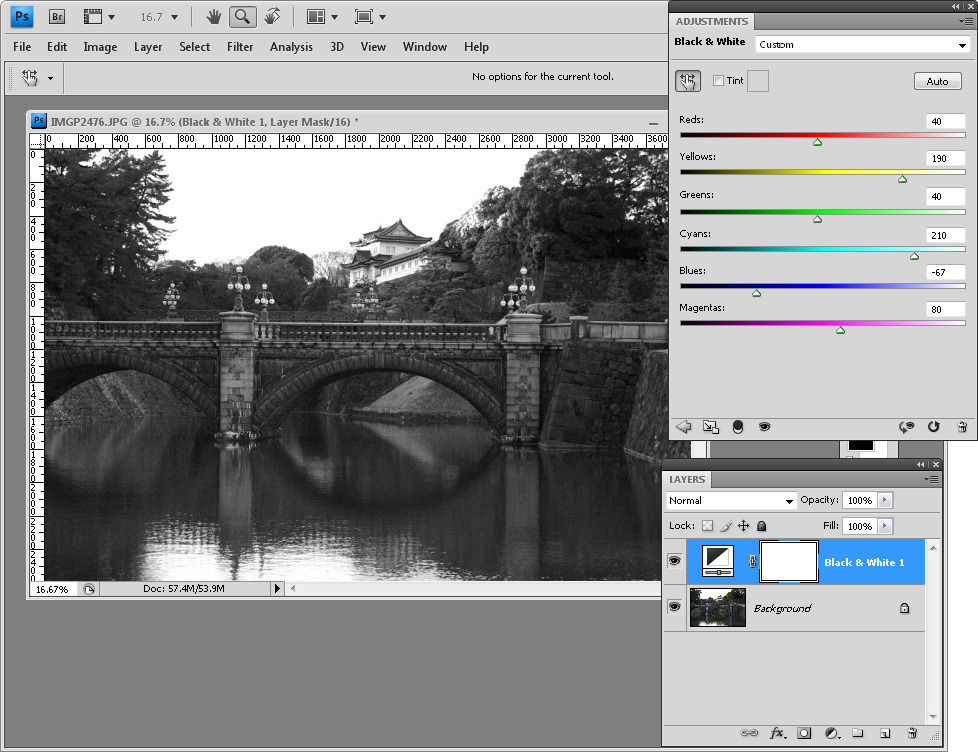 Start by creating a black and white image using your favorite tool in Photoshop. I’m using Photoshop CS4 so I’m using the Black & White filter but you could use the Channel Mixer or Hue/Saturation and drag the Saturation slider into -100.
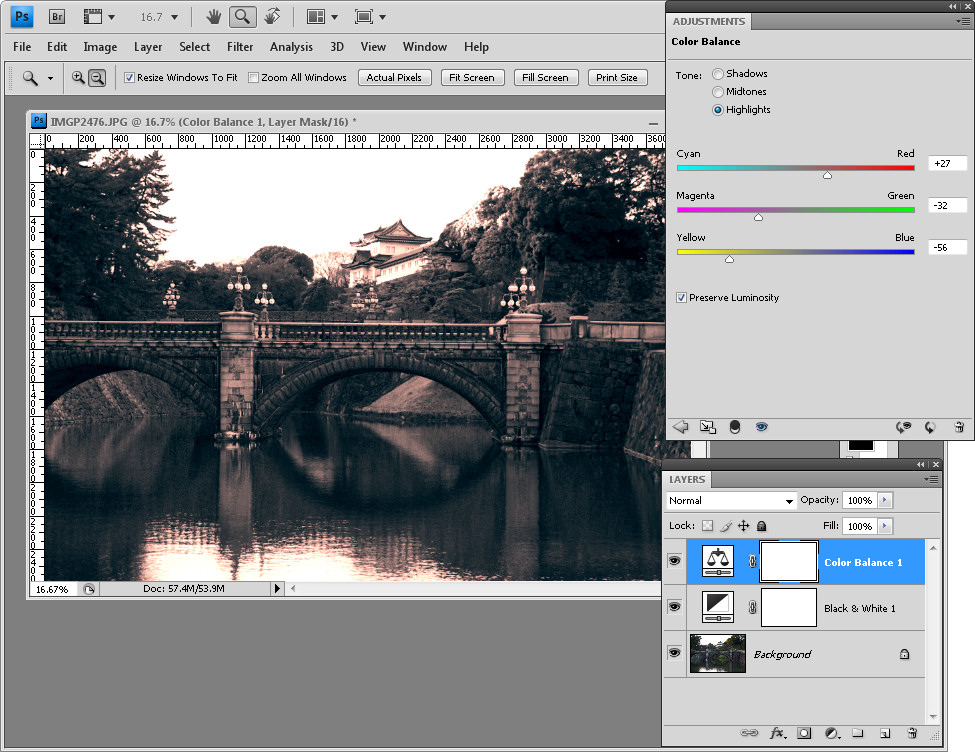
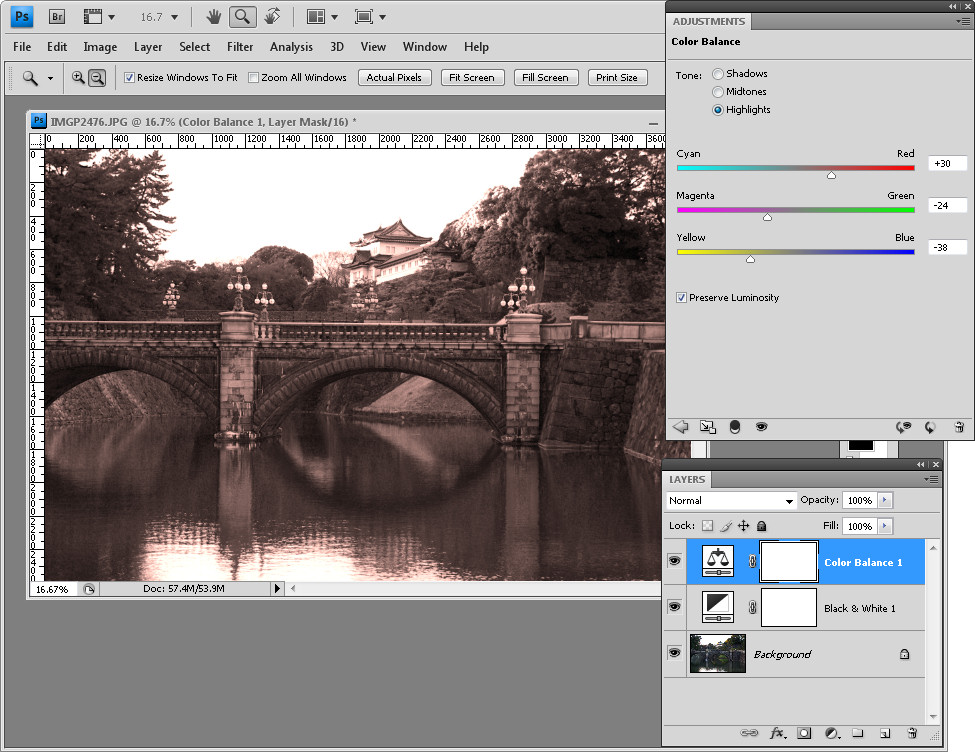 To create the split tone effect you can use a Color Balance adjustment layer as it lets you isolate the highlights and shadows in the image and to apply different colors to each. To start, choose Layer > New Adjustment Layer > Color Balance and click to select the Highlight tones. Now adjust the color sliders until you get a pleasing color in the image highlights.
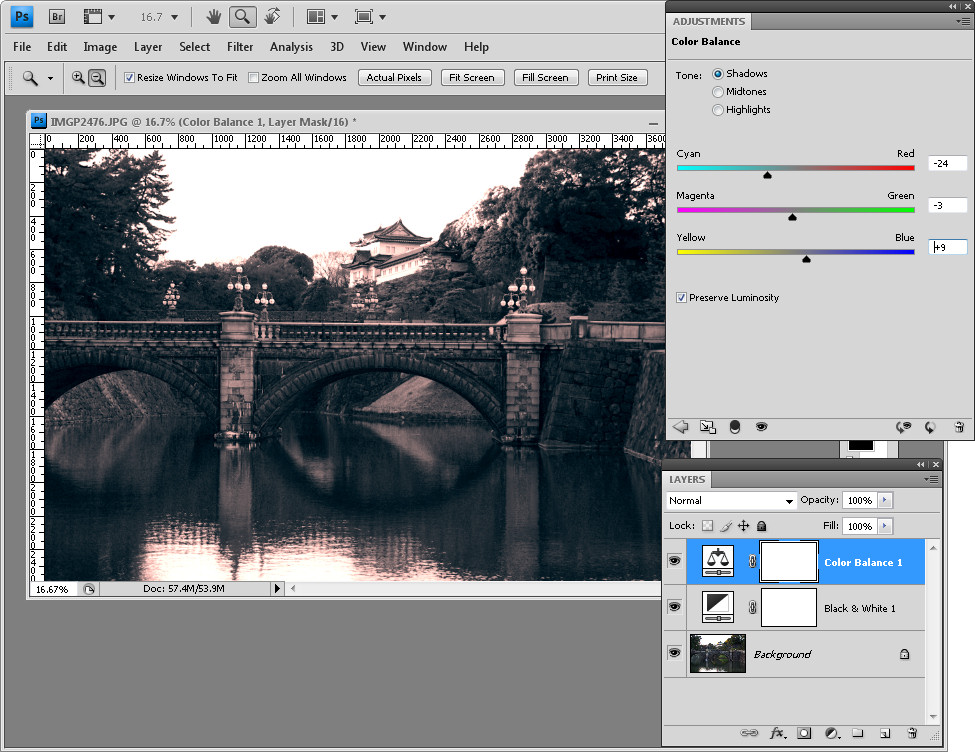 Click the Shadows tone selector to isolate the shadows in the image and adjust the color sliders to get a pleasing color in the Shadows.
 If necessary you may want to select the highlights again and fine tune the color used so it complements the color you’ve chosen for the shadows.
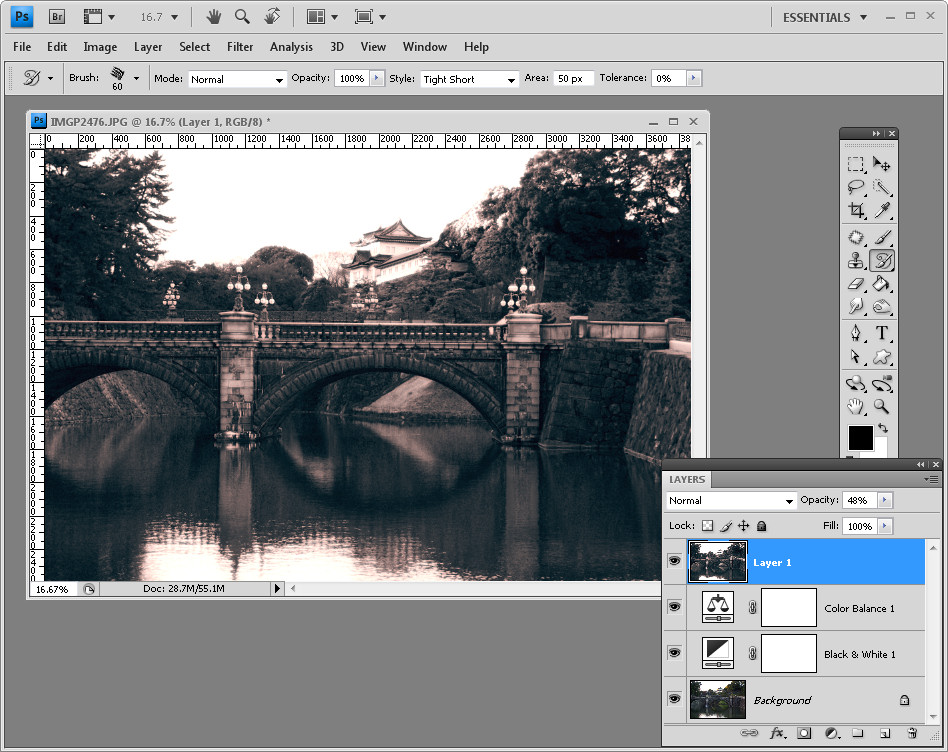
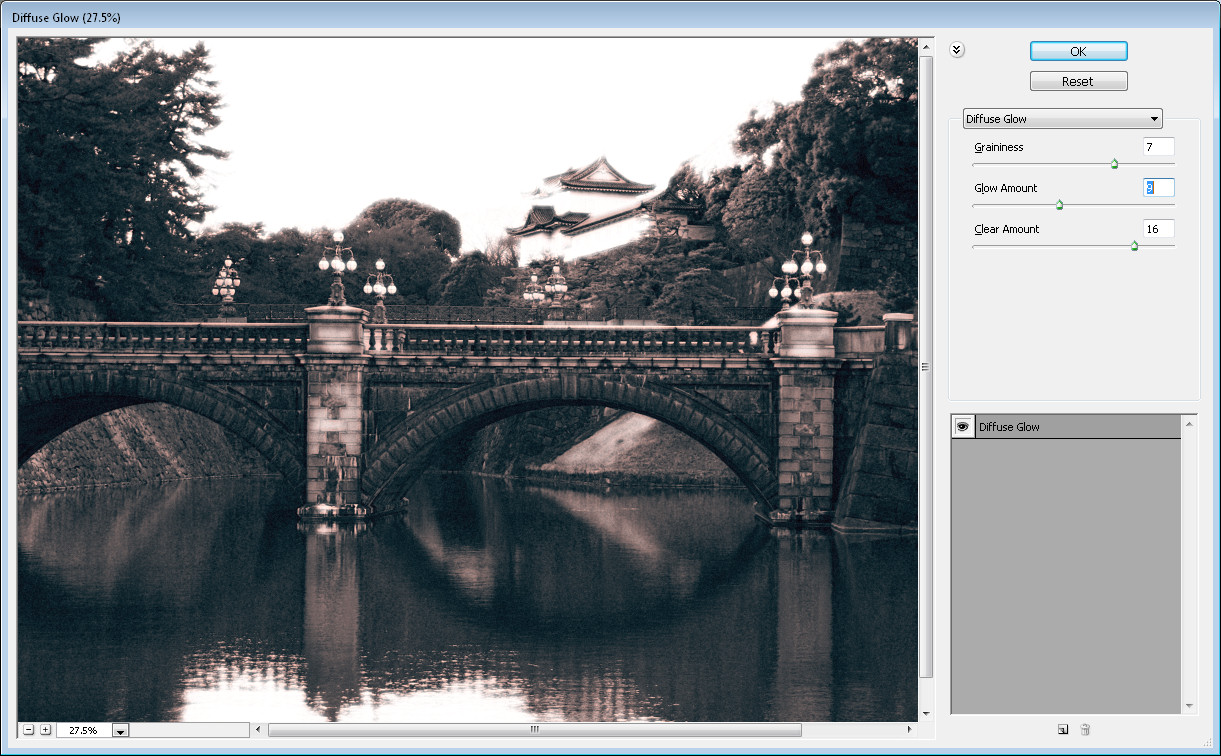 You can consider your image done for now or you can apply a filter effect. Here I’ve created a flattened image layer by pressing Control + Alt + Shift + E (Command + Option + Shift + E on a Mac) and applied a Diffuse Glow filter (Filter > Distort > Diffuse Glow) to it before blending the layer back into the underlying image.
Post a Comment
Please feel free to add your comment here. Thank you!