

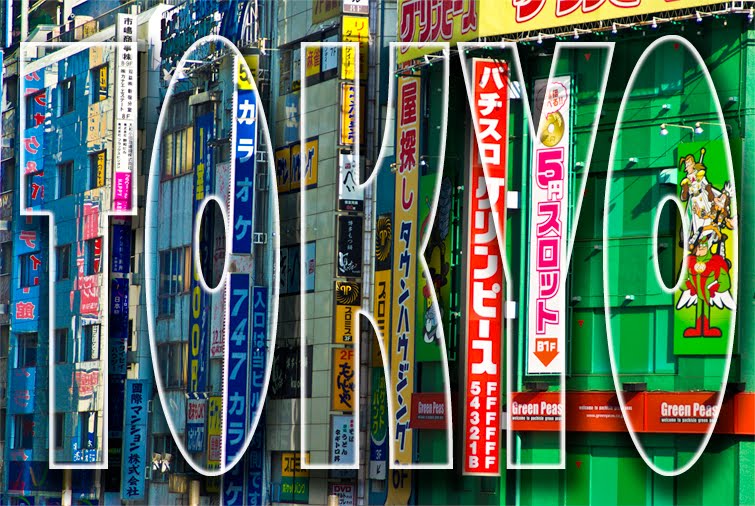
 This is a cool effect that you see quite a lot in advertising and elsewhere. It involves cutting some text out of an image so you see an image in the text shape.
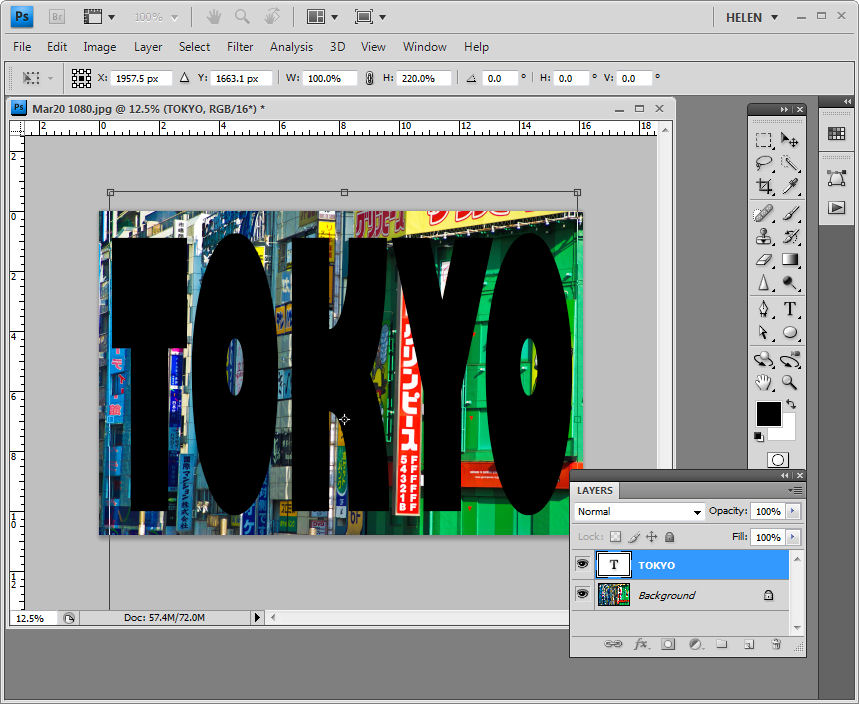 Step 1
To begin, open an image to use and then use the Type tool to type some text over the top of it. Make sure that the type is very large and that it covers a lot of the image so choose a thick font.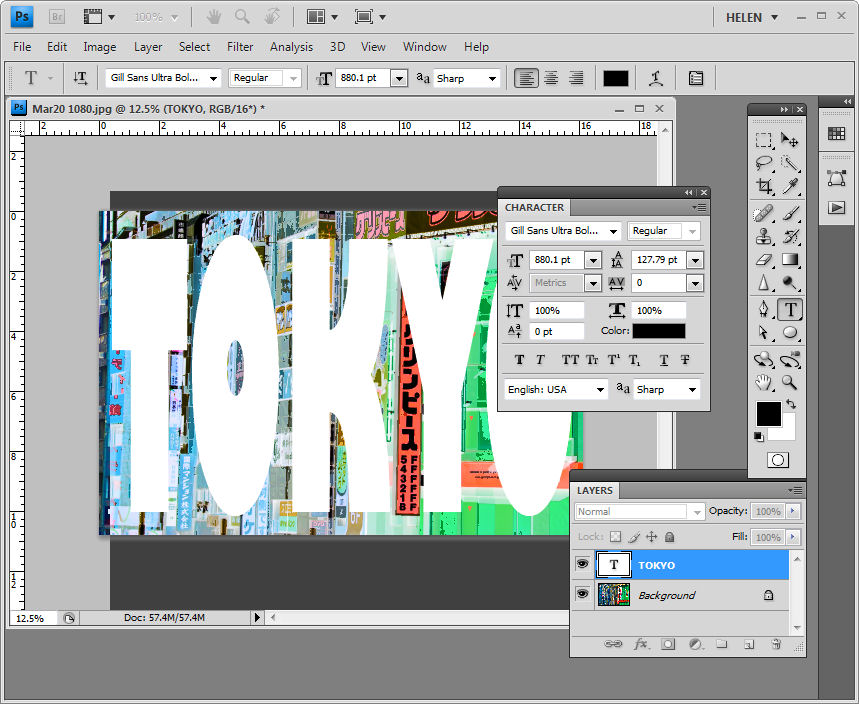 Step 2
You can adjust the Tracking and Font size of the text in the Character palette to ensure that the text is large and so that you do not have excessive spaces between characters.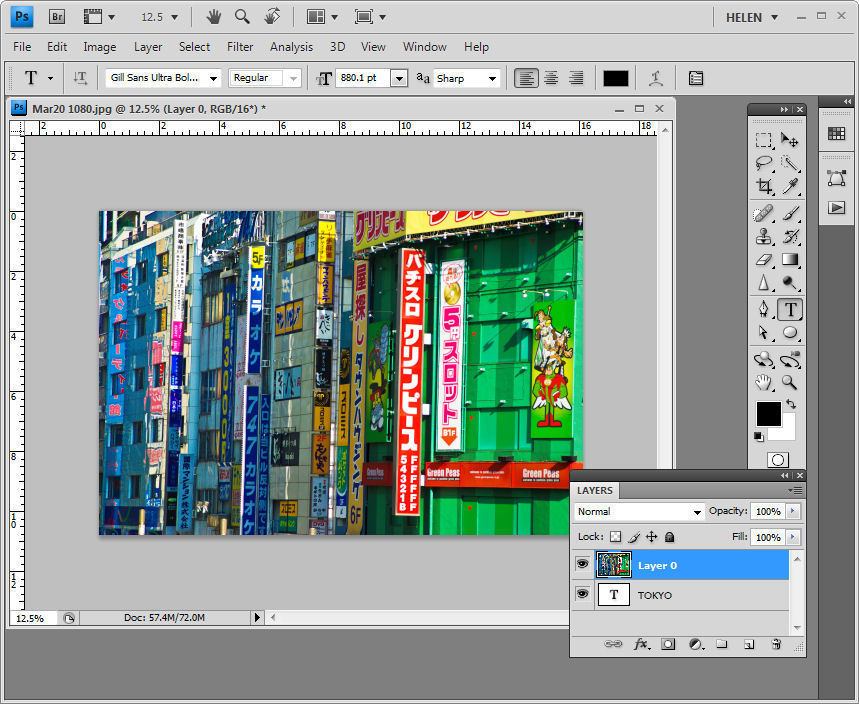 Step 3
Double-click on the background layer of the image and click Ok to convert it to a regular layer. Drag the image layer on top of the text layer in the layer palette.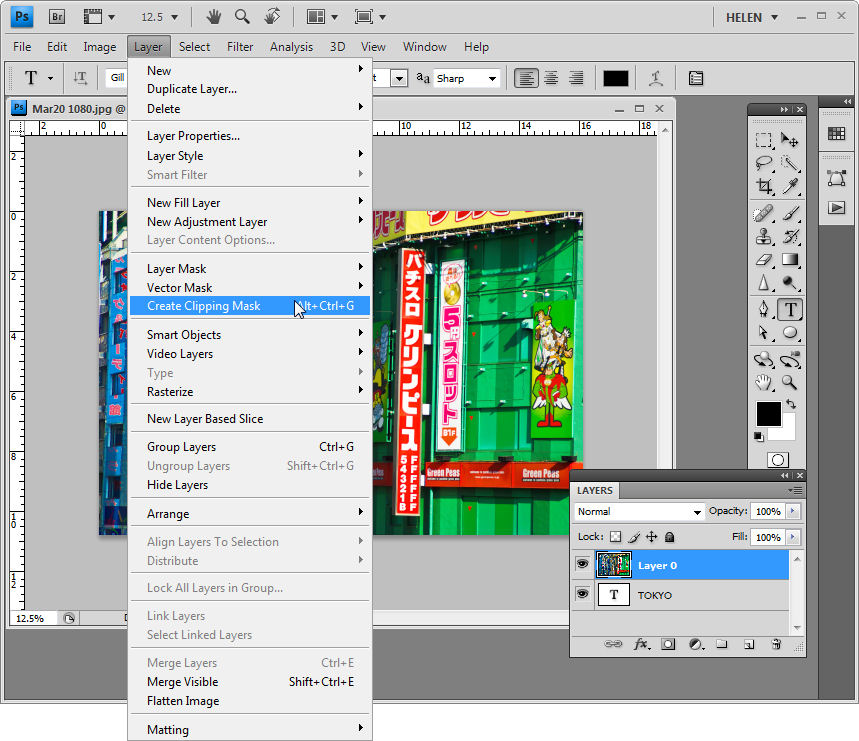 Step 4
With the image layer selected, choose Layer > Create Clipping Mask to clip the image to the shape of the text on the layer underneath. 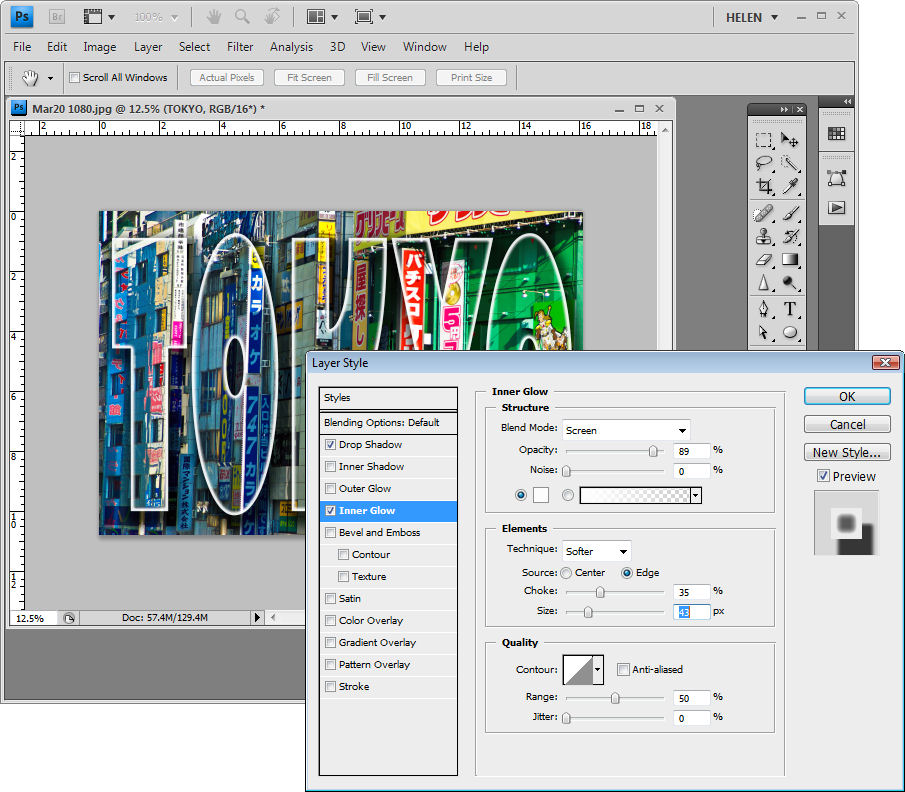 Step 5
To add some extra dimension to the effect, duplicate the image layer by selecting it and choose Layer > Duplicate Layer and click Ok.
Drag this layer containing a second copy of the image to the bottom of the layer stack. Select the text layer again and add layer style such as a Inner Glow or a Drop Shadow to finish the effect.
Photoshop, Photoshop Creative, clipping mask, text effect
thanx for sharing 😀
this tutor very helping me, tx
great tutorial…thanks 🙂
thanks helen, nice tuts.. 🙂
Very helpful.would like to get your updates.
VERY HELPFUL!!! Thank You!
thats not cutting text from an image, thats making an image visible through text…two completely different things