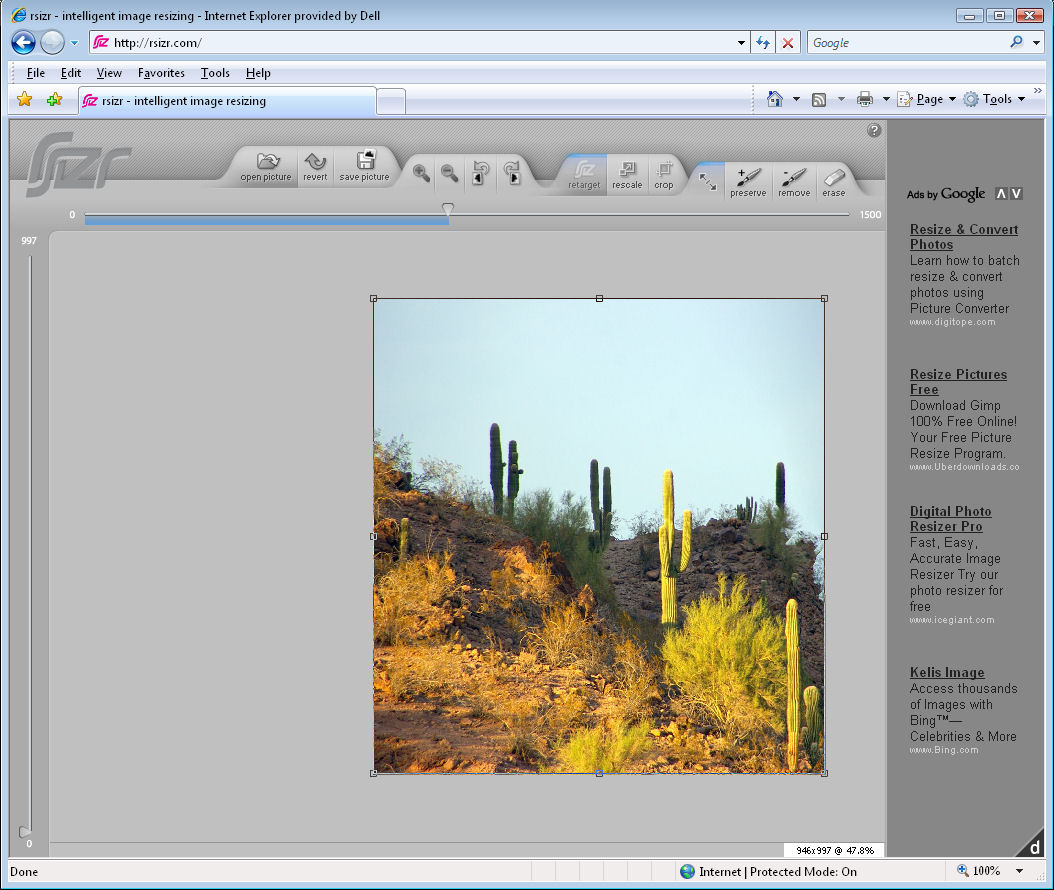
New to Photoshop CS4 is its Content-Aware Scale tool which allows you to transform an image in a way that you’ve never been able to do before in Photoshop. The technology itself has been around for some time and you may have been familiar with the website rsizr.com which offers content aware scaling as an online service. However, the feature is now built into Photoshop making it a readily accessible tool for images large and small.
In this post, I’ll explain how to use content aware scaling and how to protect areas of your image from being distorted in the process.
Step 1
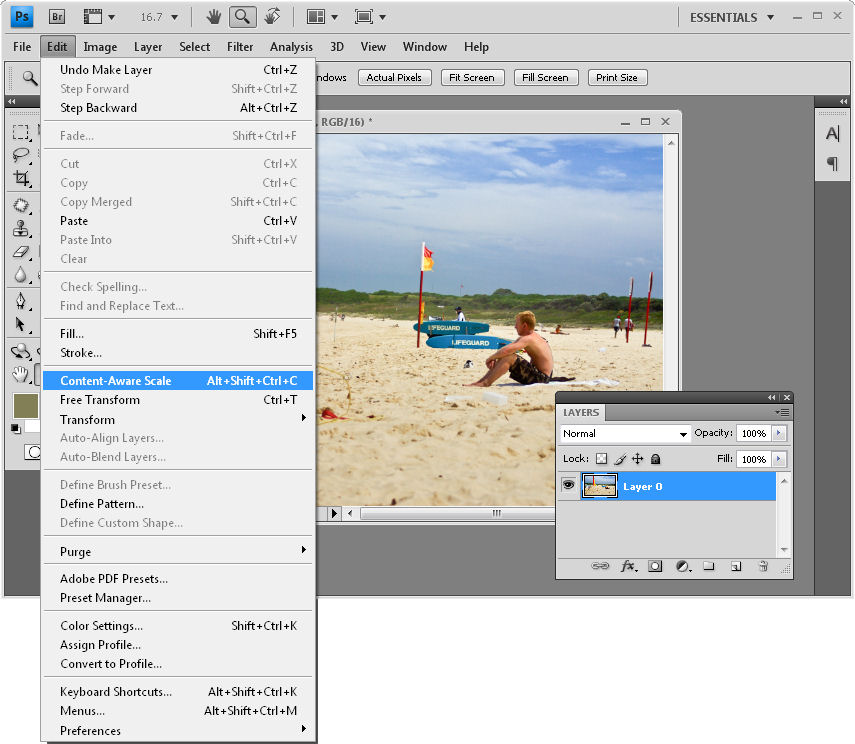
To see the tool at work open an image in Photoshop CS4 (this feature is not in other versions of Photoshop), double-click the background layer to turn it into a regular layer and choose Edit > Content-Aware Scale.
Step 2
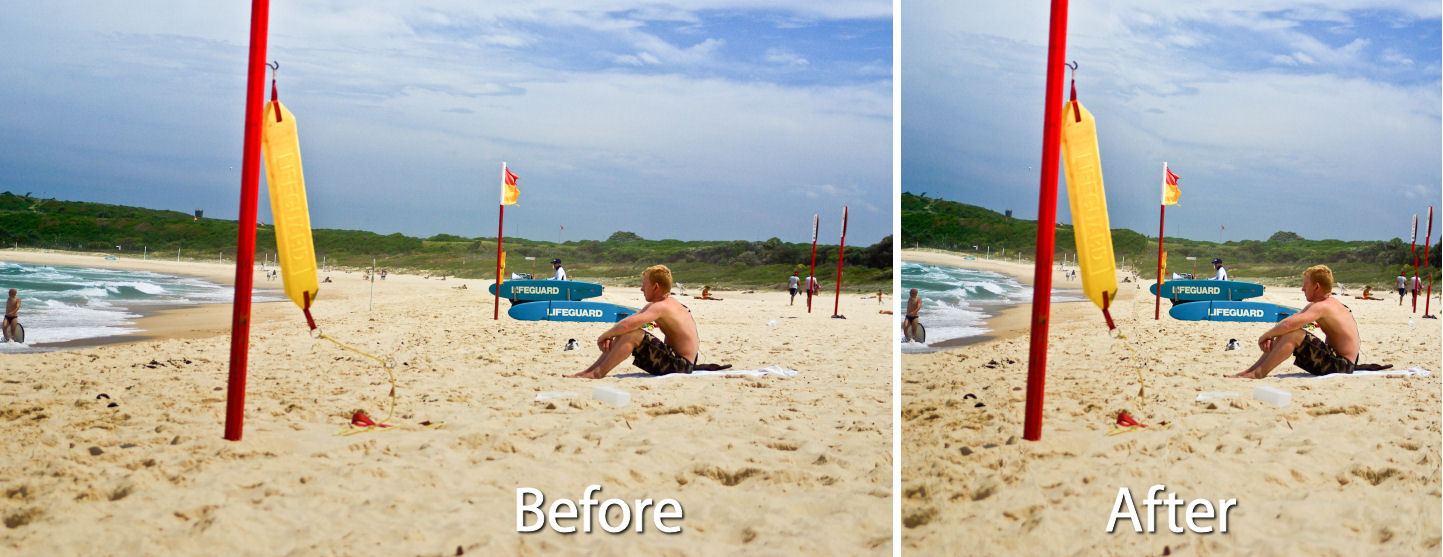
Notice the sizing handles on the image. Drag from one side inwards and watch what happens as you do so. You’ll find that the image shrinks in size, but most of the information in the image is still there – the image is made narrower but key elements in it are not squashed up.
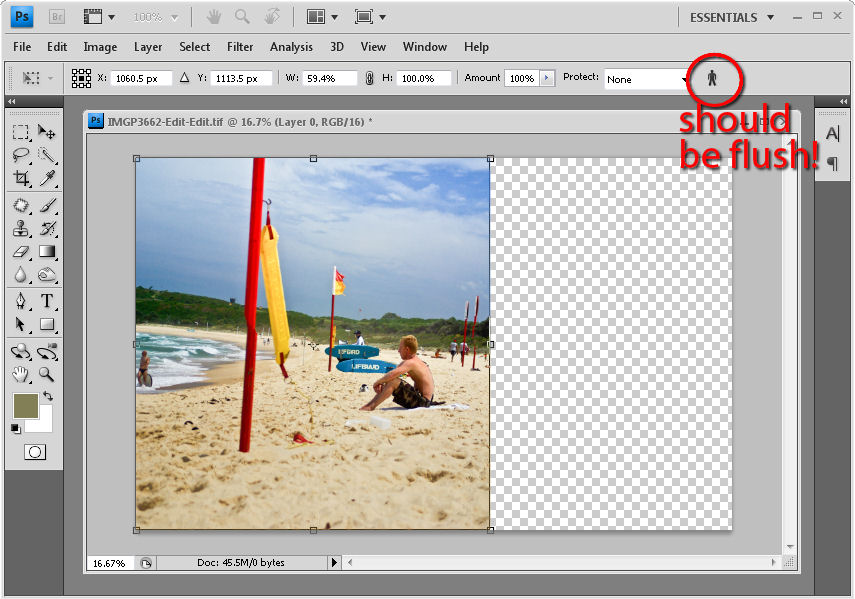
If your image includes people, click the person indicator on the toolbar so that it is not pressed in – when the indicator is flush with the toolbar the option is selected. This protects people by recognizing skin tones and ensuring that they are not distorted by the effect.
Step 3
You can also protect elements in the image using an alpha channel mask. This technique is handy if you have areas of the image that you want to retain at the expense of other areas and it can also be used to protect people in the image.
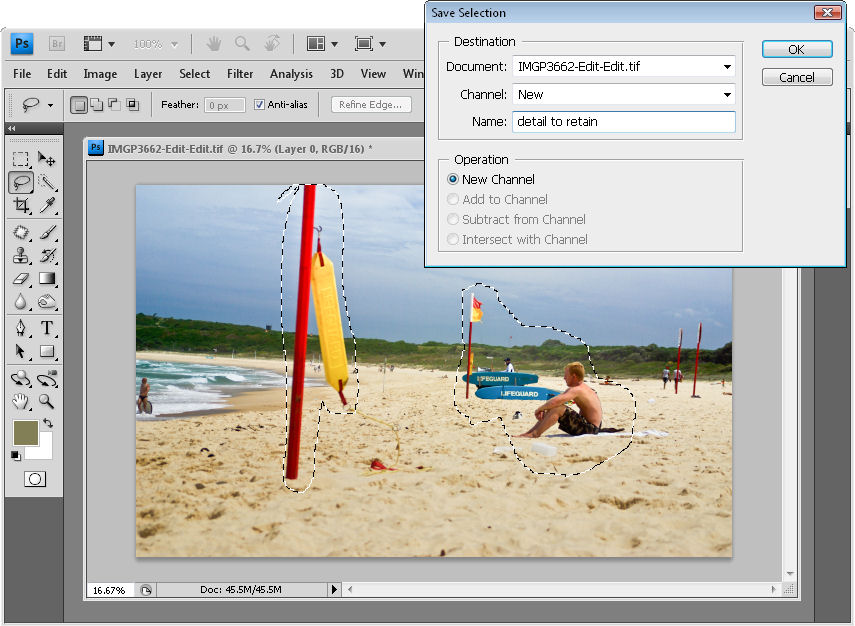
Make a rough selection around the area that you do not want to be affected by the scale effect. A good tool to use is the Lasso tool – select an area and hold the Shift key to make a second selection over another area, if necessary.
Choose Select > Save Selection, type a name for the selection, such as detail mask, make sure that the Channel is set to New and the operation is set to New Channel and click Ok. Press Ctrl + D (Command + D on the Mac) to deselect your selection.

Step 4
Now choose Edit > Content-Aware Scale and from the Protect dropdown list on the toolbar, select the mask you just created. Scale the image and notice that the masked areas are protected from being damaged as the image shrinks in size.
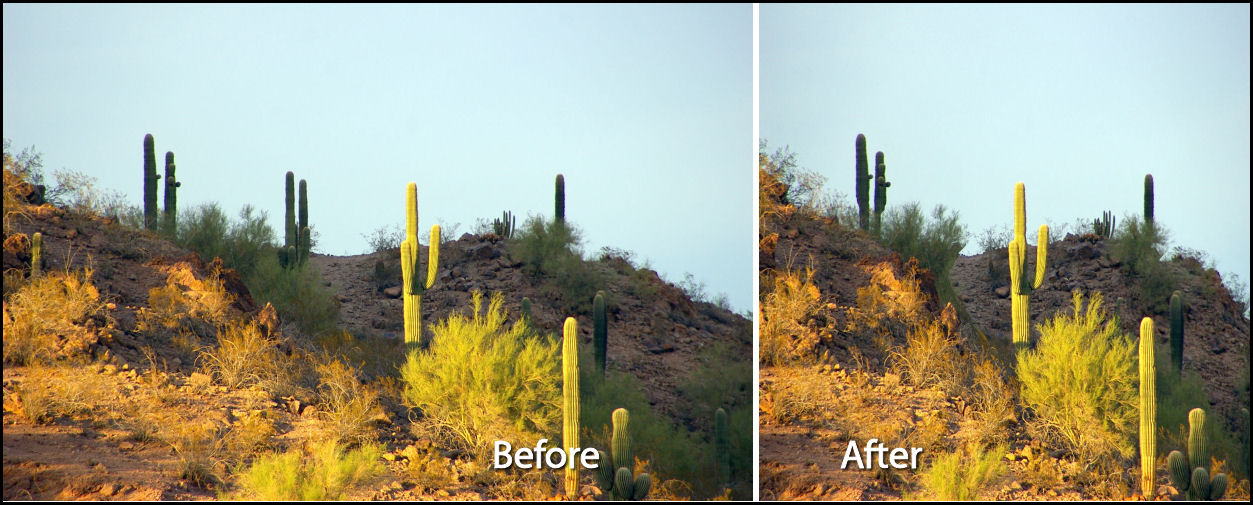
Content-Aware Scaling is a handy way to change the aspect ratio of an image. For example, you can turn a landscape image into a square image and close up the space between people in a photo if they are a long way apart. It also works in reverse and you can use it to make an image larger. You may need to do some work with the clone tool to repair small areas of the image damaged as the result of the scaling but typically the tool does a very good job.
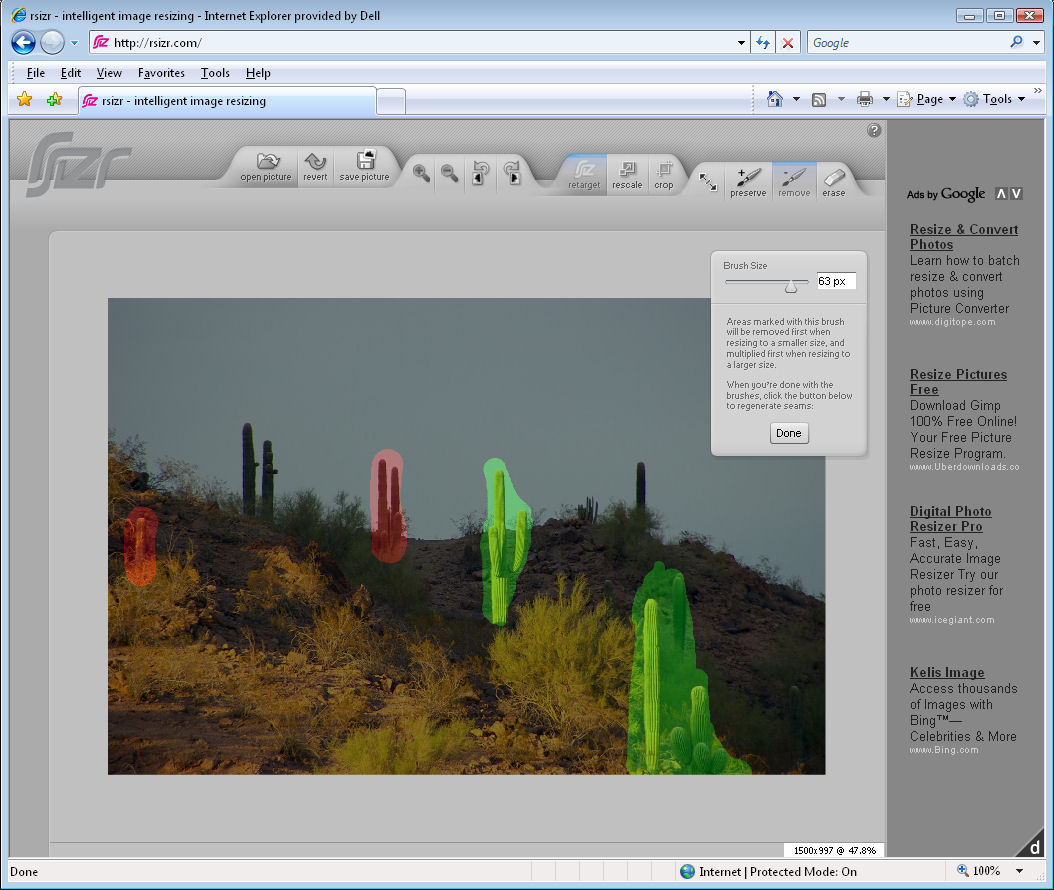
If you don’t have Photoshop CS4 then head, image in hand, over to rsizr.com and give the online tool a try. Here is an earlier post I wrote on the Rsizr tool.