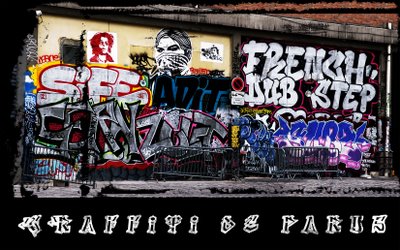
I was looking for an image to put on a t-shirt for a friend for Christmas. Let’s say, he’s a bit out there and pretty just won’t cut it.
I had two good photos of this graffiti covered wall so the Photoshop Automate > Photomerge tool put them together into a panorama. I used the clone and copy and paste to put back the missing bits as it was shot from a moving boat – a far cry from the ideal for shooting a panorama.
Color fix was an issue. I needed a channel to blend back into the image to boost the color and contrast. Problem was, the red killed the blue and the blue killed the red. Solution was to use both.
Duplicate the background layer twice. Select the first copy, choose Image > Apply Image and apply the red channel to the image. Then use the second copy and apply the blue channel to the image. Use the lighten blend mode on the top layer to blend the two together. You can use a Layer mask on the top layer if necessary to bring back detail from the layer underneath.
The grunge details are an image/edge from a set of grunge images from Graphic Authority applied as a layer mask with a black background layer put behind everything.


