Saturday, March 30th, 2013

Photoshop – Self Masking an Image using Apply Image

Learn how to make an image its own mask using Apply Image in Photoshop.
Here we use an image of a cast iron grill and apply it to itself to show another image through it.

Transcript:
Hello I’m Helen Bradley. Welcome to this video tutorial. In this tutorial we’re going to look at using an image as its own mask in Photoshop. And we’re going to do this using the Apply Image tool.

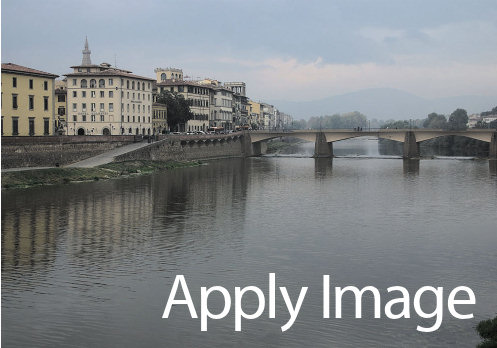
Before we get started with this tutorial let’s have a look and see what it is that we’re trying to achieve. I have an image here that’s just some oranges and then I have another image here of a grate. And what I want to do is to put the grate over the oranges just as I’ve done here. And I’ve actually got a drop shadow behind it to give it some dimension. And what we’re going to do in this tutorial is see how we can use an image and use itself as its own mask to mask that image and how we can also adjust the mask so that we get this effect that we’re looking for and adding a drop shadow to it. So if you’re ready let’s just get rid of the bits that we don’t want. I’ve now got my orange image and let’s get started.

The first thing I’m going to do is bring in my grill image. So I’ve got these images just floating loose because I find that the easiest way of doing it. And I’m just going to drag this image’s background layer away from it, hold the Shift key and just drop it over the top of this image. Now of course it hasn’t disappeared from its original image. I’ve just dragged a copy away. And I don’t need that any longer so I can just get rid of it. With this image it’s a little bit on the small side, so I’m going to press Ctrl T and Ctrl 0 (zero) to see my handles and to set transform on. I’m also going to enabled this lock so that the ratio between the height and width is fixed. This means that the image is not going to be skewed out of proportion. And now I’m just going to drag it into position and I can place it anywhere I want. So I think this is a pretty good arrangement so I’ll click the checkmark here.

Now right now we’re not seeing through this image because of course it brought its own background with it and it’s got a sort of dark background with some light aspects. We’re going to need to do some work to fix this image up. And in actual fact the work that we’re going to do is in masking so I’m just going to drag this up a little bit. What I want to do is I really want to turn this image into its own mask.

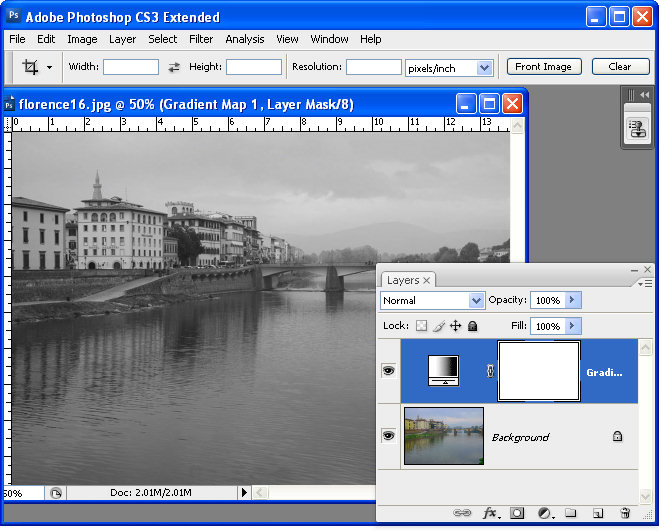
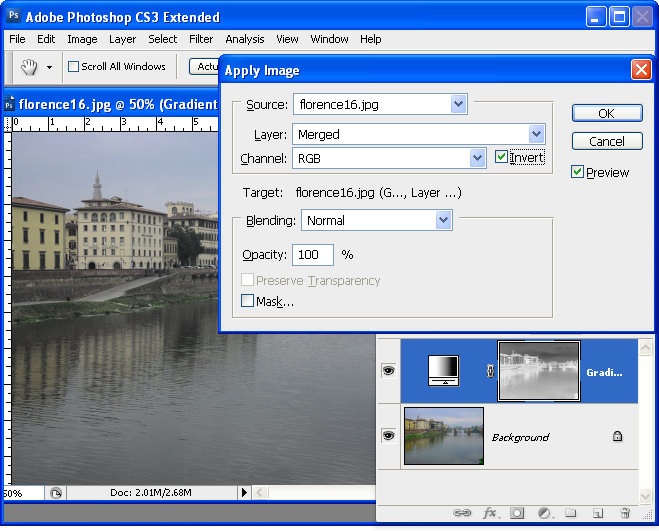
So once I’ve got it in position it’s fairly critical that I actually get it in the right position before I start because I want the mask and the layer to be in the same place. I’m going to add a layer mask to this layer by just clicking the Add Layer Mask icon. But what I want to do is put this image in this mask. And an easy way to do that is to click the mask itself and use Apply Image. It’s up here, Image, Apply Image. And what it lets us do is to apply an image as a mask. So for example layer zero is the oranges themselves so that in this case we would be applying the oranges as a mask. But we can also select layer 1 which is applying this particular grill as its own mask. Now it’s not looking good right now but it is certainly masking it. I could invert it if I wanted to but that’s only going to give me the orange images over the grill work not where I want it. I want it in the bits in between the grill work so I’m going to disabled invert because I don’t want it inverted. If I’ve got that right I’m just going to click Ok.

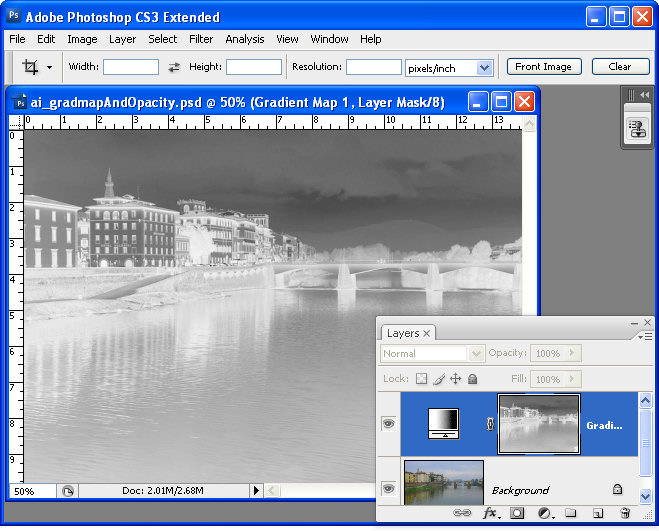
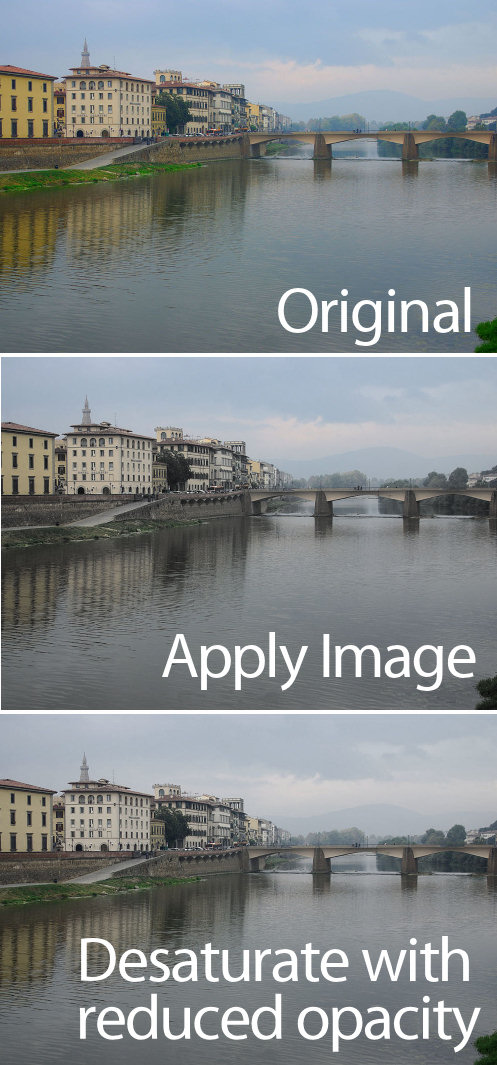
Now the problem with this mask is that this particular image is not black and white. It’s not. Let’s just turn everything off here. You can see that this is actually really quite gray. And for the mask to really be doing its work it needs to be almost black and white. So I need to boost the contrast up on the mask alone. So I’m going to click the mask to target it so any changes I’m making now are to that mask alone. And I’m going to choose Image Adjustments and Curves because curves will allow me to adjust the mask and have a look here on the mask itself as I work. What I’m doing here is I’m increasing the whiteness of the mask and then I’m increasing the black areas. The whiter and lightest areas are going to ensure that we can see the grill in these places. And the black the darker black areas are going to cope with the areas that we’re seeing through. So I need a fairly sharp change from black to white and I also need to make sure that my sharp change from black to white copes with the fact that there’s a sort of darker gray bar behind the image. And I want to make sure that that dark gray bar goes to the right color. It needs to go to black and not to white. And what I’m looking for here is to make sure that I can really see the image through this grill, and when I’ve got it I’ll click Ok.

Now if I wanted to I can lighten my grill. That’s fine. I need to make sure that my mask is black and white so that the image behind is being shown through and then if I want to change the actual grill itself well then I can add an image adjustment to that. But the two are very different adjustments. One is adjusting the grill color itself and the other is changing it as it appears as a mask over that original grill image. So if I want to make that a bit more light I can do so just to add that extra contrast. And now to add a drop shadow to push the orange image behind that grill I’m just going to click on the grill layer and choose Drop Shadow. And here’s the default drop shadow. Well that’s what you would see as a default drop shadow. And I can add as much or as little drop shadow as I want to push that behind and gave us the sense that there is a dimension or a distance between the grill and the actual orange image itself. And we can make that deeper or less deep as we want to and then click Ok.

So here we’ve used an original image of some oranges. We’ve added an image of a grill and we want to see through the holes in the grill to the image of the oranges behind. And we’ve done that using the image as its own mask so it’s showing us where we want to see through. We’ve added a lot of contrast to this so this mask is almost pure black and white. The image itself can be anything. We just gave it a little bit more of a pop by making it a little bit brighter but it could be anything. And we’ve finished with a drop shadow to add some dimension to the entire scene.

I’m Helen Bradley. Thank you for joining me for that this tutorial. Look out for more tutorials on projectwoman.com and on this YouTube channel. And please if you liked the video click to like it and consider subscribing to this YouTube channel.

Helen Bradley

Tuesday, May 5th, 2009

Photoshop: Partially removing color

While there are lots of ways that you can convert an image into black and white in Photoshop sometimes you want to remove some of the color but not all of it.

One method to do this, is to use a tool such as an adjustment layer to remove the saturation from the image or to apply a black to white gradient map adjustment. This removes all the color and you can then recover some of it by reducing the opacity of the adjustment layer to show some of color from the image layer underneath. However, when you adjust opacity, the setting is applied to every pixel in the image so light and dark pixels are treated equally.

You can achieve a richer effect by using the image as its own mask so that the desaturation effect is applied with different strengths to pixels in the image depending on their relative lightness or darkness.

To see how this effect can be achieved:


Step 1
Open a new image and add an adjustment layer to convert it to black and white. I used Layer > New Adjustment Layer > Gradient Map and used the Black, White gradient from the basic set of gradients.


Step 2
Click the Adjustment Layer’s layer mask to select it – this is the white box in the Layer palette to the right of the Adjustment layer thumbnail. Choose Image > Apply Image. This tool lets you apply the image to itself as a layer mask. The current image name should appear in the Source Image area and you need to apply it to the Merged layer. Experiment with selecting and deselecting the Invert checkbox, if you have Preview selected you’ll see how each setting affects the image. Choosing Invert typically gives the best looking results and it’s the option I chose. Click Ok to add the image as its own layer mask.


Step 3
Inspect the image and let’s talk about what’s happening. The screenshot here shows the mask (not the resulting image). You can toggle the mask’s visibility on and off by Alt + Click (Option + Click on the Mac) on the Layer Mask thumbnail in the Layers palette.

Masks are grayscale so they’re always black, white or shades of gray. They work like this: where they are white, the current layer is shown – that’s the black and white conversion in this example. Where the mask is black, we are seeing through the current layer to the colored layer below. Where the mask is grey we’re seeing some partial transparency in the black and white layer so some color is showing.

Here the mask is dark in the sky area and around two of the buildings on the left so you’re seeing some blue in the sky and color in the buildings in this area. Where the mask is white, the image is almost all desaturated.


So you can see how subtly different the results are using this method, here’s the original image, the version we just created using the Apply Image command and another version showing the result with the same Gradient Map adjustment layer but this time with a reduced opacity and no layer mask. The significant differences are in the sky which is bluer and the grass which is more desaturated in our example – a result you cannot achieve by simply adjusting the opacity.

Tip
Masks can be adjusted just like regular layers. So, you can create more variety in the mask by clicking on it, and choose Image > Adjustments > Levels. Adjust the levels to suit – if you lighten the mask you’ll make it whiter overall which means the image will become more black and white and less colorful. If you darken the mask then you will see more of the colored image below.

I contribute to the post production blog at Digital Photography School and this post first appeared there.

Helen Bradley

Tuesday, November 20th, 2007

Paste to a layer mask

Ok, here’s the dilemma. You have two images open in Photoshop and you want to add one image as a layer mask into the other.

One solution is to copy the first image, then switch to the second. Click the layer mask and switch to the Channels palette. The layer mask appears as a channel. Select the channel’s visibility icon to make it visible, select the channel to make it active, and click Edit, Paste. Deselect its visibility, reselect the RGB channel to make that one active, switch back to your Layers palette and the pasted selection is in your layer mask. This solution has the advantage that the copied/pasted piece doesn’t have to be the same size as the layer mask.

The alternate solution if the two images are the same size, is to use Apply Image. Select the target layer mask, choose Image, Apply Image and, as the Source, select the image to copy from, the layer to copy and click Ok. Now the selected layer (or the merged source) is pasted into the Layer Mask.

Two alternatives, the second is easier to use but it does require two same size images.

Helen Bradley

Monday, November 19th, 2007

Graffiti de Paris

I was looking for an image to put on a t-shirt for a friend for Christmas. Let’s say, he’s a bit out there and pretty just won’t cut it.

I had two good photos of this graffiti covered wall so the Photoshop Automate > Photomerge tool put them together into a panorama. I used the clone and copy and paste to put back the missing bits as it was shot from a moving boat – a far cry from the ideal for shooting a panorama.

Color fix was an issue. I needed a channel to blend back into the image to boost the color and contrast. Problem was, the red killed the blue and the blue killed the red. Solution was to use both.

Duplicate the background layer twice. Select the first copy, choose Image > Apply Image and apply the red channel to the image. Then use the second copy and apply the blue channel to the image. Use the lighten blend mode on the top layer to blend the two together. You can use a Layer mask on the top layer if necessary to bring back detail from the layer underneath.

The grunge details are an image/edge from a set of grunge images from Graphic Authority applied as a layer mask with a black background layer put behind everything.

Helen Bradley

Saturday, November 17th, 2007

Paste to a layer mask

Ok, here’s the dilemna. You have two images open in Photoshop and you want to add one image as a layer mask into the other.

One solution is to copy the first image, then switch to the second. Click the layer mask and switch to the Channels palette. The layer mask appears as a channel. Select the channel’s visibility icon to make it visible, select the channel to make it active, and click Edit, Paste. Deselect its visiblity, reselect the RGB channel to make that one active, switch back to your Layers palette and the pasted selection is in your layer mask. This solution has the advantage that the copied/pasted piece doesn’t have to be the same size as the layer mask.

The alternate solution if the two images are the same size, is to use Apply Image. Select the target layer mask, choose Image, Apply Image and, as the Source, select the image to copy from, the layer to copy and click Ok. Now the selected layer (or the merged source) is pasted into the Layer Mask.

Two alternatives, the second is easier to use but it does require two same size images.

Helen Bradley

Thursday, October 18th, 2007

Shopping for books by the Seine – No 2

I took yesterday’s image and decided I wanted to look at it another way. So, I cropped it horizontally this time and worked a lot with the colors. I wanted not only to crisp it up but to punch some of the colors.

I’m working on some notes from Dan Margulis from Photoshop World in Las Vegas – his 5 minutes to a picture postcard class.

One of the great tricks I learned there is using the Luminosity channel to add punch to a photo. The idea is to duplicate the main layer in the image and then select this duplicate layer. Then use the Apply Image command. It’s a command most people don’t use because it’s so damn obscure but I’ve used it quite a bit before and I love it. Here you apply a channel such as the Red, Green or Blue to the image but, after you’ve done this, instead of accepting the default blend mode in the Layers palette – which is Normal and which makes the image Greyscale, you use the Luminosity blend mode to take the contrast but drop the color.

It’s a great tool – it’s only one of Dan’s tricks but it is fun to play with. Use the Green channel for portraits and the red channel for skies.

I did a lot to this image to try and recover and enhance the color. I started out by balancing the color to remove the cast. Then used a range of tools including curves and apply image to try to punch up the color.

I quite like the result.

Helen Bradley