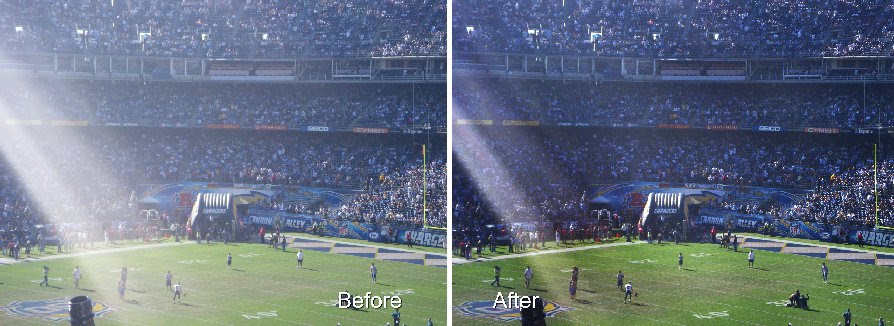
Blog reader Mark Mayer approached me recently to ask what he could do with some images which are overexposed. He asked “I am a point and shoot camera user and like many of my friends we often take pictures that have too much sun. Although I know taking a picture facing towards the sun isn’t ideal, it’s hard to always line up the right shot”.
Mark is right. Not all of us have great digital SLRs with us all the time and we’re not always able to move into the right place to take a shot. So, if you’ve got a less than well exposed image that you like, how will you fix it?
Here is a simple fix. Depending on how much time you’re willing to spend on the image you can stop after step 2 or go on. Even if you go all the way through the fix it will take you less than five minutes. So, in my book, that’s worth the effort.
Step 1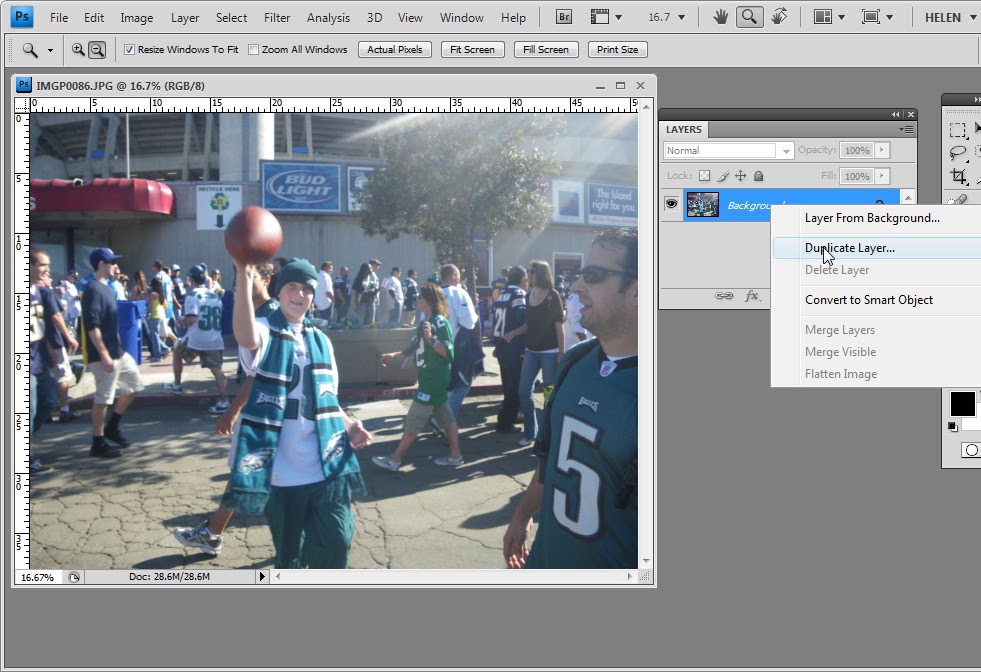
The simplest place to start salvaging an image like this is to make a duplicate of the background layer by right clicking the layer and choose Duplicate Layer. Set the layer blend mode to Multiply.
Step 2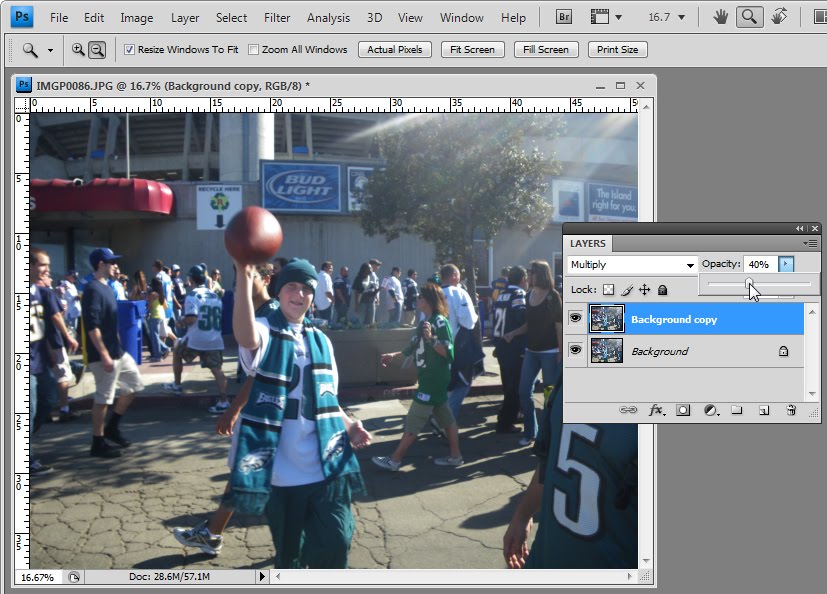
If the fix is too much you can adjust the opacity of this top layer downwards to get the result you like.
However, you can get even better results with a mask. Read on…
Step 3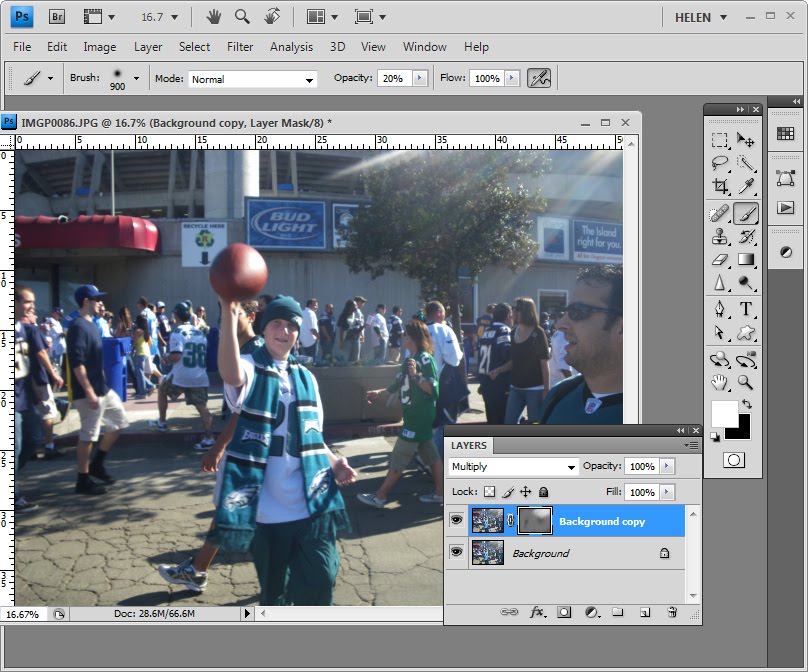
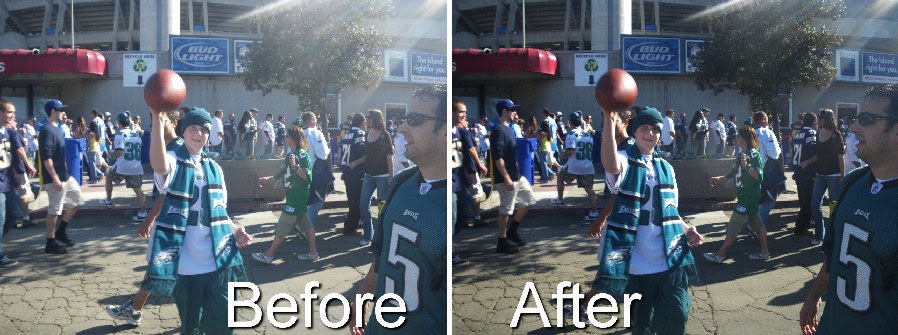
While the duplicate a layer and set the blend mode to Multiply method is a good way to salvage an overexposed image it doesn’t work perfectly on this image because the overexposure is more obvious in the areas where the sun’s rays are. If you’re prepared to do a little more work you can adjust the fix to suit the image. To do this, adjust the Opacity of the top layer back to 100%.
Set the foreground color to Black and hold the Alt key as you click on the Add Layer Mask icon at the foot of the Layers palette. This adds a black filled layer mask to the layer essentially removing the fix entirely.
Switch and make white your foreground color, select a very large very soft edge brush and click on the Mask in the Layers palette and begin to brush on the fix. You’ll want the fix to be less apparent around the edges of the image and more in the area where the sunbeam is.
Step 4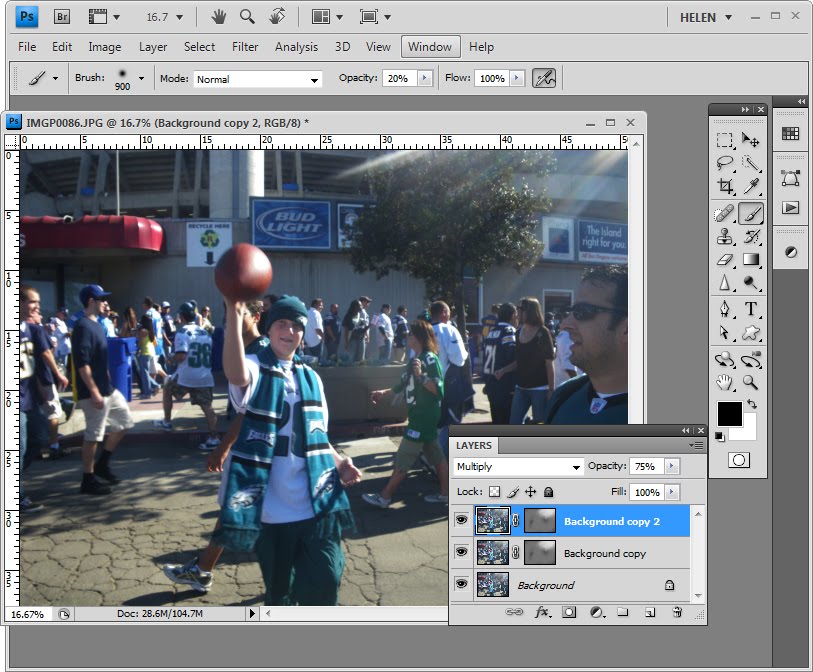
You can duplicate this layer again to make a slightly more intense fix but again limiting it to where the sun’s rays are most apparent. You can also adjust the opacity of the top layer downwards if you’re getting too much of a fix.
Step 5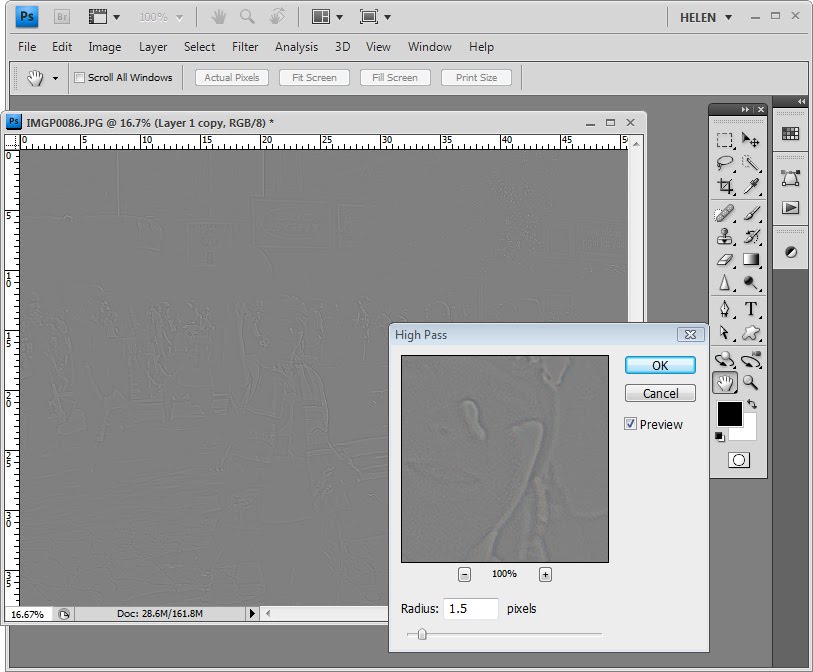
Once you’ve done this, you can create a flattened version of the image by clicking on the topmost layer of the image and press Ctrl + Alt + Shift + E to create a new layer containing the image data. Duplicate this layer so that you have two identical layers at the top of the document.
Select the topmost layer and choose Filter > Other > High Pass. We will use the High Pass Filter to sharpen the image because the image has a lot of color noise in it. Using this tool we can limit the sharpening to just the edges in the image and avoid sharpening the noisy areas.
Watch the image in the Preview dialog and adjust the Radius down until you see a greyscale image and so you cannot see any color. A Radius value of around 1.5 is sufficient for this image. Click Ok.
Step 6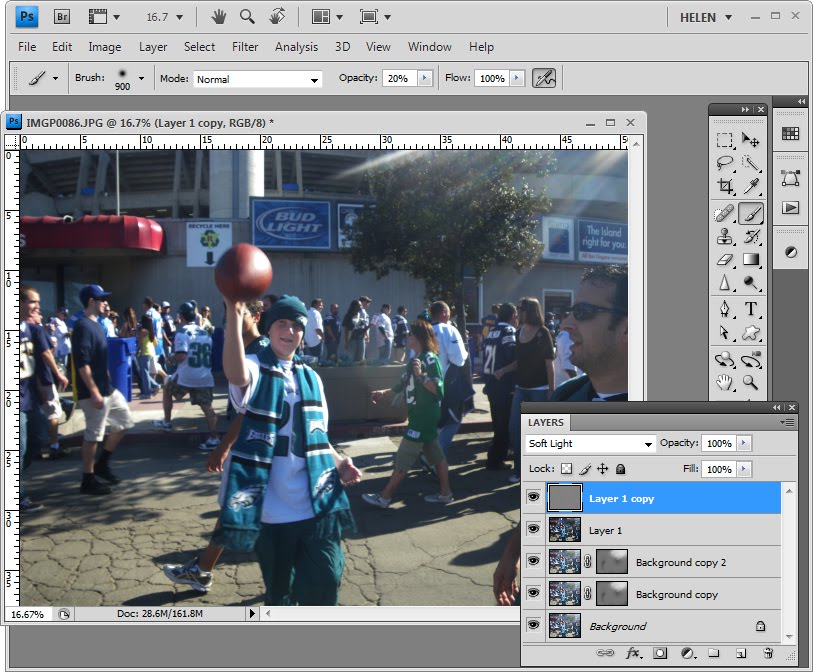
Set the layer blend mode of this top layer to Soft Light to complete the sharpening.
Next time you’re taking a photo like this in strong sunlight, consider removing your sunglasses and place them over the camera lens. This lets you use the polarizing sunglasses as a filter over the camera lens and should cut the glare. You can do this with a point and shoot camera and with a camera phone. If you’re getting results like these with a digital SLR you should purchase a polarizing filter to use as you will get much better results with it.
Thank you to Mark Mayer for the images and this question! If you have questions, send me your question and a problem image with permission to use it as an example on my blog and I’ll see what I can do.
Note: Original photos are © Mark Mayer.