Thursday, November 15th, 2012

Photoshop Grunge Portrait

Give a grunge look to a portrait using the Photoshop High Pass filter and Smart Objects – it is a quick, easy, and fully editable.

Transcript:

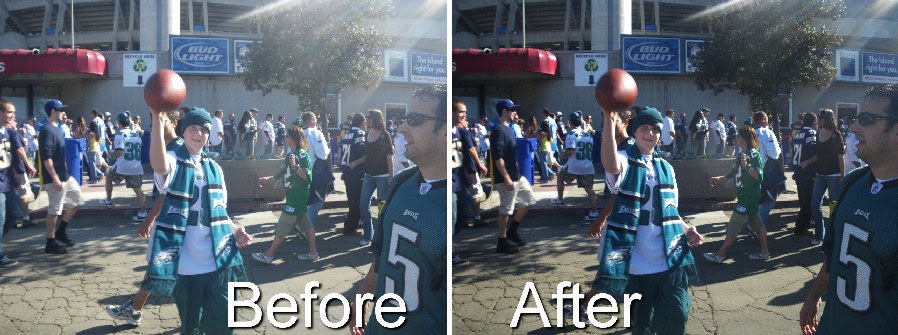
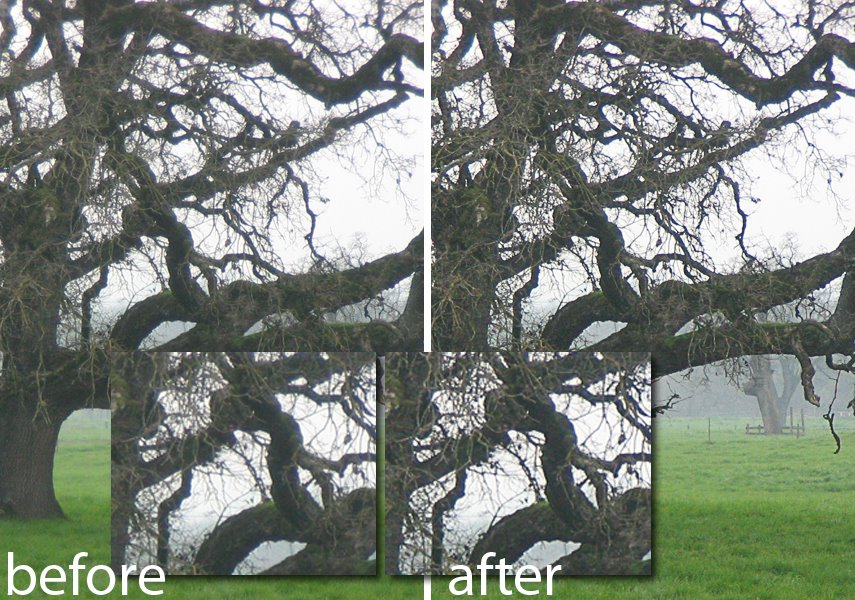
Hello, I’m Helen Bradley. Welcome to this video tutorial. In this tutorial we’re going to apply a grunge portrait effect to a portrait in Photoshop. Before we start on creating the grunge effect let’s have a look and see what we’re looking for. This is the original image that I have open here in Photoshop. All I’ve done really is cropped it. And this is the final appearance that we’re going to give this image. It’s a lot more grungy. It’s a lot darker. It’s a lot more interesting image. And the way we’re going to do it is by harnessing the power of the high pass filter which allows us to get edges out of the image. And we going to do it in a way that we could adjust it if we needed to as we go along.

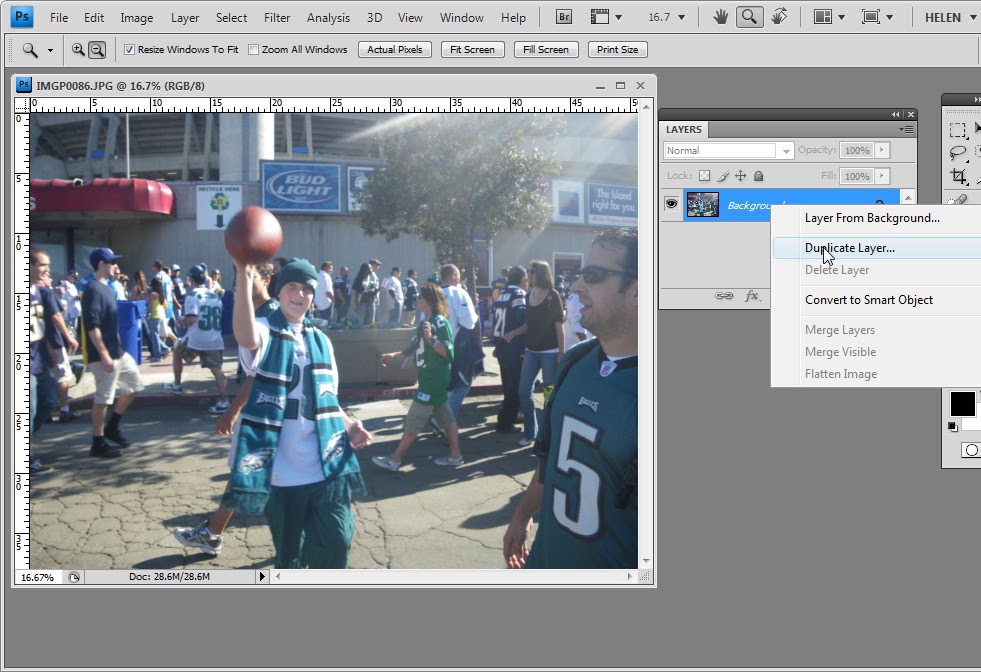
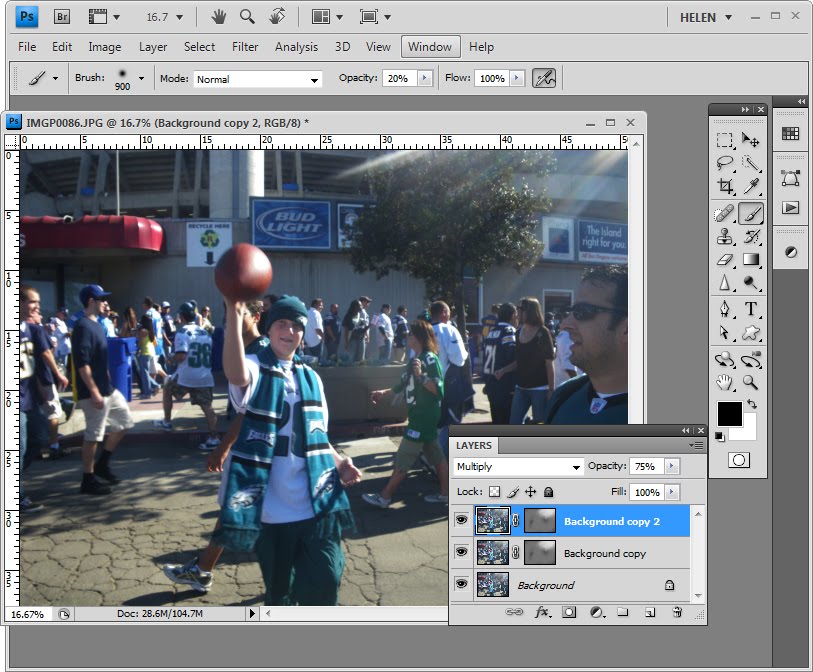
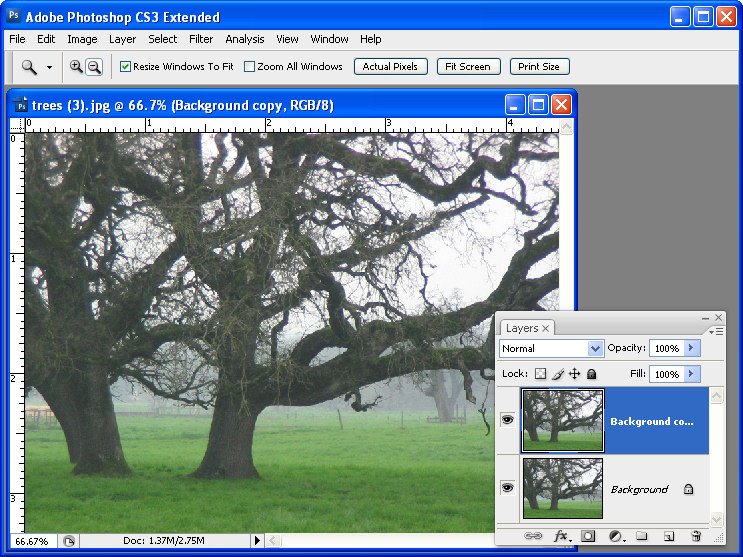
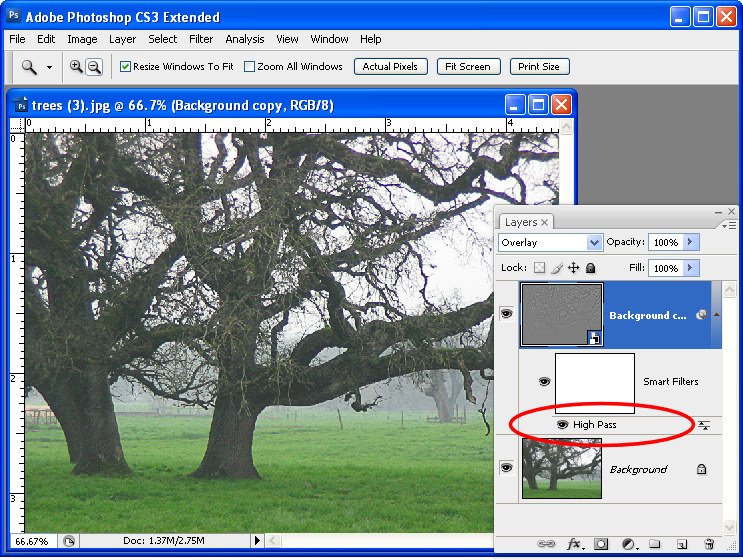
So now that we’ve seen what we’re aiming for let’s get started on our new image. And here’s the image here, and I’m just going to hide away the existing one. And we’re going to start by creating a duplicate of the background layer. I’ll right click and choose Duplicate Layer and click Ok. This is the layer that we’re going to apply the high pass filter to. And if we want it to be editable we need to first convert it for smart filters. All we’re doing effectively is making it a smart object. So we could right click and choose Convert to Smart Object, and it’s exactly the same process to choose Filter, Convert for Smart Filters. This is now a smart object so when I apply the high pass filter to it, it’s going to be done in a way that could be edited later on.

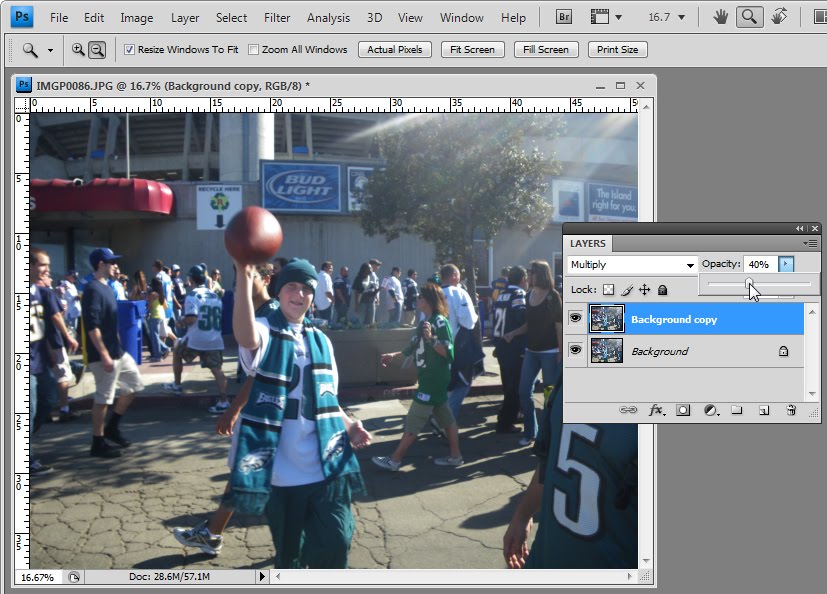
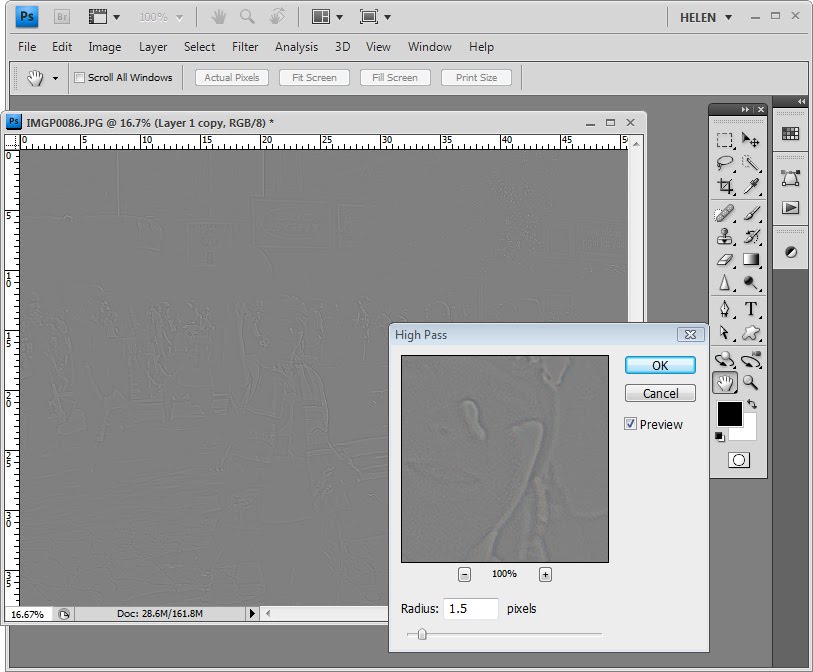
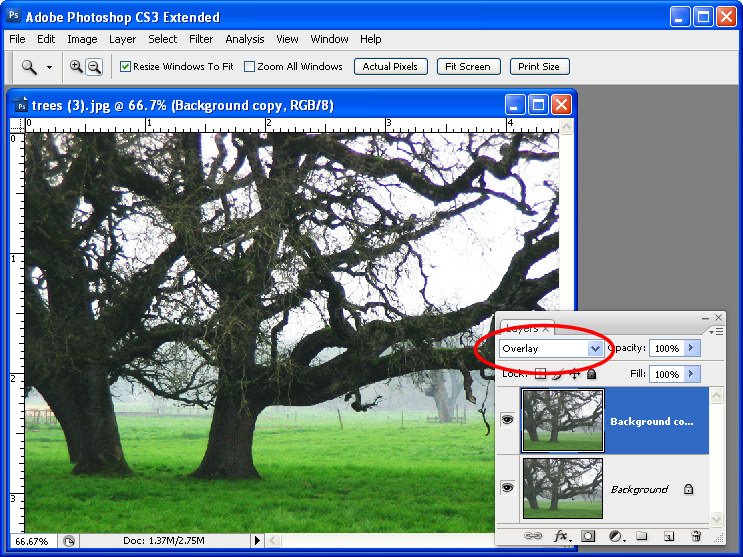
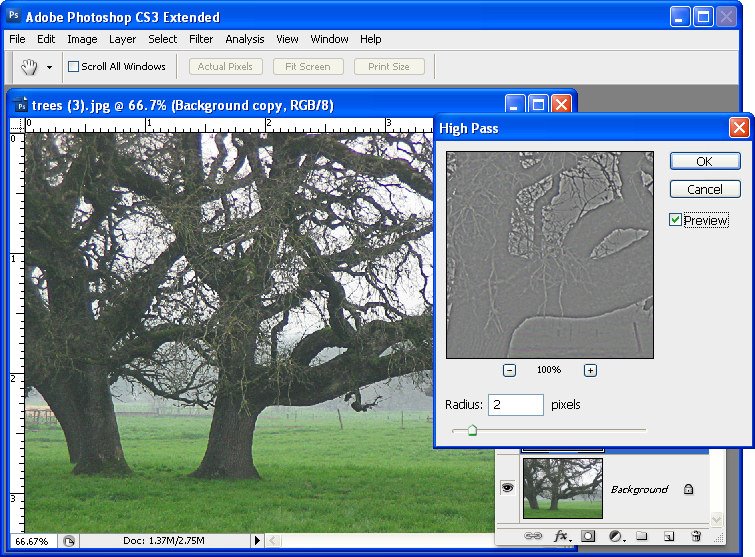
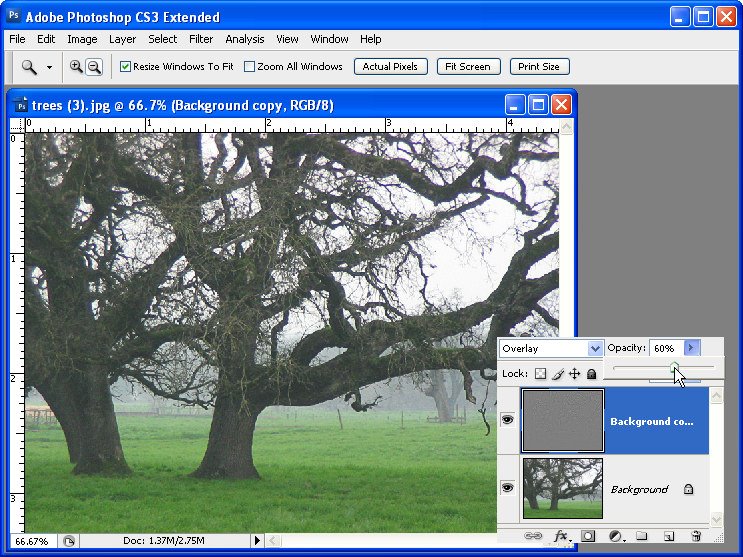
I’m choosing Filter, Other, High Pass. And with this high pass filter what I want is to begin to see the edges in the image but not a lot of color. Now depending on the sharpness of your image and exactly what the image is all about, this might be a larger or smaller value. Usually I suggest around 5 but this image is really quite soft and 5 is just not going to cut it. So I actually have this wound up to 9.6 and click Ok. But because this is a smart filler it doesn’t really matter because if it’s too much or too little we can come back later and fix it. We’re now going to set this layer blend mode to overlay so that we’re picking up these edges in the underlying image. So let’s see how far we’ve come. This is the original image and this is a slightly grittier, grainier version. But it’s going to get better.

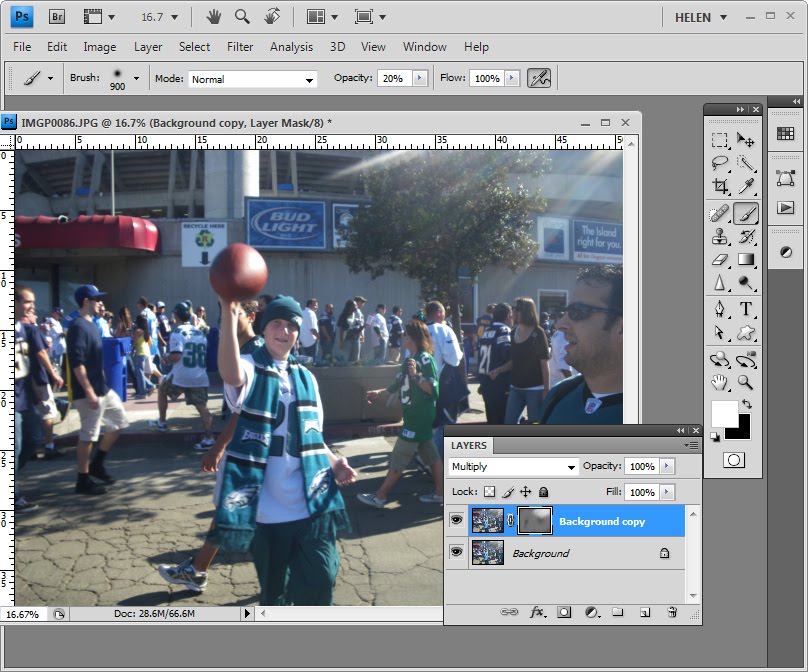
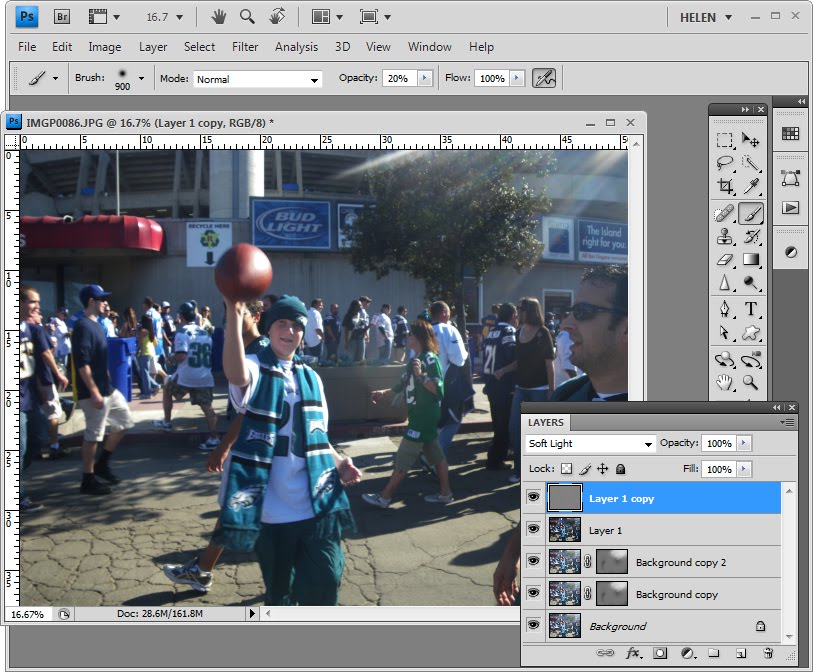
We’re going to make another duplicate of the background layer, right click and choose Duplicate Layer. And we’re going to drag this above everything else. And we’re going to make it black and white and then blend it back into the image. It’ll be easier to do if first of all we set the blend mode to something like hard light so we see the effect that we’re going to have. And I would like to do this adjustment using an adjustment layer so that we can also change that later on if we like. Let’s start with Layer, New Adjustment Layer, Black and White. I’m going to click Ok and then I’m going back into this layer stack here. And I’m going to clip this layer because right now this adjustment layer affects everything so we have a black and white image. I just want it to affect this layer. So I click on this top layer and then either position my cursor between the two layers and press the Ctrl and Alt keys, Command and Option on the Mac, to clip that or I could choose Layer and then Create Clipping Mask. It’s exactly the same thing. And what that does is it clips the effect of this black and white layer to adjust this layer underneath.

Now we can have a look at our black and white layer and see how we can grunge up this portrait a little bit better because we’re actually seeing the final results. Now we can drag on these sliders our self to make our own setting or we could select a preset. And I’m going to choose the red filter because I kind of like that effect. And I’m probably just going to lighten these red and magenta channels and perhaps even the yellow channel a little bit before I continue. So I’m just going to close that down now.

Now we’ve got the image that we want we can fine tune it by adding another adjustment to it. And for this I would use a curves adjustment. So I’m going to again choose Layer, New Adjustment Layer, Curves. And this is going to affect the entire image this curves adjustment layer. And I just really want to lighten it and add a bit more contrast into the skin tones. If I click on this slider here you can see where the skin tones are in the image. They’re in this area down here so I can drag around this area to increase the contrast in the skin tones, perhaps lighten them up a little bit as we go. And that’s really personal preference at that point.

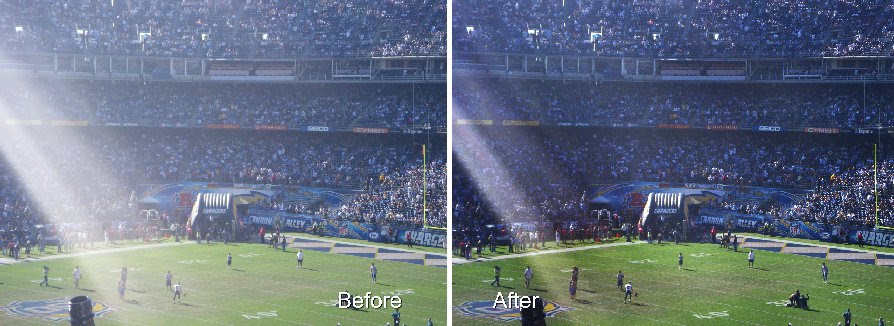
So let’s have a look and see where we started and how far we’ve come. This is the original image. It looked a little perhaps grungy when we started but we’ve actually been able to make it even look a lot more grungy with the application of this high pass filter, blending it back in with some black and white and then adjusting the curves. Now all of these changes are adjustable so for example we can come back to this high pass filter, double click here and adjust the high pass filter effect. So we can get more or less grunge effect by just adjusting that filter. We can also come back here and adjust this black and white filter, double click here and adjust this. And the final adjustment layer was a curves adjustment layer and it’s editable too. So there’s how to create a quick and easy grunge portrait effect. It’s all editable so that you can change it and fine tune it if you like.

I’m Helen Bradley. Thank you for joining me for this YouTube video. Look out for more of my YouTube videos on this YouTube channel. I encourage you to subscribe to my channel so you’ll be advised when new videos are released. And remember to visit projectwoman.com. You’ll find more tips, tricks and techniques for working with Photoshop, Photoshop Elements and Lightroom and other applications there.

Helen Bradley

Tuesday, December 28th, 2010

Photoshop: Grunge Portrait Effect

To create a high contrast grunge portrait effect, first duplicate the image background layer, then choose Filter > Other > High Pass, select a Radius that shows lines on the image but not a lot of colour – typically a value of around 5 is sufficient – and click Ok. Set this layer’s Blend Mode to Overlay.

Duplicate the background layer again, moving the duplicate to the top of the layer stack and convert the layer to black and white by choosing Image > Adjustments > Black & White. Adjust the sliders to create an interesting black and white image – dragging the red slider to the left often to darken the reds often works well. Set the blend mode of the layer to Hard Light.

Select the top layer and press Ctrl + Alt + Shift + E to create a flattened version of the image and set this layer’s blend mode to Overlay, Soft Light or Hard Light as desired. Adjust the opacity to suit.

Make a new flattened layer by pressing Ctrl + Alt + Shift + E and use the same process as before to fix the eyes. Choose Image > Adjustments > Curves and adjust to brighten the eyes only. Add a black filled layer mask by pressing Alt as you click on the Add Layer Mask icon. Paint with white on the layer mask to bring details back in the eyes and adjust the opacity of the layer to suit.

Helen Bradley

Thursday, December 31st, 2009

Photoshop – Recover an overexposed image

Blog reader Mark Mayer approached me recently to ask what he could do with some images which are overexposed. He asked “I am a point and shoot camera user and like many of my friends we often take pictures that have too much sun. Although I know taking a picture facing towards the sun isn’t ideal, it’s hard to always line up the right shot”.

Mark is right. Not all of us have great digital SLRs with us all the time and we’re not always able to move into the right place to take a shot. So, if you’ve got a less than well exposed image that you like, how will you fix it?

Here is a simple fix. Depending on how much time you’re willing to spend on the image you can stop after step 2 or go on. Even if you go all the way through the fix it will take you less than five minutes. So, in my book, that’s worth the effort.

Step 1

The simplest place to start salvaging an image like this is to make a duplicate of the background layer by right clicking the layer and choose Duplicate Layer. Set the layer blend mode to Multiply.

Step 2

If the fix is too much you can adjust the opacity of this top layer downwards to get the result you like.

However, you can get even better results with a mask. Read on…

Step 3

While the duplicate a layer and set the blend mode to Multiply method is a good way to salvage an overexposed image it doesn’t work perfectly on this image because the overexposure is more obvious in the areas where the sun’s rays are. If you’re prepared to do a little more work you can adjust the fix to suit the image. To do this, adjust the Opacity of the top layer back to 100%.

Set the foreground color to Black and hold the Alt key as you click on the Add Layer Mask icon at the foot of the Layers palette. This adds a black filled layer mask to the layer essentially removing the fix entirely.

Switch and make white your foreground color, select a very large very soft edge brush and click on the Mask in the Layers palette and begin to brush on the fix. You’ll want the fix to be less apparent around the edges of the image and more in the area where the sunbeam is.

Step 4

You can duplicate this layer again to make a slightly more intense fix but again limiting it to where the sun’s rays are most apparent. You can also adjust the opacity of the top layer downwards if you’re getting too much of a fix.

Step 5

Once you’ve done this, you can create a flattened version of the image by clicking on the topmost layer of the image and press Ctrl + Alt + Shift + E to create a new layer containing the image data. Duplicate this layer so that you have two identical layers at the top of the document.

Select the topmost layer and choose Filter > Other > High Pass. We will use the High Pass Filter to sharpen the image because the image has a lot of color noise in it. Using this tool we can limit the sharpening to just the edges in the image and avoid sharpening the noisy areas.

Watch the image in the Preview dialog and adjust the Radius down until you see a greyscale image and so you cannot see any color. A Radius value of around 1.5 is sufficient for this image. Click Ok.

Step 6

Set the layer blend mode of this top layer to Soft Light to complete the sharpening.

Next time you’re taking a photo like this in strong sunlight, consider removing your sunglasses and place them over the camera lens. This lets you use the polarizing sunglasses as a filter over the camera lens and should cut the glare. You can do this with a point and shoot camera and with a camera phone. If you’re getting results like these with a digital SLR you should purchase a polarizing filter to use as you will get much better results with it.

Thank you to Mark Mayer for the images and this question! If you have questions, send me your question and a problem image with permission to use it as an example on my blog and I’ll see what I can do.

Note: Original photos are © Mark Mayer.

Helen Bradley

Saturday, August 8th, 2009

Smarter sharpening with the High Pass filter


In previous posts I have introduced the basics of sharpening in Photoshop and I also looked at a way to spot sharpen an image in Photoshop Elements using faux layer masks. In this post I want to show you the benefits of using high pass sharpening in Photoshop as an alternative to using the Unsharp mask.

The Unsharp mask has historically been the sharpening tool that most Photoshop users start out using. There are, however, different and better tools to use and one of these is the High Pass filter. One reason for this is that the Unsharp mask operates on the actual image pixels and it makes changes to those pixels. The sharpening process that makes use of the High Pass filter doesn’t operate on the original image so it does not destroy the image pixels – this is particularly useful if you’re using Photoshop CS2 or earlier which doesn’t offer the Smart Objects for Filters option for applying the Unsharp mask filter.

In addition, instead of sharpening the entire image as the Unsharp Mask does, using this High Pass filter process limits sharpening to the edges in the image which is where the most value can be obtained from sharpening the image.

Step 1
To see the process at work, open an image and duplicate the background layer of the image. If your image has multiple layers, add a new layer at the top of the layer stack, click it to select it and press Ctrl + Alt + Shift + E (Command + Option + Shift + E on the Mac) to fill the top layer with a flattened version of the image – without affecting the other layers.

Step 2
In the Layers palette set the blend mode of the new top layer to Overlay. This will let you see the sharpening results in place on the image in the next step.

Step 3
With the topmost layer still selected, choose Filter > Other > High Pass. This filter has one slider to adjust the Radius value. Drag the slider until you see a pretty much gray image in the preview window with the only detail being around the edges of objects in the image. If you can see color in the preview image then the radius is set too high. Typically a Radius value of well under 10 pixels should be sufficient – we used 2. Click Ok.

Step 4
The image is now sharpened – check the original against the sharpened version by clicking the Layer Visibility Icon for the top layer on and off to compare the result.

To finish the effect, adjust the Opacity of the top layer to 0 and then move it back up stopping when you have a good sharpening result. The ideal Opacity will depend on your personal preference.

If desired you can use blend modes other than Overlay, for example Soft Light and Hard Light can be equally as effective depending on the result that you are looking for.

Tip
When you are sharpening an image, adjust the image to the way you want it to look if you’re planning to display the image on the web. If you’re printing it you can (and should), sharpen more aggressively.

Tip

If you are using Photoshop CS3 or CS4, before you apply the High Pass filter to the top layer of the image, convert it to a Smart Object by selecting the layer and choose Filter > Convert for Smart Filters. Then apply the High Pass filter to the new smart object in the same way as I have outlined above. When you apply a filter to a Smart Object you can return later on to edit it – simply double click the filter name in the layer palette and the filter dialog opens allowing you to change the Radius value.

If you’re new to sharpening, check out these recent posts:

Sharpening 101 – Understanding the basics of Sharpening

Sharpening in Lightroom 2

Photoshop Elements, Spot sharpening with a faux layer mask

Helen Bradley