

In previous posts I have introduced the basics of sharpening in Photoshop and I also looked at a way to spot sharpen an image in Photoshop Elements using faux layer masks. In this post I want to show you the benefits of using high pass sharpening in Photoshop as an alternative to using the Unsharp mask.
The Unsharp mask has historically been the sharpening tool that most Photoshop users start out using. There are, however, different and better tools to use and one of these is the High Pass filter. One reason for this is that the Unsharp mask operates on the actual image pixels and it makes changes to those pixels. The sharpening process that makes use of the High Pass filter doesn’t operate on the original image so it does not destroy the image pixels – this is particularly useful if you’re using Photoshop CS2 or earlier which doesn’t offer the Smart Objects for Filters option for applying the Unsharp mask filter.
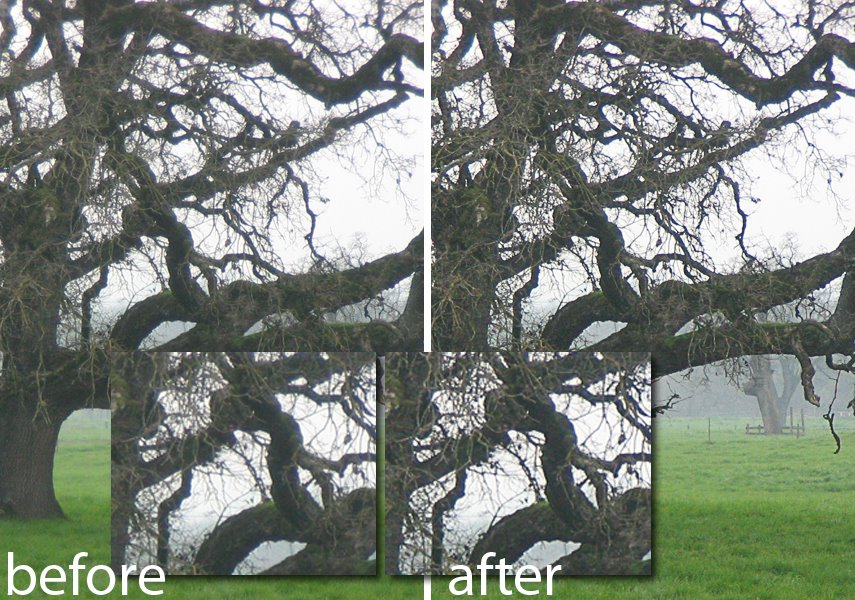
In addition, instead of sharpening the entire image as the Unsharp Mask does, using this High Pass filter process limits sharpening to the edges in the image which is where the most value can be obtained from sharpening the image. 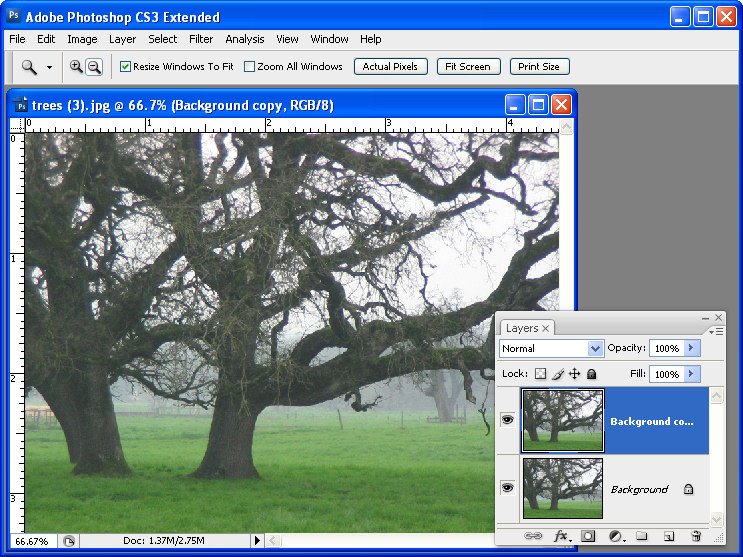
Step 1
To see the process at work, open an image and duplicate the background layer of the image. If your image has multiple layers, add a new layer at the top of the layer stack, click it to select it and press Ctrl + Alt + Shift + E (Command + Option + Shift + E on the Mac) to fill the top layer with a flattened version of the image – without affecting the other layers. 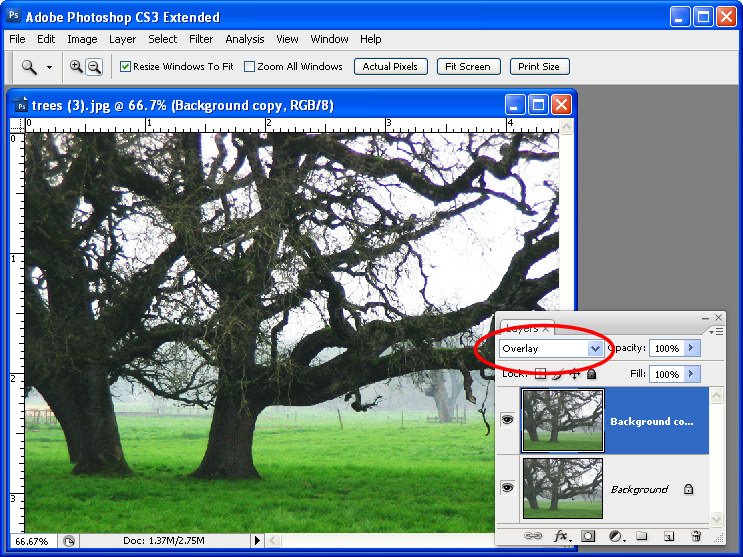
Step 2
In the Layers palette set the blend mode of the new top layer to Overlay. This will let you see the sharpening results in place on the image in the next step.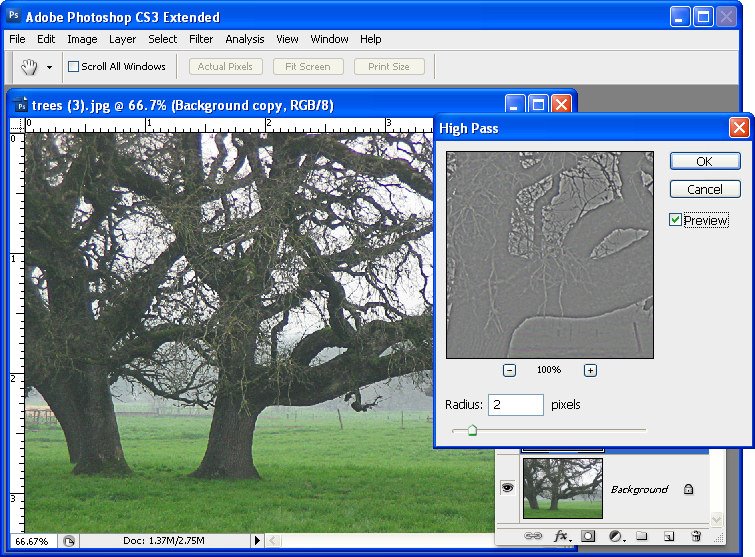
Step 3
With the topmost layer still selected, choose Filter > Other > High Pass. This filter has one slider to adjust the Radius value. Drag the slider until you see a pretty much gray image in the preview window with the only detail being around the edges of objects in the image. If you can see color in the preview image then the radius is set too high. Typically a Radius value of well under 10 pixels should be sufficient – we used 2. Click Ok.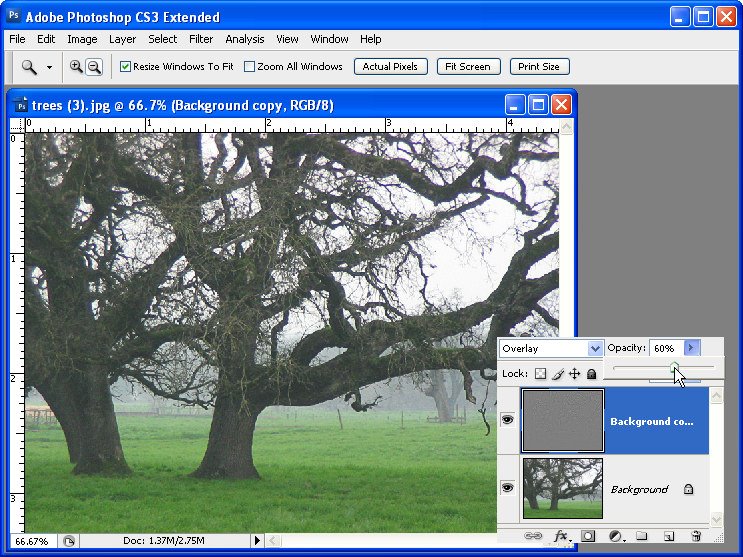
Step 4
The image is now sharpened – check the original against the sharpened version by clicking the Layer Visibility Icon for the top layer on and off to compare the result.
To finish the effect, adjust the Opacity of the top layer to 0 and then move it back up stopping when you have a good sharpening result. The ideal Opacity will depend on your personal preference.
If desired you can use blend modes other than Overlay, for example Soft Light and Hard Light can be equally as effective depending on the result that you are looking for.
Tip
When you are sharpening an image, adjust the image to the way you want it to look if you’re planning to display the image on the web. If you’re printing it you can (and should), sharpen more aggressively.
Tip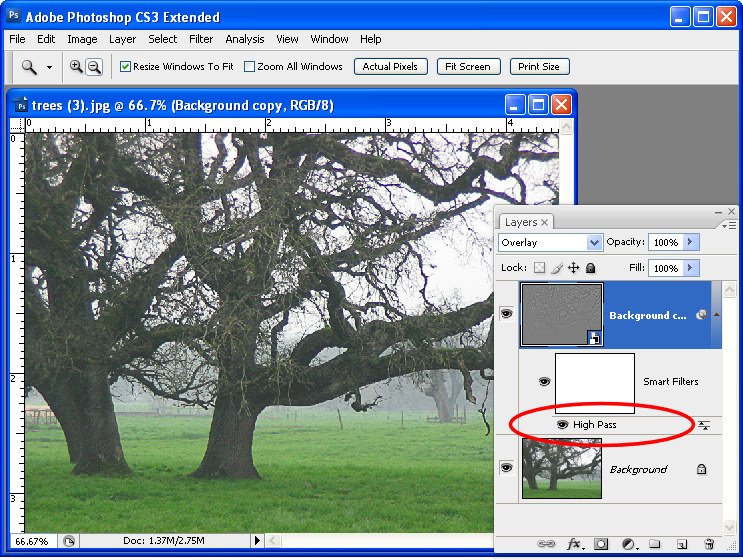
If you are using Photoshop CS3 or CS4, before you apply the High Pass filter to the top layer of the image, convert it to a Smart Object by selecting the layer and choose Filter > Convert for Smart Filters. Then apply the High Pass filter to the new smart object in the same way as I have outlined above. When you apply a filter to a Smart Object you can return later on to edit it – simply double click the filter name in the layer palette and the filter dialog opens allowing you to change the Radius value.
If you’re new to sharpening, check out these recent posts:
Sharpening 101 – Understanding the basics of Sharpening
Post a Comment
Please feel free to add your comment here. Thank you!