

One of the features on the wish list of most advanced Photoshop Elements users is Layer Masks. It is one of the key features that separates Photoshop Elements from Photoshop – but it doesn’t have to be that way. It is possible to create faux layer masks in Photoshop Elements if you know how – and today, I am going to show you how.
One of benefits of this approach to creating faux layer masks in Elements is that it uses features built into Elements and it doesn’t rely on a third party plug-in so it works with most versions of Photoshop Elements.
A bit of background
While Photoshop Elements doesn’t support layer masks for regular layers, it does provide them for all its adjustment layers. This faux layer mask solution takes advantage of this by forcing an adjustment layer’s layer mask to behave like a layer mask on a regular layer just as it does in Photoshop. The trick is to apply an adjustment layer to the image which does nothing to the image at all – so you get the benefit of the layer mask but without forcing any unwanted change on the image. Once you’ve done this you have a layer mask you can borrow.
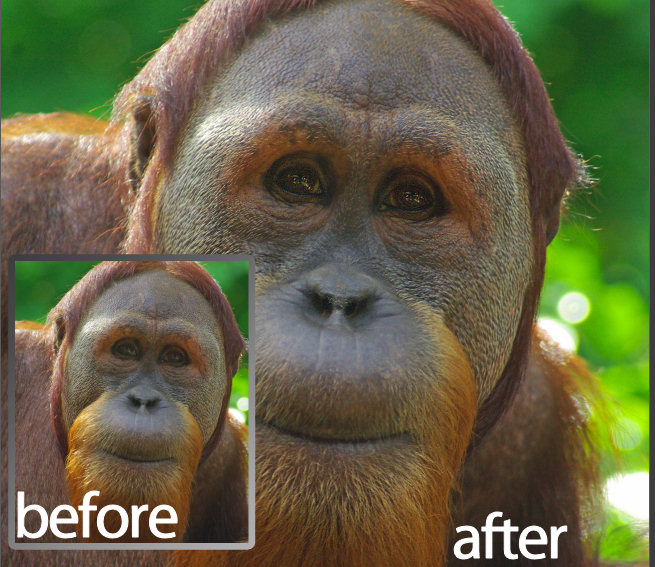
In this step by step example, I’ll show you how to use the mask to paint some additional sharpening onto an image. What I’ll do is oversharpen an image – well beyond the level of sharpening which the image should have and then I’ll remove the sharpening with the mask and paint is back over selected parts of the image – again using the mask.
While this technique is shown using Photoshop Elements you can use the same technique in Photoshop – only in Photoshop you won’t need to use the fake mask as you can add a layer mask to the oversharpened layer itself.
Step 1
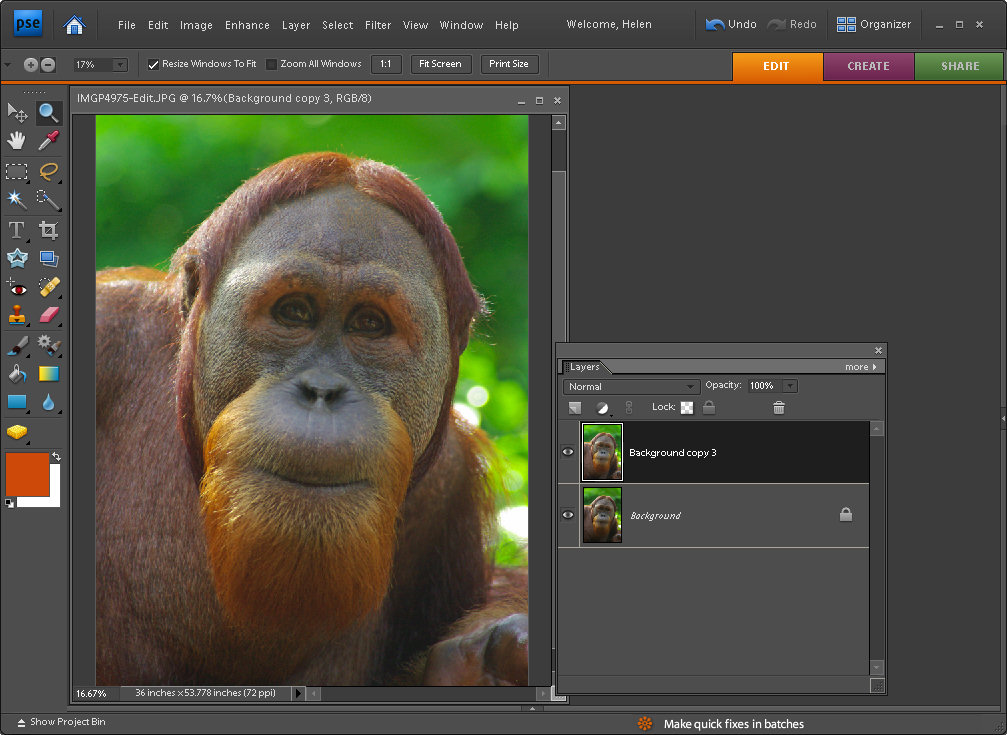
Finish editing your photo. If you have multiple layers, create a flattened version of image by selecting the topmost layer and press Ctrl + Alt + Shift + E (Command + Option + Shift + E on the Mac). This creates a new composite layer without flattening the layers.
Duplicate this layer by right-clicking it and choose Duplicate Layer. You should now have two identical image layers at the top of the layer stack.
Step 2
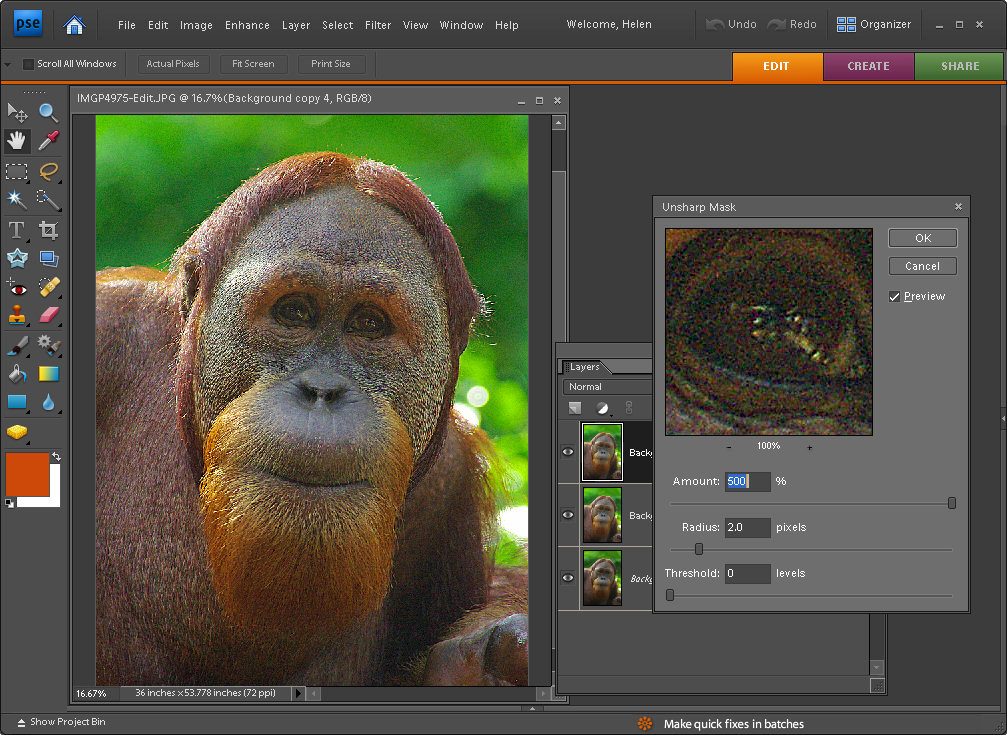
Select the topmost layer and choose Enhance > Unsharp Mask and apply excessive sharpening to the image. What you want is an extremely oversharpened image. You don’t want halos, just very heavy sharpening. In this example, I’ve used a radius of 2, a threshold of 0 and the full amount of 500. Click Ok.
Step 3
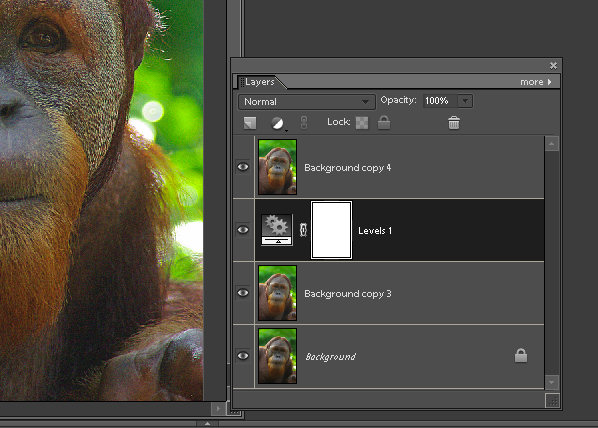
Add an adjustment layer by choosing Layer > New Adjustment Layer and choose either Levels or Brightness/Contrast or Hue/Saturation – you need an adjustment layer that doesn’t do anything to the image if you don’t alter its settings. Click Ok and don’t make any changes to the adjustment layer settings. Drag the adjustment layer so it sits between the two image layers.
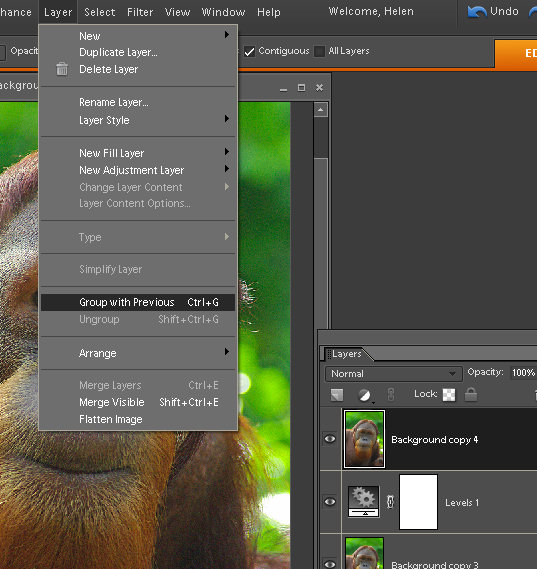
Step 4
To create the fake layer mask, select the topmost oversharpened layer and choose Layer > Group with Previous. This attaches the oversharpened layer to the adjustment layer below limiting the effect of this layer to the area that is white in the adjustment layer mask – right now that is all the top layer.
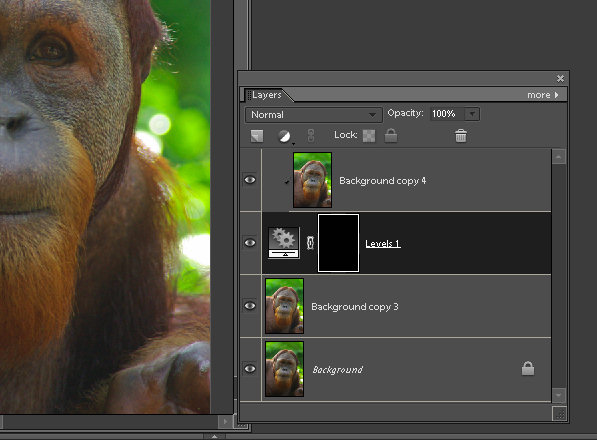
Step 5
Click on the adjustment layer and click on the layer mask thumbnail which is the white box on the right side of the layer in the Layers palette. You should see a double border around it indicating that it’s selected. Fill this mask using the paint bucket tool with black. The entire oversharpening effect is immediately removed from the image.
Step 6
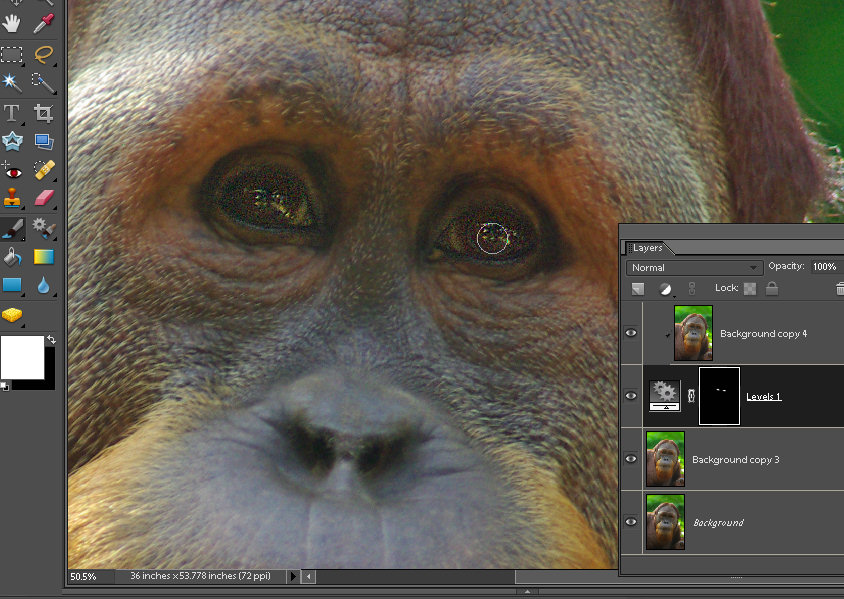
Select the brush tool and select a soft round brush. Adjust the opacity to around 25 percent and select white as the foreground color. With the layer mask thumbnail still selected, paint over the areas of the image that you want to apply additional sharpening to. In my case, I wanted to oversharpen the eyes on the orangutan.
Step 7
As you paint, the sharpening effect will built up – if you paint somewhere by mistake, set black as the foreground color and paint out the mistake. This is how a mask works – you paint with black to remove the effect on this layer (in our case you paint in black to remove the sharpening effect form the layer above because the two layers are grouped together) and you paint with white to reveal the effect.
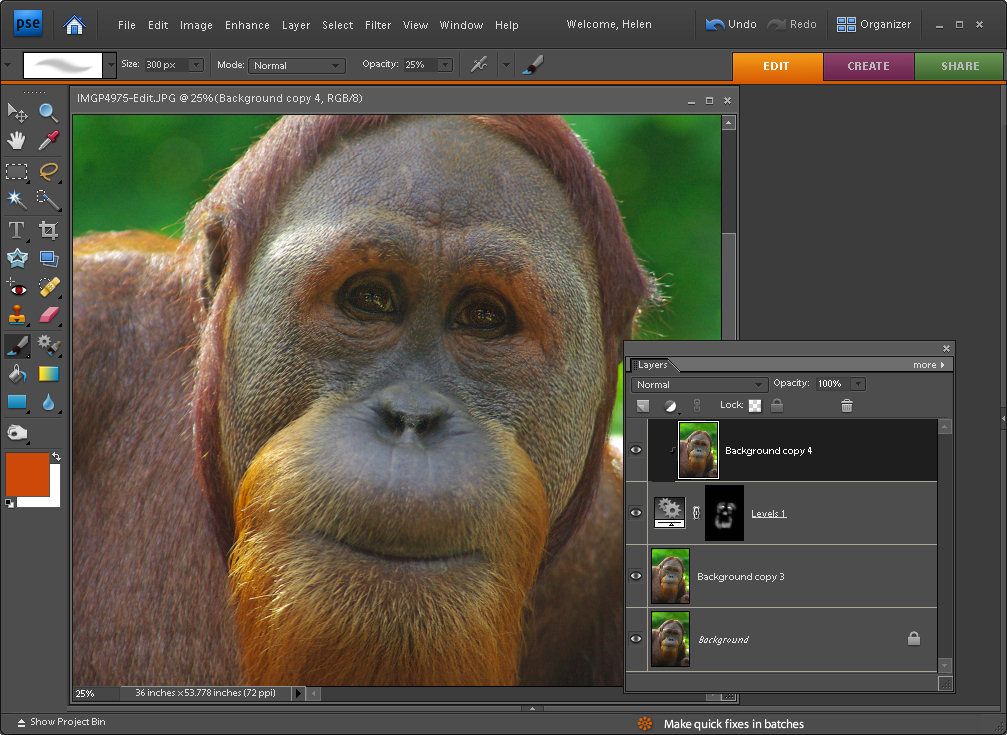
When you are done, you can flatten the image or save it as a layered PSD file.
In future whenever you need to use a layer mask in Photoshop Elements, simply apply an adjustment layer to the image, drag it under the layer it should control and group the layers together.
Learn more: If you’re interested in learning more about sharpening, check out my very popular post on Understanding the basics about Sharpening.
Post a Comment
Please feel free to add your comment here. Thank you!