Thursday, August 9th, 2007

Shapes are different in Word 2007

I’ve been working with shapes a lot in Office 2007 cause I’ve just written a huge article about them. It didn’t start out to be huge but that’s the way it ended up. You see there’s just so much to learn about them and it’s not all intuitive. The problem as I see it is that part of Office 2007 was just cobbled together (love that word cobbled!). Things aren’t consistent, far from it. One of the most interesting inconsistencies is how Shapes are implemented in Word and in Excel and PowerPoint.

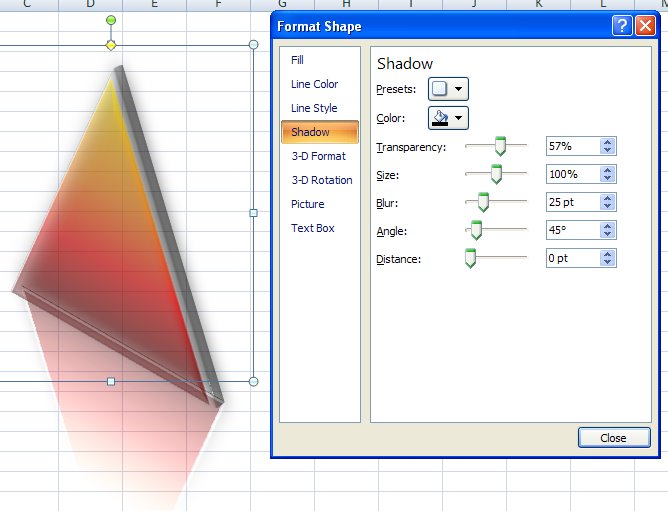
In Excel and PowerPoint shapes work the same pretty much and, if you add a shape and right click it you can choose Format Shape and you get this snazzy new dialog to work with. Do the same in Word and life is very different indeed – there’s no new dialog just the old stuff.

What this means in practical terms is that you can’t fill a Word shape with an image from the clipboard or a clip art image – you can in Excel and PowerPoint and you can’t create your own custom multicolor gradient for a Word shape. The issue is that there’s a new graphics engine in Office 2007 called Escher graphics (presumably named after one of my favourite artists, MC Escher) which is implemented fully in Excel and PowerPoint but only partially in Word. So, don’t expect Shapes in Word to behave the same as they do in PowerPoint or Excel, cause they won’t – it’s that simple.

Helen Bradley

Wednesday, August 8th, 2007

Office 2007 – DIY Keyboard shortcuts

I use Control + S to save an Office document on the fly and it’s something that is so automatic that I just do it, hundreds of times a day.

There are other things I’d like to do as quicky but which have no shortcut key assigned to them. In Office 2007 this is an easy situation to rectify.

To create your own keyboard shortcut, click the Office Button at the top left of the window and choose Word Options, Customize. You’ll see a Customize button next to a Keyboard Shortcuts option, click it and you can create a shortcut for any Word command of your choice as well as for symbols, fonts and the like.

What is particularly useful is that there’s a list of items which aren’t included on the Ribbon that you can still access if you ycreate your own custom shortcut to do so.

Helen Bradley

Tuesday, August 7th, 2007

Smart Art in Office 2007

Today I’m indulging in shameless self promotion. This is an article I wrote recently which discusses a how to work with SmartArt in Office 2007.

Exploring Office 2007: Using SmartArt Graphics

Anything that helps your audience connect with your message will help you in your communications with them. You probably already know how useful charts are for presenting numbers in an easy to read format and how helpful tables are for organizing data.

Microsoft Office 2007 offers a handy new feature called SmartArt that makes it easy to create business diagrams that display textual information in an easy to read and understand format. The SmartArt graphics tool is great for creating everything from simple diagrams to cutting-edge business graphics… more

Helen Bradley

Tuesday, August 7th, 2007

Where is it? Office 2007 stole your fave command

I get a lot of emails from folk who have spent time agonizing about things missing from the new Office 2007. True, a few of your old favourite commands have probably bitten the dust but some are still there, just not visible.

To see what you can’t see (if that isn’t a totally confusing statement) click the Office button, choose Word Options (or Excel Options if you’re using Excel etc) and then click Customize. This is where you can manage your toolbar. From the Choose Commands From list choose Commands not in the Ribbon. The list below shows all the commands that still function but which you just can’t see. Click any you can’t live without and click Add to add them to the Quick Access toolbar and they’ll be there for you to use.

This is also the first place to look when you are wondering if a certain command is on the ribbon. If you can’t see it, check here, this is a definative list of what still works but isn’t where it is easily accessed.

Helen Bradley

Thursday, August 2nd, 2007

Print in Reverse – Word

Are you one of those people who print long documents in Word and then spend a few mintues reversing the page order because they come out printed back to front? Or do you print multiple copies of a document and then have to collate them by hand?

If you are, it’s probably cause you haven’t read this blog post! You see, life doesn’t have to be this difficult. Word will collate for you and it will print in the order you want and if it’s not doing it right you can change it.

First things first, if you need to reverse your print order, choose Tools, Options, Print and change the setting in the Reverse Print Order checkbox – if it is checked, uncheck it and if it is clear then check it. This setting remains for all documents so now you don’t have to shuffle paper any more.

The collating options are in the printing dialog. Choose File, Print and you can click to set one of two collating options for multiple prints.

In Word 2007, find the print options by clicking the Office button, choose Word Options, Advanced and scroll down to locate the Print options.

Helen Bradley

Wednesday, August 1st, 2007

How old are you?

I know.. it’s none of my business, but sometimes you wonder, don’t you, just how old you are in days? If this question consumes your waking hours, put the calculator away and crank up Excel.

Excel’s Datedif function, while not documented, calculates the difference between two dates in a number of formats; days, months or years. The syntax of the function is: =datedif(start date,end date,units to return). The units must be provided by a quoted string in the format: “y” – full years, “m” – full months, “d” – full days, “md” – full days in excess of the last full month, “ym” – full months in excess of the last full year and “yd” – full days in excess of the last full year.

So, for example, this formula determines the number of days between the dates in cells B6 and C6: =DATEDIF(B6,C6,”d”). Type your birthday and today’s day in the cells and you’ll know immediately how old you are in days..

Helen Bradley

Page 2 of 212