


While Photoshop’s HDR merge tools are not as sophisticated as those of, for example, Photomatrix Pro, if you have Photoshop then you can use the merge to HDR option to create an HDR image from multiple exposures that you have taken of a scene.
You’ll need 3 or more images all at different exposures. I used 5 for the example shown here and all were shot using a tripod with IS turned off!.
Here’s how to assemble the images in Photoshop:
Step 1
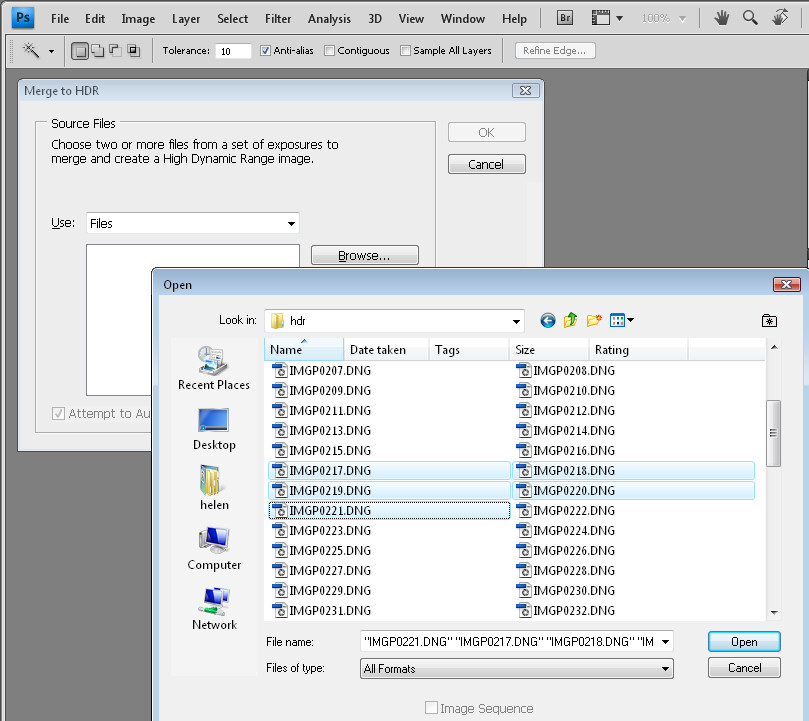
Choose File > Automate > Merge to HDR and click Browse and select the files that you want to merge.
Alternatively, if you have the files open already in Photoshop, select this same option and click the Add Open Files button to add the open files to the list.
Enable the Attempt To Automatically Align Source Images checkbox and Photoshop will align the images if they are not perfectly aligned.
To progress, click Ok.
Step 2
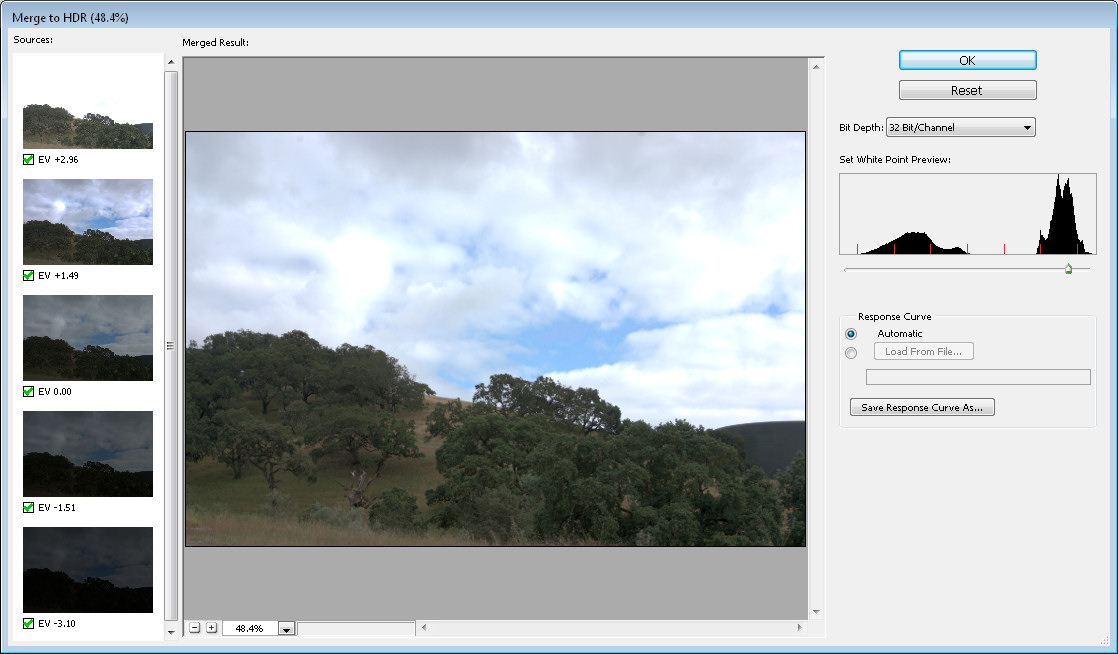
When the images are processed you will see your images combined to a single 32-bit image.
You’ll see a histogram in the top right corner which allows you to preview areas of the image. By dragging on the histogram you can see the lights and darks in the image. Drag the histogram to the far right and you’ll see all the shadow detail; drag it to the far left and you’ll see all the highlight detail.
Position the slider at an average position in the image and click Ok.
Step 3
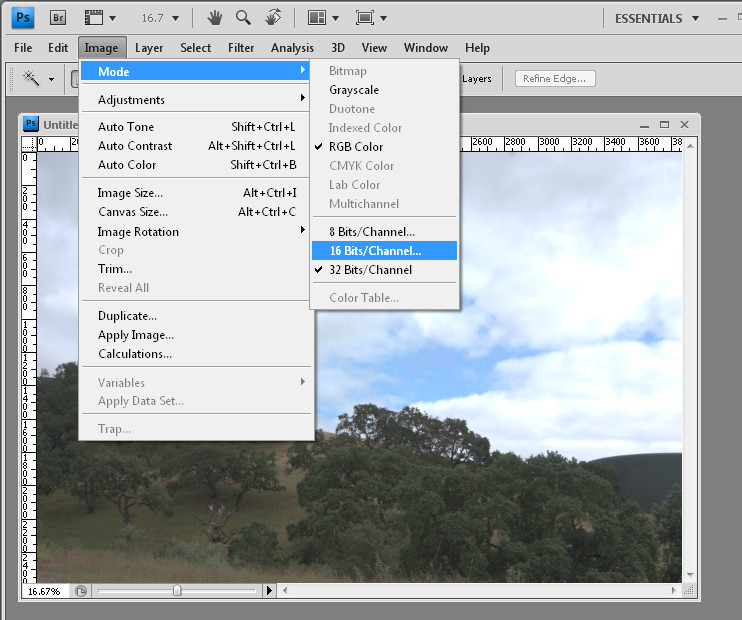
This opens the image as an HDR image at 32-bits per channel inside Photoshop. You can’t actually do anything much with this image as it is so you’ll need to convert it to an 8 or 16-bit image.
To do this, choose Image > Mode > 16 Bits/Channel.
Step 4
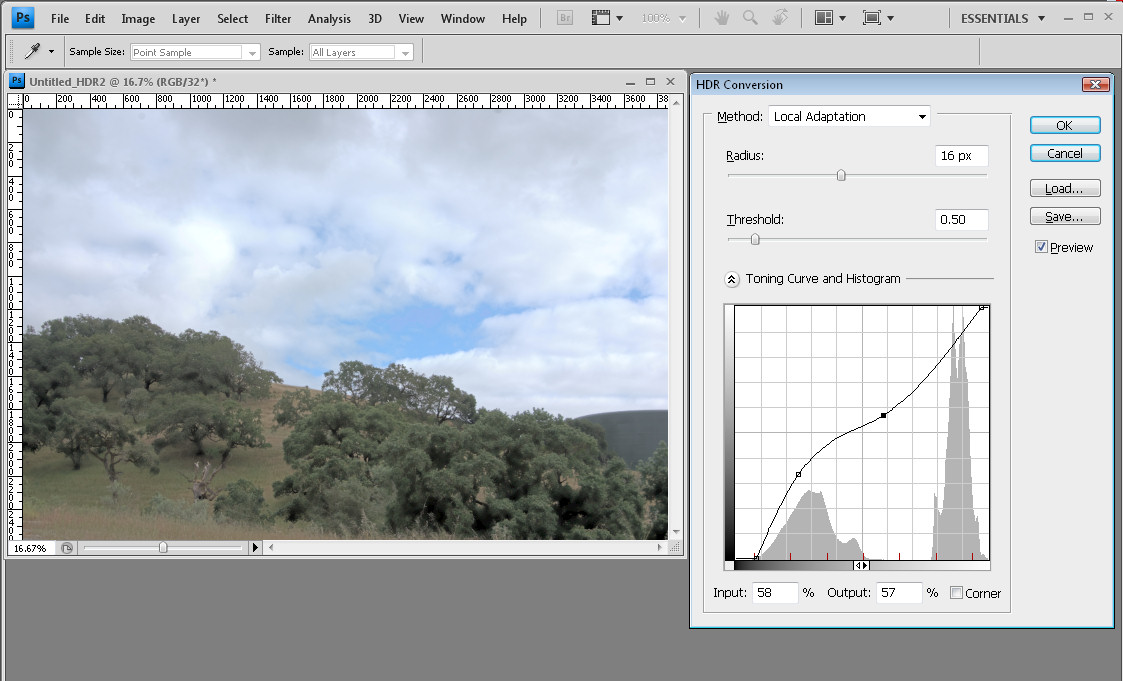
When you do this you will see an HDR Conversion dialog.
From the Method dropdown list, select Local Adaptation and make sure the Toning Curve And Histogram chart is shown.
Here you will fine tune the image. Drag the leftmost edge of the curve line in to the right so it touches the beginning of the darks in the image – this ensures you have some true blacks in the image.
Do this also for the highlights so that you get some true highlight areas.
You can then adjust the curve to your own preferences.
For this image, I wanted more lightness in the shadow areas and not so much in the lighter areas so I dragged the curve to give this result. This results in pleasing detail in the hill area as well as in the clouds.
Your artistic requirements for your own images will be different so adjust the curve until you get the detail in the image that you want to see.
When you’re done, click Ok.
Step 5
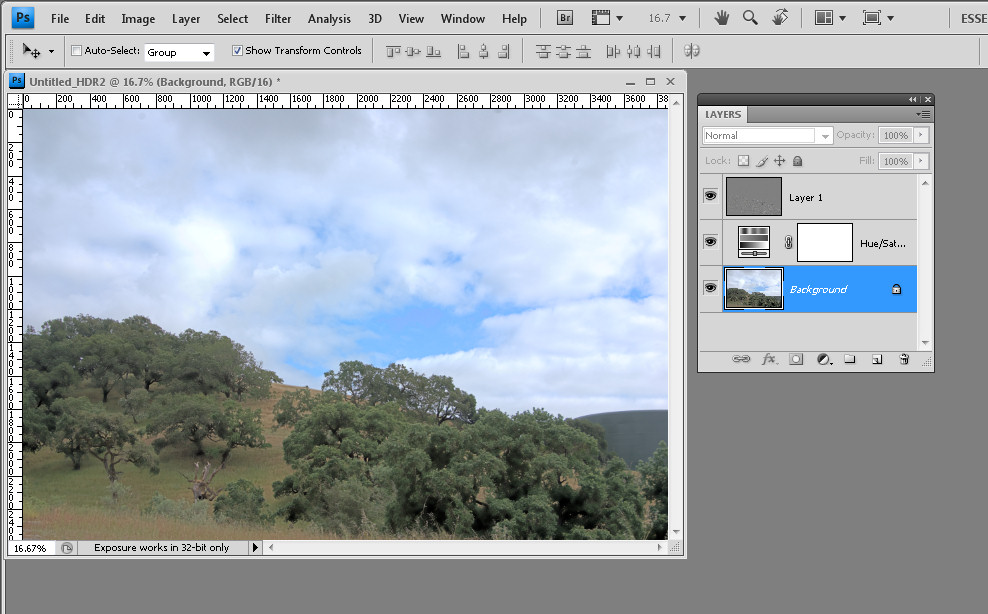
You now have a 16-bit image and you can go ahead and make the additional adjustments to it.
For example, I added a Hue/Saturation Adjustment Layer to boost the saturation in the image and then flattened the image to a single layer and applied a High-Pass Filter to it at a low radius to sharpen the image. The high-pass filter layer is set to Soft Light Blend Mode to finish the result.
If you want to save the image as a JPEG you’ll need to render it as 8Bits/Channel now to save it.
Post a Comment
Please feel free to add your comment here. Thank you!