

Following on from the post on creating silhouettes in Photoshop, here is how to create fun sunburst images to put behind them.
 Step 1
Start by adding a new layer to your image by choosing Layer > New > Layer.
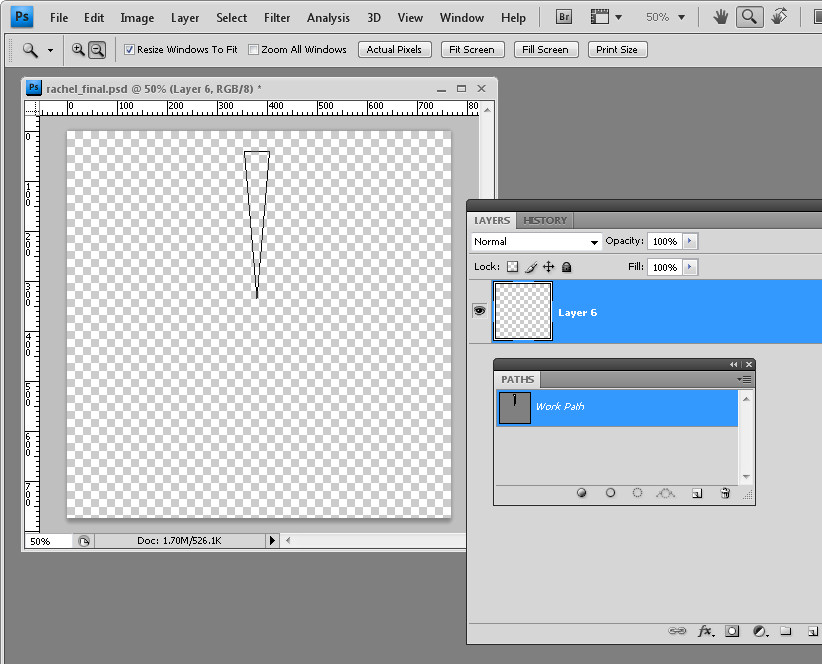
Click the Pen tool, ensure the Paths option is selected on the options bar and draw a single triangle.
Do this by clicking where the point will be at around the middle of the image, then click above this and slightly to the left to create the first of the sides, hold the Shift key and then click to the right to create the base and then click again over the original point to finish. You now have a triangle path.
Step 2
View the Paths palette; click the Load Path as a Selection button at the foot of the palette.
Set the foreground colour to your choice of fill colour and press Alt + Backspace to fill the shape with this colour.
Press Ctrl + D to turn the selection off.
 Step 3
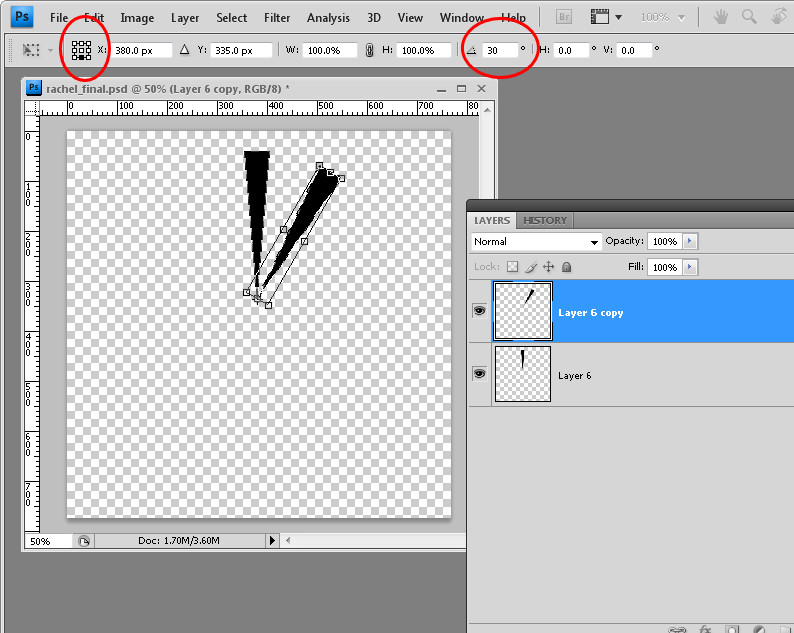
Click on the layer itself, choose Layer > New > Layer Via Copy then choose Edit > Transform > Rotate to display the rotation tool options.
In the Reference Point Location block select the bottom middle of the nine boxes. Set the angle to 15 degrees or some value that divides evenly into 360 and click the Commit Transform button.
 Step 4
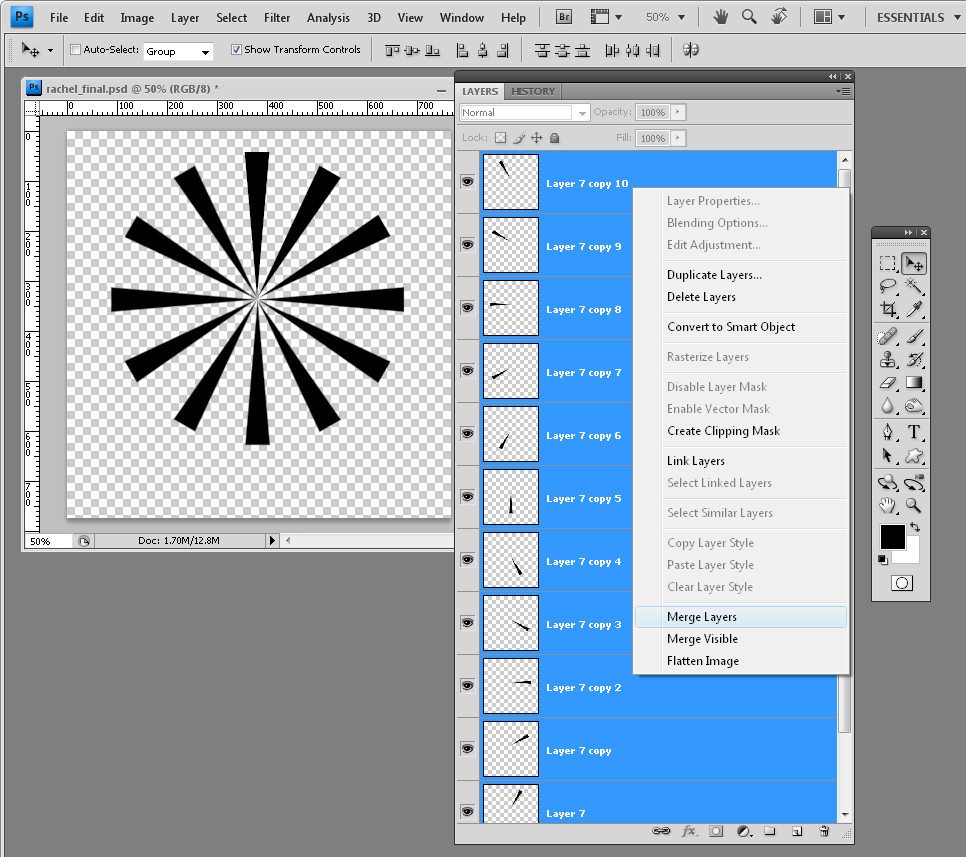
Select Layer > New > Layer Via Copy and then Edit > Transform > Again.
Repeating these two commands or pressing the shortcut keystrokes Ctrl + J and Ctrl + Shift + T lets you repeat the copy and transform task and, in a few keystrokes, you will have a piece of custom art. When you’re done, merge all the layers except the background layer.
Here is how I created my silhouette background:
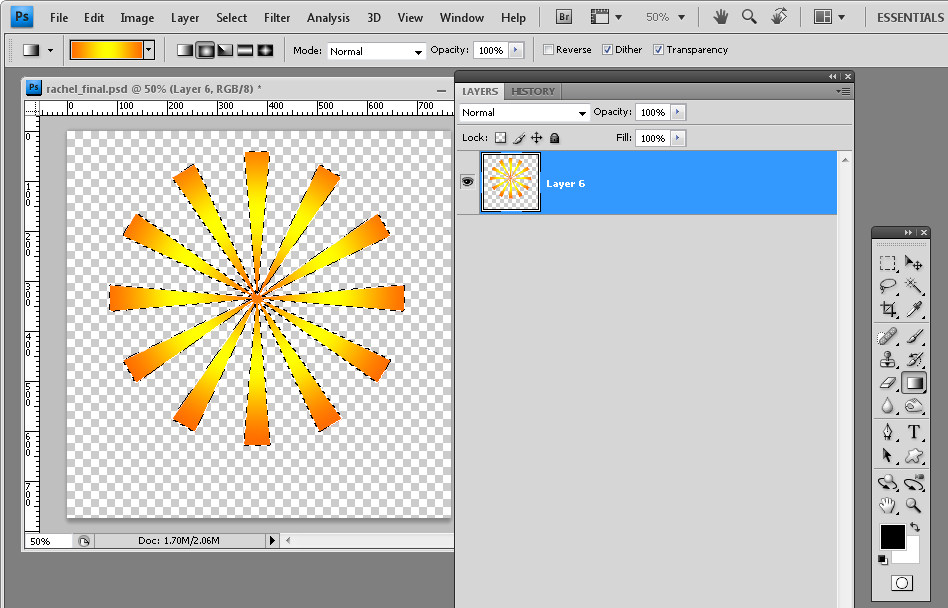 Control + Click on the flattened sunburst layer and select the Gradient tool. Select a yellow/orange radial gradient and fill the shape with it by dragging from the middle of the shape outwards.
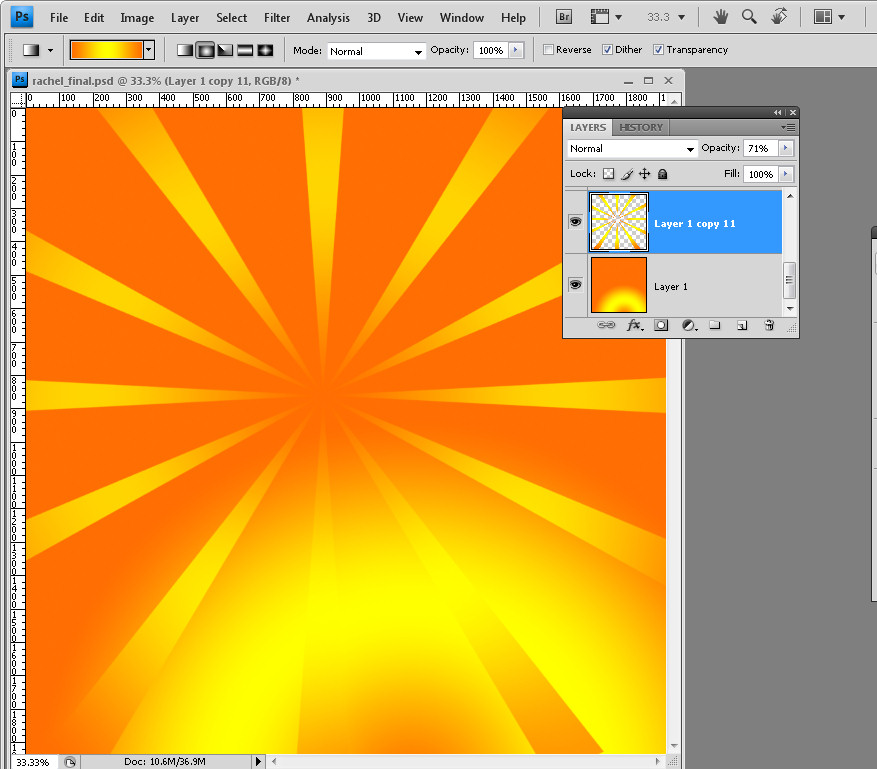 Add a second new layer and drag it to the bottom of the layer stack. Fill it with the same gradient but this time drag from outside the image to the middle to reverse the gradient.
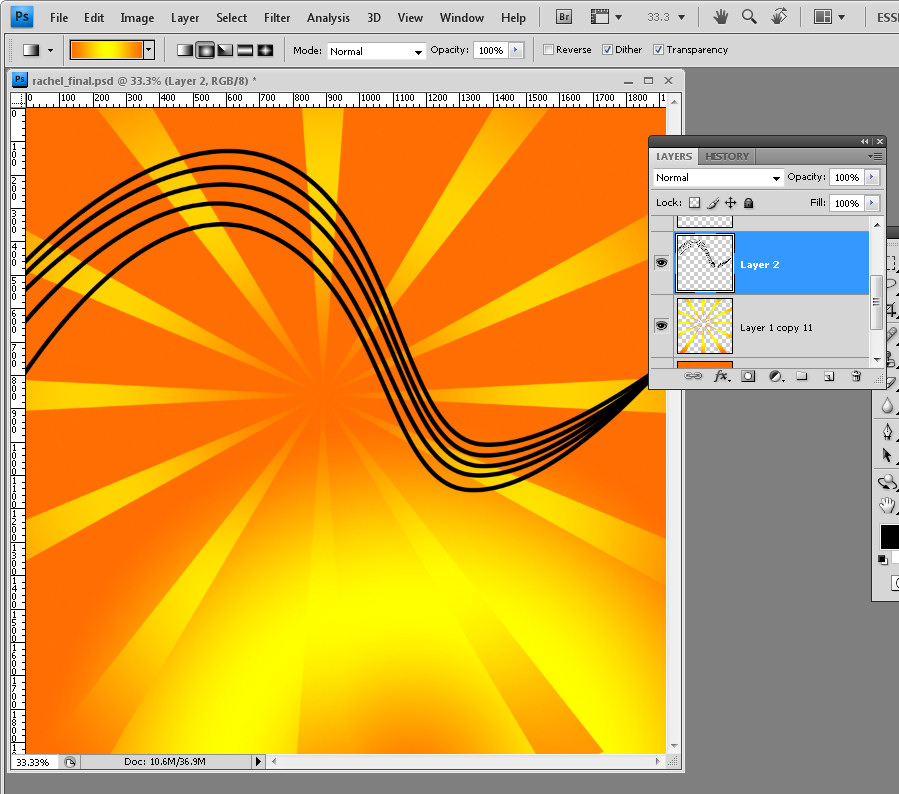 The music staff is created using a pen line – I drew a single wavy line using the pen tool with the Paths option selected.
Display the Paths palette and click on the Work Path layer.
Click the Brush tool, set it to a small hard brush, set the foreground colour to black and click the Stroke path with brush icon at the foot of the palette to add a brush stroke to the pen line.
Move the line using the Path Selection Tool and repeat the process to add a stroke to this path. Repeat until you have five lines in total.
 I finished by adding a few musical notes using shapes from my Photoshop shapes collection.
You can download free music shapes from http://myphotoshopbrushes.com/custom_shapes/id/2033 if desired.
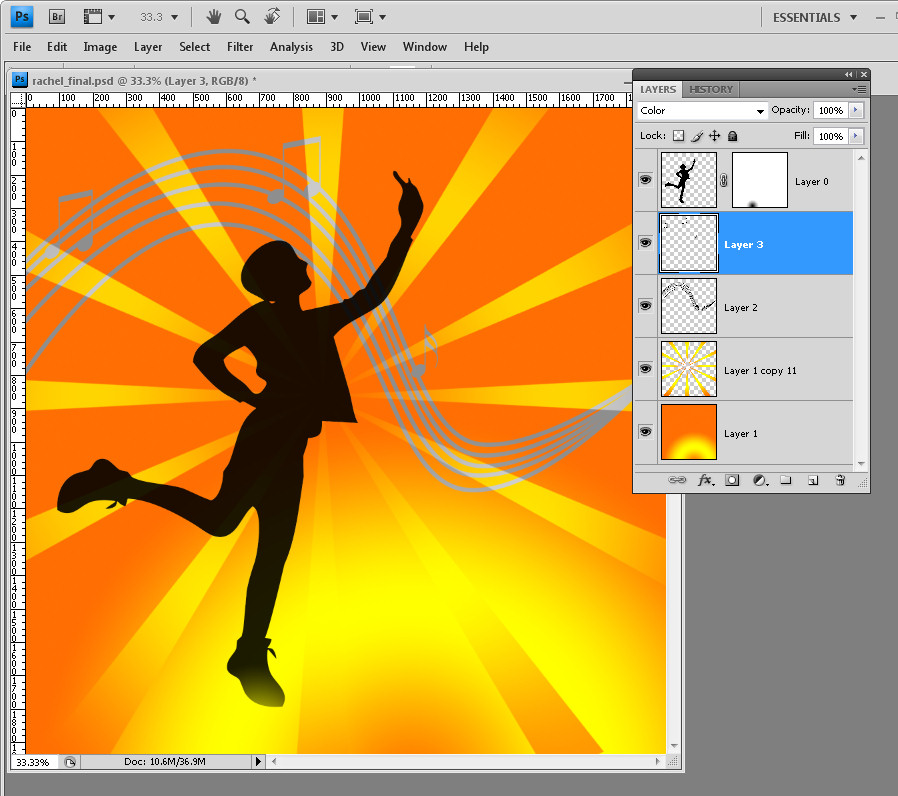 This time use the filled pixels option to fill the shapes as you draw them. I blended both drawing layers using the Color blend mode and then added the silhouette.
Hi Helen,
Thanks for the great tutorials. I have the book for Dummies, but sometimes its overwhelming. I was wondering if this same idea can be made in reverse? With the points out (like a long pointed star)
Thanks,
Jenny