

If you’re new to Lightroom, there are a lot of interface options that you may not realize hide must know and handy program features. In this post, I’ll show you some of the buttons, icons, samplers and switches that a knowledge of Photoshop (at least versions prior to CS4) won’t help you identify or locate.
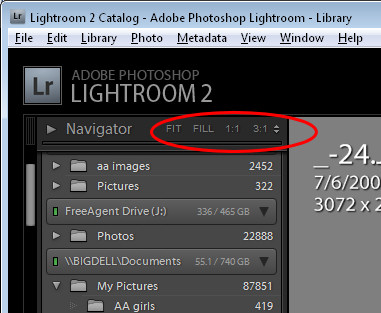
1 Navigator
In the top left corner of the Library and Develop modules you’ll see the Navigator. Beside it are the Fit, Fill, 1:1 and 3:1 options. Click these to resize the image in the current window to various sizes including fitting in the space, filling it and 1:1 and 3:1 resizing options. Other sizing ratios are available from the dropdown list.
The 1:1 ratio is particularly useful when you’re sharpening an image. You may already know that, when you hold the Alt key as you drag on the sharpening sliders the small preview image turns to a grayscale mask showing you the impact of the slider on the image.
If you are in 1:1 preview, the entire image acts as the preview, allowing you to focus in on a much larger area of the image and see the sharpening effect. 3:1 and other larger sizes also work but 1:1 is the minimum size
2 Switches
Switches in Lightroom appear in areas such as the Develop module where they can be used to enable or disable a setting such as the Tone Curve. Switch the switch to the up position to turn it on and to the down position to turn it off.
When using the Adjustments Brush the switch works from left to right to select to work with one fix at a time (Effect Buttons) or to work with multiple adjustments at once (Effect Sliders).
3 Arrows
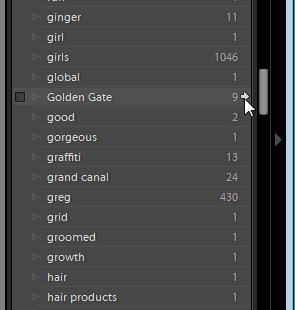
In the Library > Keyword list panel, you can click the arrow to the right of a keyword to view images that have that keyword associated with them.
These arrows only appear when you are hovering over a keyword in the list.
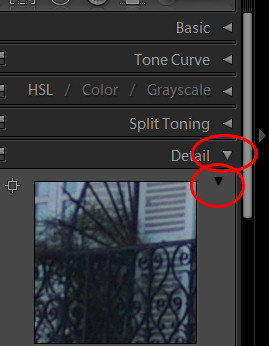
4 Expand/Collapse Triangles
Throughout the Develop panel, for example, are small triangles beside the various options that you can click on to display or hide that option. For example, when Detail is not visible click its triangle and the detail panel will display.
There is another triangle directly below the Detail triangle which appears only when it is expanded. Click this to display and hide the sharpening preview dialog.
Watch out for these triangles – sometimes they aren’t light gray and are, instead, almost black and difficult to see.
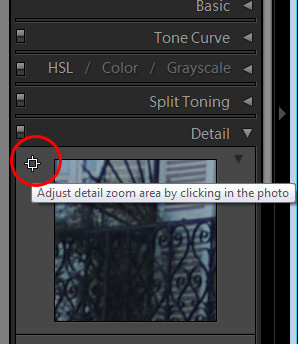
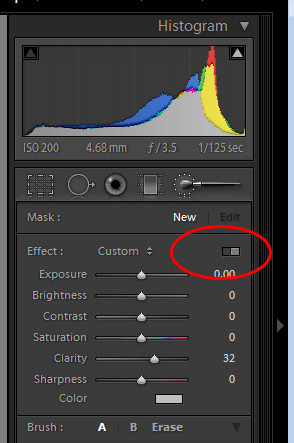
5 Area Picker
Also in the Detail area of the Develop module is a small square icon with lines radiating from it that you can click on and then click on an area of the image to determine what shows in the preview panel for the sharpening process. This icon has a visible tooltip which helps identify what it does – most do not.
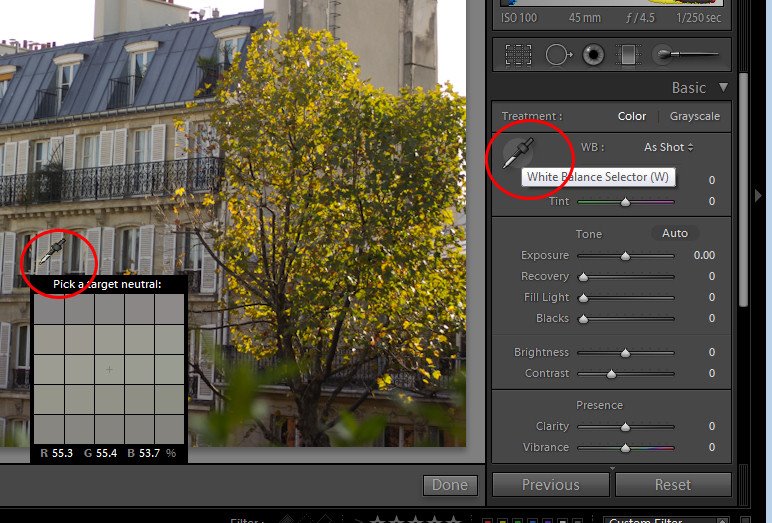
6 Eyedropper
In the Develop panel’s Basic module is a white balance selector icon. Click it and click on an area of the image which should be white.
This adjusts the white balance of the image based on that selection. It also displays a small 25 x 25 pixel grid showing the pixels in the general area so that you can be more accurate in your selection.
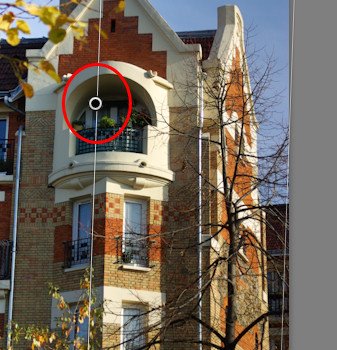
7 Adjustment Markers
When you use the Adjustment Brush or the Graduated Filter, you will see a marker on the image which, when you click on it turns into a black circle surrounded by a lighter circle.
This marks the adjustment or the filter and you need to click this to select it before you can make alterations to the adjustment or to the filter.
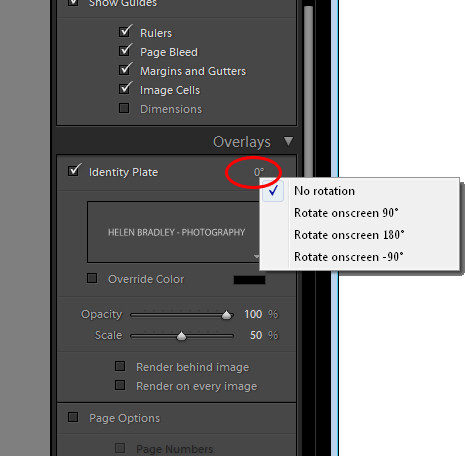
8 Invisible clickable rotation options
In the Print module, watch out for items that don’t even look like they are selectable.
For example, in the Overlays > Identity Plate area when you have the identity plate enabled there is a small indicator to the right of it showing the current rotation in degrees.
If you click it you will see a popup menu offering other rotation options.
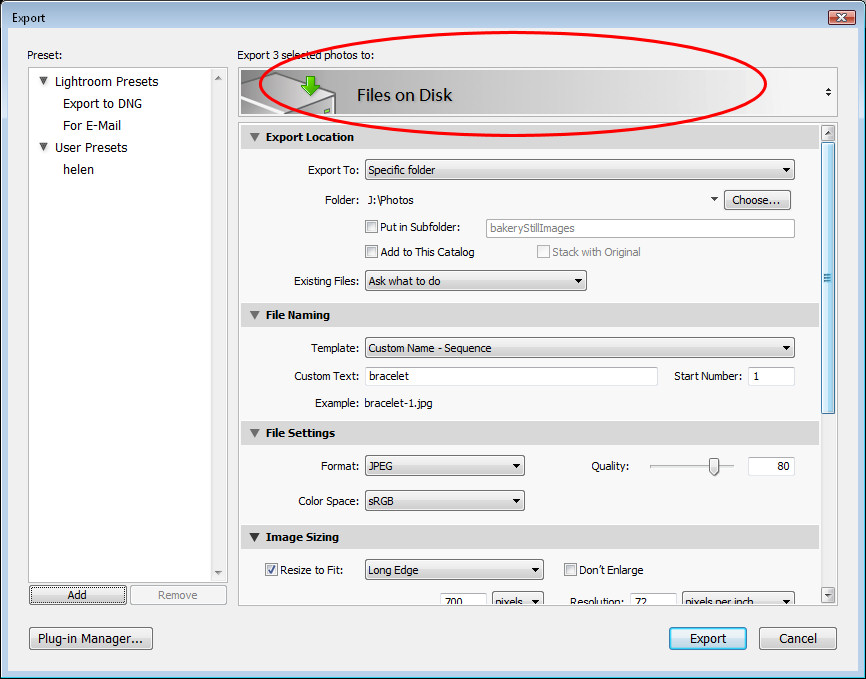
9 Way big buttons
Watch out for panels at the top of dialogs which can contain selectable options. For example, a dialog that has a large area like that shown in this image is often selectable offering different options but because it doesn’t look like a typical selectable option, it’s easy to overlook.
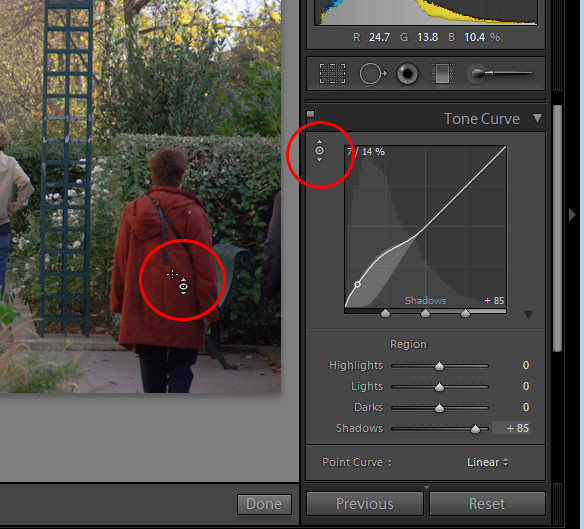
10 Direct Adjustment tool
In some areas such as the Tone Curve and Hue/Saturation Lightness in the Develop module you’ll see a small adjustment indicator in the top left of the panel area.
Click it and then drag on the image to change the image at that point.
While in Photoshop CS3 you would drag left to right to alter the sliders, in Lightroom you’ll typically drag up and down with this tool.
While these aren’t all the unusual buttons that you’ll find in Lightroom, it should help you understand that a lot of the features in Lightroom are hidden behind icons and buttons for which even a program like Photoshop is no adequate preparation for locating, understanding and using.
Post a Comment
Please feel free to add your comment here. Thank you!