

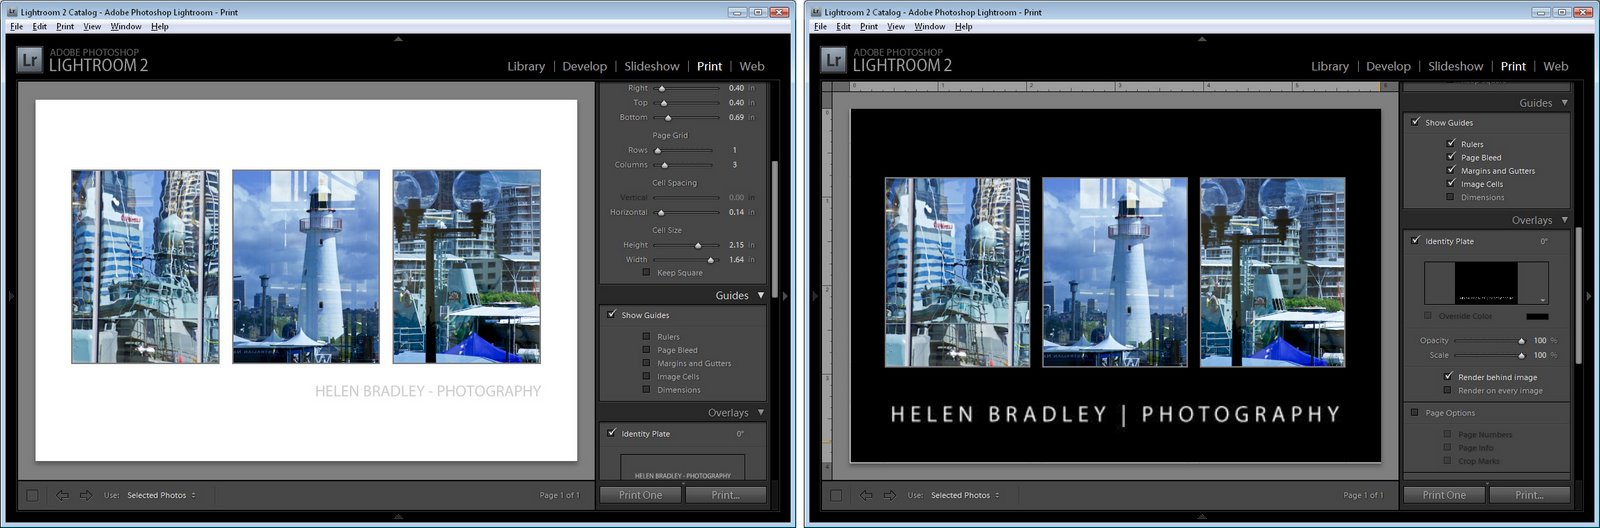
One issue with Lightroom is that all the images that you print from the print module print with white backgrounds.
While Lightroom does not offer color backgrounds for images, there is a workaround that you can use to print with any color background you like.
Here’s how to do this:
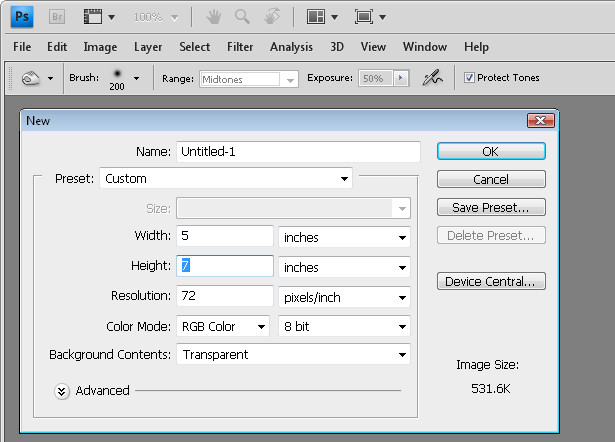
Start in Photoshop or another bitmap editor that lets you create and save JPG images. Create a new image the size of the page that you want to print.
For convenience, I’d create images for all the paper sizes you plan to use all at once. This means you may want one for 5 x 7″ paper, one for 4 x 6″ and one for Letter paper for example. Whatever size you print at, create a new image that size and at around 96 pixels per inch if you’re using a solid color background.
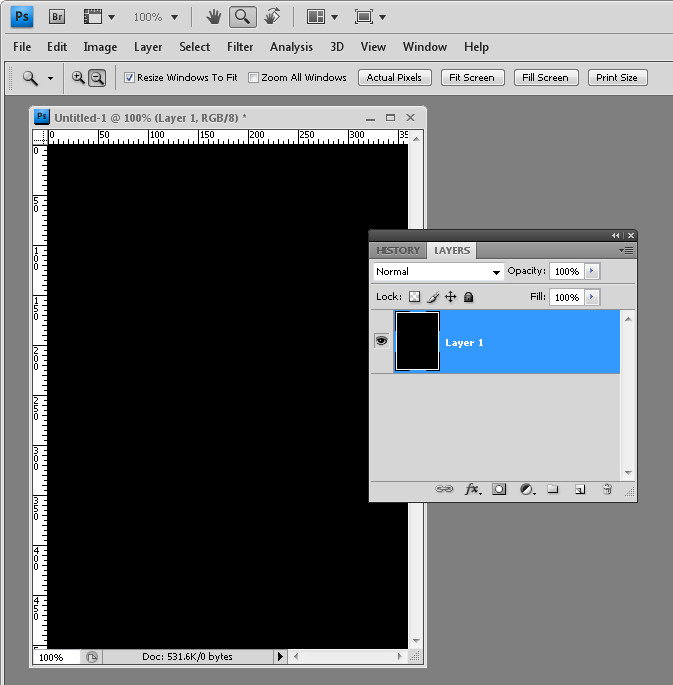
Fill the document that you have created with the color background that you want to use. For example, if you want a black background, fill the documents with black and for another color background, fill the document with that color.

If you typically use an Identity Plate to print your name or other details on the image in Lightroom then you’ll need to know that what you’re doing right now is creating something that will replace the Identity Plate in Lightroom so you can’t use both a background and a text identity plate.
However, if you know this ahead of time you can add the same details you add to your identity plate to this image as text.
If you plan to do this, you’ll will need separate documents for each paper size in each of the two orientations: Landscape and Portrait. If you’re just using plain backgrounds you won’t need to create one in each orientation as you can rotate the images later on – you just won’t want to rotate something that has text in it. You will probably want the images to be a better size for printing so 1500 x 1000 pixels will print on 6 x 4 paper at 250 dpi so the text will look crisp and neat.
Once you’ve created all your documents, save each with a name that indicates its size and color and, if relevant, its orientation. I suggest you save it somewhere that will make it easy to find and so they are safe from being removed accidentally.

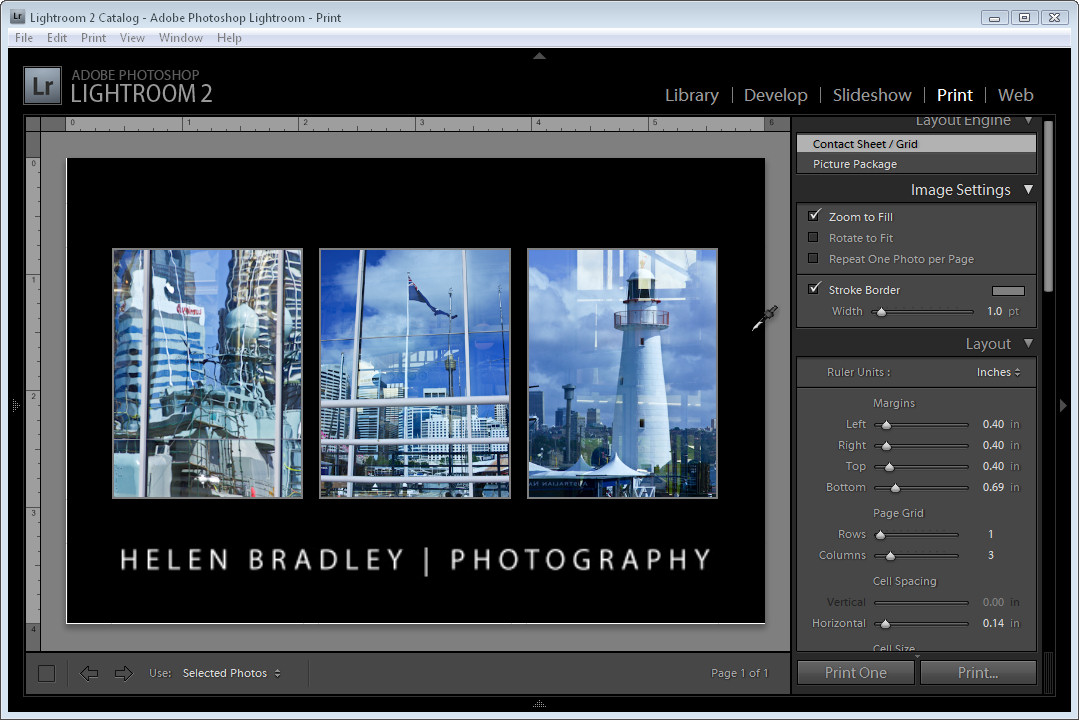
Return to Lightroom and switch to the Print module. Set up your image or images to print. You can use a Contact Sheet/Grid layout or a Picture Package.
To add your background locate the Overlays panel on the right and click the Identity Plate checkbox. Click on the Identity Plate to display the menu and select Edit. When the Identity Plate Editor dialog opens, click the Use a graphical identity plate option and click Locate File.
Select the image that you created for this paper size (and orientation, if applicable), and click Choose. Click Ok to add the image as the Identity Plate.
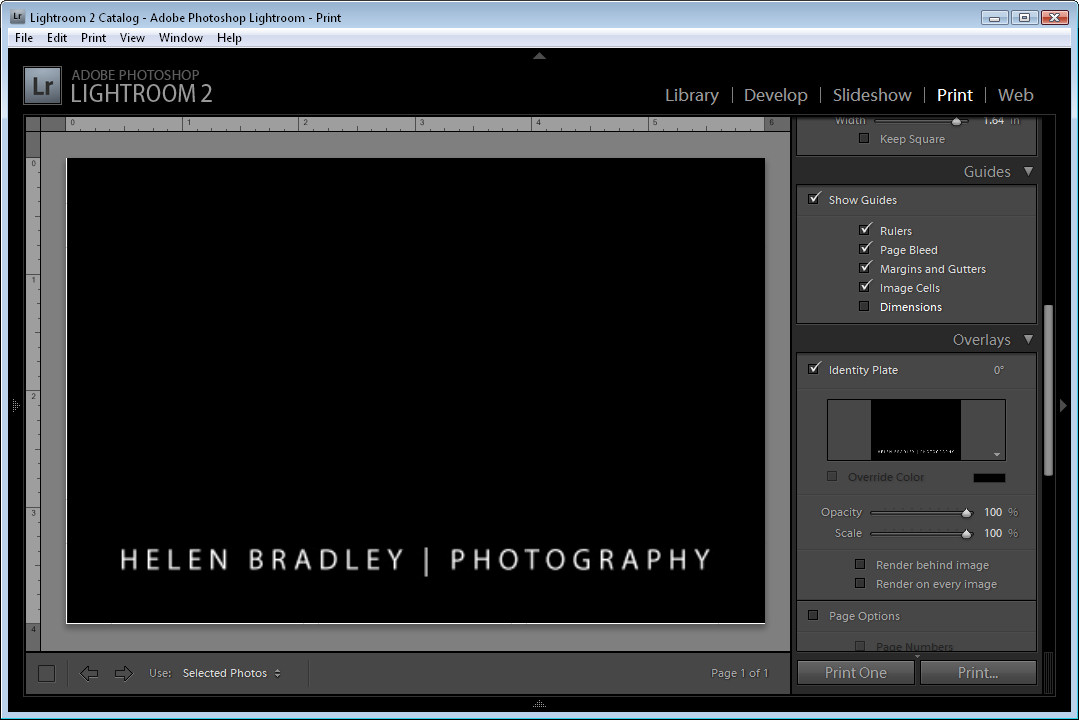
When the image appears in the document set the scale to 100 so it fills the page layout and drag it into position.
You might notice that you cannot make the image any bigger than the page itself and you can’t drag it out of its original aspect ratio – this is why you need to create multiple versions of the image one for each paper size as the ratios 8:10, 5:7 and 4:6 are all different.
Once you’ve dragged the background over the entire page, click the Render Behind Image option in the Overlays area.
This moves the solid color image behind the pictures on the page.
You can now change the stroke border if desired to, for example, add a white or gray stroke if you’re using a black or dark gray background.
Then go ahead and print your image.
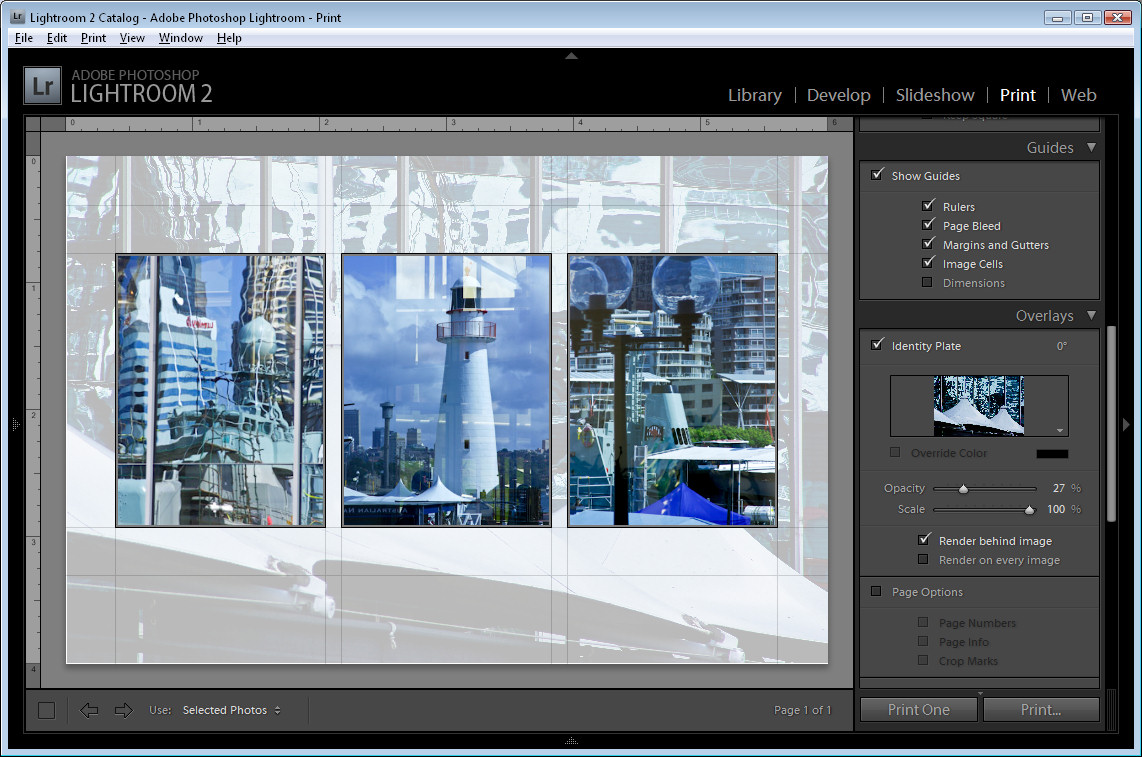
You might realize by now that any image can be used as a print background.
So, for example, you can crop an image in Lightroom to the size that you need for the background, export it to disk as a JPG and then reimport it as an Identity Plate to use as a background for your printed images.
You could do this with a black and white version of an image or a color version. The Overlays > Identity Plate area also provides an Opacity slider allowing you to make the image partially opaque to lighten it so it doesn’t overwhelm the images you are printing.
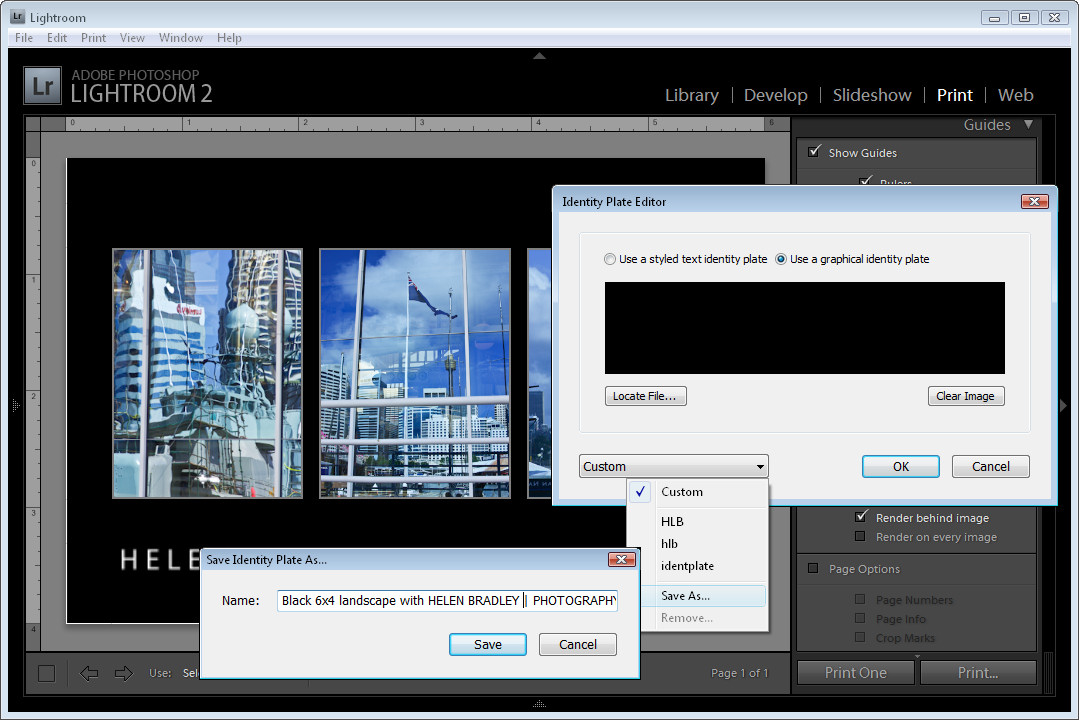
When you are done, save your Identity Plate by clicking on the Identity Plate option, choose Edit and then from the custom dropdown list, choose Save As and save it so that it can be easily accessed next time.
Post a Comment
Please feel free to add your comment here. Thank you!