

By Helen Bradley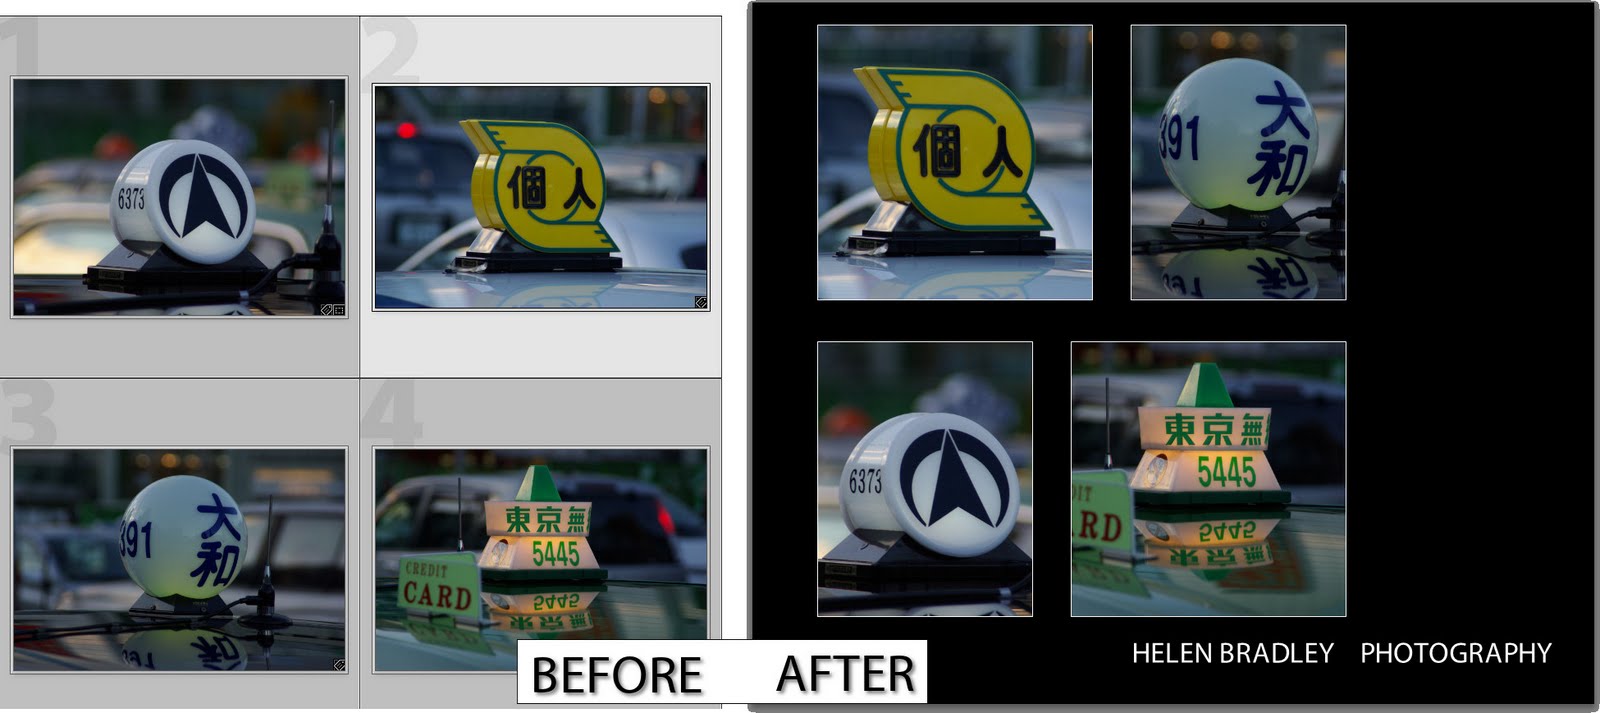
With Lightroom 3 Beta having just been released, the first thing that most people will do – as I did – is to look and see if the features that you’ve always wanted in the program have been added.
One of the areas that Lightroom 2 fell a little short on in my book was the Print module. I wanted to be able to print with a colored background without having to import a background to use as a Identity Plate to achieve the effect and I wanted to be able to assemble a single printed sheet incorporating multiple images but I didn’t want them to have to always be the same size.
Ok, so the good news is I am a very happy gal! Both these problems are fixed in the new Lightroom 3 Beta. In fact, the new print module in Lightroom 3 Beta totally rocks.
Over the next few weeks I plan to post on some of the new features in the Lightroom 3 Beta but today I just want to show off the new Custom Picture Package tool.
Get the beta!
If you haven’t used Lightroom before or if you are interested in looking at the new Lightroom 3 Beta, visit http://labs.adobe.com to download the free Lightroom 3 Beta. As always you should never trust vital stuff and day to day work to a beta version of any software – it’s there to work with and experiment with but you can’t expect it to be 100% reliable.
Ok, technical stuff out of the way, let’s get into the Print module in Lightroom 3 Beta.
Step 1
Start with a selection of images – this can be a folder of images or a collection. Click the Print module and select Custom Package. Click the Page Size button and select your printer and page size – even if you will print to a JPEG file you still need to do this – Ok, so it’s not perfect!.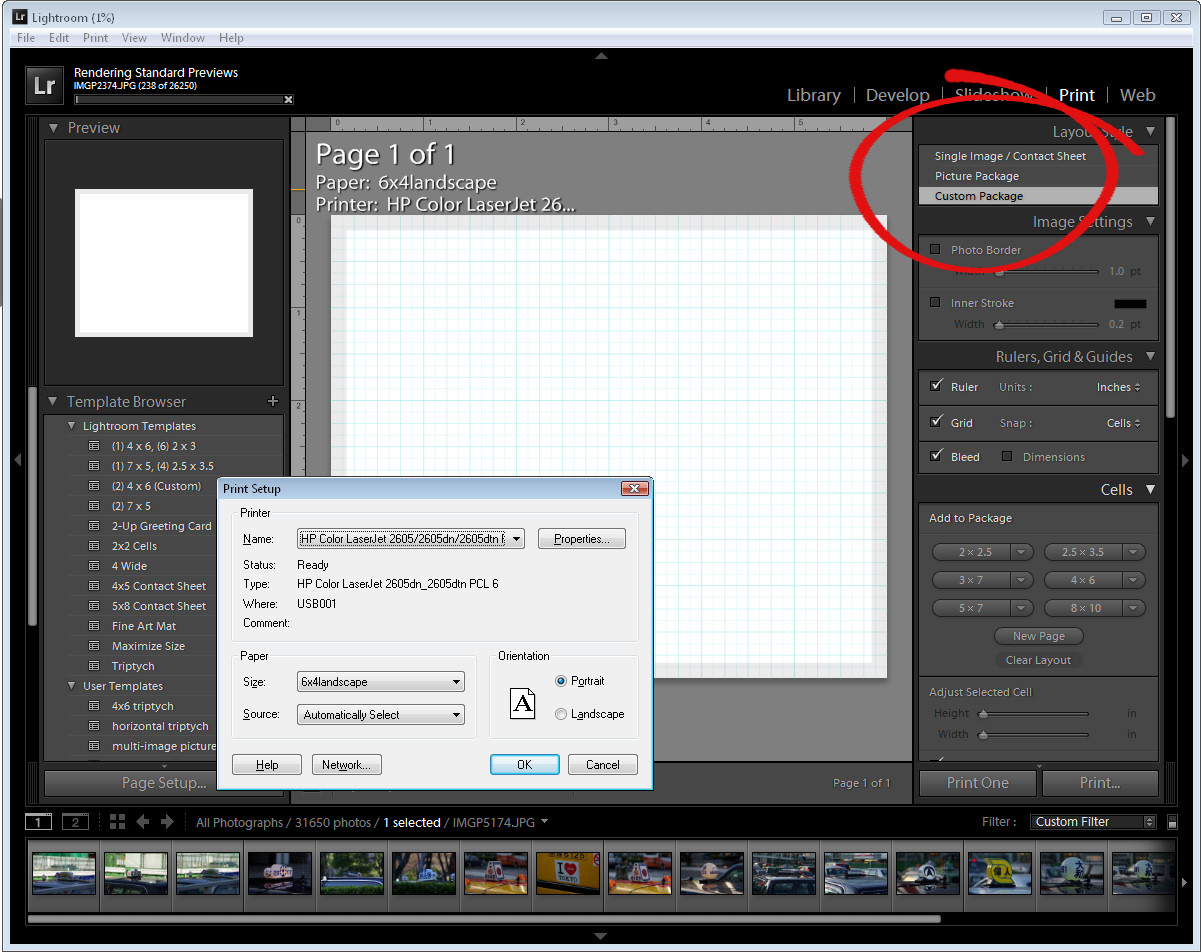
Step 2
Get ready for the most exciting change to Lightroom in my book at least. Grab an image from the filmstrip and drag and drop it onto the grid. Keep the grid visible for now as it makes it easier to line everything up.
When you drag and drop the image in position, you can resize it as desired.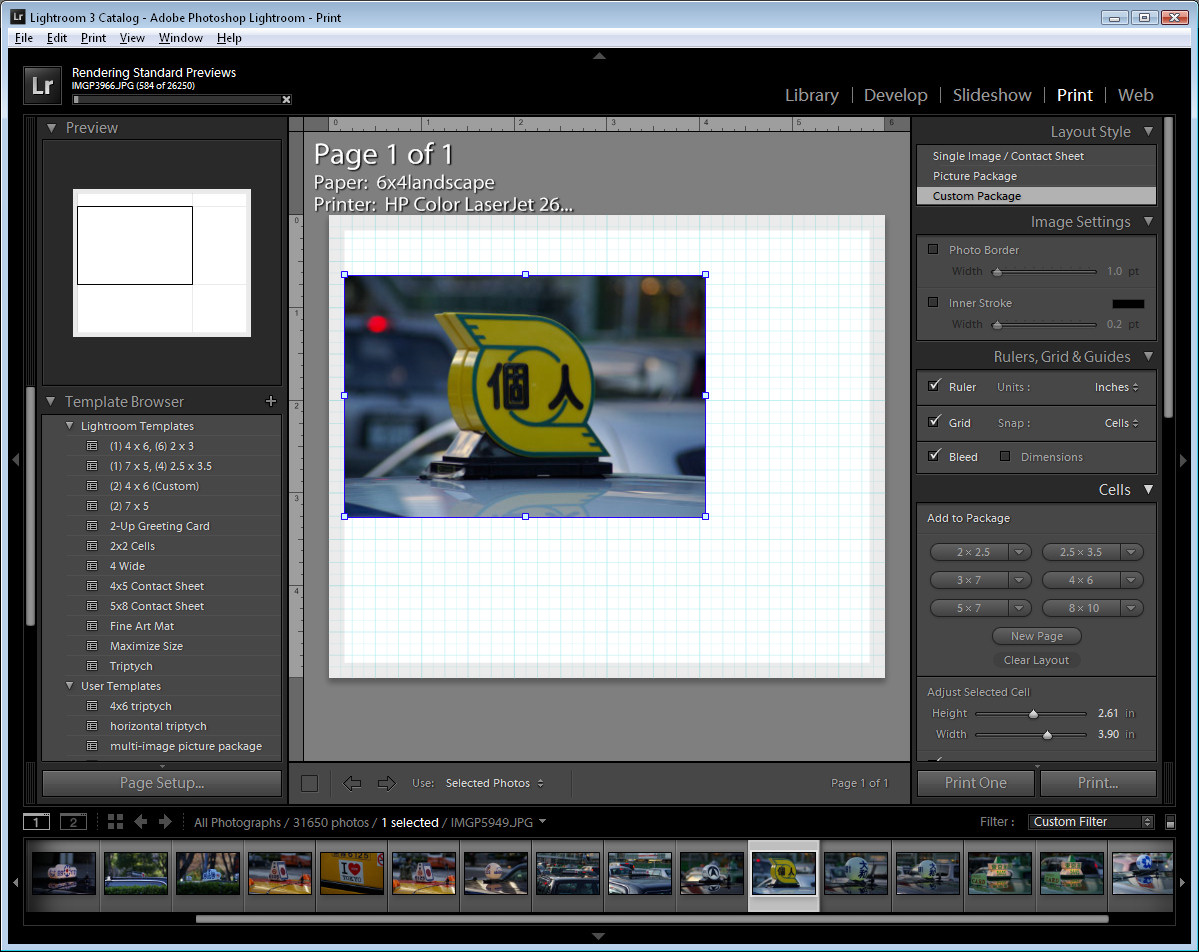
Step 3
If you want the container to match the image aspect ratio click the Lock to Photo Aspect Ratio checkbox. If not, deselect it and you can size the image to any dimension you like – so you can create a portrait shape image from a Landscape one, for example. 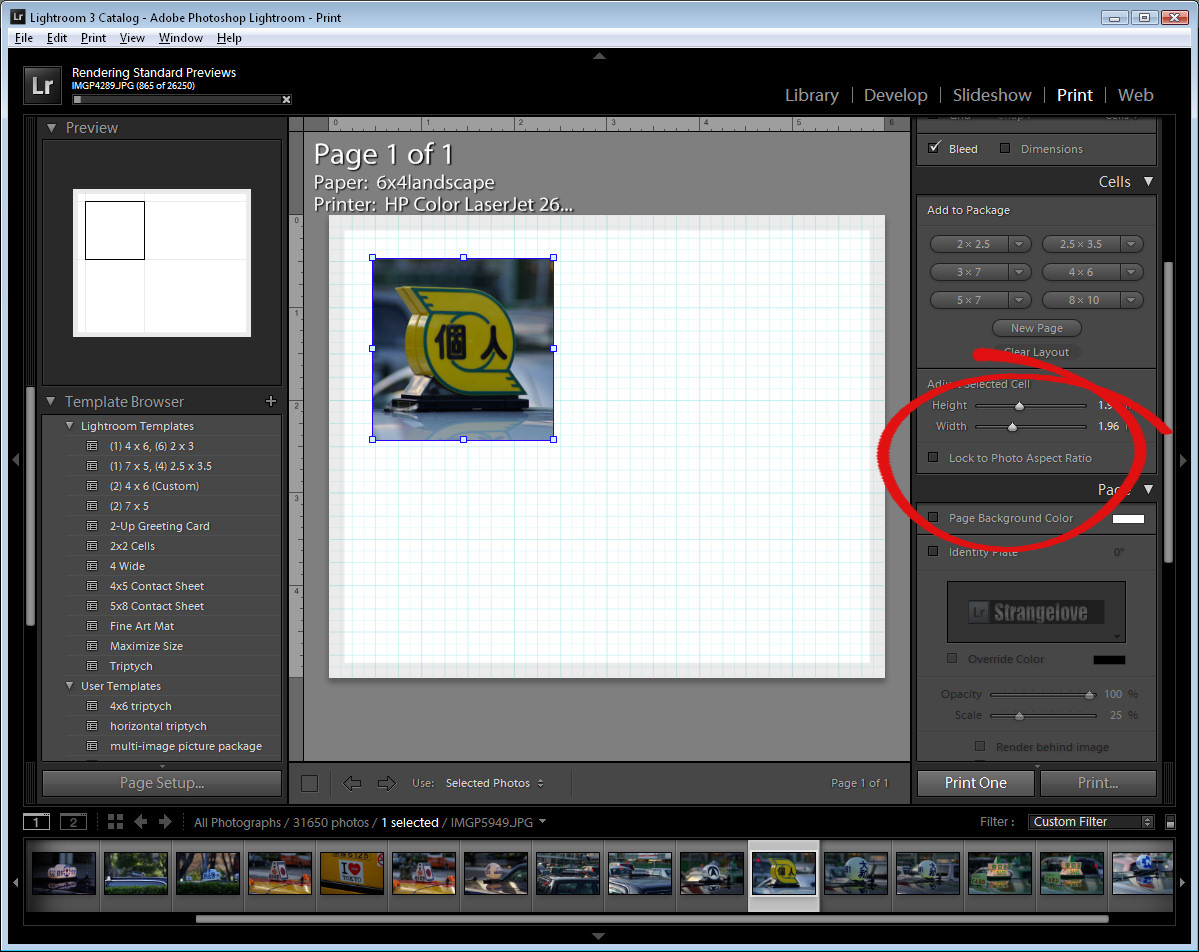
Step 4
You can now drag and drop a second image into the display and size it to any dimension.
If your image is larger than the container, hold the Control key (Command on the Mac) and drag the image inside the container to find the best position for it.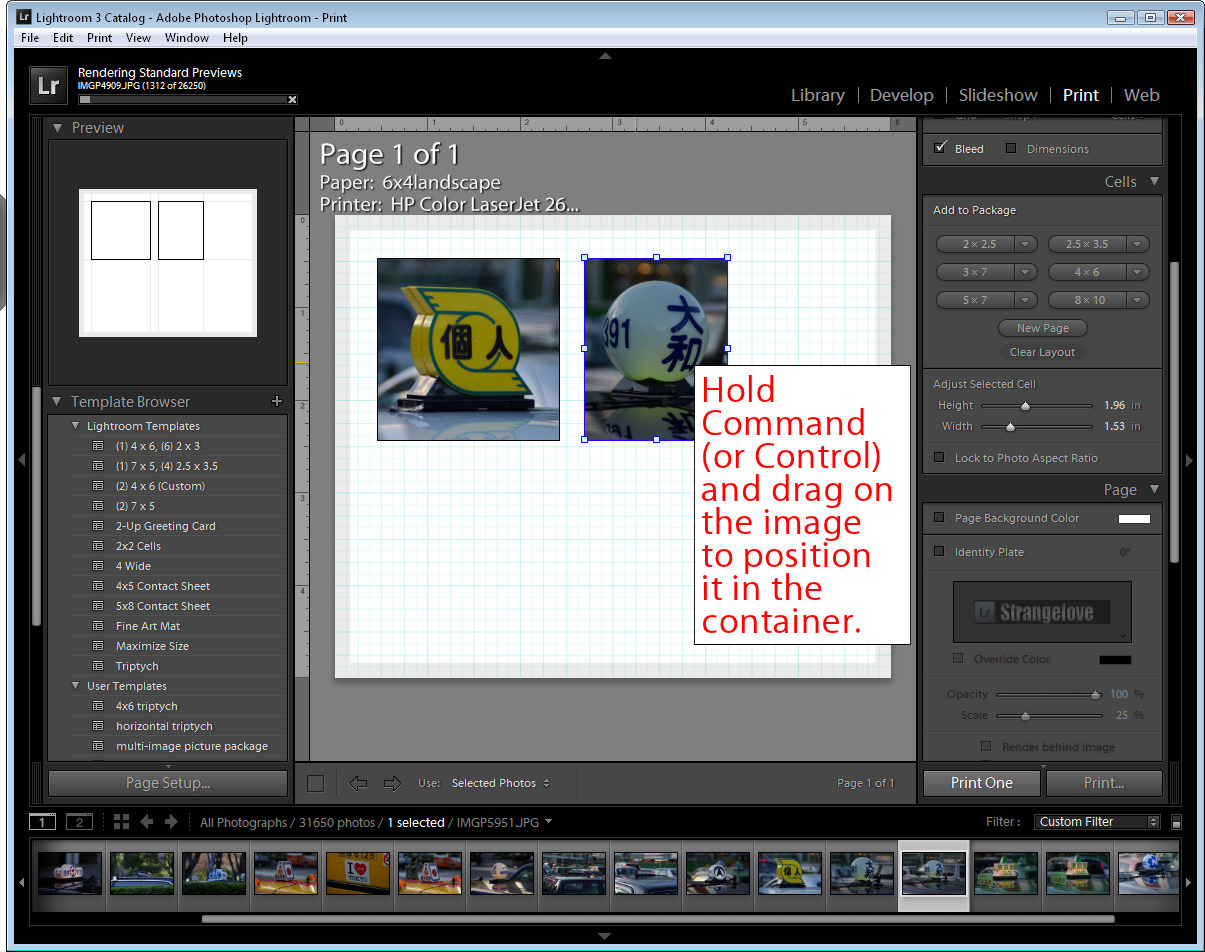
Step 5
Continue and add the images that you want into your display.
If you prefer to use fixed size containers, you can click to add specific size containers using the options in the left hand panel. You can then drag images from the filmstrip to fill them. 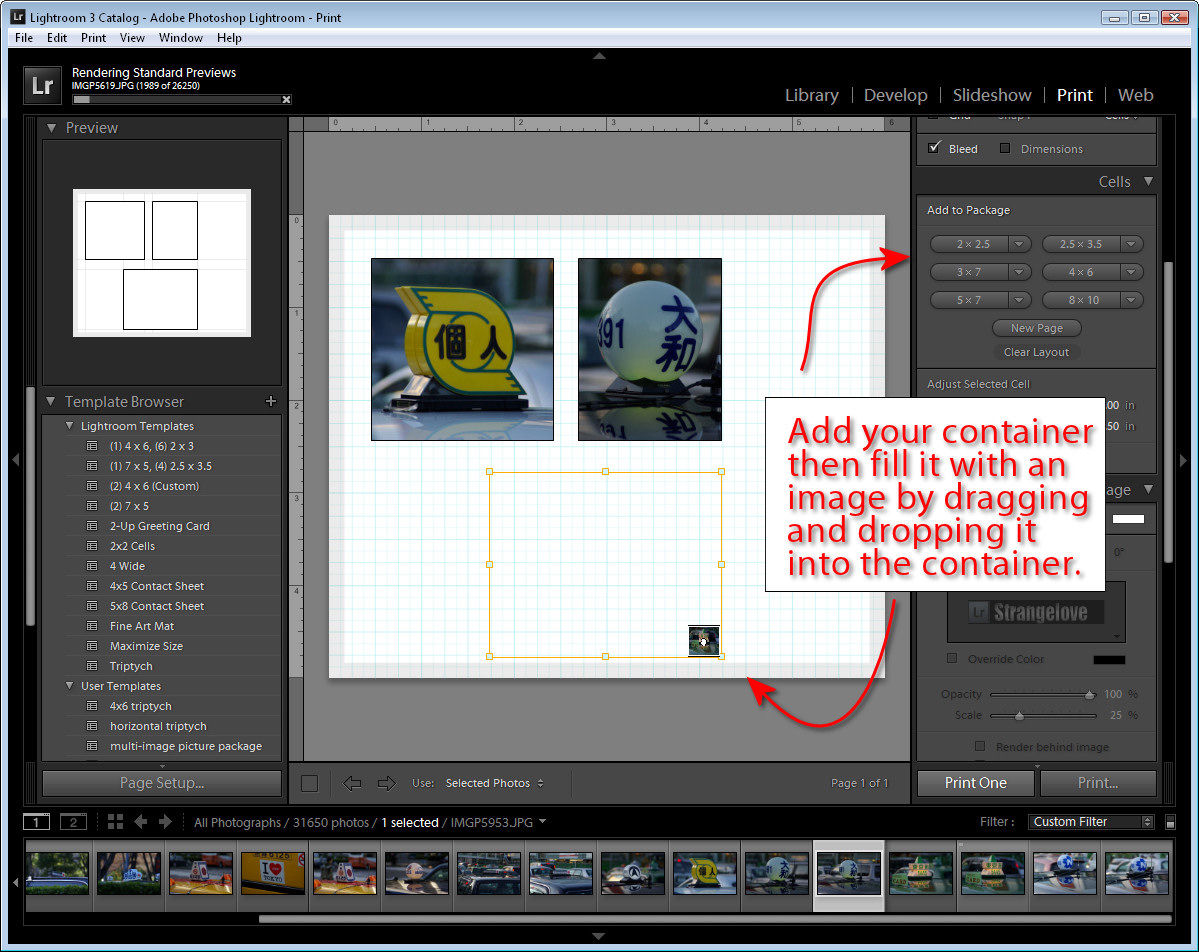
Step 6
To change the background color, select the Page Background Color option and choose a color to use. If you choose anything other than solid black, you’ll still see the grid lines on the screen but these won’t print and you can turn them off if they’re in the way. 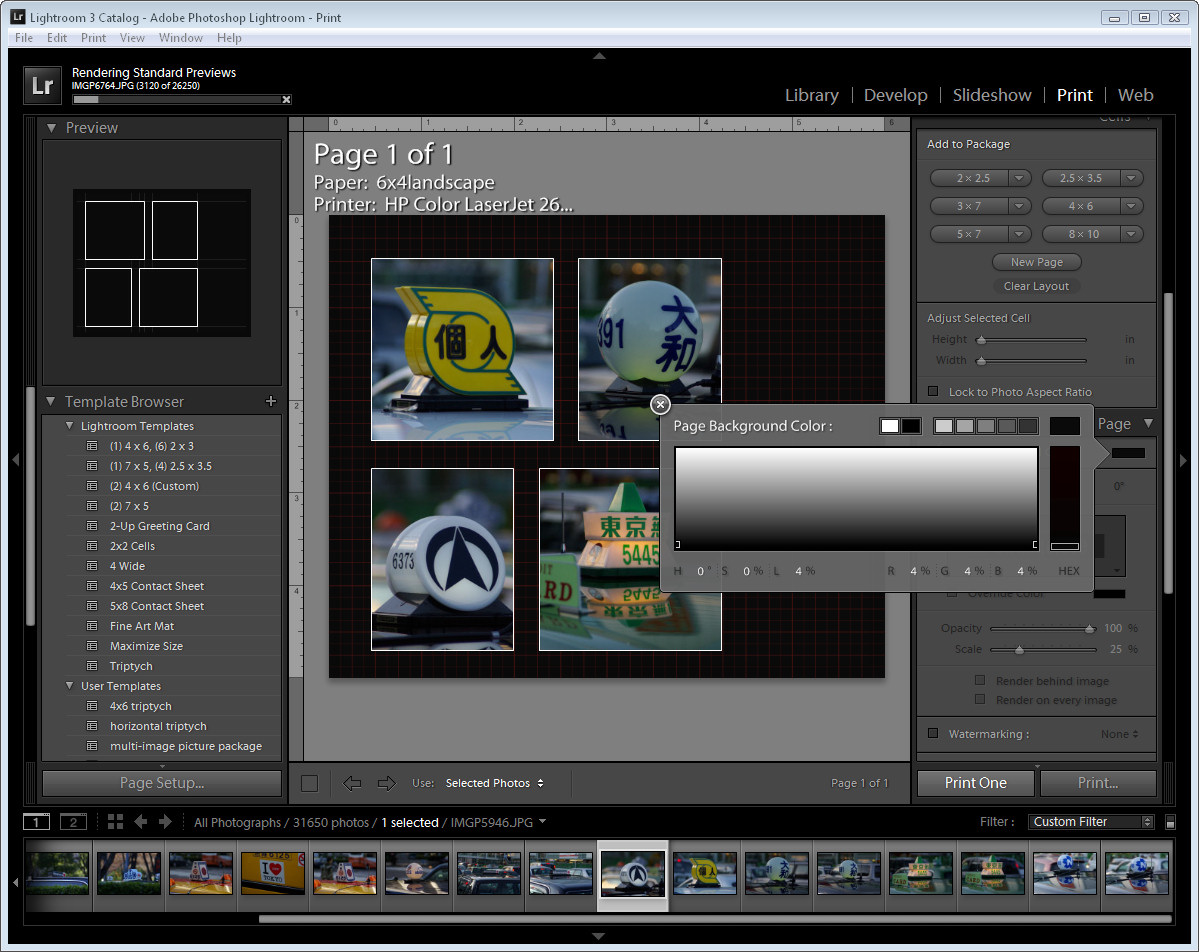
Step 7
Click the Identity Plate and you can add your own identity plate as you could with other versions.
When you’re done, from the Print To options, select to print to a printer or to a JPEG File and you can then print by clicking the Print/Print to File button.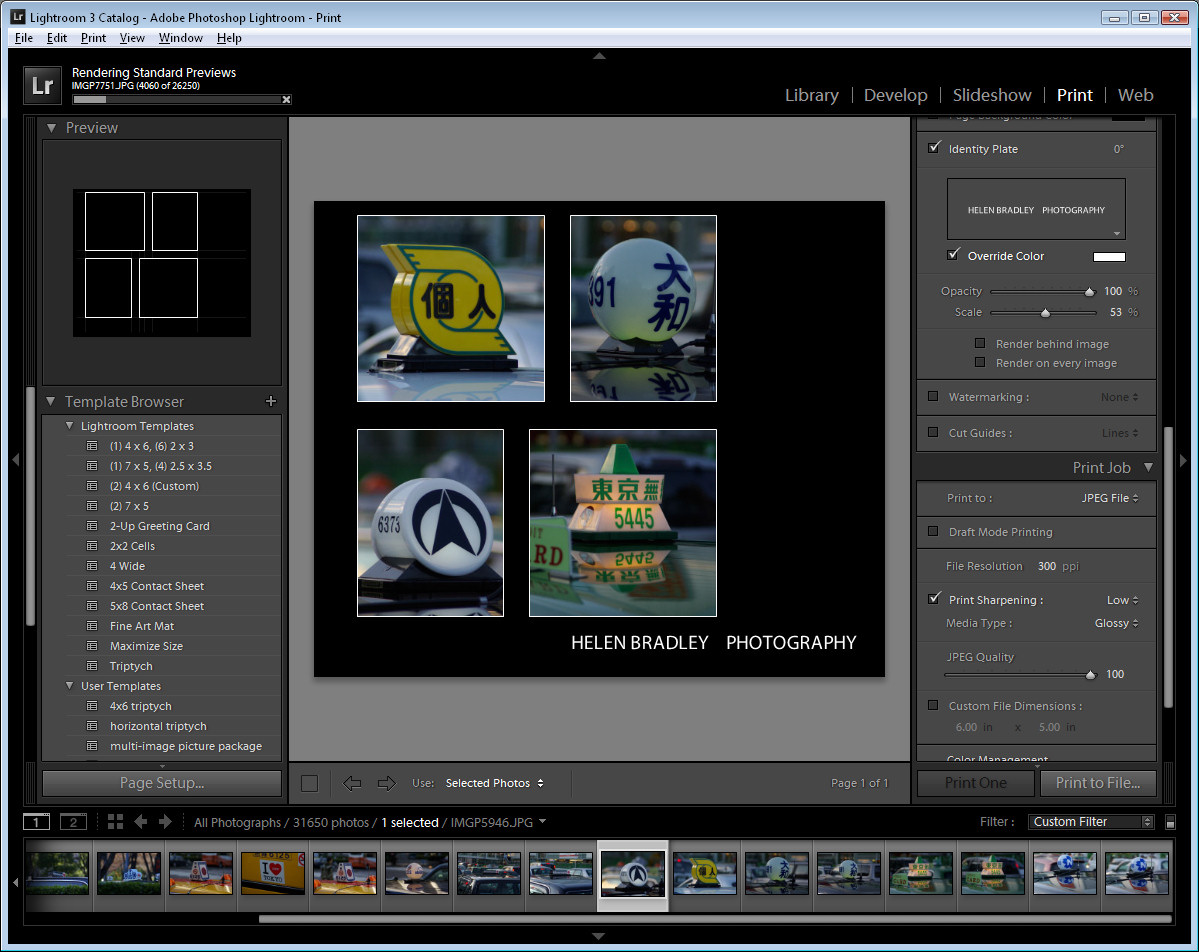
Step 8
Before you leave the module, click the + symbol to the right of the Template Browser entry on the left panel and type a name for your template so it is saved and you can reuse it again in future.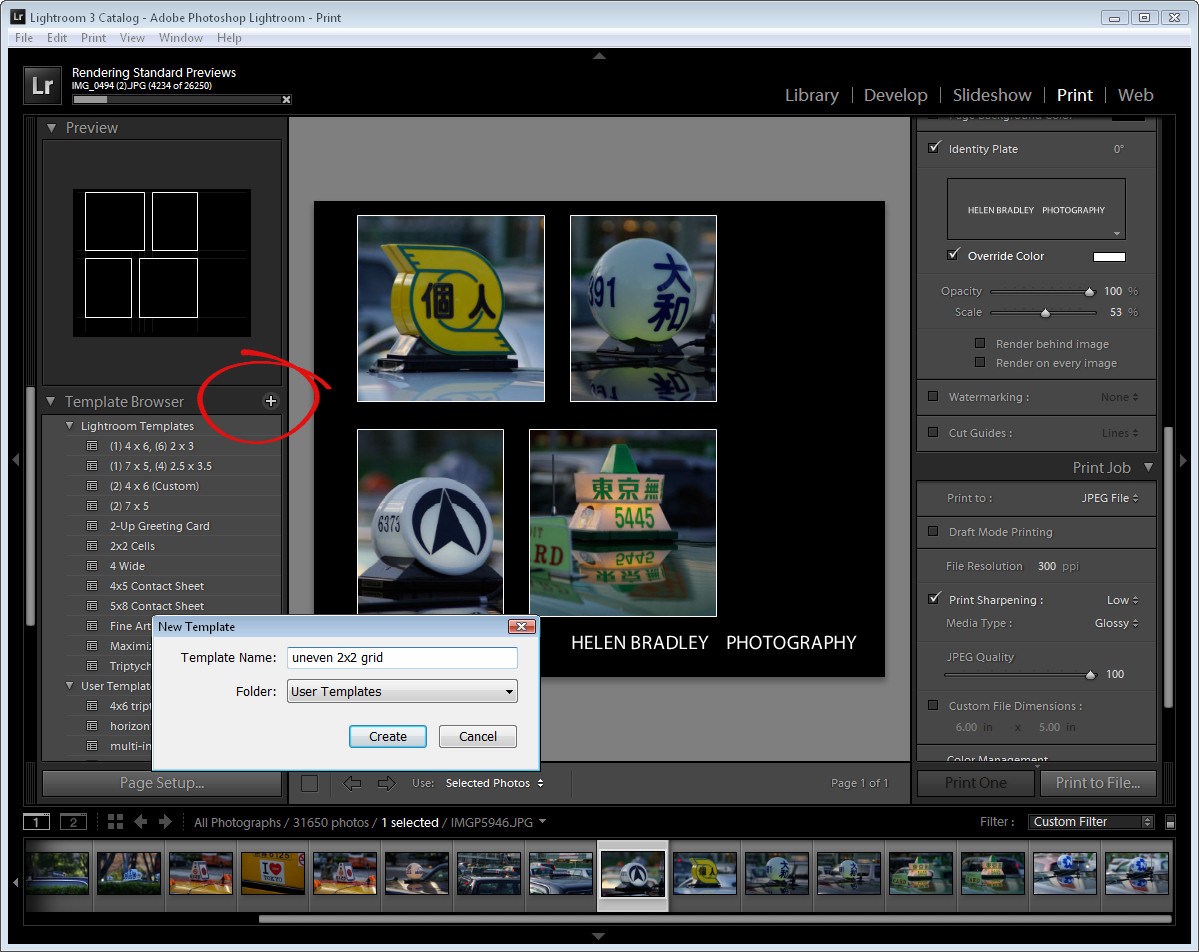
While it’s still not perfect, the Print module in Lightroom now has support for features that were not achievable with Lightroom 2 without complex workarounds and which will be appreciated by avid Lightroom users everywhere.
One Comment
Post a Comment
Please feel free to add your comment here. Thank you!