

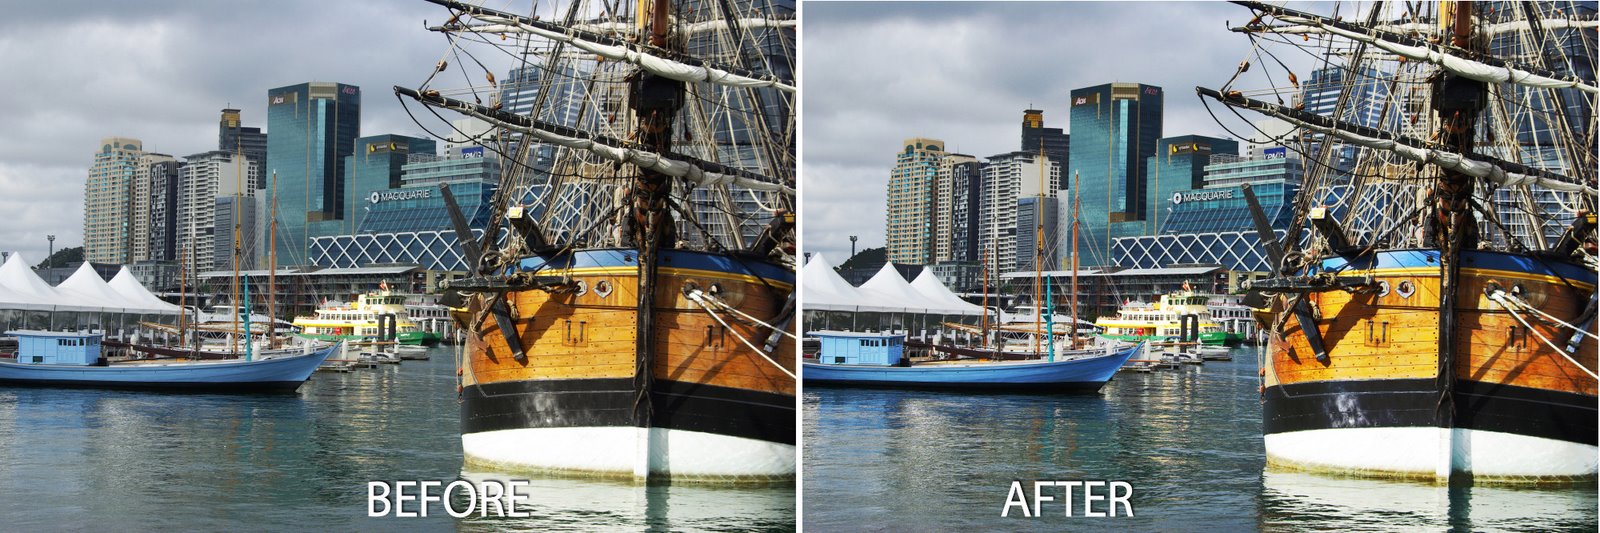
If you’re a Photoshop and Lightroom user you may, like me, love the Clarity adjustment in Lightroom and wish it were available in Photoshop too. The Clarity slider lets you adjust the contrast in the midtones of an image which gives an over all sharpening and color boost to the image midtones.
As yet, there is no Clarity tool in Photoshop (although there is one in Camera RAW). There is, however, a technique which has been popularized by Mac Holbert which does a similar thing. While the Photoshop technique is more cumbersome than using the Clarity slider in Lightroom it does work very well and gives very similar results.
Once you’ve performed the fix a couple of times you may want to create this as an Action so that you can run it on your images at any time you need to do boost the midtones.
Step 1
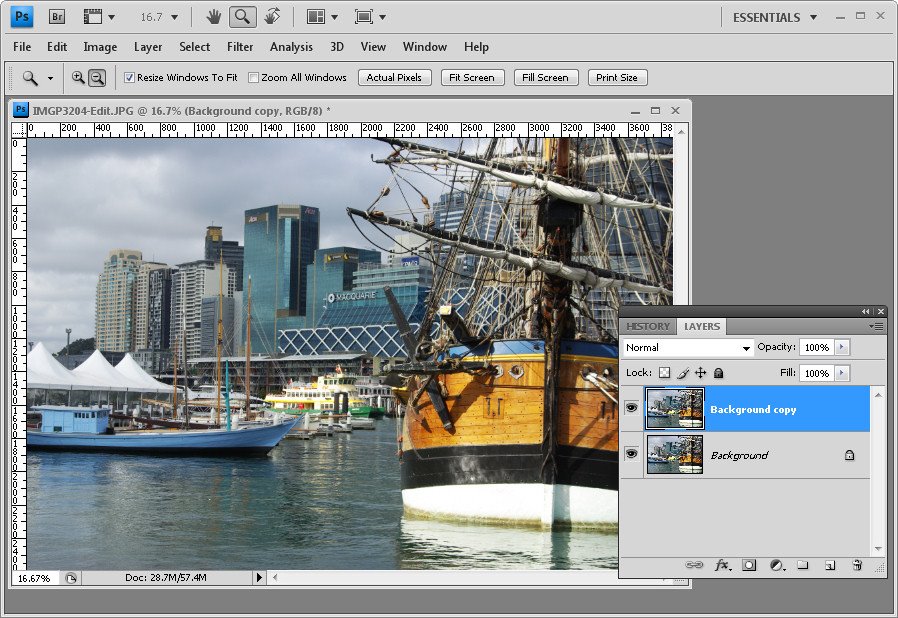
For an already flattened image, duplicate the background layer by right clicking it and choose Duplicate Layer.
For an image that already has multiple layers, click the topmost layer and press Ctrl + Alt + Shift + E to create a merged layer to work on.

Step 2
In the layers palette set the Blend Mode of this new top layer to Overlay and set its Opacity to somewhere around 20 to 25 percent.
Step 3
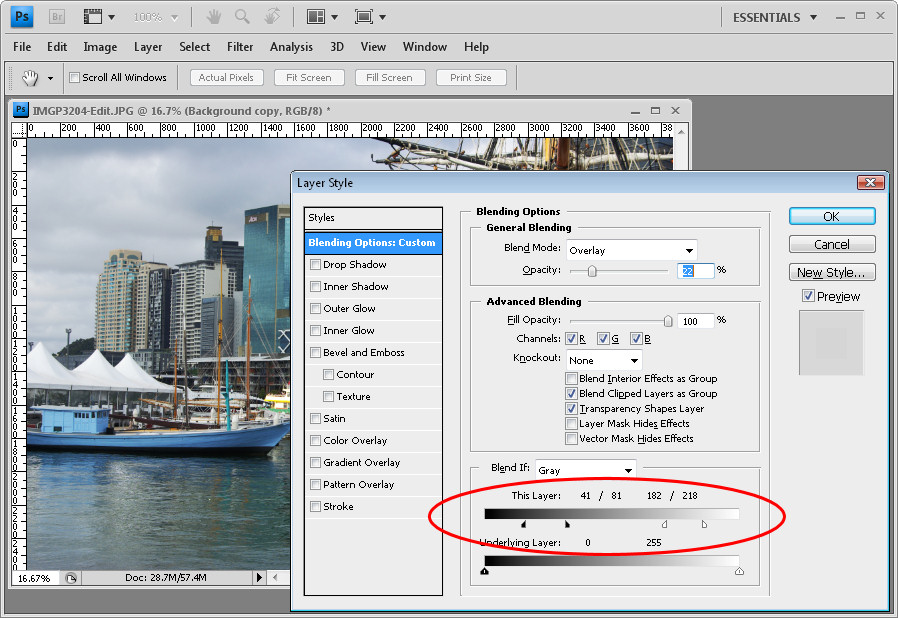
Select the Add a Layer Style button at the foot of the Layers palette and choose Blending Options.
In the Blend If section of the dialog, locate the This Layer slider. Drag the indicators under the slider in to approximately one-third of the width of this slider so you’re dividing it into thirds.
Hold the Alt key (Option on the Mac) to divide each slider into two pieces and position the outside halves at approximately the 1/6th mark, use the image as a guide.
The positioning of the sliders does not have to be exact. All you’re doing here is removing the very lightest pixels and the very darkest pixels on this top layer from this fix, so it remains applied to the midtones only.
By splitting the sliders, you’re ensuring that there is a gradual change from where the effect is applied and not applied.

Step 4
If you’re using Photoshop CS3 or CS4, you can convert the topmost layer to a Smart Object before continuing. To do this, right click the top layer and choose Convert to Smart Object.
Step 5
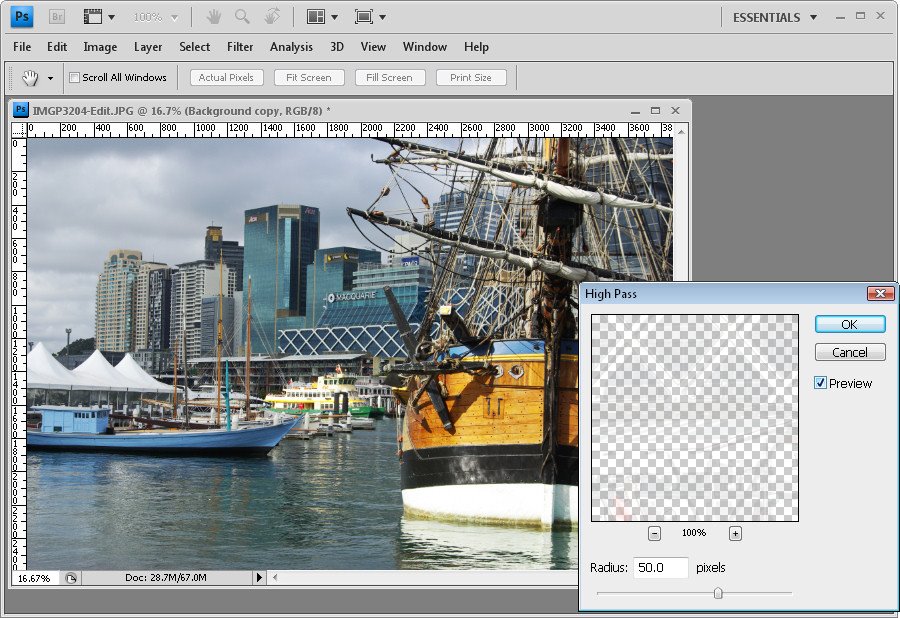
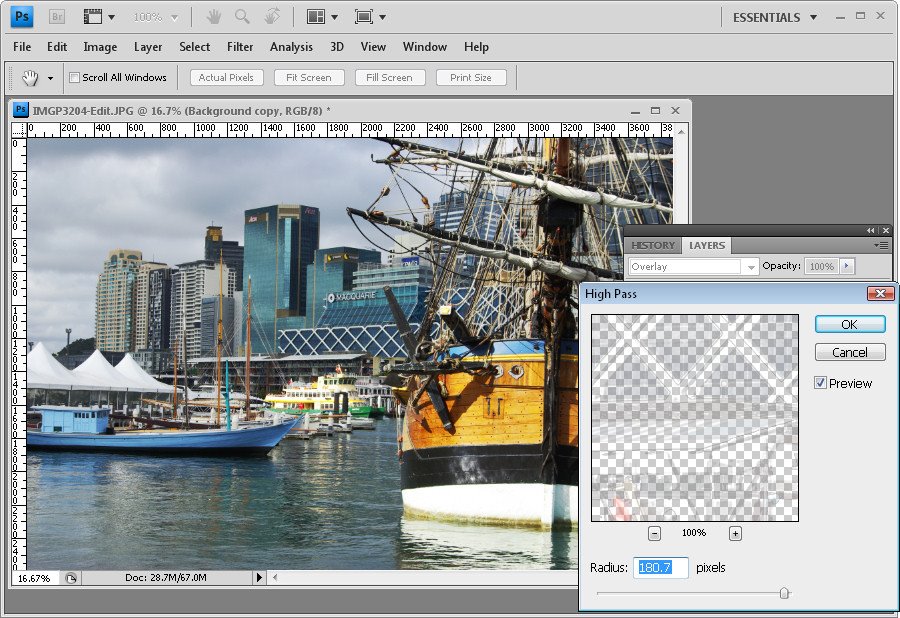
Choose Filter > Other > High Pass and set the Radius to approximately 50 pixels. Click Ok.
The High Pass filter sharpens the image and the Overlay fix applies a contrast and saturation boost. The Blend If sliders ensure that the fix is applied only to the image midtones.
Step 6
Any of these adjustments can be changed. You can adjust the Radius of the High Pass filter to a larger or smaller value and, if desired, increase or decrease the layer Opacity to apply more or less of a contrast boost.
You can also adjust the Blend If sliders to apply the fix to a larger or smaller range of the image tones.
Post a Comment
Please feel free to add your comment here. Thank you!