Finished project: a garage door color matched to a selected Pantone color. Image (c) Sarej, sxc.hu.
One issue that a lot of people face is matching color in Photoshop. You may have a Pantone color that you want to match to or some other color and you want an image to be colored this way.
The solution is to start with a Grayscale version of the image, so desaturate the image to start with and make sure it is light enough to take your color – so if you want to use a light color brighten it to suit.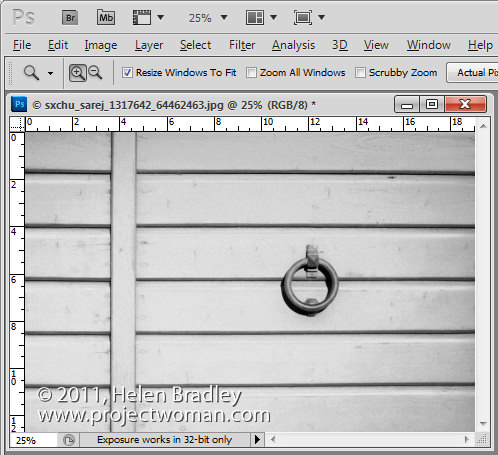
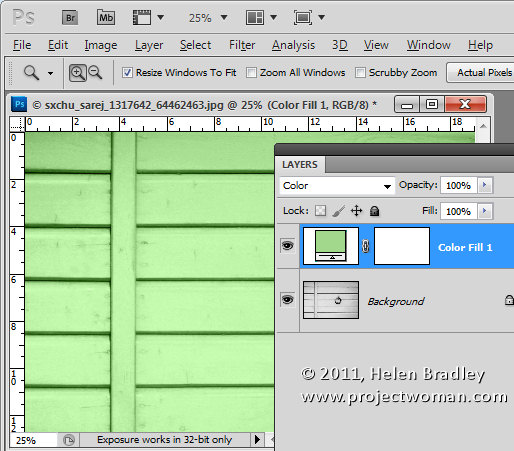
Now add a new fill color layer to the image by choosing Layer > New Fill Layer > Solid Color and click Ok.
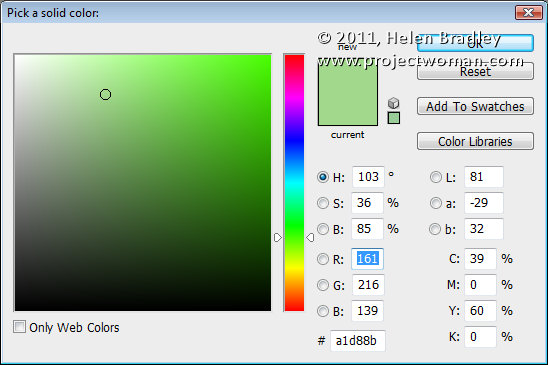
Set the solid color to the RGB or CMYK values of the color that you want to match. Set the Blend Mode for the layer to Color.
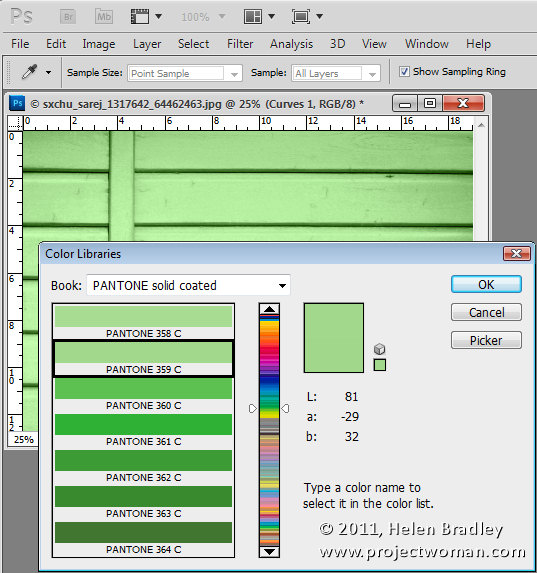
I chose Pantone 359C which has RGB values of 161, 216 & 139.
Right now you’ll have a reasonable match for the color but not as good a one as you can get.
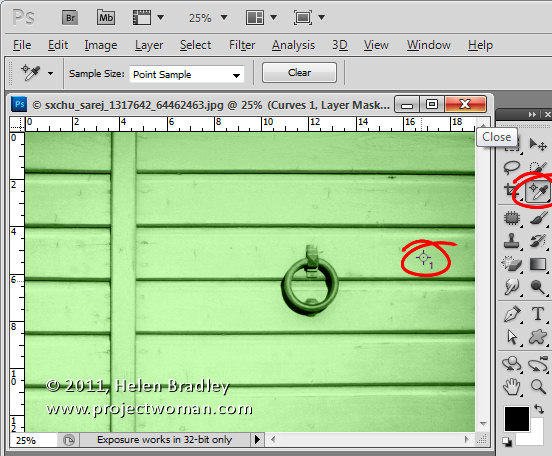
To improve it, select the Color Sampler Tool, which sits under the Eyedropper tool in the tool palette, and click in an area of the image that you want to be that particular color.
Because the grayscale values will vary, you need to identify a place in the image that you want the color to be exactly your chosen color. Around it, the other tones in the image will vary as they should – some will be lighter and some will be darker. Click on that point to add a color sample point.
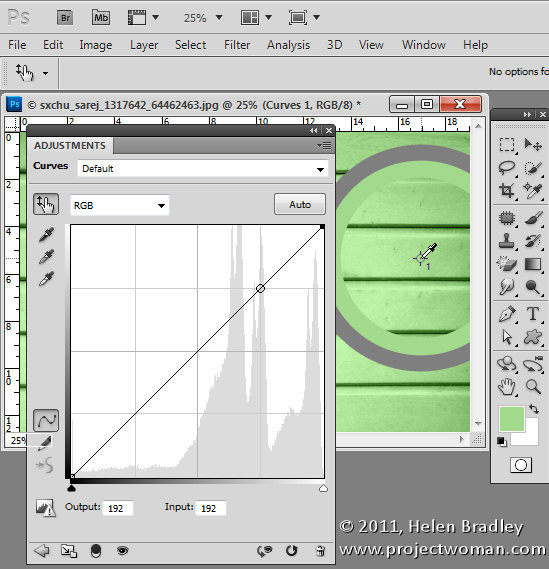
Now add a curves adjustment layer by choosing Layer > New Adjustment Layer > Curves. Click Ok to create the curve adjustment. If you’re using Photoshop CS3 or earlier, Ctrl + Shift + Click (Command + SHift + Click on the Mac) on the color sample point to mark this point on the curve in the Red, Green and Blue channels.
If you’re using CS4 or later, the functionality of the curves dialog has changed. In this case, you should use the On Image Adjustment tool, which is the tool in the top left corner of the curves dialog, which has a hand on it. Click this, then Ctrl + Shift + Click (Command + Shift + Click on the Mac) on the sample point to add the marker to the Red, Green and Blue channels.
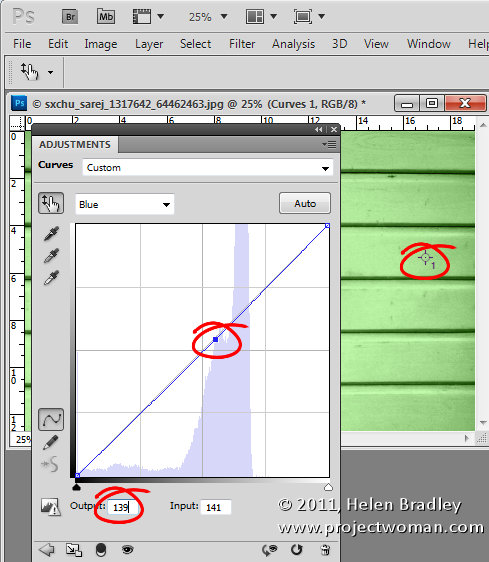
Now select the Red channel, click on the marker you just added and adjust the Output value to the Red value of the RGB color number that you want to match. Repeat this for the Green and the Blue channels. Then close the dialog. In my case I’ve set the Red output value for this selected point to 161, the Green to 216 and the Blue to 139 to match the Pantone color values. If you are trying to match a CMYK value then you’d do the same thing but for the Cyan, Magenta, Yellow and Black channels.
To remove the Color Sample Point, select the color sample tool and hold Alt as you hover over the sample point. It turns into an icon like a pair of scissors which you then click to remove the sample point.
You will end up with an image where, at your designated point, the color is exactly as you wanted it to be.
Thanks to blog reader Lesley Clarke for posing the question.


I would like to thank Helen very much indeed for solving this problem that I have been wrestling with for ages!
Lesley I had a ball working this one out and trying to make it simple and effective. So thank you for giving me the challenge.
I know a lot of Graphic Designers who work with trying to match Pantone colors will really grab at this solution too.
Helen
Thank you for the helpful advice. At the end of the procedure, how can I apply the Curves and Color Fill layers to the layer just beneath them that I chose for them to add color to? Or should the Curves and Color Fill layers just stay there? Photoshop Help’s instructions about Fill Layers chose not to discuss this.
When you are done, if you save the file as a .psd file the layers will stay there so you can edit the file later if needed. If you save as a .jpg the layers will merge automatically so you will have a merged file for sharing. If you want a .psd file but no layers you can merge them by selecting the top layer and choose Layer > Merge Layers.
cheers
Helen
Curves tool in Photoshop is perhaps the most powerful and flexible image transformation. Since photographers effectively paint with light
I find similiar tutorial about How to use Color Curves in Photoshop… just for share maybe its usefull
http://photograpyreview.blogspot.com/2011/11/how-to-use-color-curves-in-photoshop.html
I have an interest in this topic and enjoyed reading your view on it.
Thanks for the sharing. But the whole image became the fill layer’s colour (different shades). What about if I just want a particular object of the image to be changed to the exact desired colour?
Thanks for Very useful tutorial. But after changing each RGB curve values to values that we require, The shadows and Tones of image changing to either very darker or lighter. Sometimes, sample point only changes to exact color and in other parts color changing like darker or lighter dissolve, especially in dark areas or light areas. Is there any solution for this, so that is very useful in changing color to exact values.