The new SmartArt feature in Word 2007 and 2010 helps you create timelines very easily:
Step 1
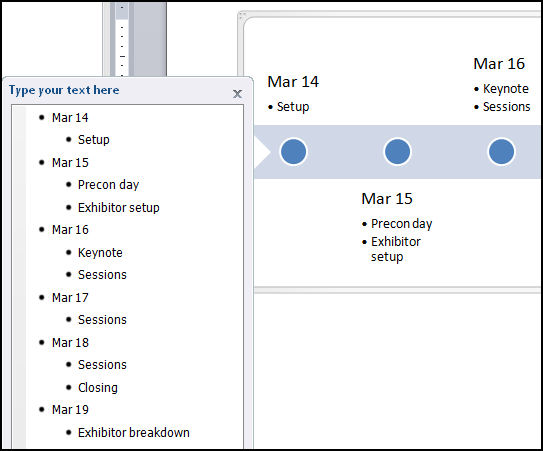
Choose Insert -> SmartArt -> Process and select one of the process options such as Basic Timeline and click Ok. Type the text into the textboxes in the SmartArt object. Alternately, click the arrows at the far left of the object and add text via the dialog.

Step 2
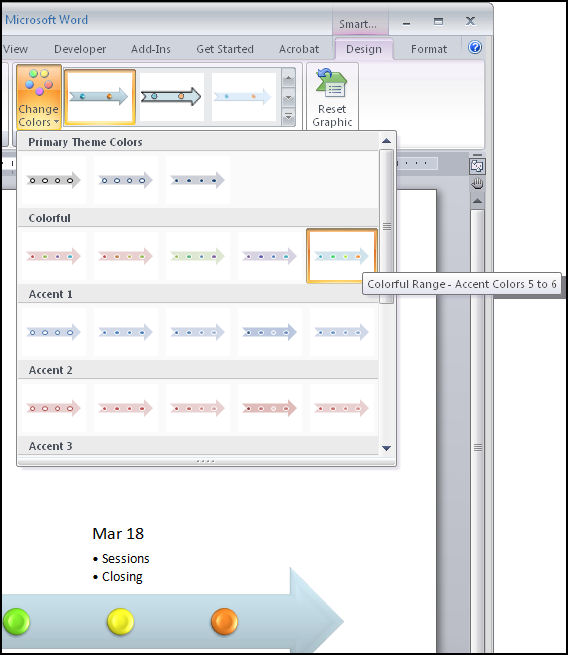
To format the timeline SmartArt, select the object and choose Format -> Design on the Ribbon and then select one of the SmartArt Styles. Click Change Colors to alter the colours used in your SmartArt object.

Step 3
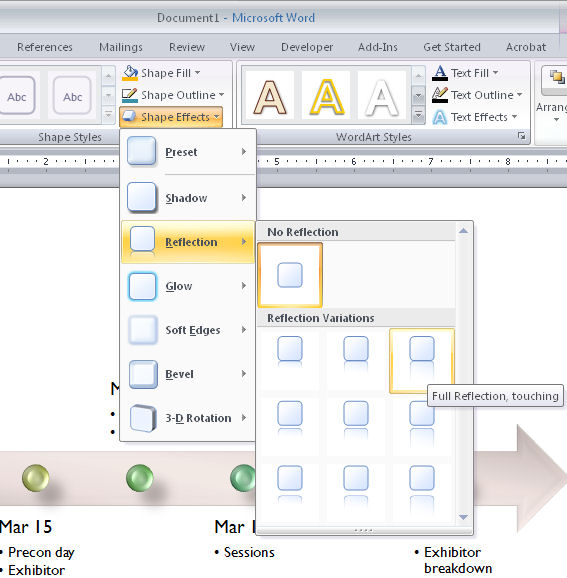
From the Shape Effects list you can customise an effect such as reflection or shadow for the art. In addition, as the look of a SmartArt object is controlled by the document theme you can choose Page Layout -> Themes and select an alternate theme for your document.


2 Comments
Post a Comment
Please feel free to add your comment here. Thank you!