One technique I’ve seen used a lot lately on blogs, websites and even email newsletters is a hand drawn frame effect.
In this post, I’ll show you how to create an effect like this and save and use it for your images.
Step 1
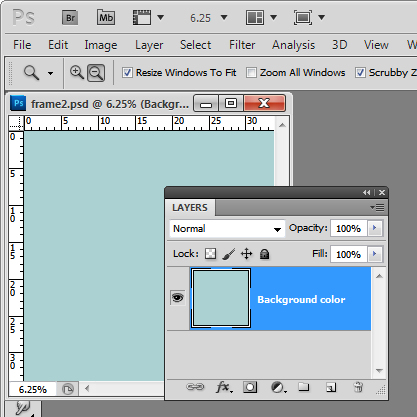
Start with a new image in Photoshop. A good size frame is important to create as you can size it down but not size it up as successfully. Start with an image around 4,000 pixels square with a resolution of 300 pixels RGB color and transparent background.
When the image opens, fill the background with a color of your choice, I’ve chosen a blue fill color.
Step 2
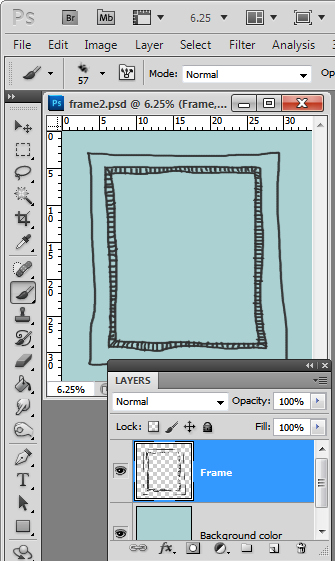
Add a new layer and then select the brush tool and a smallish brush. You want something that is going to ‘paint’ looking a little bit like pencil marks so I chose the Chalk 11 pixels brush and sized it up to around 57 pixels.
Select black or a dark brown or dark gray color as the foreground color and hand draw your frame. It will help if you use a tablet to do this although that’s not necessary and a mouse can be used.
Draw the frame so it has closed inside and outside edges to make the next step easier.
Step 3
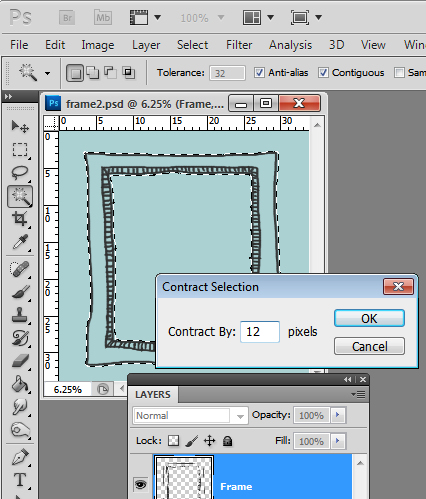
Target the Magic Wand tool and click inside the frame. This selects the inner portion of the frame.
Choose Select > Inverse to invert the selection.
Now hold the Alt key and click with the Magic Wand tool on the outer area of the image so you remove the outer edge from the selection.
To eliminate any anti-aliased edges, choose Select > Modify > Contract and contract the selection by around 12 pixels.
Step 4
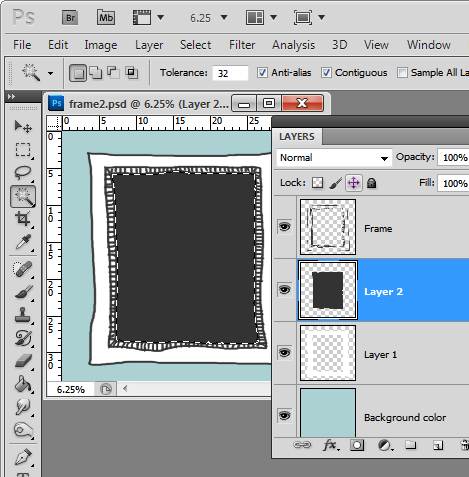
Add a new layer between the frame drawing and the background and fill it with white.
Return to the frame layer and select the inside again, this time choose Select > Modify > Expand and expand the selection by around 12 pixels.
Add a new layer and fill the selected area with a black/brown or dark color. This is the template for your image.
Save this image as a layered .psd file so you can use it anytime in future.
Step 5
To frame an image, open an image to frame and this frame too.
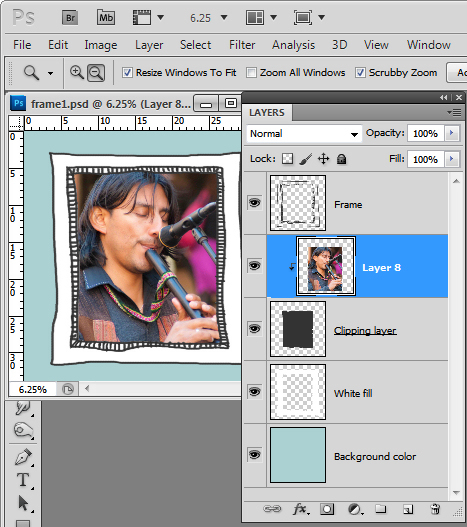
Drag the background layer of the image into your frame image holding the Shift key as you do so to center it. Press Ctrl T + Ctrl 0 to size the image to size. Make sure the image layer is directly under the drawn frame and above the dark template layer.
Now, with the image layer selected choose Layer > Create Clipping Mask to clip the image to the size of the inside of the frame.
You can move the image layer using the Move tool so it is positioned as desired.
Now size and save the image for print or the web.


Post a Comment
Please feel free to add your comment here. Thank you!