Whether you need to make an open sign for your business or one to help find a lost pet, the basic premise is the same. You have a message you want to get across to your audience and you need to do this in the best and most effective way.
Signs pose difficulties not always present in other documents – you don’t have a lot of room to get the information across and often the sign will be placed where there is lots of other signage competing for attention.
Before you start
Before you make your sign, determine what you want to say and what information is most important for your audience to see. For example, for an Open sign, the word OPEN is critical and it will work without any other words very well. For a lost pet sign, the word Lost is important as it distinguishes the sign from others about pet grooming services, kennels etc.
Size of letters are important – a sign to be viewed from 3 yards/metres distance will need to have letters around 2.5cm/1 inch in height and you can add an extra 2.5cm/1 inch for every extra 3 metres/yards away your audience will be. The font size equivalent for letters 2.5cm/1 inch in height is around 72 points.
Colour is vital and it’s important that your sign be visible. The best colour combinations are high contrast ones such as black on yellow and white on black. Bad combinations are green on red or red on green – they’re indistinguishable to colour blind people and hard to read for the rest of us.
If you must use low contrast colours such as pale blue on white, add a black border around each letter to distinguish it from its surroundings.
When choosing fonts for your signs, stick to plain readable fonts and steer clear of script and other fancy typefaces. Fonts like Times New Roman and Arial and Verdana are good as they are clean and easy to read.
Capture interest
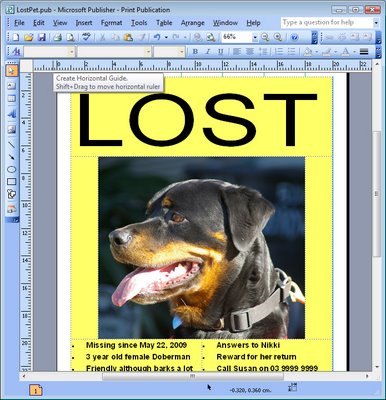
When you’re using photos to capture attention and to inform, make sure they are high quality and cropped to show the pet clearly. When typing information, group it logically so it’s easy to read. Include the details a person will need to have to contact you.
In the situation where immediate contact is crucial, creating tear off strips across the foot of the page is a good idea – a person can simply tear off the information they need and take it with them. However, make sure you also put the information on the sign as a person will need to have this available if the tear off strips are already removed.
Here’s how to create a sign with tear off strips.

Step 1
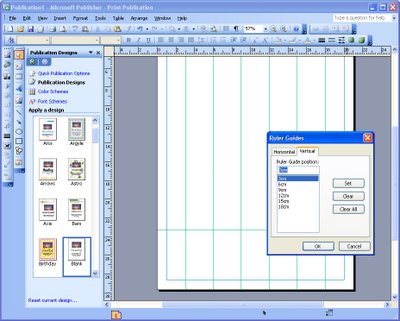
Start a new blank print publication. Choose File, Page Setup and set up full page printing and Letter or A4 paper size depending on the paper you will use. Choose Arrange, Layout Guides and adjust the margins to match your printers margins – the defaults are generally too big. Choose Arrange, Ruler Guides, Format Ruler Guides, vertical and add them at equal intervals across the page. Add one horizontal ruler across the bottom of the page.

Step 2
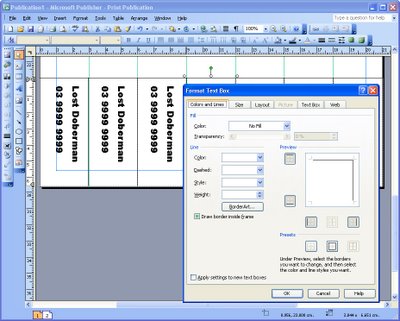
Create a text box and, in it, type the contact details for the tear off strip. Rotate the text by right clicking the shape, choose Format Text box, Text Box tab and check the ‘Rotate text within AutoShape by 90 degrees’ checkbox. Click the Colors and Lines tab and add a line to the top and right of the box. Drag the box into position and size it to fit. Hold Control as you drag a duplicate of the box to make the second box. Continue to complete all the boxes.

Step 3
Complete the rest of your sign by adding a large text message to attract a viewer’s eye. Add other explanatory text – make sure to include your phone number or contact details in the main notice in case all the tear off strips are removed. Focus on the important details someone will need to know. Add an image if desired to help attract attention.

