

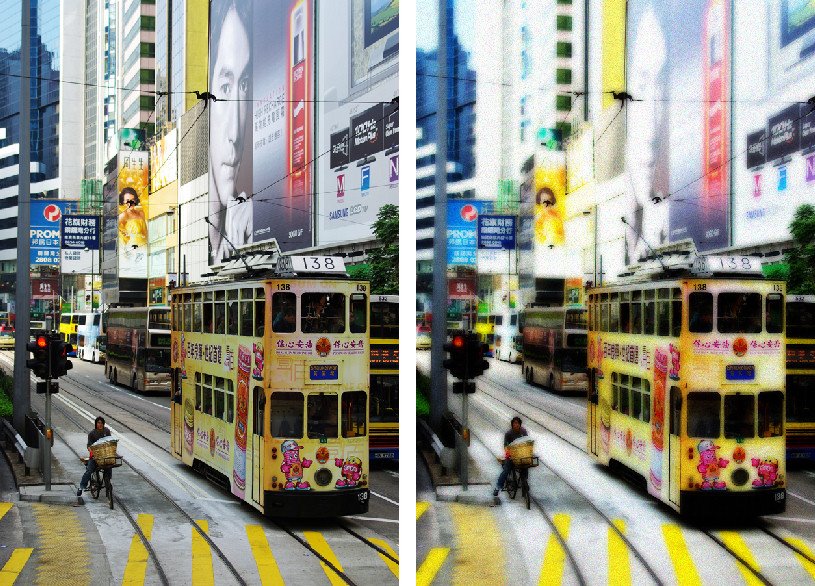
Photoshop gives us tools we can use to create effects which previously could only be obtained in the darkroom using images which were captured specially. One such process is the Orton effect named after photographer Michael Orton. This process results in a somewhat surreal image which has a slightly out-of-focus look while retaining lots of edge detail.
In the darkroom this effect is created using two images one of which is slightly out of focus and both of which are slightly overexposed. Sandwiching these together and taking a print yields a photograph similar to the one above.
Thanks to Photoshop we can create this effect from a single well exposed image and create the overexposed and soft focus looks digitally.
Here is how to create this Orton effect on an image from your collection:
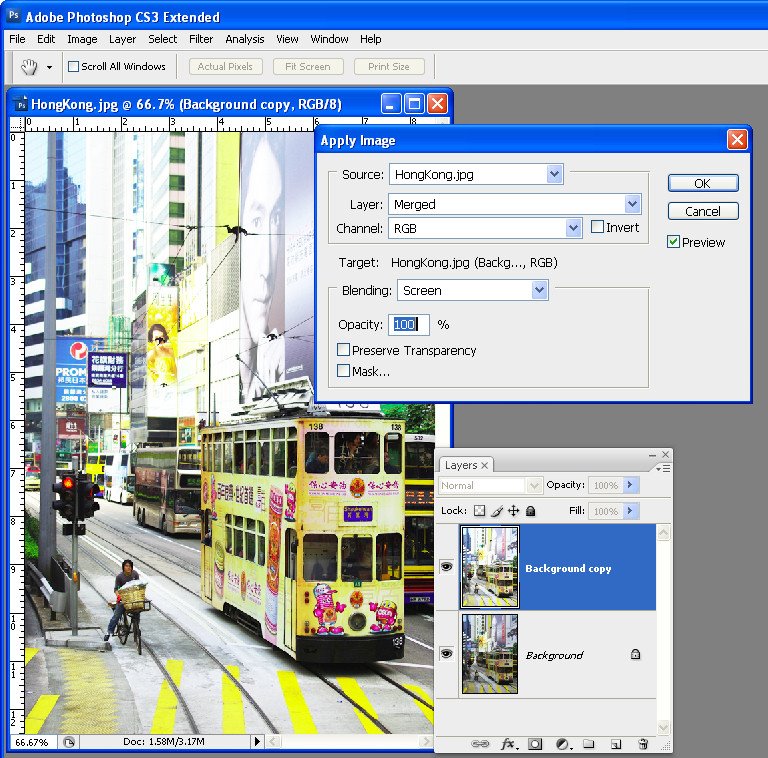
Open the image, right-click the background layer in the layers palette and select Duplicate layer. With the duplicate layer selected choose Image > Apply Image, select the Screen blend mode and click Ok. This applies the image to itself in screen mode which is the same as creating an additional duplicate layer, setting this layer’s blend mode to Screen and then merging the two layers. The benefit to using Apply Image is that you do it all in one step.
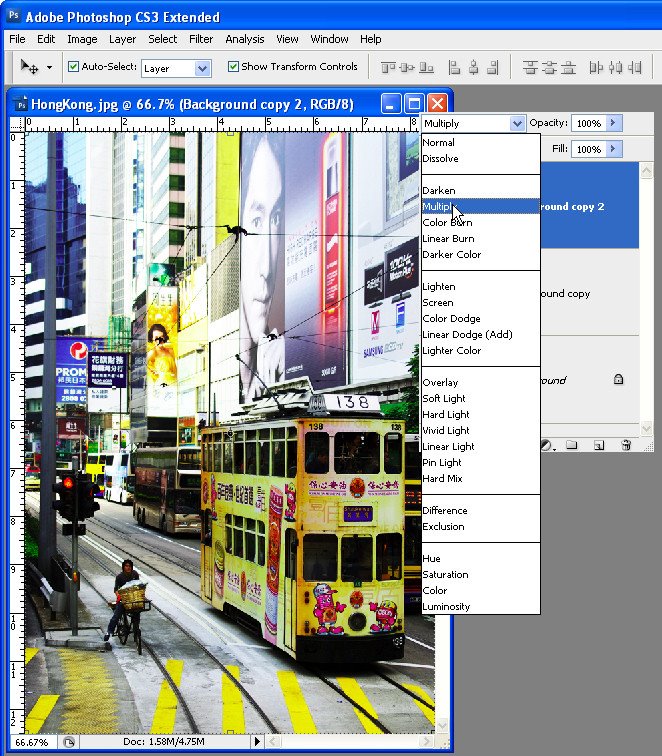
Duplicate this layer and set its blend mode to Multiply. This has the effect of cancelling out the lightening effect from applying the Screen mode.
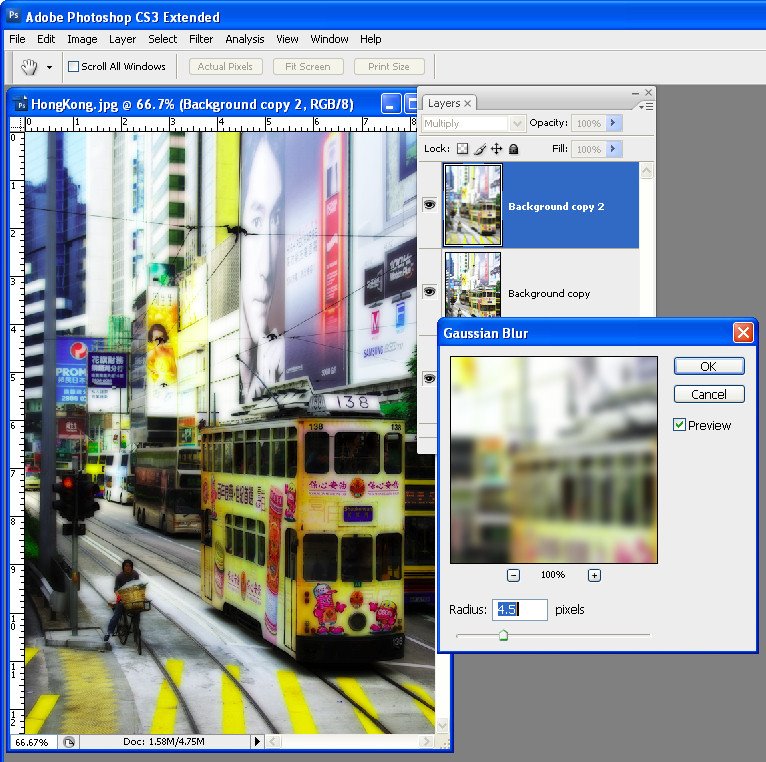
With this topmost layer still selected apply a blur to it using Filter > Blur > Gaussian Blur. Select the Preview checkbox so you can see the result on the image. Adjust the blur Radius to your choice of value – I used 4.5 but choose the best for your image. Notice that, if you create a very large small or very large blur, the effect all but disappears.
If the image isn’t light enough, return to the middle layer and repeat Step 1 to apply the image to itself again in Screen mode.
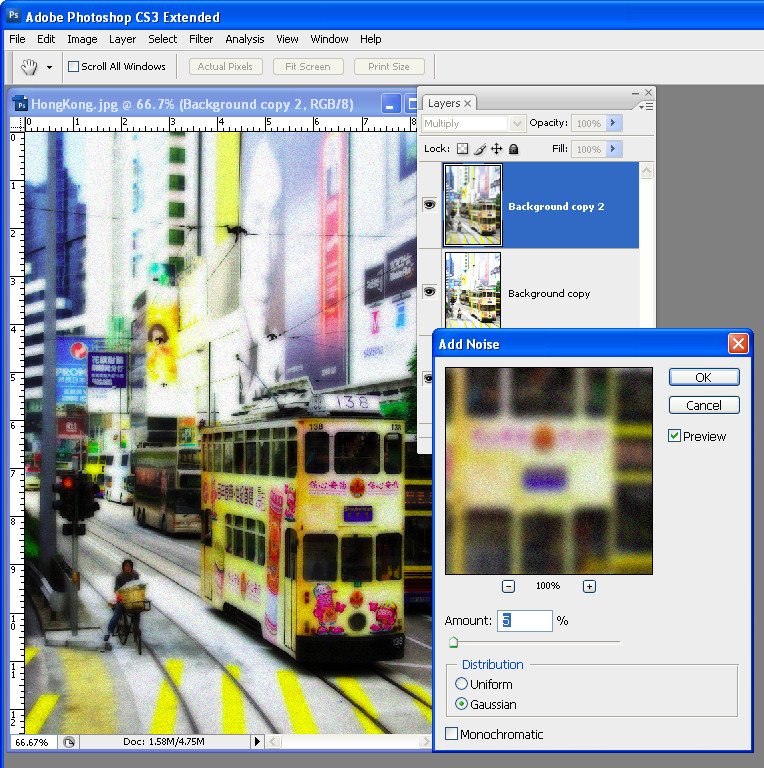
Then, if desired, add some noise to the image to give it a grainy look. To do this, choose Filter > Noise > Add Noise. Disable the Monochrome checkbox, click Gaussian and adjust the amount till you get a slightly grainy feel to the image.
The result is a soft focus image which still has lovely detail in the edges and it is a process well suited to being used with portraits as well as landscapes and cityscapes.
Using Photoshop Elements?
The same effect can be achieved in Photoshop Elements but you will need to perform step 1 the long way. To do this, duplicate the Background layer twice, set the top layer’s Blend Mode to Screen then choose Layer > Merge Down to merge it to a single layer. There is no Apply Image command in Photoshop Elements.
2 Comments
Post a Comment
Please feel free to add your comment here. Thank you!