Saturday, September 21st, 2013

Photoshop – 3 Vignette Techniques

Learn to add vignettes to your photos in Photoshop using three different methods. One uses a Inner Glow style, one a filled and blurred layer and the third the Lens Correction filter.

Transcript:

Hello, I’m Helen Bradley.

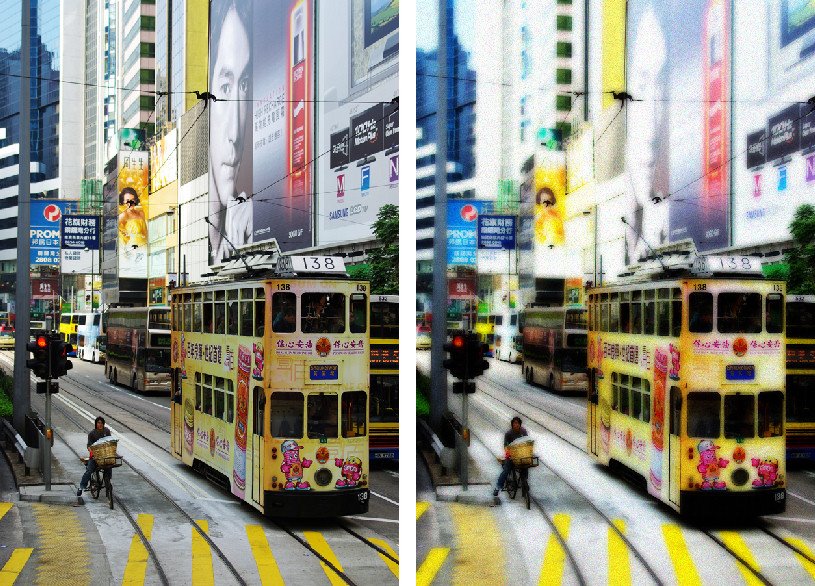
Welcome to this video tutorial. In this tutorial I’m going to show you how you can create vignettes in Photoshop in three different ways. Before we get started with this tutorial let’s have a look and see what a vignette is so that we can understand what it is that we’re aiming for.

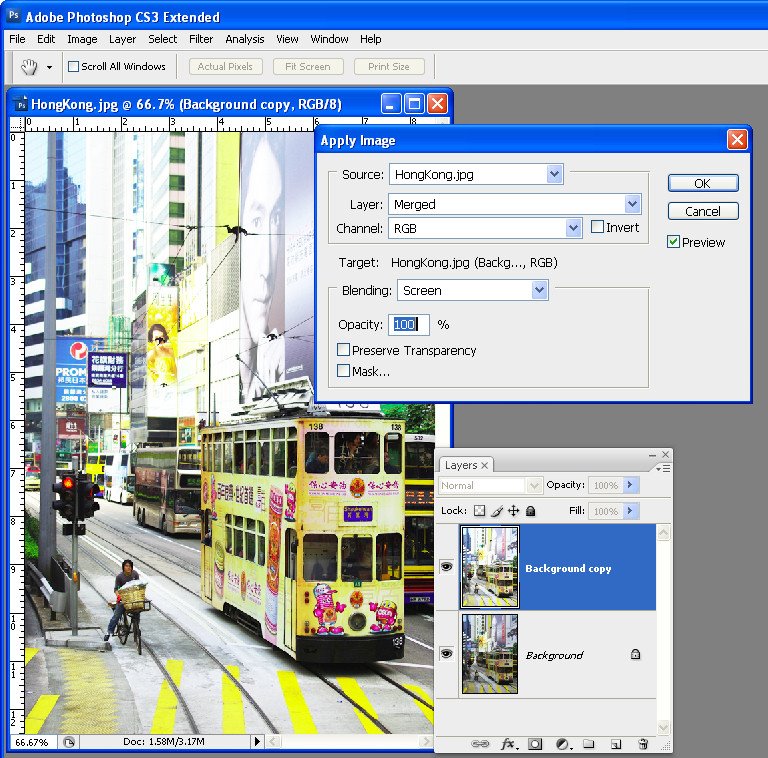
This image has a vignette. It’s a darkening around the edges of the image. If I turn this layer off you can see the original image and now there is this darkening edge. And that’s the vignette that we’re going to create. And I’m going to tuck that image away for now and let’s go and get the original image and we’ll create that same vignette style. To do this, first of all I’m going to add a new layer to the image so I’ll click on the Add New Layer icon at the foot of the layers palette. I’m going to target the Rectangular Marquee tool and I’m going to drag in here to create a marquee just inside the edge of the image because this area is going to be my vignette.

Because I have selected the middle of the image I need to invert my selection with Select Inverse and that inverts the selection so just this edge is selected. I’ll now grab a color from my image. I’ve used the Eyedropper tool here and I’m just going to grab a brown color from my image as my foreground color. And now I’m going to fill the edge here with that color by pressing Alt Backspace on the PC or Option Delete on the Mac. Now I’m going to choose Select, Deselect because I’m about to blur the edges of this and I need to get rid of the selection before I do or else I won’t be able to blur it correctly.

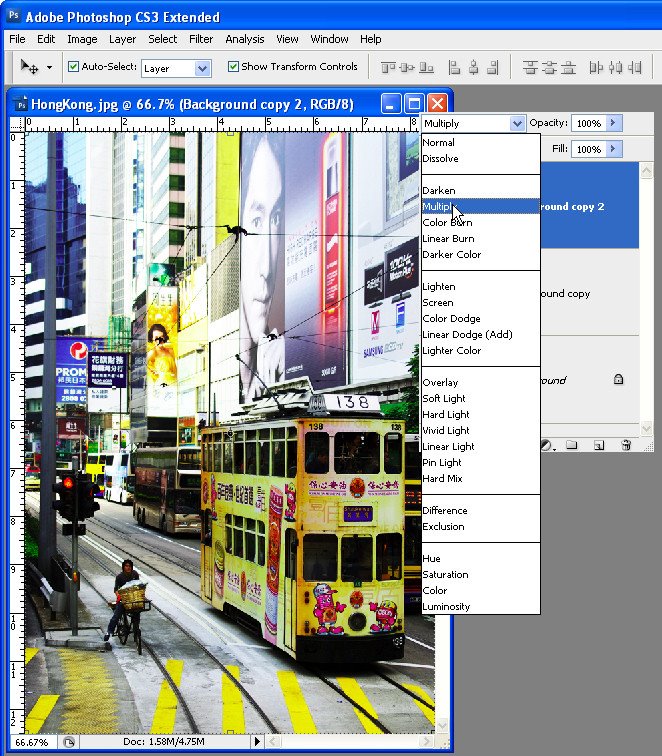
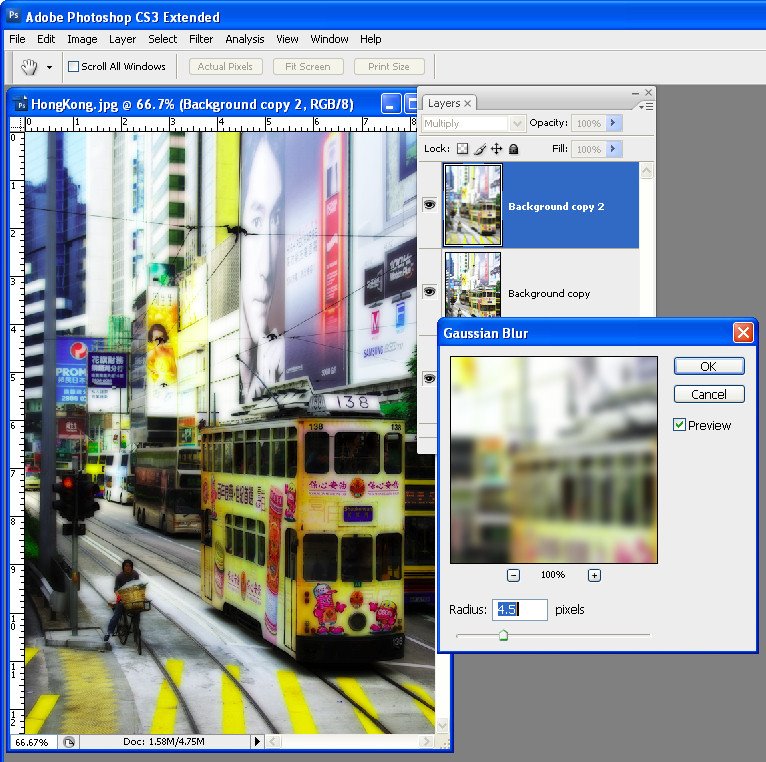
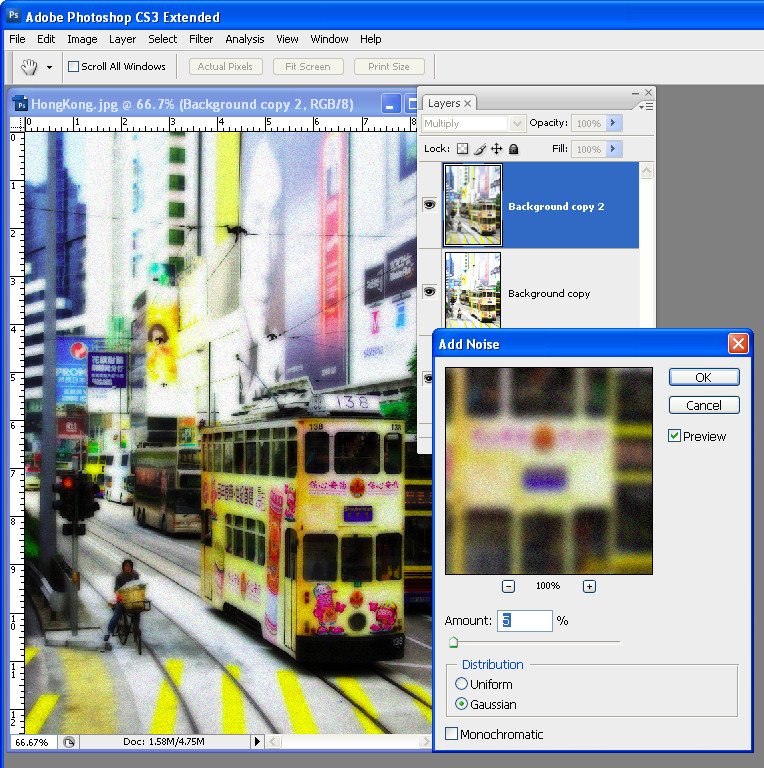
With this layer selected I’ll choose Filter, Blur and I’m going to choose Gaussian Blur because that gives me a nice blurred edge. I’m going to wind up the blur until it’s nice and soft and so you can do this as much or as little as you like. I’ll click Ok. Now to get this effect on the image rather than being painted on like this to blend it in I’m going to set the blend mode to multiply. And that multiplies the edges. It darkens it all around the edges where the image is darker and it’s not quite so dark where the image is lighter. And now I’m just going to adjust the opacity until I get a pleasant darkening of the image.

Now if I wanted to I could go one step further with this and I could with this layer still selected choose Edit and then Transform and then Warp and this would allow me to warp this layer. So for example I could pull it away from the edges but leave it more definite in the corners. So you might want to try something like that if you’re using this particular effect. It can’t be done with all other effects. So there’s one of the vignette possibilities. Let’s go and get a second version of our image and we’ll try another vignette. This time I’m going to choose Filter and I’m going to choose the Lens Correction filter.

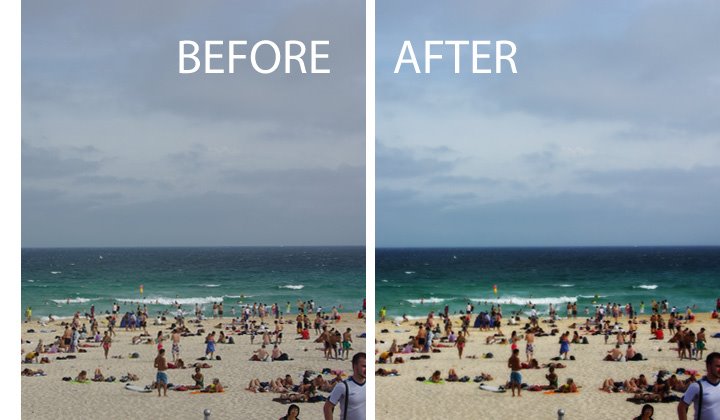
The Lens Correction filter has two panels. I’m going to click Custom because what I want to do is to add a vignette and I’m going to drag towards the darken side so that you can see that the edges of the image are being darkened. And when I have the vignette that I want here I’ll just click Ok. So now I’m going to wind this back so that you can see the effect. That’s the original and this is the vignetted version, before and after. For this final vignette we’re going to use a style. This layer has been converted from a background layer into a regular layer so I’m going to click the Effects or Style button and we’re going to add an inner glow to the image.

Now a glow can be something light but it can also be something very dark. So I’m going to click here and we’re going to choose a really dark color for our glow. So I’m looking for a sort of brown color here to use. Let’s click on that. Because I want it to be darker I need to use a different blend mode than screen because screen will always be lighter. So I’m going to use multiply and I’m going to increase the size of this quite a bit so it comes in around the edges of the image. And you can see it in place here.

And now I can adjust down the opacity if I don’t want it to be quite as dark and here I can work on the choke and I can also change the contour. So for example you can get different effects by choosing different contours here. You get a different effect again by choosing one of the ones that is looped inwards rather than bent outwards. And once I’ve got the vignette effect that I’m looking for I can just close this dialog. Now one of the things about a vignette done this way is that it’s able to be saved. For example we could save this and call it vignette and then in future we could add it to an image by adding that vignette style to it.

So I’ve just dropped the style off but let’s select this layer and now let’s choose Window and then Styles and this opens up the styles panel. This is our vignette style. We can just click to apply it to that image. So that is a very reusable vignette created using a style. So you can create vignettes using styles. You can create them using filled layers that are blurred or you can create them using the Lens Correction tool in Photoshop.

I’m Helen Bradley.

Thank you for joining me for this video tutorial. Look out for more of my tutorials on this YouTube channel. Please if you liked the video consider subscribing to this YouTube channel. And visit my website at projectwoman.com for more tips, tricks and tutorials on Photoshop, Lightroom, Illustrator and a whole lot more.

Helen Bradley

Monday, November 26th, 2012

Photoshop – Quick Portrait Makeover

Touch up your portraits with this quick video tutorial. I’ll show you how to remove blemishes and soften skin tones.


Transcript:

Hello, I’m Helen Bradley. Welcome to this video tutorial. In this tutorial I’m going to show you how you can do a quick and easy portrait makeover.

Let’s have a look and see before we begin exactly what we’re going to achieve. So this is the starter image that I started off with. And I did some spot fixing on it to make sure that I had removed the skin blemishes and then I brought out the detail from the shadows. And this is the starting point that I then had and this is the effect that we’re going to look at creating. We’re going to soften the skin and brighten the eyes in our model. So let’s have a look and see how we would start off with spot fixing this image.

I would go into this image and then I would start by selecting the spot healing brush tool here because this is a tool that you can simply just paint over problems on the skin and it will fix them. So I went over this image really, really carefully. I zoomed in and I got every single one of the blemishes on this model’s skin and it’s probably a five minute job to just neaten the image up and just to get a really good starting point for it. And then having done that I did a shadows and highlights adjustment to bring some detail out of the shadows. So I’ll choose Image, Adjustments, Shadows/Highlights. And the default setting is 35. Now I used that. It was probably a little bit high. So you could probably bring it down a little bit perhaps to around 23 or 24, but there’s a good starting point for your image. And from there you’re ready to go ahead with the softening effect.

So let’s go back to the image that I’ve spot fixed and now let’s get rid of the two layers that are the fixed layers. And we’re just going to work from the point at which we opened up some of the shadows and highlights. So the first thing that we’re going to do is to create a duplicate of this background layer, just duplicate it and then we’re going to blur it. So I’m going to choose Filter, Blur, and then Gaussian Blur. I’m going to set the blur value to sort of a lowish sort of value. What I want to do is blur the model’s skin and use that in a minute to paint over her skin. So I want something that’s sort of a little bit over what I want my final effect to be but not totally over. So I’m thinking here about 9 or 10 pixels will be a good amount for this image, so I’ll just click Ok.

And having blurred that layer a little bit I want to add a bit of noise into it and I’ll do Filter, Noise and then Add Noise. And we want to bring in monochromatic noise and we want it to be Gaussian. Gaussian noise applies more noise to the lighter areas of the image and less to the darker areas. And we want probably somewhere between 5 and 10 percent noise. And this slider is really hard to adjust at that level so I’m just going to type in 7.5 percent and that’s giving us a nice little bit of noise in her skin tones, so I’ll click Ok.

So we do not want the image to look exactly like this. We just want that to be a starting point. So let’s add a mask to this layer. I’m going to Alt or Option click on the Add Layer Mask icon. And what that does is removes the blur. it will remove the entire effect from the model. And we’re going to paint on this mask to bring back in the softening where we want it to be. So I’m going to select my brush tool and select a nice soft brush, this one’s a good brush to use, and I’m going to paint with white. I’m just going to size the brush up a little bit. Now you’ll be a bit more careful than I am being, but what I’m doing is selecting over all the areas, painting over all the areas that I want the skin to be softened. So that is basically everywhere but her nose and mouth and eyes. Although I want the skin on her nose to be softened, I don’t want to soften this detail around here. And I may want to soften this area, but I don’t want to soften her eyebrows themselves. So very carefully softening by painting on the image with white in the areas that you want it to be softened. And you can see on the mask here the areas that we’ve got and perhaps any areas that we might have missed out on at this stage. Again, I don’t want to soften that jaw line too much. that’s a nice strong line and I want to keep that there.

Now that I’ve done that I can adjust the opacity of this layer a little bit. I’m going to adjust it down to zero which is totally removing the sharpening effect. And now I’m just going to march it up using the scrubby slider until I get the amount of softening that I want. So I really want a subtle softening, not totally obvious but just subtle softening of the skin. And I think probably about 30 percent is a good value for this image.

Now I’m going to make another duplicate of this background layer and drag it to the top because what I want to do now is to fix her eyes. So all I’m going to do is focus on this top layer and I’m going to look for some stronger color and contrast in her eyes. So I’m going to choose Image, Adjustments, Curves. Curves is a good adjustment for this and again I’m going for slightly more than I need. So there is some more whites in her eye. Now I know that the blue color of her eye is in this area, so let’s add a bit more contrast through that area.

So let’s see. That’s the before and that’s the after on her eye. So I’m just going to click Ok to accept that, but of course that’s not the image effect that we what. We want more of this effect, but we’d like to borrow some of the eyes from this effect. So again I’m going to Alt or Option click on the Add Mask icon to add a layer mask. And again with my paintbrush which is already preset and my white paint I’m going to target the mask and paint over her eye. Now again this is probably going to be too much, but we can tone it down a little bit by again adjusting the opacity of the mask. So we’ll just take it up to what we want it to be. I am thinking it’s probably going to be a little too much, maybe about 50 percent.

So let’s have a look at the starting point for the image. This is post having been spot fixed and post having had shadows and highlights applied to it. Then we added the skin softening and finally we added a little bit brighter eyes in our portrait.

I’m Helen Bradley. Thank you for joining me for this video tutorial. If you liked the tutorial please click to like it on YouTube. Consider also subscribing to my YouTube channel. You’ll be advised when new videos are launched and right now that’s about twice a week. You can also visit my website projectwoman.com where you’ll find more tips, tricks and tutorials on Photoshop, Photoshop Elements. Lightroom, Illustrator and more.

Helen Bradley

Thursday, November 22nd, 2012

Photoshop Landscape Glow Effect

Quickly learn how to create a Landscape glow effect in Photoshop to give your photos a dreamlike quality.


Transcript:

Hello, I’m Helen Bradley. Welcome to this video tutorial. In this tutorial I’m going to show you how to apply a landscape glow effect.

Before we get started with creating this landscape glow effect let’s have a look and see what it is that we’re aiming for. This is the original image that I’m starting with. It’s from sxc.hu which is a stock image site and this is just a little house in the middle of a paddock. And this is the result of applying my landscape glow effect to it. The image has a bit more of a glow to it and a slightly more painterly look. I have another image that I’ve applied it to. Let’s just hide that one for now. Let’s have a look and see what this image looked like before. Again it’s a stock image and this is what it looks like after we’ve applied the effect.

So let’s get started creating this effect. I’m just going to remove these three layers from this image, and let’s see how we would do the effect ourselves. We’re going to start on the background layer of the image. And we’re going to choose Select and then Color Range because this allows us to pick out the darker areas of the image without having to make a selection which is really nice because they would be really hard to identify otherwise. So I’m just clicking to select shadows. And Photoshop has automatically selected all the shadow dark areas of my image so I’m just going to click Ok. And this is the selection it has made.

Now I’m going to put this on a new layer so I’m going to choose Layer, New, Layer via Copy. And that’s going to copy the blacks onto their own layer. So you can see this is what we’ve got. I’m actually going to hide that layer for now. Now I’m going to make two additional copies of the background layer. I’m going to right click it and choose Duplicate Layer and click Ok and then do that again. With the topmost of these duplicate layers I’m going to set its blend mode to Screen and that will lighten the image considerably. And then I’m going to merge this layer into the layer below by choosing Layer, Merge Down.

Now I have a lighter version of the image on top of the original. And I’m going to duplicate this so I have two light versions of the image on top of each other. And I’m going to set the blend mode for this particular top layer to Multiply and that will darken it all again. Now with this darkened layer I want to blur it so I’m going to choose Filter, Blur, and then Gaussian Blur. And I’m going to set my blur to a quite high value, something like sort of 9 or 10 but in that sort of higher value area so I’m going to get this sort of glow look to my image and click Ok.

So there’s my blurred darkened layer, my light layer underneath and my original layer below. And now that I’m ready to do so I’m going to make the top layer this dark tree visible again. And you can see that in actual fact the pixels in that layer are really quite light in comparison now to the rest of the image underneath. And I can even make it lighter by blending this particular tree back in in Screen mode and then just adjust the opacity down to suit. So that’s giving my landscape a very sort of glow look. It’s a lot richer color and a lot more of a glow look to it.

So I hope you’ve enjoyed this video tutorial. Thank you for joining me for it. If you liked the tutorial please like it on YouTube and subscribe to my YouTube channel to be advised when new videos are released which is a couple of times a week. You can also visit projectwoman.com for more tips, tricks and tutorials on Photoshop, Photoshop Elements, Lightroom, Illustrator and others.

Helen Bradley

Sunday, June 14th, 2009

Orton Effect – Photoshop


Photoshop gives us tools we can use to create effects which previously could only be obtained in the darkroom using images which were captured specially. One such process is the Orton effect named after photographer Michael Orton. This process results in a somewhat surreal image which has a slightly out-of-focus look while retaining lots of edge detail.

In the darkroom this effect is created using two images one of which is slightly out of focus and both of which are slightly overexposed. Sandwiching these together and taking a print yields a photograph similar to the one above.

Thanks to Photoshop we can create this effect from a single well exposed image and create the overexposed and soft focus looks digitally.

Here is how to create this Orton effect on an image from your collection:


Open the image, right-click the background layer in the layers palette and select Duplicate layer. With the duplicate layer selected choose Image > Apply Image, select the Screen blend mode and click Ok. This applies the image to itself in screen mode which is the same as creating an additional duplicate layer, setting this layer’s blend mode to Screen and then merging the two layers. The benefit to using Apply Image is that you do it all in one step.


Duplicate this layer and set its blend mode to Multiply. This has the effect of cancelling out the lightening effect from applying the Screen mode.


With this topmost layer still selected apply a blur to it using Filter > Blur > Gaussian Blur. Select the Preview checkbox so you can see the result on the image. Adjust the blur Radius to your choice of value – I used 4.5 but choose the best for your image. Notice that, if you create a very large small or very large blur, the effect all but disappears.


If the image isn’t light enough, return to the middle layer and repeat Step 1 to apply the image to itself again in Screen mode.

Then, if desired, add some noise to the image to give it a grainy look. To do this, choose Filter > Noise > Add Noise. Disable the Monochrome checkbox, click Gaussian and adjust the amount till you get a slightly grainy feel to the image.

The result is a soft focus image which still has lovely detail in the edges and it is a process well suited to being used with portraits as well as landscapes and cityscapes.

Using Photoshop Elements?
The same effect can be achieved in Photoshop Elements but you will need to perform step 1 the long way. To do this, duplicate the Background layer twice, set the top layer’s Blend Mode to Screen then choose Layer > Merge Down to merge it to a single layer. There is no Apply Image command in Photoshop Elements.

Helen Bradley

Friday, March 27th, 2009

3 Step Photoshop Every Image Quick fix


Ok, so not technically Photoshop only – this tip works for any image software that supports layers, has layer blend modes and can do a gaussian blur. That includes Photoshop, Photoshop Elements and Paintshop Pro as well as lots of other great photoediting programs.

This is a very quick fix for boosting and image and giving it a really nice look.

Step 1
Start by duplicating the image layer by choosing Layer > Duplicate Layer.

Step 2
Add a Gaussian blur to the top layer by using Filter > Blur > Gaussian blur. You need to use enough radius to get a nice light blur on your image. For smaller images you need only a small value blur – say 2-4 and for larger images you will need a higher value. Click Ok when you’re done.

Step 3
Now set the Blend Mode for this blurred top layer to Soft Light or Overlay. You’ll get a nicer looking image and the colors will get a nice boost. Reduce the layer opacity a little if necessary.

This is a simple and effective fix and isn’t that the best type?

Helen Bradley