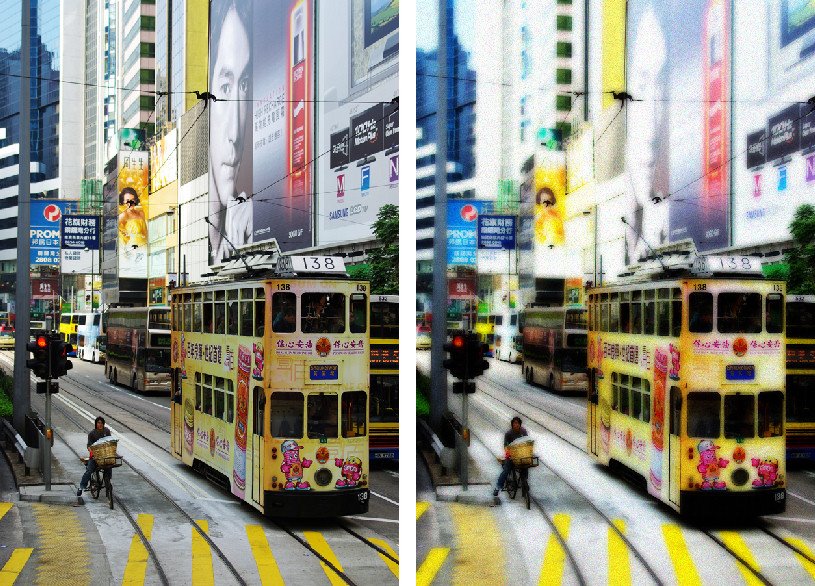
The Orton effect is a process named after photographer Michael Orton. The process is a darkroom one where you take two negatives, both overexposed – one properly focused and one slightly out of focus. Sandwiching these together and processing them gives you an image with a slightly surreal look to it.
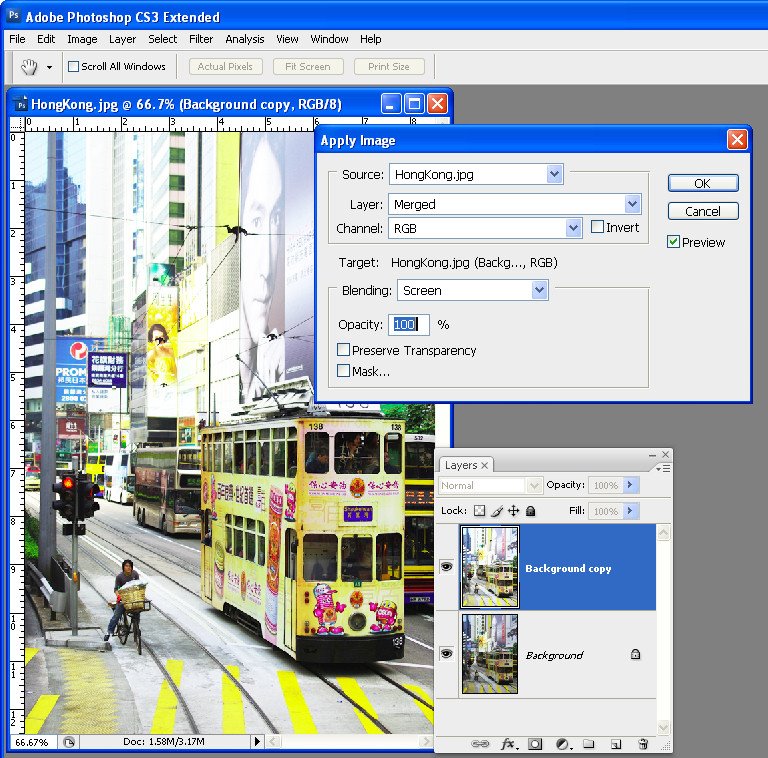
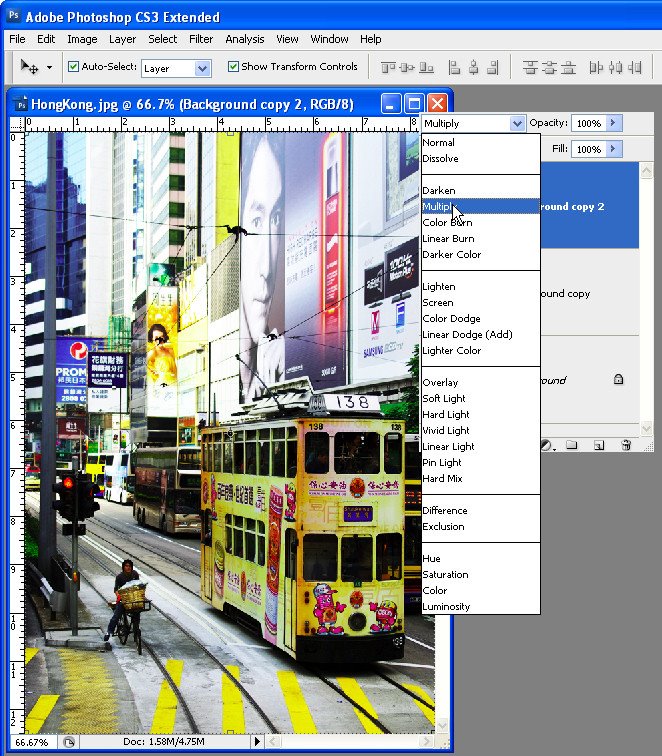
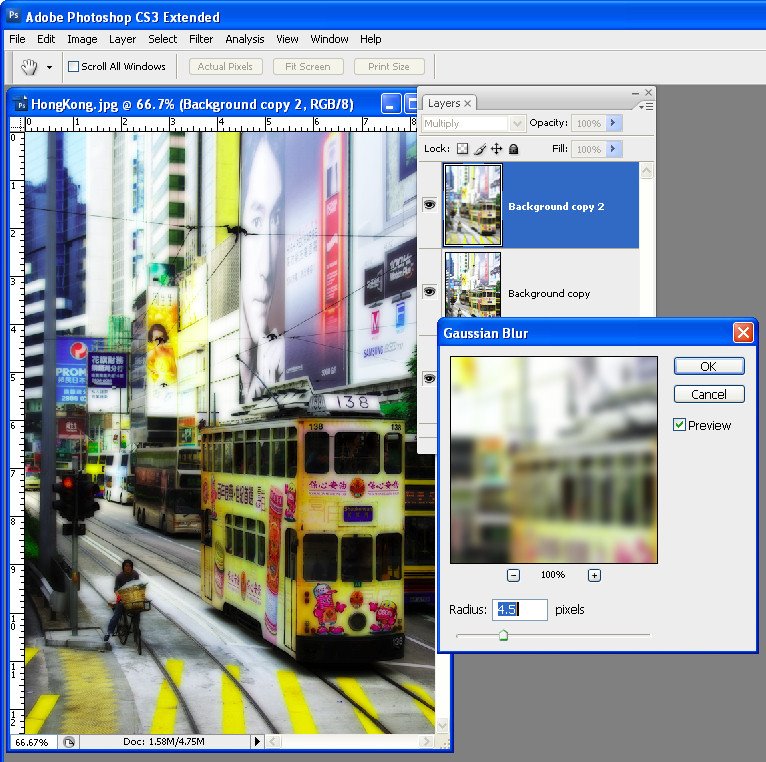
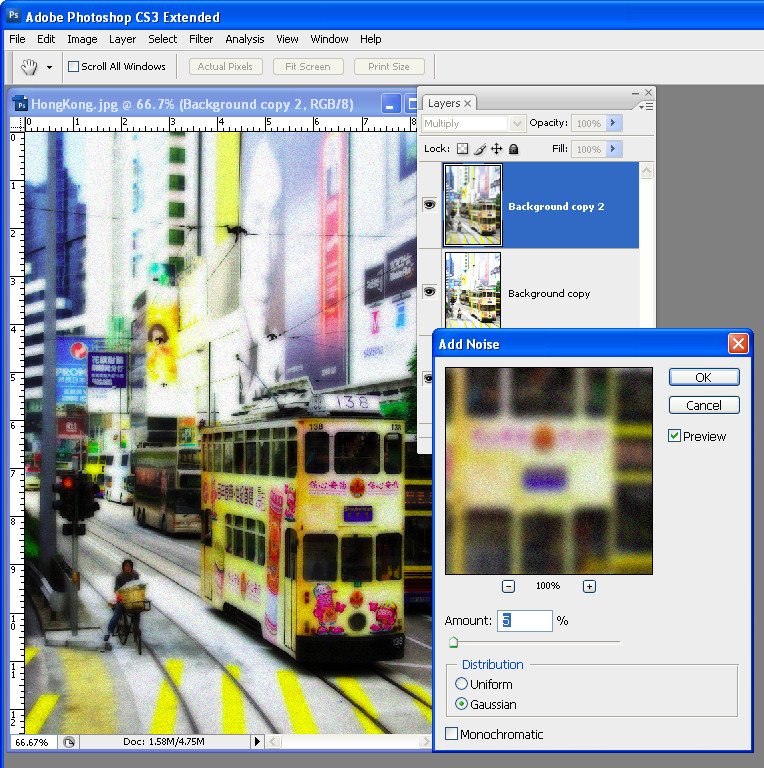
In Photoshop you can create a faux Orton look by duplicating your image’s background layer, set the layer’s blend mode to Screen and flatten the image. Duplicate this layer and set the blend mode to Multiply. Add a medium size radius Gaussian Blur to the topmost layer and, if desired, lighten the image and add some grain to it to give it a classic Orton look. I have a detailed blog post showing how to do this step by step here.

I’ve seen a few people who have said that you can’t replicate this effect in Lightroom because you don’t have layers in Lightroom. However, I’ve developed a workaround solution that gives a comparable result which I really like.
The advantage of this solution is that it can be saved as a Lightroom preset so you can apply it to other images at any time in future.
The process involves starting out with a well-adjusted image so process it as you would any image.
If desired make a virtual copy of the image by right clicking it and choose Create Virtual Copy.

Add a graduated filter to the image. Start the filter just inside the bottom edge of the image and drag down until you are just over the edge. What you want is for the filter to be anchored to the top edge of the image and to extend all the way across the image at a full intensity.

Set the Graduated filter so all values are zero except Clarity = -100 and Sharpness = -45. The combination of negative clarity and sharpness softens the image. Click the Done button under the image.

Now add a second Graduated filter over the top of the other one. Apply these settings to the image. Exposure +0.15, Brightness +10, Contrast = +80, Saturation +20, Clarity -100.

You can vary any of the settings on this last Graduated filter if desired to improve the image. What you’re looking for is an image with an ethereal glow.
It will help you to get this effect if you boost the Blacks in the image in the Basic panel.

Finish off the effect by opening the Effects panel and add some grain to the image.

To save this as a preset, click the plus symbol opposite the Presets panel on the left – give the preset a name and disable all checkboxes and then select only the Grain and Graduated Filters checkboxes. If you want to add the increased Black to the preset, click the Black Clipping checkbox too. When you’re done, click Create to create the preset.

You can now apply this preset to another image. First make sure to properly expose the image and then, open the Presets panel and click your preset to apply it to your image.

You may need to tweak some of the settings for the image as a result of doing this but you should have an image that has a glow effect to it and with a good approximation of the classic Orton look.
Of course, you can achieve the same effect in Adobe Camera Raw.
If you want to avoid the work and use my preset instead – here’s a link to download my free Orton Lightroom preset.