Saturday, July 13th, 2013

Create a reusable layered image effect in Photoshop

Learn how to create a layered image effect that can be reused any time. The process can be done in most versions of Photoshop and it uses smart objects, simple to create clipping masks and some layer blending. It is pretty easy to create and can be used over and over again.

Transcript:


Hello, I’m Helen Bradley.

Welcome to this video tutorial. In this tutorial I’m going to show you how you can create a quick cut and layer image effect that’s sure to turn any image into something that looks just a little bit more spectacular.

Before we get started with this project let’s look and see what it is that we’re aiming at. Here is my original image and this is the effect we’re going to create. We’re going to create a number of layers or what look like layers of the image and we’re going to blend them together. Now this effect is customizable.

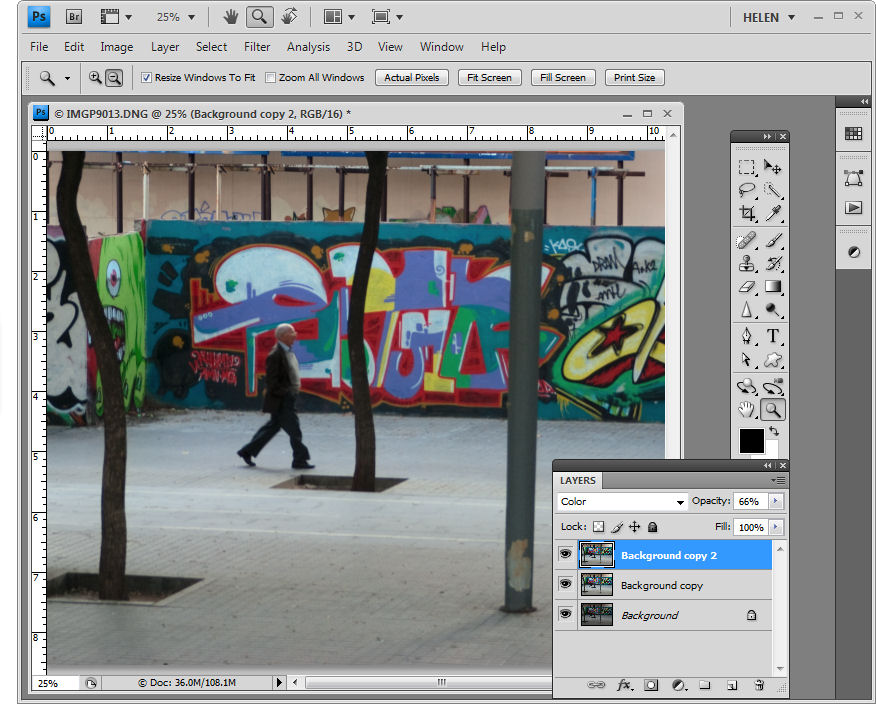
It’s really easy to select one of the shapes and to move it so that everything gets rearranged and it’s also really easy to replace the base image. So let’s get started. And I have a new image to work with here. I’m going to start by converting the image to a Smart Object.

So I’m going to right click the background layer and choose Convert to Smart Object. And now we’re going to start adding our layers of shapes. So I’m going to click to add a new layer. Let’s get my tool bin. I’m going to select the Rectangular Marquee tool. And let’s create a shape. I’m going to create this big rectangle here.

With this layer selected I’m going to make white my foreground color and Alt Backspace, Option Delete to fill the shape with white. Now in each case I need the layer and the image so I need multiples of this pair of image. So I’m going to right click and choose Duplicate Layers and click Ok. Now I’ve got my second shape up here.

I’m just going to turn off my images so that we can see the shapes alone. And I’m going to move this shape out of the way and I’m just going to resize it to a different size shape here. I’m going to select these two layers, right click and duplicate them again. And now I’m going to this top version and I’m going to again alter it a little bit.

You don’t have to alter it. You can leave it exactly the same shape if you want to. Select the two layers, right click, Duplicate Layers, click Ok, again selecting this top one and just moving the shape into position and resizing it to suit. Now that we’ve done this we can start to create the effect.

And what we’re going to do is we’re going to crop these images. So I need one more of this Smart Object layer so I’m just going to duplicate this layer once more and drop it on the top. Now I’m going to create a clipping mask. So with these layers all visible and all selected first of all I’m going to select the topmost layer and I’m going to choose Layer > Create Clipping Mask. And what that does, let’s just have a look, is it clips the top layer to the shape and size of the layer below.

So when we turn these two on and create a clipping mask here, Layer > Create Clipping Mask, we’re going to get a built up effect. Let’s do that again here and create a clipping mask. First of all we need to turn these two layers on and then with the picture layer selected we can choose Layer > Create Clipping Mask or you can do it using the keys.

What I do is hold down Ctrl and Alt, which is Command and Option on the Mac, and just hold my mouse over the intersection between these two layers until I get this icon and then click once. Now I find that a whole lot easier and you may too if you create a lot of clipping masks. It’s really important that the clipping masks are filled with white.

Now in normal circumstances it doesn’t matter too much what you fill your clipping mask layer with but in this case it’s going to because we want to reduce the opacity of the layers a little bit so that we can see some of the background through. And so when we add two layers together, when we overlap two layers, we’re going to get a darkening in the area where they overlap.

So first of all I’m going to adjust the opacity down a little bit and now I’m going to select all of these layers by Ctrl or Command clicking on each of them in turn and set their blend mode to multiply. And what that does is it multiplies the fill layers so that the layers are built up so that we get some overlap between these layers so we can start seeing where they’re overlapped.

And from here you can just tweak the effect to darken or lighten the individual layers as you want to so that you get the effect that you’re looking for. And you can also fill in the background. So we can add a new layer, drag it to the very bottom of the layer stack and then fill it with whatever we like. I’m actually going to sample some of the yellow color from this leaf and with the layer selected I’ll Alt Backspace on the background layer to fill it with that.

But I could also fill it with a gradient. I could do all sorts of things. Now the important thing to know is that once you’ve created this effect it is fully customizable. So it’s very easy to replace this image with another image. All we need to do is to right click the layer, one of these layers that is a Smart Object, any one of them will do, and choose Replace Contents. So now what I’m looking for is an image to replace the contents with.

The image doesn’t have to be in the exact same proportions. We were using a landscape image but these are square images. But they do need to be good size images. So I had a really large image that I was working with so I want this image to be nice and big. And this one is 3,100 pixels so it’s pretty big. So I’ll select it and click Place and when I do it’s replacing the original image.

And I may want to adjust the opacity of these so that I get the effect that I’m looking for. For example, I mightn’t get enough of a layering effect without adjusting the opacity. And I may also want to adjust the background of this image to give it a darker background in these circumstances.

But it’s very easy to just reuse all of the basic work that you’ve done with this image and just replace it with another image. So I’m just sampling a color to use, Alt Backspace to fill the background. And there we have our effect. You could also use a color for these clipping mask layers but be aware that any color that you use is going to come through the images.

So let’s just make black our foreground color. Let’s just target this particular layer here and I’m going to Alt Backspace to fill it with black. Well you can see that the multiply effect has totally blackened that out. But if I use a sort of fairly light color here, well this is sort of a pale blue, but you’ll get the same effect, and fill it here you’ll see that we get a slightly darker look.

So we can darken this and have an effect on the image. The darker the color we use we’re going to not only see the color itself or example if we use pink we’re going to see the color through the image but we’re also going to darken up the effect.

Now it would be possible for example to choose different colors. So I’ve got some pastel colors that I’m filling these with. Let’s go for a sort of pastel blue here. And you can see the effect that it’s having, well I chose the wrong layer there. Let’s just undo that. Let’s go to this one and actually select the layer and fill it with a pastel blue.

So you could do that as well. And of course any time you choose to replace the image these color layers are going to stay in place so that you’ll get the effect on the new image that you’re replacing this one with. So there’s plenty of creative possibilities here in creating a layer image effect in Photoshop.

I’m Helen Bradley.

Thank you for joining me for this video tutorial. Subscribe to my YouTube channel so you’ll be advised when new videos are released.

And visit my website at projectwoman.com for more tips, tricks and tutorials on Photoshop, Lightroom, Illustrator, Photoshop Elements and a whole lot more.

Helen Bradley

Tuesday, May 28th, 2013

Photoshop – 3 Blend Modes you MUST KNOW

Learn three must know blend modes for Photoshop and in particular for editing photos in Photoshop. Covers how to use Screen, Multiply and Overlay blend modes.

Transcript:
Hello, I’m Helen Bradley. Welcome to this video tutorial. In this tutorial I’ll introduce you to the three must know blend modes in Photoshop. I’ll explain how they work and how you might put them to use.

There are three blend modes that it’s really handy to know how to use in Photoshop, and we’re going to look at those three blend modes in this video tutorial.

In this particular image I have a picture of a building in Darwin and over the top of it I have a second layer. And on the right hand side is the exact duplicate of the layer below. And on the left hand side is just the color pink because we’re going to have a look and see how these blend modes work not only with images where you’ve got two layers that are identical but also what happens when you have for example a layer that is different. And the three blend modes that are really handy to use are got to by clicking this blend mode dropdown list in the layers panel in Photoshop.

If you can’t see your layers panel choose Window and then Layers and that will show you your layers panel. When you’re using blend modes you’ll always use the blend mode on the topmost layer or the layer that you want to affect. And it will affect how this particular layer blends in with the layer or layers below.

The first blend mode we’re going to look at it is this one here. It’s Screen. Now you’ll see that the blend modes here are grouped together. The blend modes in this particular group are the lightening blend modes. They are lighten, screen color, dodge, linear dodge and lighter color. And we’re going to look at screen in this particular group. And screen always lightens an image. So you can see here that the image is lighter than it was in the original. Here it’s colored this sort of pink tone. And here we’ve just got the original image over again, but it’s a lighter version. This is a blend mode that you can use to salvage an underexposed image. If you’ve got an image that doesn’t have enough light in it, you could use the image on each of the layers and then blend the top one into the bottom using the screen blend mode. And that will lighten the image and bring detail out of it.

The next blend mode we’re going to look at is similar but works in the opposite way. This is a darkening blend mode. And it’s accessible from this darken group of blend modes: darken, multiply color burn, linear burn and darker color. And in this case the one we’re going to use is multiply. And multiply darkens the image. You can see that we’ve got a darker version of the image with this sort of pink overlay. But here where we had the image on the two layers, the exact same image on each of the two layers, you can see that we’ve got a darkening of the image. This would be useful if we had an overexposed image. If we put the overexposed image on two layers and then blend them together with the multiply blend mode, we’ll bring back some of the detail in the overexposed image.

The other of the blend modes that you’ll typically use in Photoshop is overlay. It’s in this group of blend modes, and it’s one of the contrasty blend modes. What this does is it lightens everything that is lighter than a mid-gray and it darkens everything that is darker than mid gray. So it’s a nice contrasty blend mode. Let’s have a look here at what it’s doing to the image on the right. You can see that this is a flatter sort of image. And when I turn on this layer we’re getting a lot more contrasty image. And that’s what’s happening on the left too is we’re getting a contrasty, a colored version, of the original image. Anytime you want to boost the contrast in an image you can use the overlay blend mode.

So the three blend modes that I suggest that you look at using with your photos in particular are multiply to darken, screen to lighten, and overlay to add some contrast and punch. Now if you find that a certain blend mode is too much let’s just get rid of this particular layer and let’s duplicate the image itself. And let’s go and use the overlay blend mode. And if this is too much of a contrast enhancement to the image all you need do is to back off the opacity of this layer. This will give you some of the layer below and some of this additionally contrasty layer so that your image gets more contrast but perhaps not as much as it would have if you’d had this layer at 100 percent opacity.

I’m Helen Bradley. Thank you for joining me for this video tutorial. Look out for more of my tutorials on this YouTube channel. Comment on the video and like it if you like it. And look out for more tips, tricks and tutorials on Photoshop, Lightroom, Illustrator and a whole lot more at my website projectwoman.com.

Helen Bradley

Wednesday, May 15th, 2013

Photoshop – Collage Effects with Blend Modes

Learn how to combine two images to make a collage. Includes use of Blend modes in Photoshop, color range color selection, clipping mask, layer mask, hue saturation adjustment layer, drop shadow layer style.

Transcript:
Hello, I’m Helen Bradley. Welcome to this video tutorial. In this tutorial I’m going to show you how you can create some simple collage effects using blend modes in Photoshop. This is the effect that we’re going to create in this video tutorial. I’m going to show you how you can put the pieces of this together in just a few minutes using a couple of images and some blend modes.

We’re going to start off with this image and another one that I shot at the neon boneyard in Las Vegas, and that’s giving us the texture. And we’re going to combine these two images with a blend mode. And then we’re going to extract the color from this original image, this sort of orange color. And we’re going to recolor it using a Hue/Saturation adjustment layer. But if we wanted to leave it at this point we could leave it just with that additional color. And we’ll also going to add a drop shadow with a different color behind it.

So let’s see how we would create this effect. And I’m going to start with my two images, and I’m going to put one image into the other. So I’m going to grab this neon boneyard image and I’m just going to drag and drop its background layer in on top of this original image. I’m just going to size it so that it’s right over the top. And the first thing I would do with a collage like this is look and see what sort of opportunities I had with blend modes.

So I’ll generally select the first blend mode in the list, Dissolve, which generally gives me nothing at all. And now I can just arrow down and see what happens when I click on each of these blend modes. And all I’m looking for is something interesting. And you’ll generally get a better effect with this if you use images that are a little bit more textural and a little less like something where you don’t really particularly want to bring out of the image exactly what was in it. But you want to discover how these two images can interact with each other and what you can do with them as they interact. So that’s all the way down through the blend modes. And so I’m going to go back up and I’m going to settle on something that I want to use. And generally the most interesting bits are going to be in the overlay or the contrasty area. So in this area and sometimes even with lighten and darken.

So let’s just go up through these and find something that we like. And I’m thinking actually I might like something like this perhaps with the Opacity dragged down a little bit. Now what I want to do is to bring out the orange color in the original flower so that I can lighten them a little bit in this layer here. And what I’m going to do is create a duplicate of the background layer. And I’m going to drag it above the image. So right now all we’re seeing is this original background. And what I want to is to select the leaves in it.

Now the leaves are really bright colored here. So I’m going to choose Select. And in this case I’m going to use Color Range because it’s going to be the easiest way to select these leaves. Now either I can select on the sampled color and add to it this way by just clicking on these leaves or I could use just the reds and just grab the reds. But I think Sampled Colors is actually going to give me a slightly better effect here.

So let’s just go back to this and let’s choose Sampled Colors here and just click Ok. Now that has isolated the leaves here and what I want to do is to keep these leaves but drop the rest of the image out. And I’ll do that with a mask. And because my leaves are selected, all I need to do is to click on the Add Layer Mask icon. And what happens is that the leaves are then masked and left behind and the rest of the image is just dropped away. So this is the before and this is the after. And you can see we have brought in the color from these leaves.

Now if we wanted to we could even lighten this color. We’ve got some of the orange color in. But we may want to brighten it up even more. So I’ll make sure that my image layer is selected and choose Image, Adjustments. And then I could use levels or curves. I’m going to use levels, and I’ll just lighten this is a little bit and click Ok. Now in the earlier image that you saw we had actually colored these blue and it’s very easy to color them blue.

To do that we’ll choose Layer, New Adjustment Layer and we’ll choose a hue/saturation adjustment layer and just click Ok. Now I want this adjustment layer to only affect the red leaves so I’m going to clip this. So with this adjustment layer selected I’m going to choose Layer, Create Clipping Mask. And so anything that I do to this adjustment layer here is only going to affect the layer below, just these red flowers. So now let’s double click on the Hue/Saturation adjustment layer and now we can go and make some changes to it. And I’m looking for a blue color which will either be at this end or this end of the hue slider. So I can get to either this sort of greeny blue if I wanted or I can get to a sort of purplely blue. I’m thinking the greeny blue will be pretty good here. And now I can adjust its saturation and its lightness from here. So when I have what I like I’m just going to close that dialogue. So that has recolored those leaves to a bluey color.

And finally let’s add a drop shadow behind the leaves. So I’m going to select the leaf layer, and I’m going to choose a drop shadow effect. Now drop shadows might start out being dark but they don’t have to end up being dark. So what I’m going to do is go and find a really cool color for this drop shadow. And I’m thinking a really, really bright pink will do me. So let’s choose that. And I want to up the opacity of this. I could set it to normal so it’s going to be a very, very pink shadow. And then I’m going to adjust the settings for this. Spread is going to be the size of the shadow and softness or size is going to give me some softness. But there’s a very small sweet spot here on this that I can very, very easily exceed. So I’m just going to add my shadow in. And I think I’m going to multiply blend mode my shadow, not apply it with the normal blend mode. Although I could use normal for example with a much lower opacity if I wanted to give it this sort of pinky color. I might leave it at that.

So there’s a way of creating some interesting collage effects. And all we’ve done is grabbed a couple of images and put them on top of each other and blended them with something that counts as being an interesting blend mode. And then I isolated the orange flowers in the image and brightened them up. I also added a drop shadow in a very contrasty color. And I added to a hue/saturation adjustment layer that only effects these orange flowers to use the brightness of them but to color them a different color. And you can do all sorts of things by just combining images. And that gives you lots of practice at making color selections, using clipping masks, using masks, using blend modes and just having a little bit of playtime and a little bit of fun creating interesting effects in Photoshop.

I’m Helen Bradley. Thank you for joining me for this video tutorial. Look out for more of my tutorials on this YouTube channel and please like and comment on the tutorials if you would. Also visit my website at projectwoman.com where you’ll find more tips, tricks and tutorials on Illustrator, Lightroom, Photoshop and a whole lot more.

Helen Bradley

Thursday, November 22nd, 2012

Photoshop Landscape Glow Effect

Quickly learn how to create a Landscape glow effect in Photoshop to give your photos a dreamlike quality.


Transcript:

Hello, I’m Helen Bradley. Welcome to this video tutorial. In this tutorial I’m going to show you how to apply a landscape glow effect.

Before we get started with creating this landscape glow effect let’s have a look and see what it is that we’re aiming for. This is the original image that I’m starting with. It’s from sxc.hu which is a stock image site and this is just a little house in the middle of a paddock. And this is the result of applying my landscape glow effect to it. The image has a bit more of a glow to it and a slightly more painterly look. I have another image that I’ve applied it to. Let’s just hide that one for now. Let’s have a look and see what this image looked like before. Again it’s a stock image and this is what it looks like after we’ve applied the effect.

So let’s get started creating this effect. I’m just going to remove these three layers from this image, and let’s see how we would do the effect ourselves. We’re going to start on the background layer of the image. And we’re going to choose Select and then Color Range because this allows us to pick out the darker areas of the image without having to make a selection which is really nice because they would be really hard to identify otherwise. So I’m just clicking to select shadows. And Photoshop has automatically selected all the shadow dark areas of my image so I’m just going to click Ok. And this is the selection it has made.

Now I’m going to put this on a new layer so I’m going to choose Layer, New, Layer via Copy. And that’s going to copy the blacks onto their own layer. So you can see this is what we’ve got. I’m actually going to hide that layer for now. Now I’m going to make two additional copies of the background layer. I’m going to right click it and choose Duplicate Layer and click Ok and then do that again. With the topmost of these duplicate layers I’m going to set its blend mode to Screen and that will lighten the image considerably. And then I’m going to merge this layer into the layer below by choosing Layer, Merge Down.

Now I have a lighter version of the image on top of the original. And I’m going to duplicate this so I have two light versions of the image on top of each other. And I’m going to set the blend mode for this particular top layer to Multiply and that will darken it all again. Now with this darkened layer I want to blur it so I’m going to choose Filter, Blur, and then Gaussian Blur. And I’m going to set my blur to a quite high value, something like sort of 9 or 10 but in that sort of higher value area so I’m going to get this sort of glow look to my image and click Ok.

So there’s my blurred darkened layer, my light layer underneath and my original layer below. And now that I’m ready to do so I’m going to make the top layer this dark tree visible again. And you can see that in actual fact the pixels in that layer are really quite light in comparison now to the rest of the image underneath. And I can even make it lighter by blending this particular tree back in in Screen mode and then just adjust the opacity down to suit. So that’s giving my landscape a very sort of glow look. It’s a lot richer color and a lot more of a glow look to it.

So I hope you’ve enjoyed this video tutorial. Thank you for joining me for it. If you liked the tutorial please like it on YouTube and subscribe to my YouTube channel to be advised when new videos are released which is a couple of times a week. You can also visit projectwoman.com for more tips, tricks and tutorials on Photoshop, Photoshop Elements, Lightroom, Illustrator and others.

Helen Bradley

Saturday, January 2nd, 2010

Photoshop – Cool fix for an underexposed image

My camera seems to shoot consistently on the side of underexposing images and while sometimes an exposure adjustment will solve the problem I often need a stronger fix.

This is when Lab color can help out. This color mode has special characteristics in that it can handle very bright colors differently than RGB mode does and it can be used to boost brightness in an image while at the same time ensuring that color isn’t lost when you do this using screen blend mode. Here is a simple fix for underexposed images – if you like it you can create it as an action so all you have to do is run the action then tweak the opacity of the top layer to get the result you want.

Step 1

Right click the background layer of the image and choose Duplicate Image. Choose Image > Mode > LAB Color and select Don’t Flatten.

Step 2

Choose Layer > New Adjustment Layer > Levels and click Ok twice. This applies a levels adjustment with no change to the image. Set the layer blend mode to Screen.

Step 3

Select the Levels adjustment layer in the layer stack and choose Layer > Merge Down to merge this layer into the layer below. Choose Image > Mode > RGB Color and select Don’t Flatten to return to RGB Color with both layers intact.

Step 4

Right click the top layer (it’s the duplicate background layer) and choose Duplicate Layer and click Ok.

Select the middle of the three layers and set its blend mode to Luminosity.

Select the topmost layer and set its blend mode to Color.

Adjust the opacity of the top layer until you get an acceptable amount of color in the image.

Helen Bradley