In previous posts I’ve advocated using the Exposure slider to lighten an image but lately I’ve added the Brightness slider to my workflow. I’d encourage you, if you haven’t already done so, to experiment with it on your images.
However, before we begin a word of warning about Brightness/Contrast in general. Brightness adjustments in some programs aren’t as good as in others. If you’re using Photoshop CS2 or earlier, for example, use Curves or Levels to lighten an image not Brightness. In Photoshop CS3 the Brightness/Contrast tool was re-engineered and instead of adjusting all pixels equally as it used to do with the result that highlight areas were routinely destroyed in the process, it now protects the lightest pixels as it lightens the image. Before trusting your image to a program’s Brightness and Contrast tool, check your histogram before and after using it and make sure you aren’t blowing out highlights in your quest for a lighter/brighter image.
Now, back to Lightroom.

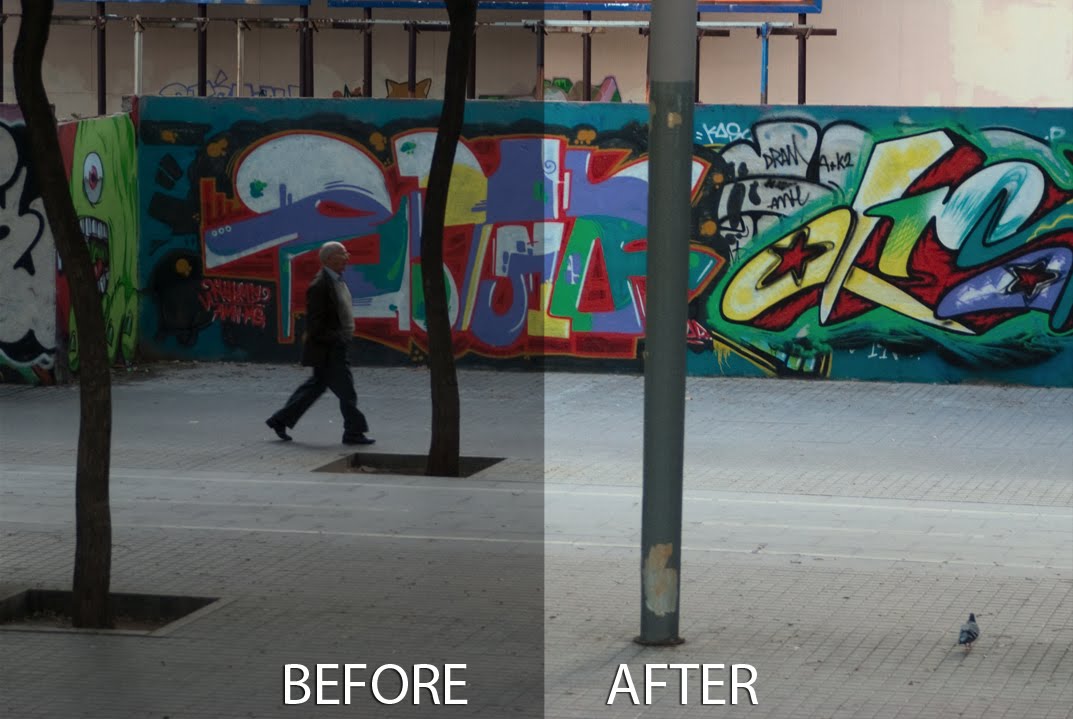
Take a look at the image shown here. If I leave Brightness at the default value – which for my camera is +50 but which may be different for yours, and if I crank up the Exposure to the maximum value, a lot of the lighter pixels in the image get blown out.
Of course I would never adjust an image to this value but it’s a useful exercise to see how Exposure works.

When I do the same thing in reverse and leave Exposure at its default value of 0 and crank Brightness up to its highest value only a small number of pixels are blown out.
Using the Brightness slider lightens the image while at the same time protecting the lightest pixels in the image from being blown out as a consequence.
So what does this knowledge mean to you in a typical Lightroom workflow? Well, my new Lightroom workflow for lightening and brightening an image involves using the Exposure slider first of all to adjust the overall exposure of the image but I stop short of where too many highlights get blown out.
Next I test the Recovery tool on the image. Hold the Alt key as you drag on the Recovery slider to check to see if there are blown out highlights (they show as varying colors on the black background). Drag to the right to see if they can be recovered . If they can’t be recovered ease off on the Exposure and check again.
If I have shadow areas in the image that are still overly dark I’ll adjust these using the Fill Light slider. This tool helps recover detail hidden in shadows, but it’s not a tool I’d use for an overall brightening effect.
Finally, I use the Brightness slider to increase the overall image brightness. Somewhere between the Exposure slider and the Brightness slider is the sweet spot for lightening an image.
From there, I’ll adjust Vibrance and Clarity and sharpen the image.
While we’re on the topic of the Brightness slider, check out the default value on an unedited image so you know where your starting point is. For most raw images, Lightroom defaults to a Brightness of +50 and Contrast of +25 as its starting point.

Also take care when working with images you had processed in Lightroom 2 with Lightroom 2 settings. When you upgrade to Lightroom 3, you’ll have a choice of Updating your images to the new Lightroom 2010 Process. My experience is that this can result in a significant lightening of images which were processed in Lightroom 2 so I apply this update on an image by image basis so I can reverse it or adjust for it as I go if necessary.