


Adding a vignette to an image involves adding a subtle (or not so subtle) edge effect to it. A popular vignette technique involves darkening the edges of your image – it gives the image a slight border which helps keep the viewer’s eye in the photo. This is an effect which has been popular for years and which was is a feature of some classic film cameras such as the Holga.
Nowadays many photographers and digital artists use vignettes as a way to finish their images. There are lots of ways to add a vignette to an image and here are some of them. I’ve included methods that work with Lightroom, Photoshop and Photoshop Elements. The latter process will work with most photo editing programs.
Lightroom 2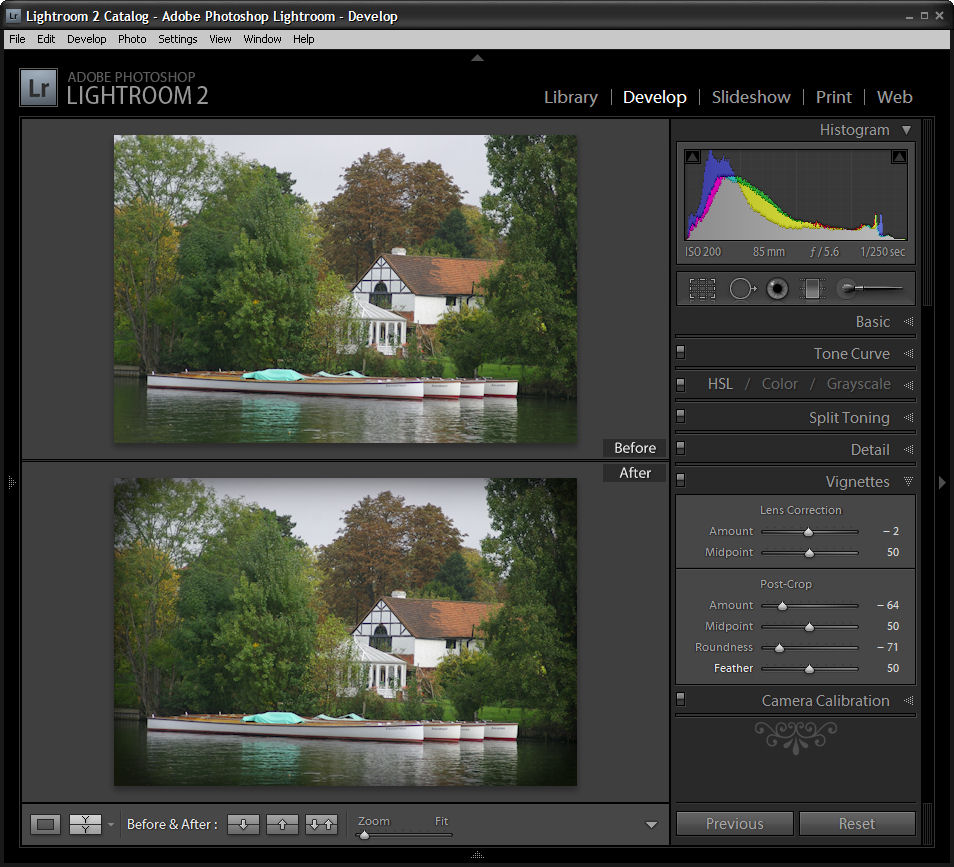
To add a vignette in Lightroom, move to the Develop module and choose the Vignette options. Set the Post Crop Amount value in a negative value to darken the edges. Set the Roundness to a low value such as -70 to get a rectangular vignette and set the Feather to around 50 so it is soft but not too soft.
Photoshop #1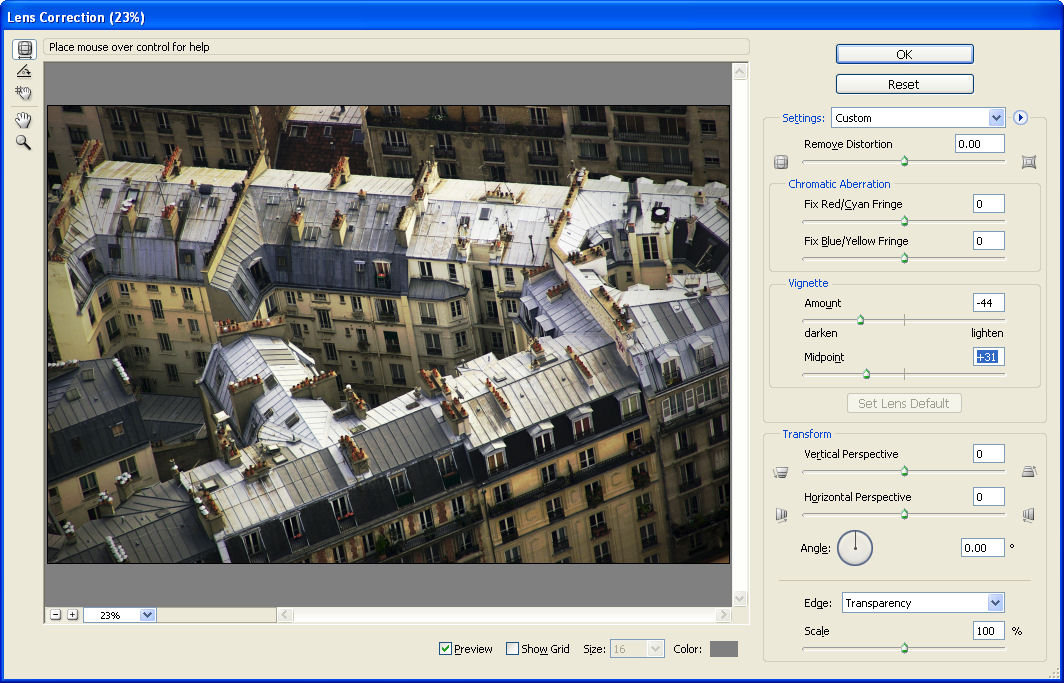
A simple way to add a vignette in Photoshop is to use the Lens Correction filter. Choose Filter > Distort > Lens Correction and adjust the Vignette amount to the Left to a negative value and the Midpoint to the left to bring the vignette into the image more.
Photoshop #2
Another way to add a vignette in Photoshop is to use a Layer style. This has some benefits and one is that the method works on just about any size image and it’s simple to do once you have the Style created.
Make the background layer a regular layer by double clicking it and click Ok. Select the Add Layer Style icon at the foot of the Layer palette and choose Inner Glow. Set the Color to Black, set the blend mode to Darken or Multiply and adjust the Size so you can see the edge. You can save this as a style preset and you can then record the process of adding the style to the layer as an action so that you have a one click vignette solution.
Almost any photo-editing software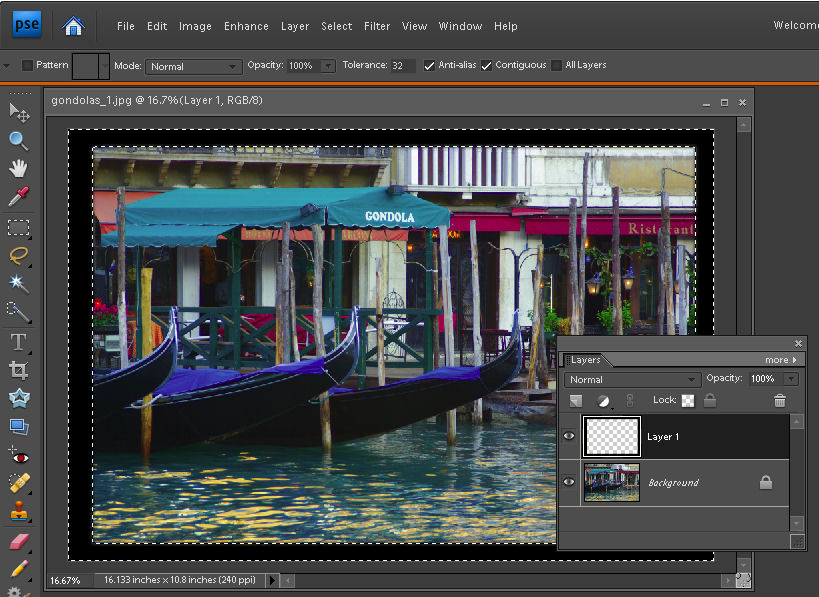
If your software supports layers and layer opacity then this method should work just fine in most photo editing programs. I’ve used Photoshop Elements and you should check your program’s help if you are unsure how to perform these tasks in your software.
Add a new layer using Layer > New > Layer and use the Rectangular Marquee to select around the inside border of this layer leaving a small margin. Choose Select > Inverse to invert your selection so the border area is selected. Now use the Paint Bucket to fill the area with black or dark brown. Choose Select > Deselect.
Choose Filter > Blur >Gaussian Blur and use a high radius value to blur the edge and soften it. Adjust the Layer Opacity to blend this edge into the image underneath and, if desired, set the Blend Mode to Darken or Multiply.
Post a Comment
Please feel free to add your comment here. Thank you!