

The Lightroom Graduated Filter tool can be used to add a secondary light source to an image where one was not in existence when you shot it. This often works better to rescue an unexposed area of an image than, for example, applying a Shadow/Highlight fix in Photoshop.
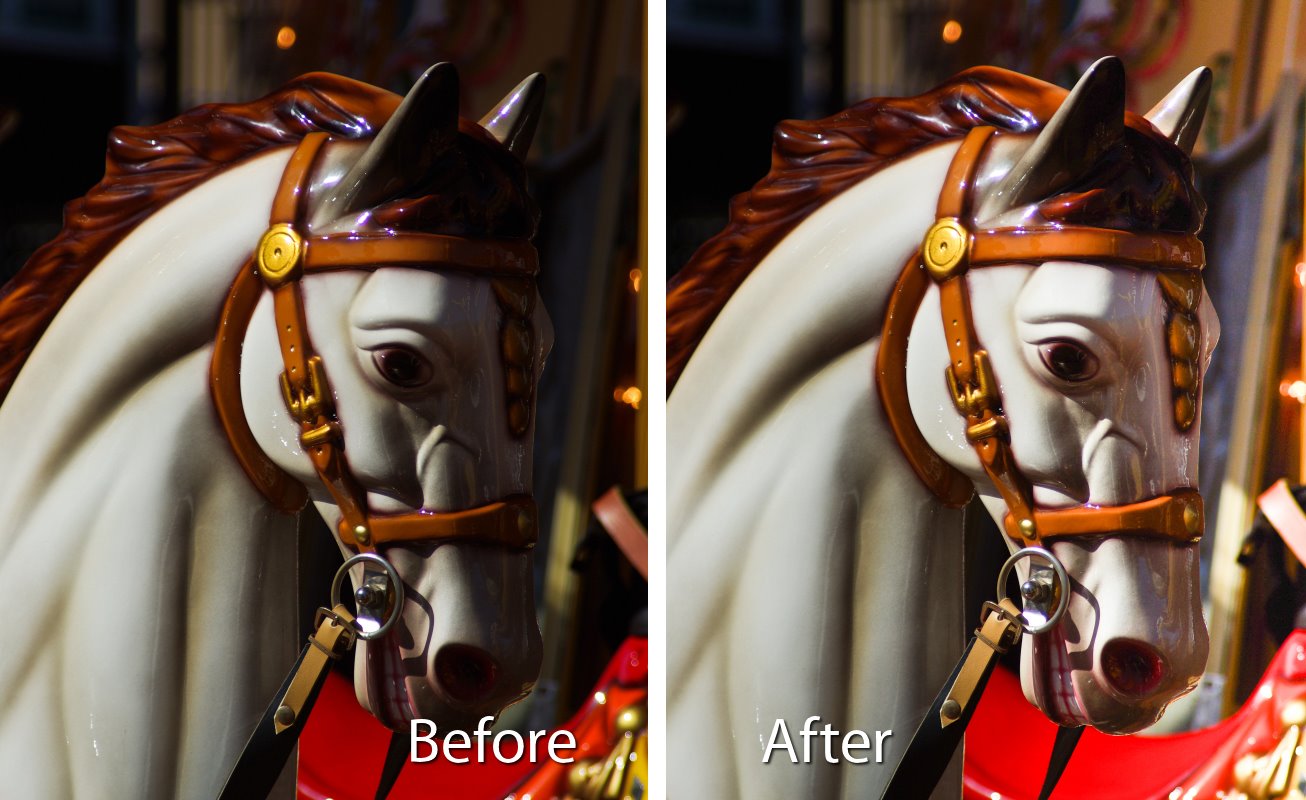
This image is extremely dark on the right – a problem caused by capturing the carousel horse in broad daylight on a very sunny day..
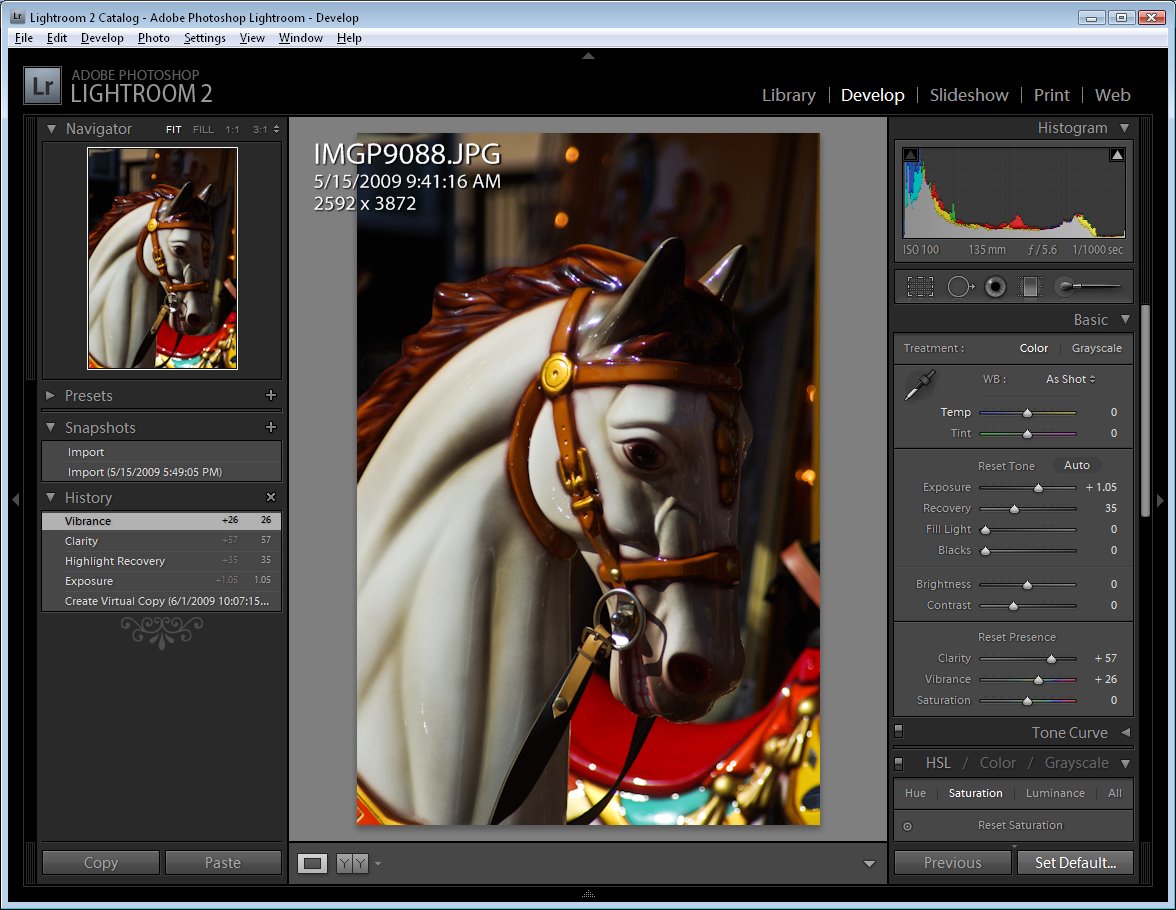
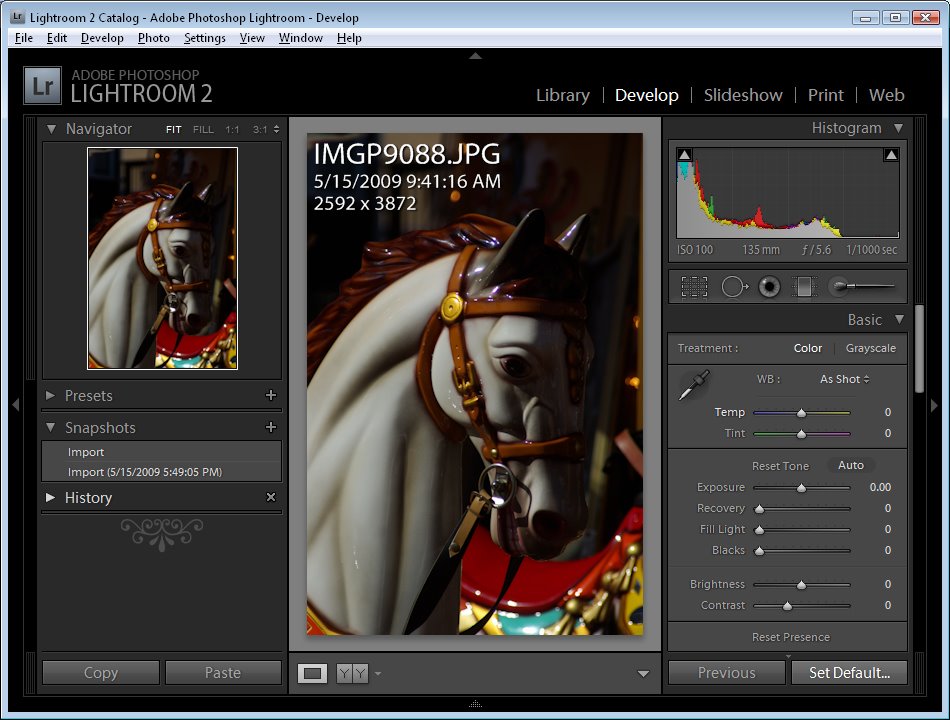
After adjusting the Exposure in Lightroom and tweaking the image using the small Recovery, Clarity and Vibrance sliders the image is still dark in areas where I would like to see more of the detail in the underlying image.
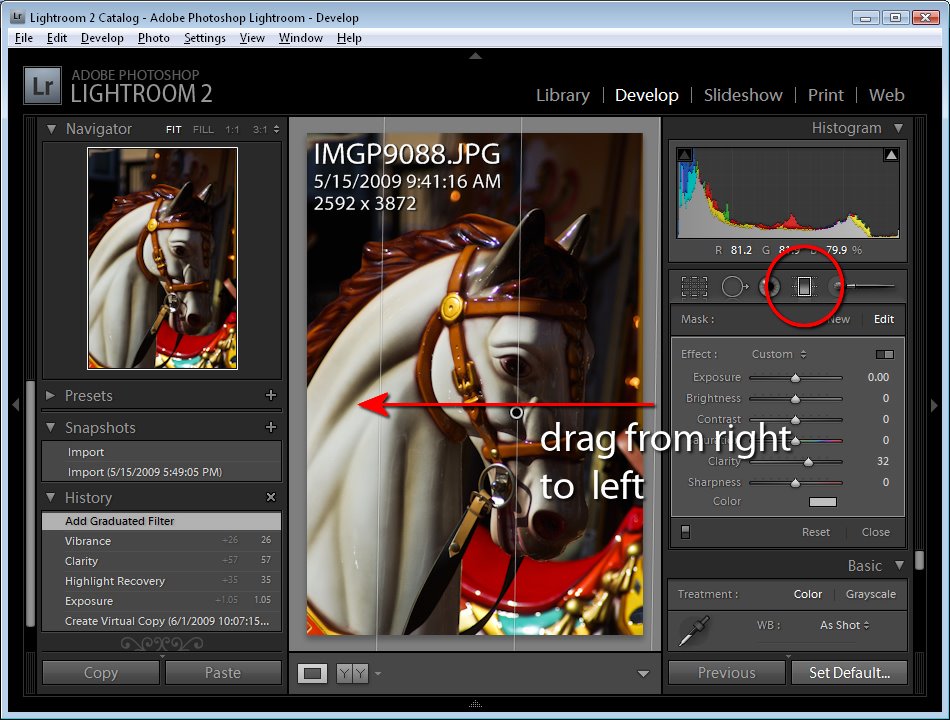
To bring in some light on the right, click the Graduated Filter tool and drag the selector in from the right edge of the image so that the midpoint of the filter is over the point where the problem ceases to exist (around the level of the carousel horse’s eye).
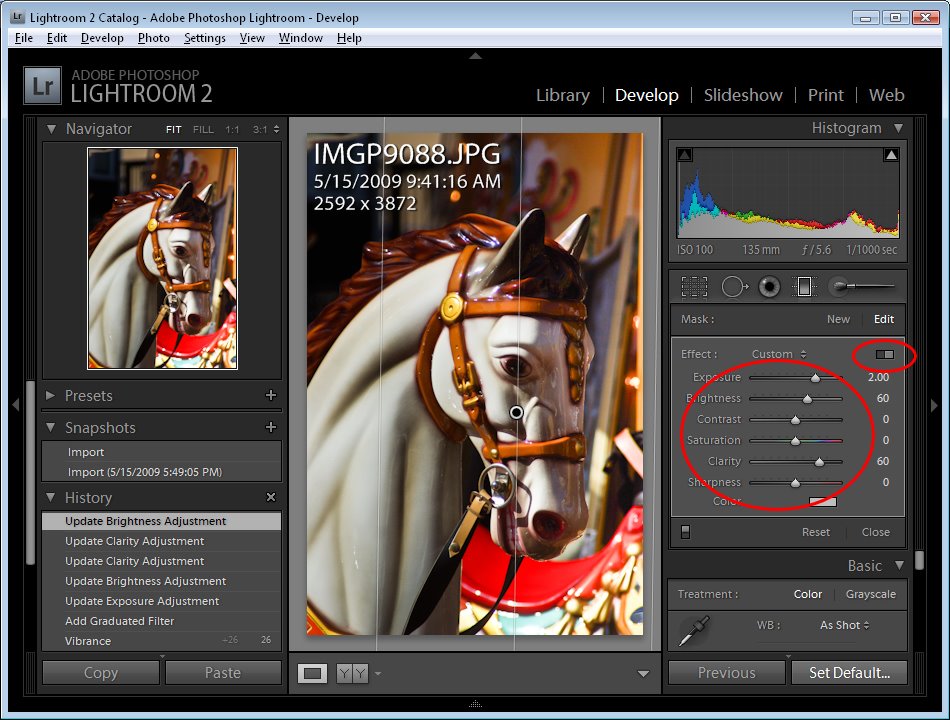
With the Effect Sliders visible, increase the Exposure and then, if desired, adjust the Brightness and Clarity sliders. Click Close when done.
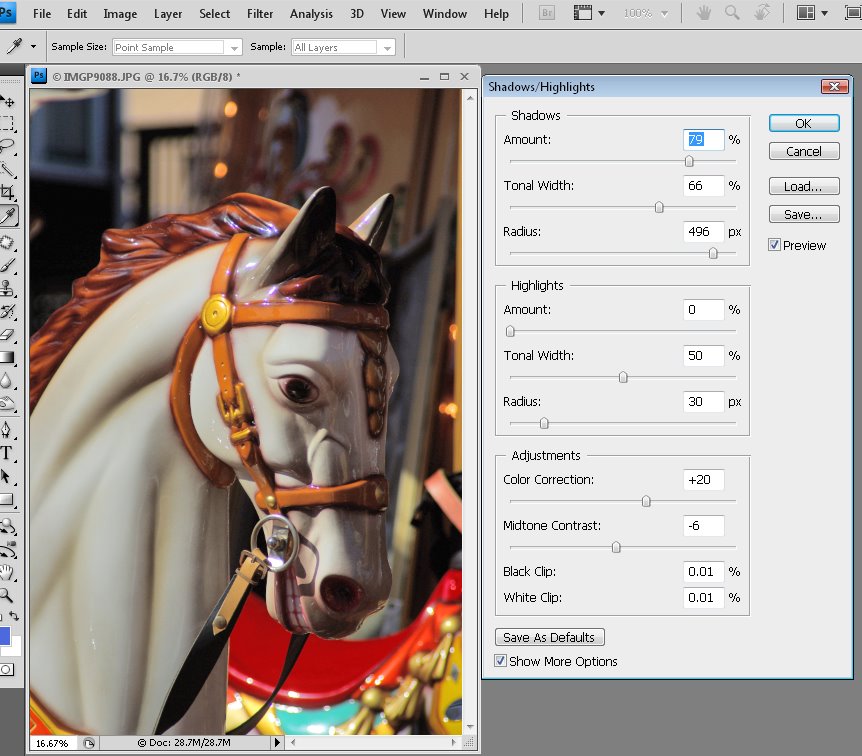
In many cases you will find the Graduated Filter gives better results than, for example, the Shadows/Highlights filter in Photoshop shown here, and it’s a lot less work.
If you’d like to learn more about using the adjustment tools in Lightroom, here are a couple of useful recent posts:
Spot fixing with the Adjustment Brush
Post a Comment
Please feel free to add your comment here. Thank you!