

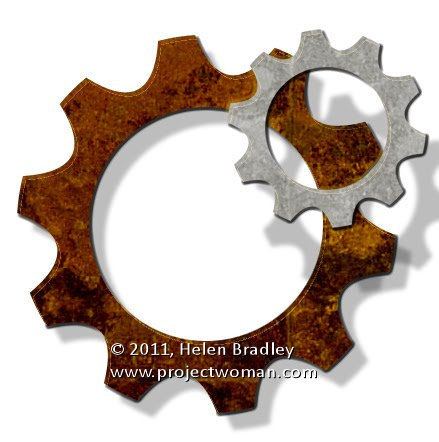
 I’m very much into steampunk and creating steampunk gears and brushes. Here’s a simple way to create a gear using a Photoshop shape.
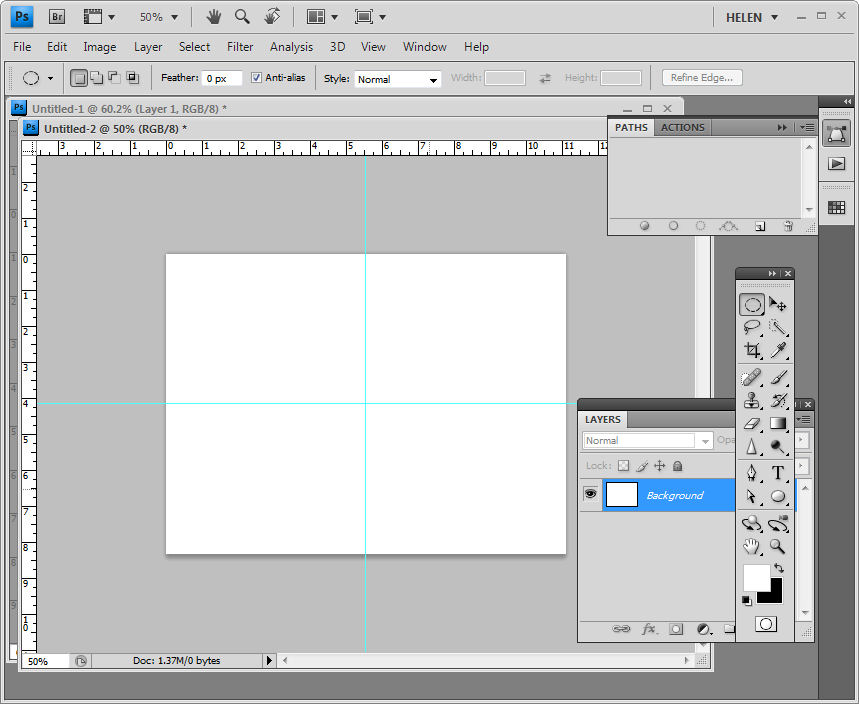 Step 1
Create a new document and add two guides using the rulers by selecting View > Rulers and then drag a horizontal and a vertical guide from the ruler lines into the middle of the image. These guides make it easier to line everything up. Add a new layer and select it so you aren’t working on the background layer.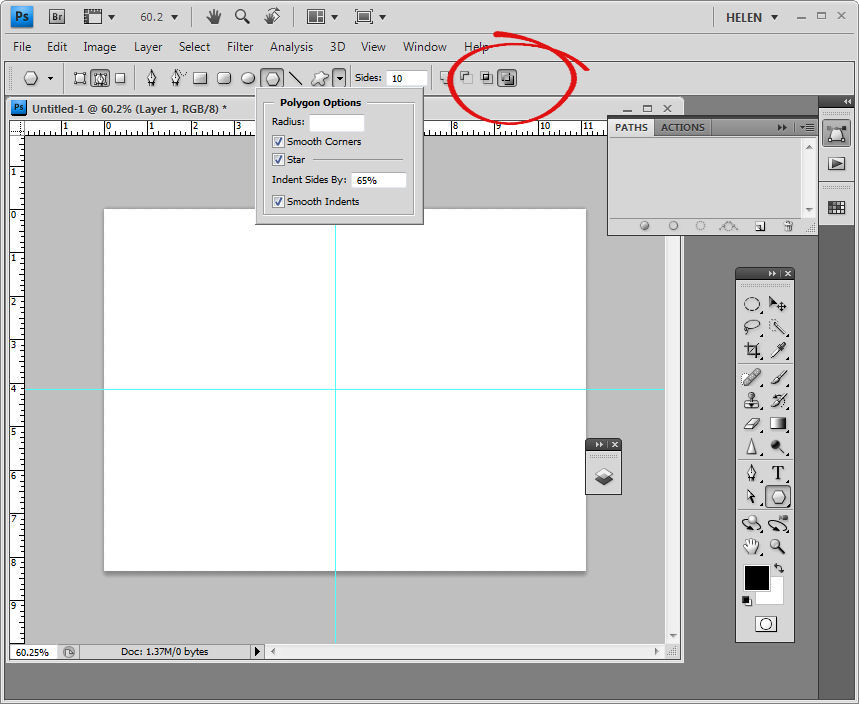 Step 2
Select the polygon tool. Select the down-pointing arrow next to the shape options and set Smooth Corners, Star, Indent Sides by 65% , Smooth Indents and set the Sides value to 10. Make sure at the far right of the tool options bar you have Exclude Overlapping Path Areas selected.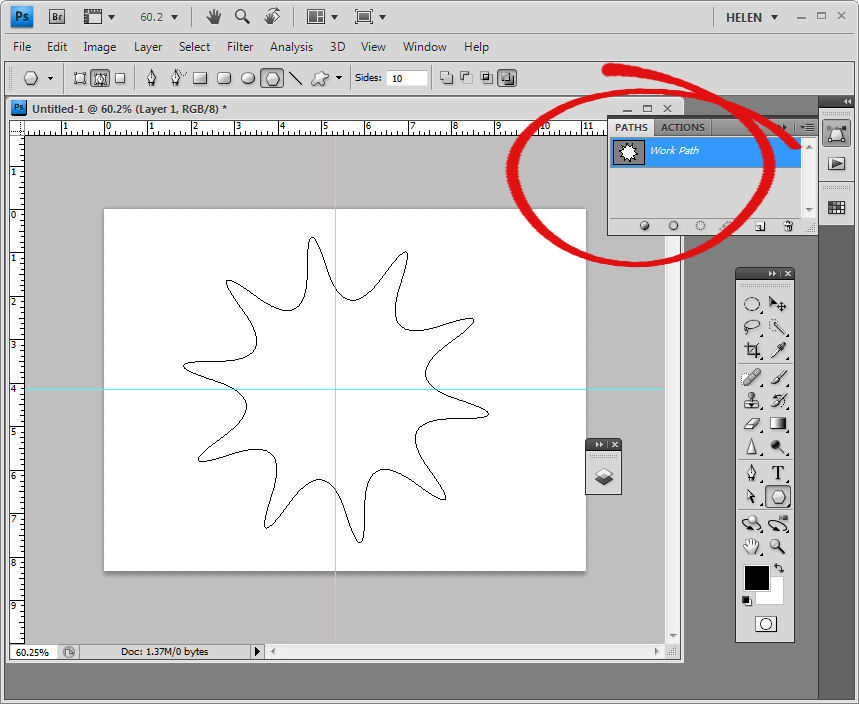 Step 3
Hold the Shift key, click and drag over the intersection of the gridlines and drag outwards to create the star shape. Check the Paths palette to make sure that you have a white shape in the middle of the image. If not, stop and start over again. 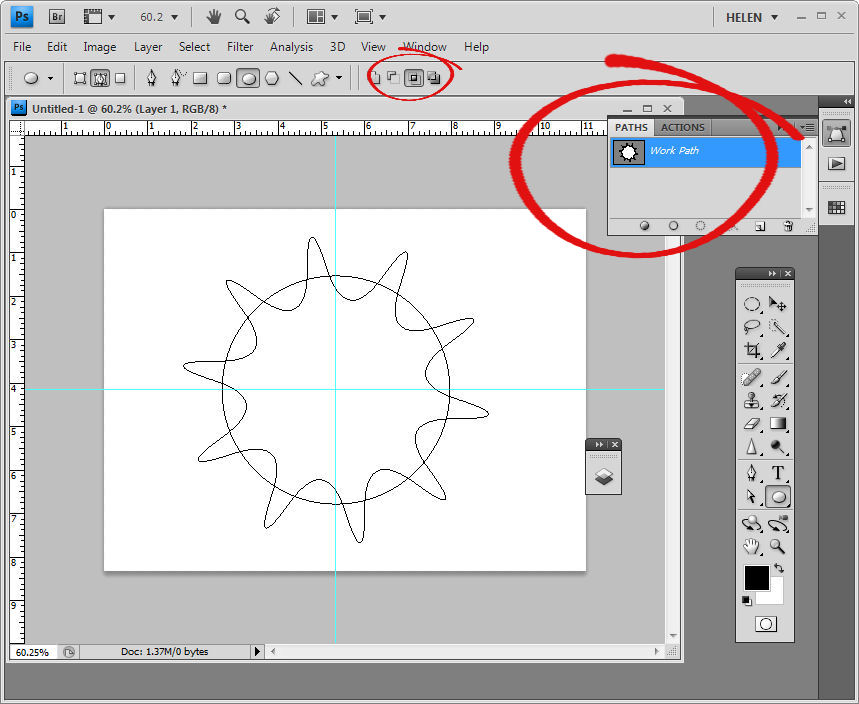 Step 4
Now with the Subtract From Path Area Option selected on the tool options bar, select the Ellipse shape tool, hold the mouse pointer over the intersection of the gridlines and start drawing. Add the Alt key (Option key on the Mac) to center the circle over the shape.
Drag the shape across the star shape so that it intersects each of the star points. Let go the mouse pointer, then let go the Alt and Shift keys.
Check the paths palette to ensure that you still have a sort of circular white shape in the middle of the image. If not, you will need to undo this last step and start over. 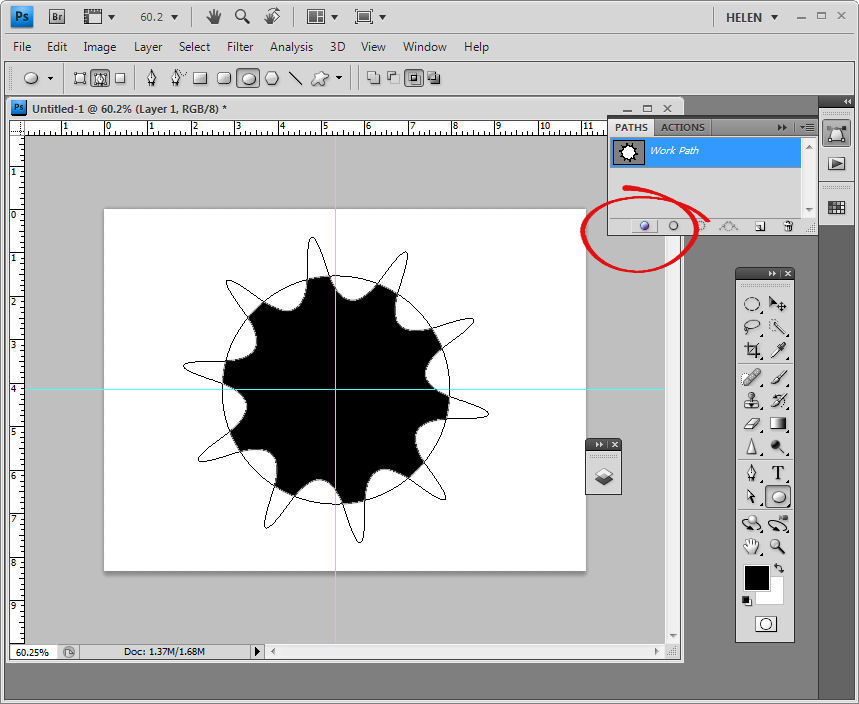 Step 5
Select black as the foreground color and in the bottom of the paths palette, select the Fill Path With Foreground Color option. You should now have a gear shape filled selection.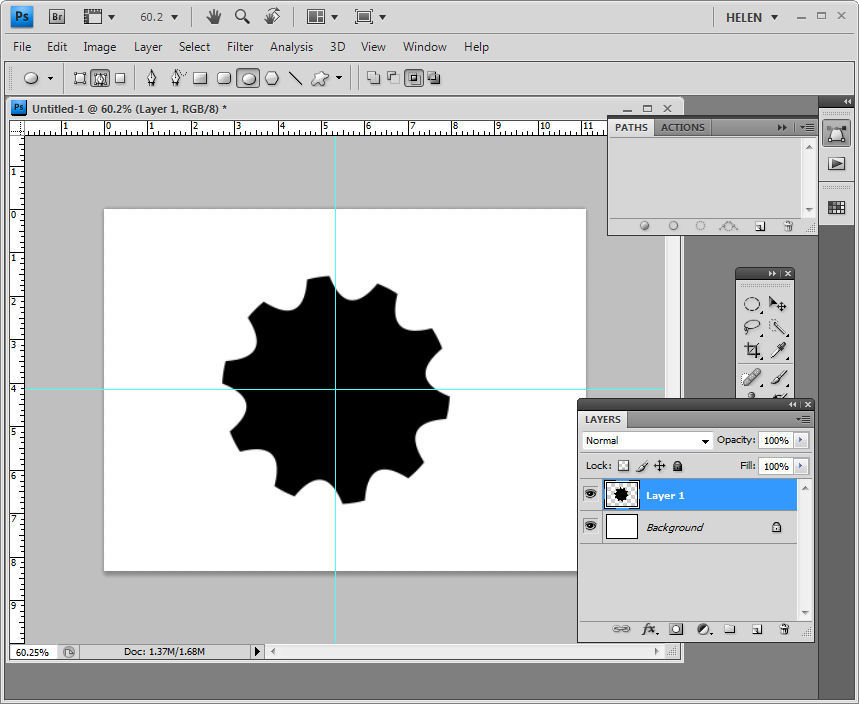 Step 6
Delete the Working Path by dragging and dropping it on the trashcan icon in the Paths palette. 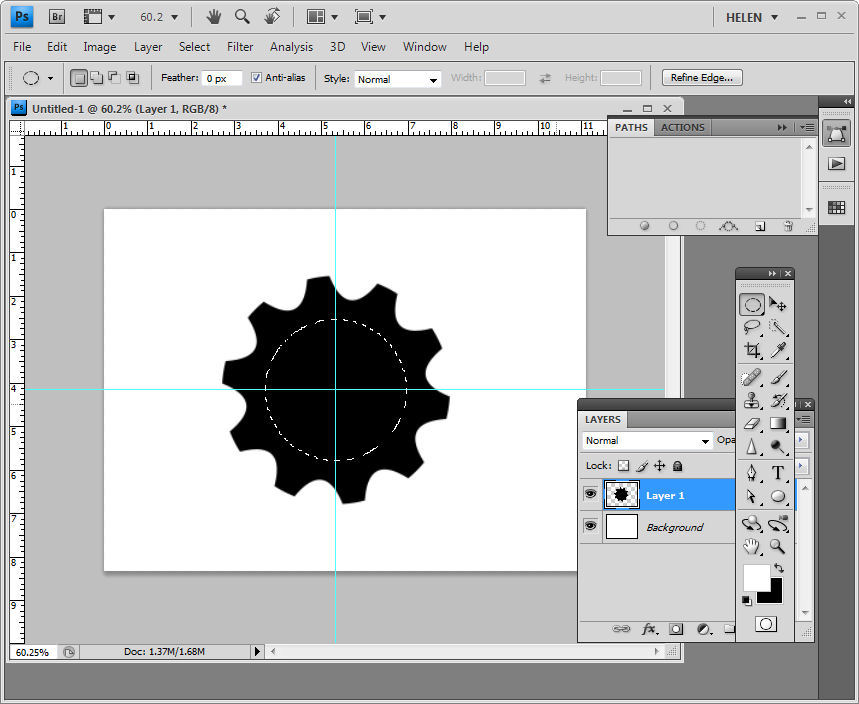 Step 7
Return to the Layers palette and select the layer that you’re working on. Select the Elliptical Marquee Tool and holding the Shift key, click and drag from the intersection of the gridlines outwards. Before letting go of the mouse button, add the Alt or Option key so that the shape is centered inside the gear shape. Position and size the circle inside the gear as this will be the middle hole. When you have what you want, let go the mouse button and then release the Alt (Option) and Shift keys.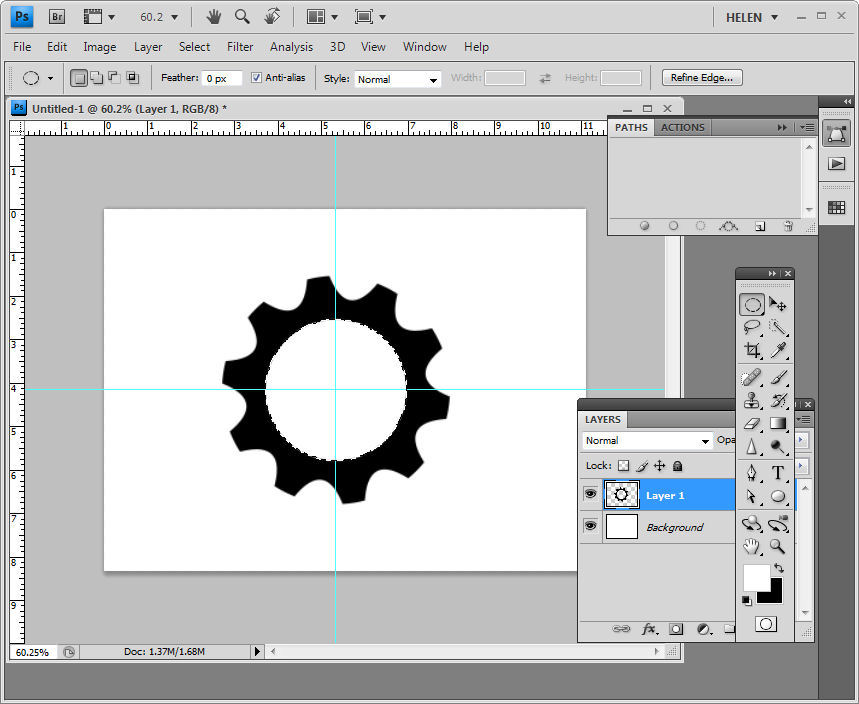 Step 8
Press the Delete key to delete the contents of this layer. As you’re working on a separate layer, this will make a hole through the image to reveal the background layer underneath.
Select Ctrl (or Command) + D to remove the marquee and choose View > Clear Guides to remove the guides. 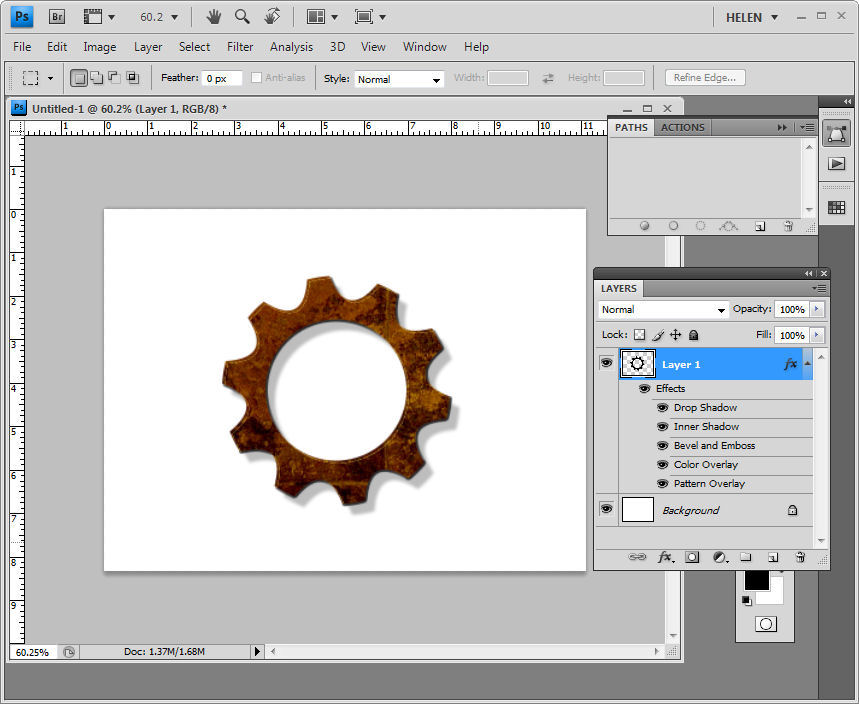 Step 9
You now have a shape that you can make a brush from or add layer styles to make it look more like a gear.
I had loads and loads of fun with this! Thank you. We needed a steampunk looking set of gears for my daughter’s team t-shirts and one of the mom’s said to just find some on Google Images. I refuse to take other people’s work off the internet without permission. This turned out to be just perfect and it’s all ours! Thanks again. You’re work is easy to follow for those of us who aren’t professional graphic artists.
Way to go Becky.. thank you for checking permissions, you’re setting a great example to others, it’s so important that folks realize that just because it is on the web it isn’t free for the taking. I’m glad you like the gears… you’ve made my day with your comments.
Cheers
Helen