If you don’t have a fish-eye lens or don’t have yours on hand when you need it, don’t worry. With Lightroom (or Adobe Camera Raw) you can create a fish-eye effect with any photo. Here’s how:
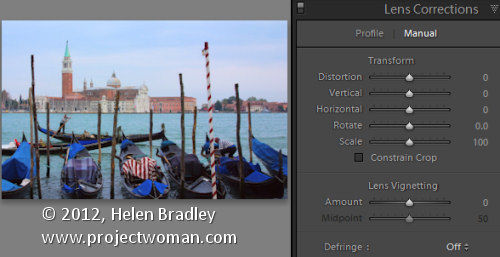
Start with an image that lends itself to being made a fish-eye image. You want something that was shot with a fairly wide angle lens to begin with so you don’t want to be zoomed in very close on your subject.
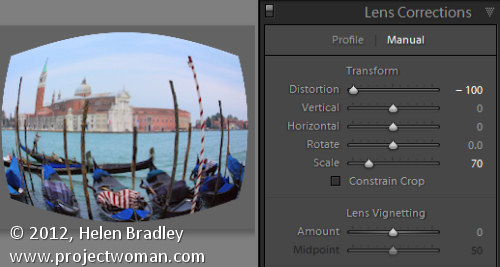
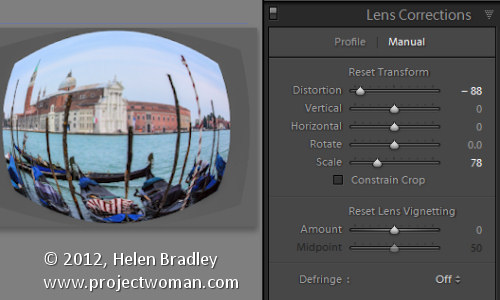
With the image open in Lightroom go to the Develop module and select Lens Correction and then the Manual tab. You’ll see the Distortion slider at the top of the Transform tools. Drag the Distortion slider to the left to blow out the middle of the image.
Deselect Constrain Crop and decrease the value for Scale so that you can see the image edges very clearly. If you like the result you can stop at this point.
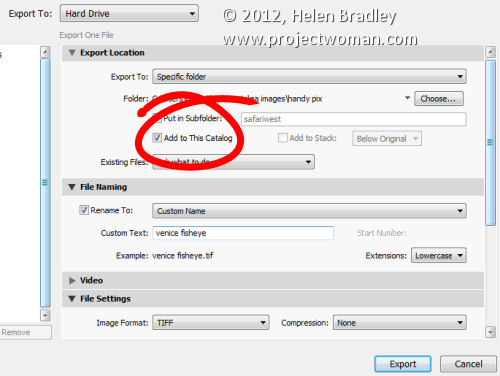
Alternately if you want to give the image a bit more punch, you can go one step further by exporting the image and importing it again and repeating the process. To do this, right clicking the image and choose Export. Export the image as a non-lossy format image such as TIFF, enable the Add to This Catalog checkbox so the image comes back into Lightroom automatically and select a folder for the image – the same folder that the original image is stored in is the best choice. Click to Export the image.
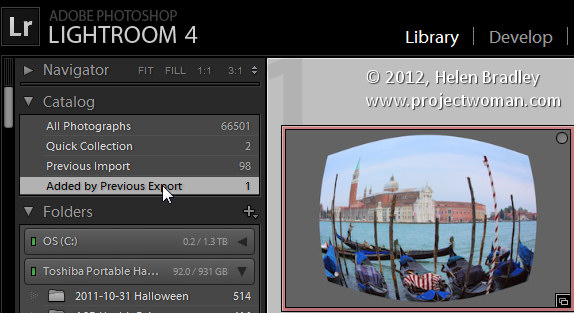
The exported version will then be automatically imported back into Lightroom. You can find it by returning to the Library module, open the Catalog panel and click the Added by Previous Export collection – it will be in that collection.
Select the newly imported image, return to the Develop module and again drag the Distortion slider to the left to increase the bowing in the image. Make sure Constrain Crop is not selected and decrease the Scale until you get a good result on your image.


Post a Comment
Please feel free to add your comment here. Thank you!