You can change the color of anything using Photoshop. A friend of mine is about to paint her house but before her husband goes shopping for paint, she wants to know that the result will look good and that the house will blend nicely with its surroundings. It’s a job for a digital camera and some Photoshop know-how. Here’s how to recolor your house (or anything else) and save color combinations to review with someone else later on. I’ve used Photoshop CS3 but almost any version will do.
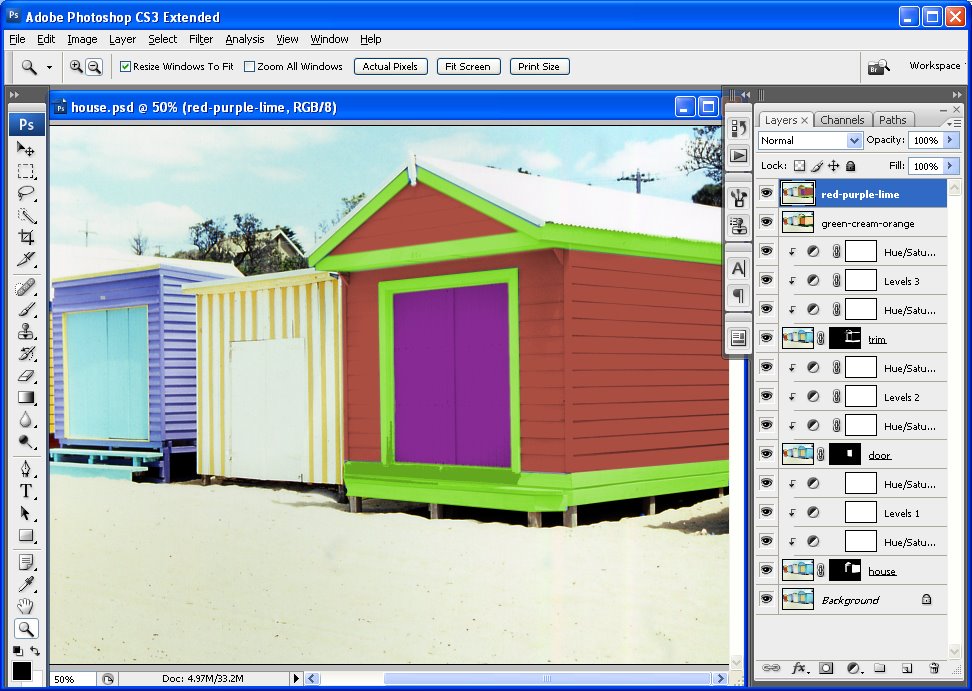
Open a photo of your house in Photoshop. I’ve used a bathing box for simplicity but the principles are the same for a house or, indeed, anything at all. You’ll need one extra copy of the background layer for each item you’ll recolor. For this image I’ve duplicated the background layer three times so I have a background layer, a layer for the house color, one for the door color and one for the trim and I’ve named them appropriately.
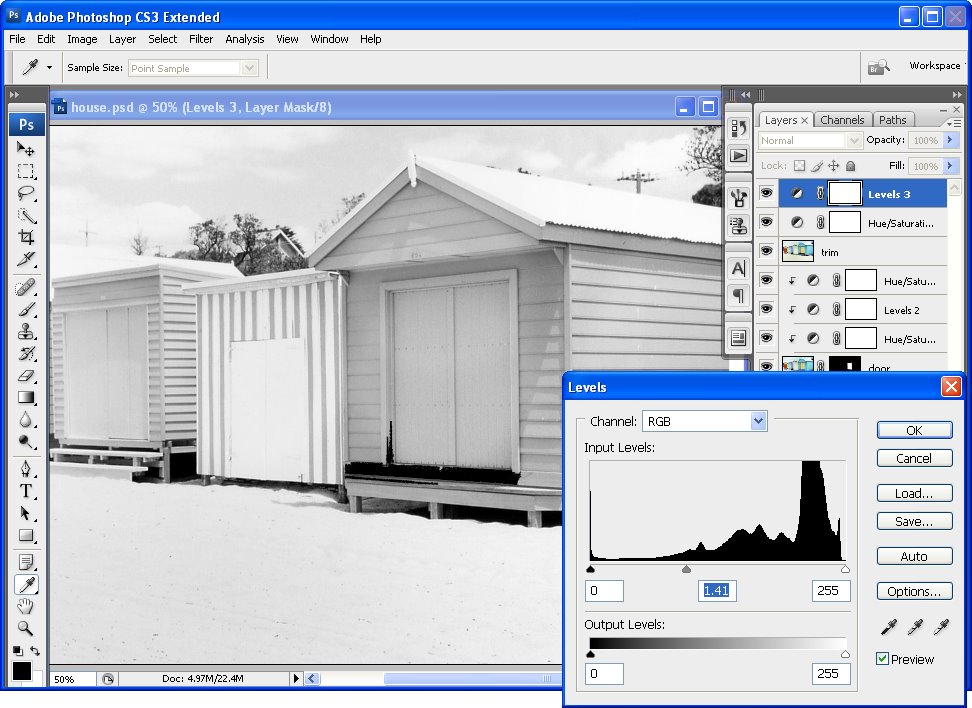
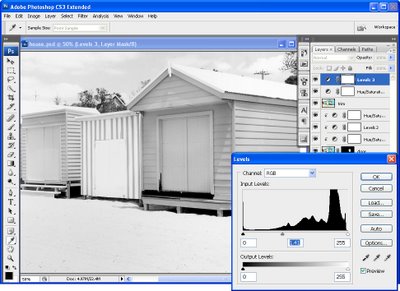
Start with the house layer and hide the others. Choose Layer, New Adjustment Layer and add a Hue/Saturation adjustment layer and drag the Saturation slider to -100 and click Ok. Add a second adjustment layer by choosing Layer, New Adjustment Layer, Levels and adjust the sliders until the area you’re focusing on looks like it could be painted with white paint. You want to retain the detail but lighten the area. Ignore everything else in the image for now. Click Ok when you’re done.
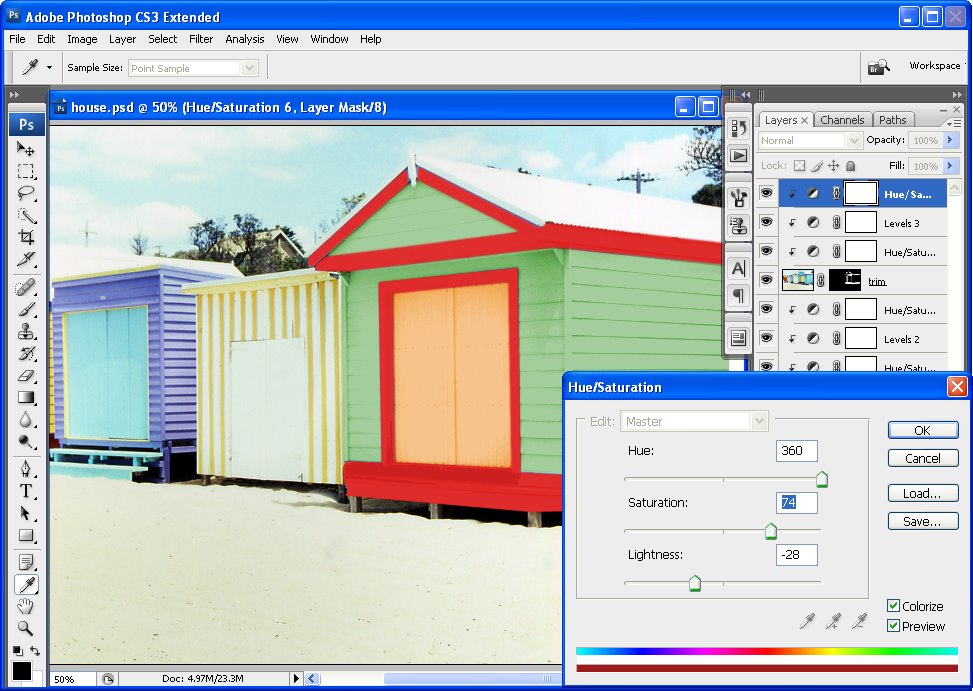
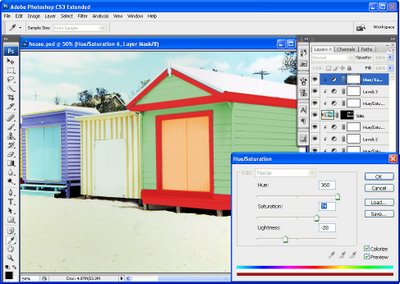
Now add a third adjustment layer using Layer, New Adjustment Layer, Hue/Saturation. Click the Colorize option and adjust the Hue, Saturation and Lightness sliders until you have the color that you want for the area you are working on. Again, ignore the effect on the rest of the image. Click Ok when you’re done.
Now, to limit the effect to the area you want painted in this color, select the adjustment layer just above the layer you’re working with and choose Layer, Create Clipping Mask. Repeat for the other two adjustment layers. You should see the adjustment layers indented in the Layers palette. Now, you can paint on the color. Select the layer you’re working on, in my case this will be the layer named house and hold Alt as you click on the Add Layer Mask button at the foot of the Layer palette. This creates a Reveal All layer mask so your photo should now be its original color.
Select white as your foreground color and paint over the areas you want to be coloured with the color you just selected. If you paint over something by mistake, switch to black foreground color and paint the original color back.
Step 1
For each area of color in the image, add the same three adjustment layers, one to remove the color, one to adjust the lightness and one to add color back. Create the adjustment layers as a clipping group with the appropriate layer. Finally, add a layer mask and paint the effect onto an area to recolor it.
Step 2
Because you will use adjustment layers for all the changes, you can alter the settings at any time if desired. Simply double click on the Adjustment layer thumbnail and the dialog will open so you can make changes to its settings and then click Ok to reapply it to the image.
Step 3
To save a color scheme, add a new layer at the top of the Layers palette, select it and press Control + Shift + Alt + E to create a new merged layer. Name this and turn its visibility off. Now change the colors to test a different look and save that version the same way.
Helen Bradley