Saturday, July 7th, 2012

Random text in Word 2010

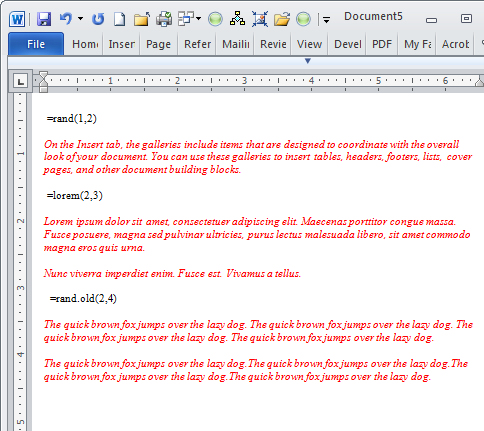
You may already know that typing =rand(1,2) on a new line in Word types one paragraph of two sentences in Word. The text is this random Word help style text:

“On the Insert tab, the galleries include items that are designed to coordinate with the overall look of your document. You can use these galleries to insert tables, headers, footers, lists, cover pages, and other document building blocks.”

But did you know there are other types of text you can type? Try =lorem(2,3)  and press enter to get two paragraphs of three sentences each of the Lorem ipsum dummy text.

“Lorem ipsum dolor sit amet, consectetuer adipiscing elit. Maecenas porttitor congue massa. Fusce posuere, magna sed pulvinar ultricies, purus lectus malesuada libero, sit amet commodo magna eros quis urna.

Nunc viverra imperdiet enim. Fusce est. Vivamus a tellus.”

If you type =rand.old(2,4)  and press enter you get the older Word dummy text – the Quick Brown fox..

The quick brown fox jumps over the lazy dog. The quick brown fox jumps over the lazy dog. The quick brown fox jumps over the lazy dog. The quick brown fox jumps over the lazy dog.

The quick brown fox jumps over the lazy dog. The quick brown fox jumps over the lazy dog. The quick brown fox jumps over the lazy dog. The quick brown fox jumps over the lazy dog.

So now you have plenty of random text options – of them all the Lorem one is the most  handy for when you really need large portions of dummy text in a document.

Helen Bradley

Monday, October 17th, 2011

Shape images and Clip Art in Word 2010

There is a healthy range of free clip art available from Microsoft and it includes some photos including content from iStockPhoto.com. However, the process of getting them into your document any other way than by choosing Insert > Clip Art is not always obvious.

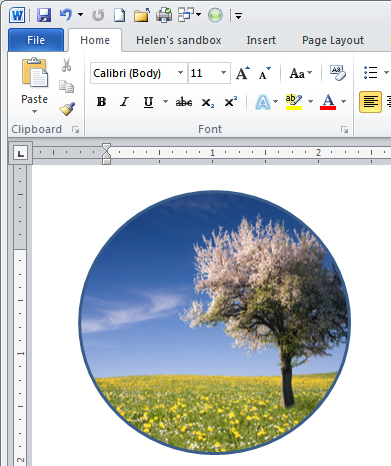
Here’s how to add a clip art image to a circle shape:

Choose Insert > Shape and select the Oval. Hold Shift as you draw to create a circle on the screen. If you choose Drawing Tools > Format > Shape Fill you get the option of applying a picture to the shape but not clip art.

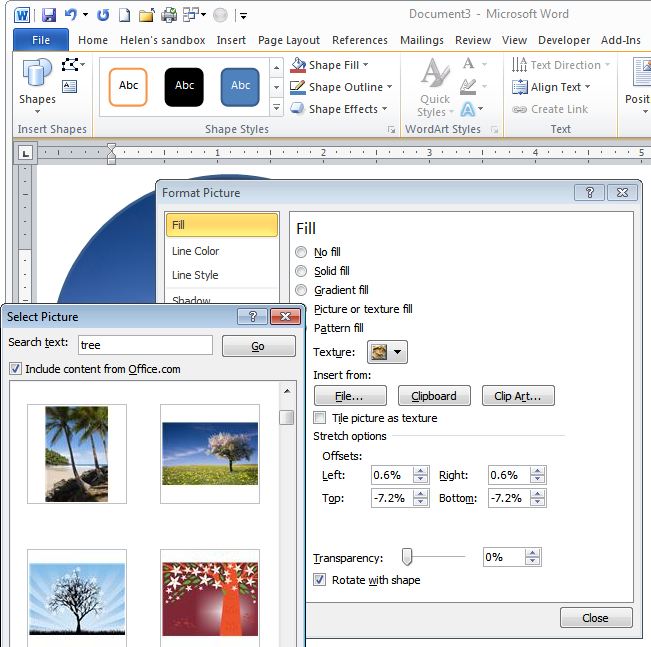
Instead, right click the shape and choose Format Shape to get access to the new to Word 2010 – Format Shape dialog. Choose Fill > Picture or Texture Fill and click the Clip Art button.

Browse or search for an image. You could also have placed a Clip Art image into your document using Insert > Clip Art and then selected it and cut it to the Clipboard. Here in this dialog you can choose Clipboard to add the image from the clipboard – in short you have more options here for using image than you have using the Shape Fill list.

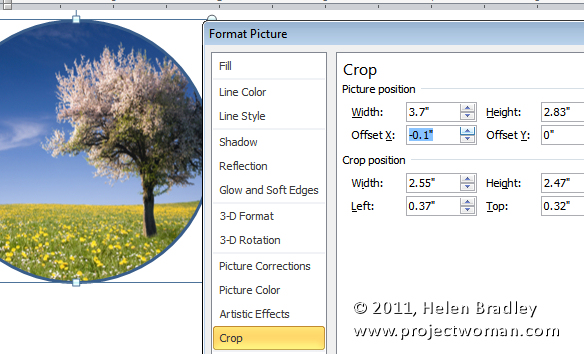
If the image is skewed out of shape – and it will be if it is a portrait or landscape image inside a circle which is pretty much a square with the corners cut off – you can adjust it.

Select Crop and, for a landscape orientation image inside a circle, increase the Picture Position Width value. For a portrait orientation image inside a circle, increase the Picture Position: Height value.

Then adjust the Offset X or Offset Y values, if desired, to control which portion of the image shows up inside the circle.

Helen Bradley

Thursday, September 22nd, 2011

Warn of tracked changes in Word 2010

Microsoft Word 2010 has some great security settings but I am continually disappointed that Microsoft hides them away so they are so difficult to find.

One of these settings is crucial to enable so you don’t accidentally send a document out to a client with, for example, a comment in it saying what a idiot your client is. The revelation that you think they are an idiot might be news to them – and you’re not going to look too smart yourself.

The culprit is tracked changes. It is all to easy to have Tracked Changes enabled but to have your document show only the final version of the text. Behind the scenes every insertion and deletion is being stored in the document even if you aren’t seeing it. However the information will be accessible to anyone viewing that document – not a smart idea!

If you don’t think this is a big deal you might be interested to know that lots of smart people have been caught out by it, including Microsoft itself. This blog post showcases stories of businesses and government caught out by tracked changes.

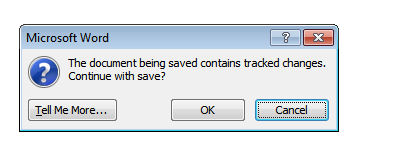
To stop this happening to you, you can do a few things but I like the method that you set once and, from there on, Word will do the work for you. This involves having Word tell you if a document you are about to print or save has tracked changes in it. Ignore the warning at your own risk!

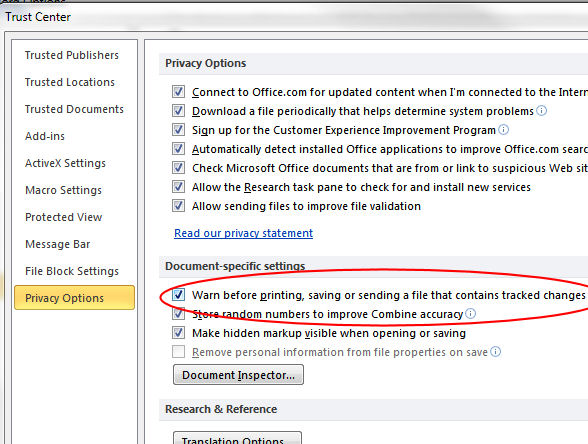
To configure this, choose File > Options > Trust Center and click Trust Center Settings then Privacy Options. Enable the “Warn before printing, saving or sending a file that contains tracked changes or comments” checkbox.

Now, in future, Word will show a warning if a document contains tracked changes even if they are hidden from sight.

It should be on by default and it should be easier to find… but there it is… and don’t say I didn’t warn you about it.

Helen Bradley