Wednesday, June 20th, 2012

Print big images with Paint


Well, who knew the humble Microsoft Paint could do what just about no other program can easily do? Well it can. I recently assembled a very large image from a series of screenshots of a help screen. The help screen was really long so I captured screenshots of each portion of it, assembled them into one really narrow and long file and then got stuck – how the heck could I print this? Hmm… enter Microsoft Paint… but first, here’s the entire process from Print screen to Photoshop to Paint!

I brought all the screen capture images into Photoshop, cropped them using an action to do it very quickly, rotated them counterclockwise 90 degrees and then saved the images with sequential numbering. There was a bit of overlap in each image – you need this for the panorama merge to do its stuff and they need to be rotated or they won’t assemble properly.


Having done that I then used the photo merge tool in Photoshop (File > Automate > Photomerge) to create a merged image from the individual images.


Then, once the merge was complete, I rotated the image back this time 90 degrees clockwise to get a vertical image that was 770 pixels wide and over 9,000 pixels long.

The problem with an image this size is that when you try to print it from Photoshop – it has to be squeezed down to a very small size to print on a single page and no other option is available so you can’t print it on multiple sheets.

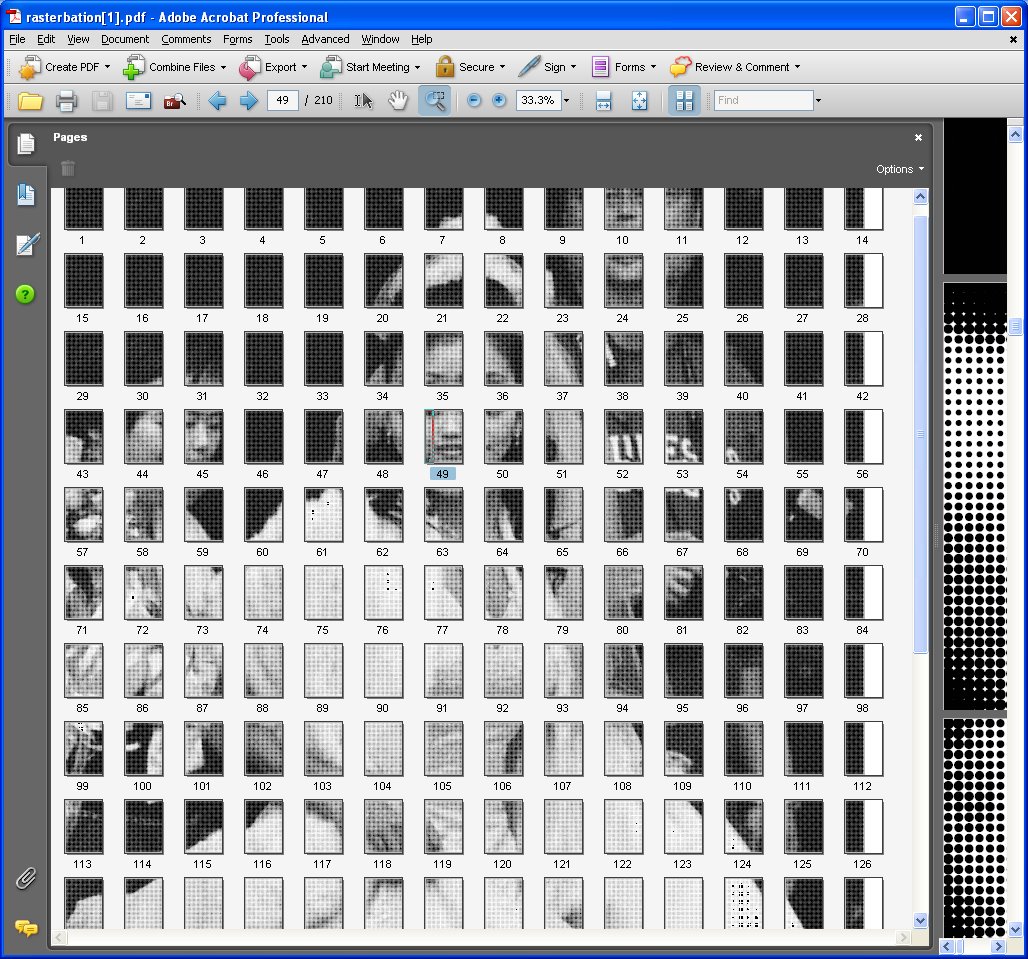
The question then becomes how to print a very large image in lots of smaller pieces. The solution is nearer than you think and, curiously, it comes in the form of Windows Paint.


Launch Paint and open the image. Choose File > Print > Page Setup. Here you’ll find an option for sizing the printout to a fixed number of pages wide or long or you can shrink option to adjust the percentage scaling size. Wow! This is really very smart indeed.

When you do this, watch the boxes below as this will tell you how many pages tall and wide the image will be printed at. When you’re satisfied with the results, you can go ahead and click to print the document. If you have a PDF printer then you can print the document direct to a PDF file or if preferred, feed some paper into the printer and print the image. Then get out some sticky tape and stick it all together.

Helen Bradley

Saturday, August 15th, 2009

Cool Photo Apps #4 Build your own camera


Not all good applications come in big shinny boxes like Photoshop and Photoshop Elements. Many cool photo apps are available on the web and they’re free.

These apps do things that other programs don’t. They are fun to use and practical. In this Cool Photo Apps series I’ll show you some of these.

One of the neatest things about the digital camera revolution is that, in embracing all the fun there is to be had in photography as a hobby, many people are looking look at film cameras in a different light.

Corbis, a company better known for stock images, offers enthusiasts a series of downloadable printable pinhole cameras that you can construct yourself from cardboard and which use regular film. It’s the ideal partnership between technology and creativity.

You simply download a PDF file which contains the camera template and instructions and print the pieces. You assemble the camera over a recycled cereal box using a few simple tools that you probably already have.

Slip in a roll of ISO 200 film – which, if you’re like me, you probably have stuffed away in your fridge door – and you have a fun “grass roots” camera that’s guaranteed to give you hours of entertainment.

I’m willing to bet you’ll be scurrying to your nearest camera shop to get the photos printed just so you can see how cool they are. Find the Corbis pinhole cameras at www.corbis.readymech.com/en.

Helen Bradley

Saturday, August 1st, 2009

Cool Photo Apps #2 big huge photo prints


Not all good applications come in big shinny boxes like Photoshop and Photoshop Elements. Many cool photo apps are available on the web and they’re free.

These apps do things that other programs don’t. They are fun to use and practical. In this Cool Photo Apps series I’ll show you some of these.

For resizing images to very large size, there are a couple of handy tools you can use. One of these is Rasterbator which you can find at http://homokaasu.org/rasterbator/. You can use this tool online or you can download it to your computer and use it from there. One benefit of downloading is that you’re not limited in the size of the starter image you use.

Rasterbator upsizes your image to anything from regular poster size to a gigantic 25 meters in size.

Here’s how to use the online version:

Step 1
Click Rasterbate Online and select to upload an image from your computer or use an image from the web. There is a maximum upload size of 1 MB. Once the file is uploaded, you can crop the image although you’re really better off doing this before you upload it.

Step 2
Select the Size option and select the final print size for your image. Each of the grid squares is one sheet of paper and you can add more sheets or reduce the number of sheets by clicking the More Sheets or Few Sheets buttons. The finished size of the project appears below the image so you can juggle the size to fit your needs.

Be sure to select the paper size as Letter and use either a vertical or horizontal orientation as required. It’s important to select your page size here as it will be too late once you’ve created the PDF file. Click Next to continue.

Step 3
The program will warn you how many sheets of paper the project will require and, if you’re happy to continue, click the Continue button – you’re not actually printing yet, just confirming you want a document that big created for you.

Step 4
Set the options such as drawing a border around the rasterbated area which will give you cutting lines that you can use later on to cut out the images before assembling the panel. Select the dot size to use from the list or use the default size. You can choose to create the image in black and white, some other colour and white or colour.

Step 5
Click Rasterbate when you are done and wait as the PDF file is created for you.

Step 6
Download and save the pdf file and then print, cut and hang and enjoy your masterpiece at your leisure.

If you liked this post, you’re sure to like the other posts in the series:

Cool Photo Apps#1: The Warholizer

Helen Bradley