Remove all the edits you’ve made to a raw or dng image in Adobe Camera Raw
No doubt you’ve encountered the situation where you have a raw file or a dng that you’ve worked on in Adobe Camera Raw or Lightroom and you one day look at it and think – “what was I thinking?”
You decide you want immediately to remove all the changes you’ve made to the image. Easy? Not really!
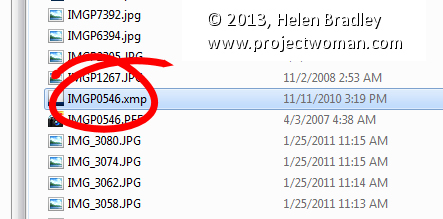
If you’re working with a raw image then you can locate the image on disk and alongside it will be its sidecar xmp. Shall I say that again, because to the uninitiated ‘sidecar xmp’ just sounds so cool doesn’t it. What it is is an .xmp file with the same name as the raw file and it contains the edits you made to your image. The sidecar xmp file is used because you cannot write data to a camera raw file so the edits have to go somewhere. They go in this little xmp file as a set of text entries – delete the file and you remove the edits, permanently – in fact just remove the xmp file to another folder where ACR can’t find it and you’re done.
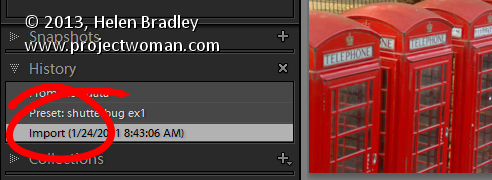
In Lightroom you can wind back edits to an image from the Develop module in the History panel on the left of the screen. Open the panel and select the bottom-most entry to wind back the changes you made to the image.
Unfortunately this won’t work if you made changes in a program that wrote an .xmp file and it won’t work if the changes were made to a dng file, written to that file and then the file was imported into Lightroom.
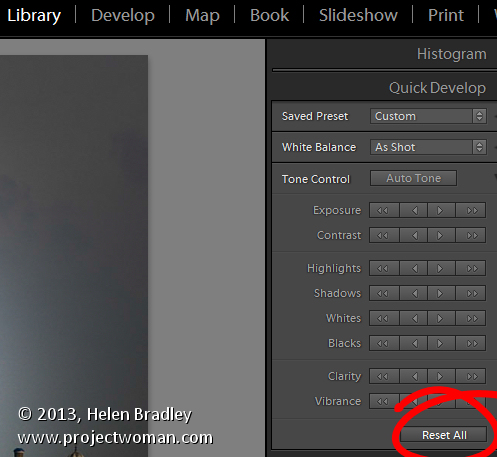
In that case, go to the Library panel and open Quick Develop and click Reset All – that removes all the edits.
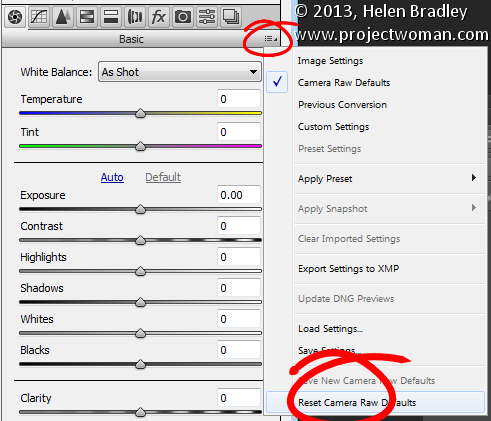
In ACR, go to the small menu in the top right of the edit pane and choose Reset Camera Raw Defaults. This removes the edits and returns the image to its out of camera state (see image at the top of this post)
This is also very handy for teachers who teach using a set of images – if you need to start over editing an image with a new class, this option will help you start over with a clean image.


