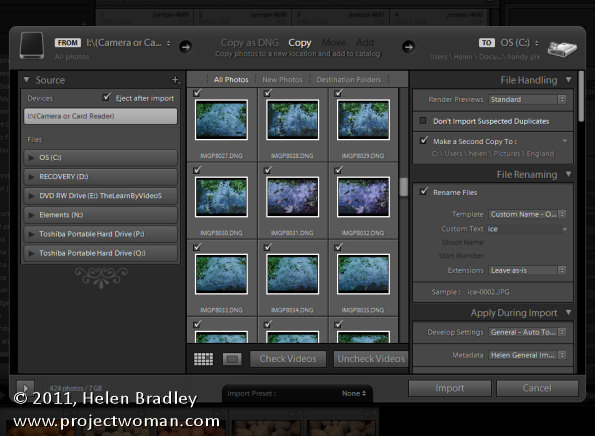
In Lightroom 3 the Import dialog was updated and there are heaps of cool tools here to speed up and make the import process more efficient.
Here are five things that you should know about the import dialog.
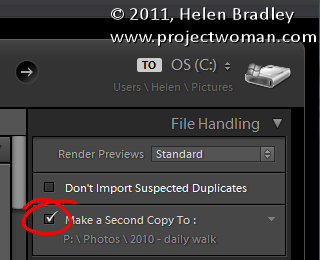
1. Back up as you import
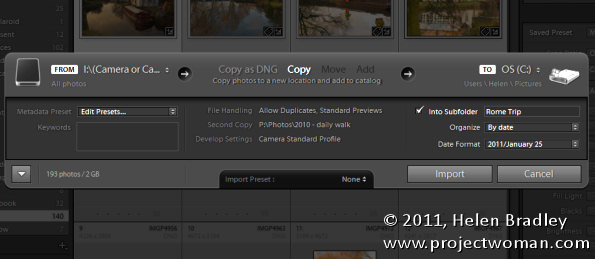
In the Import dialog’s File Handling panel you can select to make a second copy of your images upon import to another folder. This option is available provided you are using either Copy as DNG, Copy or Move as the option for importing images into your catalog – if you have Add selected this is not an option. This is a quick and no fuss way to ensure you always have a backup of your photos.
You should be aware that if you chose Copy as DNG the backups will be in the original raw image file format and they won’t be converted to DNG.
2. Fix as you import
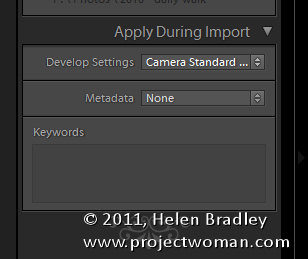
In the Apply During Import panel is a Develop Settings option. Here you can select from any of the Develop Presets that you have in your Develop Module. If there is not a preset for a fix that you want to apply, create a preset with those fixes that you want to apply to all your images on import. Once saved as a preset you can then apply those fixed automatically using this option. The presets are shown in alphabetical order and no distinction is made between yours and those shipped with Lightroom.
For example, for one of my cameras, I prefer to set the Profile to Camera Standard in the Camera Calibration panel of the Develop module. By creating a Preset for this, I can apply it to all images as they are imported whenever I download from that camera.
3. Apply Metadata
Also in the Apply During Import panel is a Metadata option. Here you can create a copyright preset and apply it as images are imported. Typical copyright presets will include IPTC Copyright and IPTC Creator data. You should also include IPTC Status: Credit Line. The remainder of the IPTC information is generally added on an image by image basis but you can, at the very least, apply basic copyright information on import.
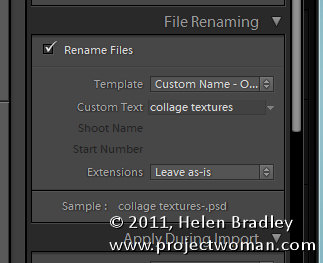
4. Rename files
If you prefer to rename your files to something other than what they are named by the camera open the File Renaming panel and choose a template to use. Where a template includes a custom name, shoot name or sequence you can type the relevant data into the boxes in this panel. The files will be automatically renamed as they are imported. If you are making a copy of the images at the same time as importing them, the backups will be renamed too.
5. Organize by date
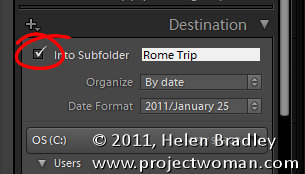
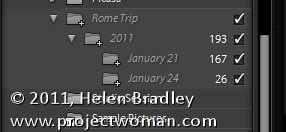
In the Destination panel you can select to create a subfolder for the files as you bring them in and, if desired, organize this by date and then select a date format to use. So you can, for example, create a subfolder such as Rome Trip and have various additional subfolders added automatically for each of the days that you captured images during that trip.
If you scroll down in the folder system, you will see the intended folder structure with the numbers of images listed. This allows you to check the folder structure is correct before committing to importing images.
If you already have a folder that you plan to use then don’t select the Into Subfolder checkbox and instead select just the folder that you want to import into.
Bonus tip
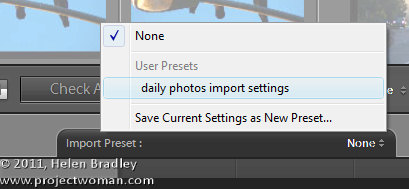
Once you have the Import dialog set up as you want to use it most of the time, create an Import preset using the Import Preset option at the foot of the dialog. This allows you to select the preset any time to set up the dialog the way you usually want it to look. You can then make changes to it to suit a particular import and click to Import your images.
If you always use a standard importing process you can shrink the Import dialog to a small bar by clicking the Show Fewer Options button in the bottom left of the dialog. This bar still shows the settings you have in place – but it is more compact – and these settings too can be altered if needed.



Post a Comment
Please feel free to add your comment here. Thank you!