

Learn to use Masks in Photoshop. Here we look at how to collage a series of images together, using masks in Photoshop.
Transcript:
Hello, I’m Helen Bradley. Welcome to this video tutorial. In this tutorial we’re going to look at Masking 101. So we’re going to get you started with masks in Photoshop.
In this introduction to masks I’m going to show you how you can use masks to create images like this collage image. This collage image has been built up from a number of images and they’ve all been masked so that everything can appear nicely on top of each other.
The first image was the tail end of some cows and then I added an image of a tree. And this image has been masked so that we can see part of the cows’ tails behind it. But you can see that these two images are sort of blending into each other with this mask effect. Then we have the cow by herself and again we’ve masked her so that we can see the image of the tree behind her. And then we’ve added an image of some hay over here, and again added a mask to the hay image around the edge of the cow so that we’re getting this sort of almost seamless blended effect all the way across the image. And then we’ve got some milk cans and then finally we had some different effects that sort of tied the whole thing in together. But we’re going to have a look at masks and we’re going to have a look at it doing the last three images in this particular collage, just seeing how that would have been put together.
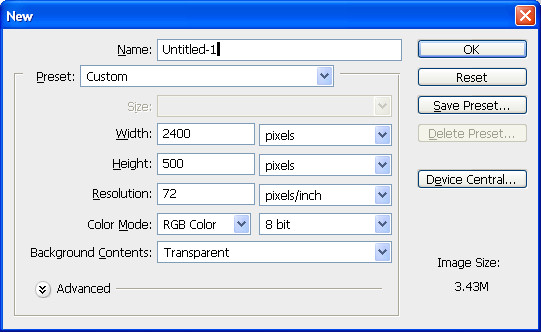
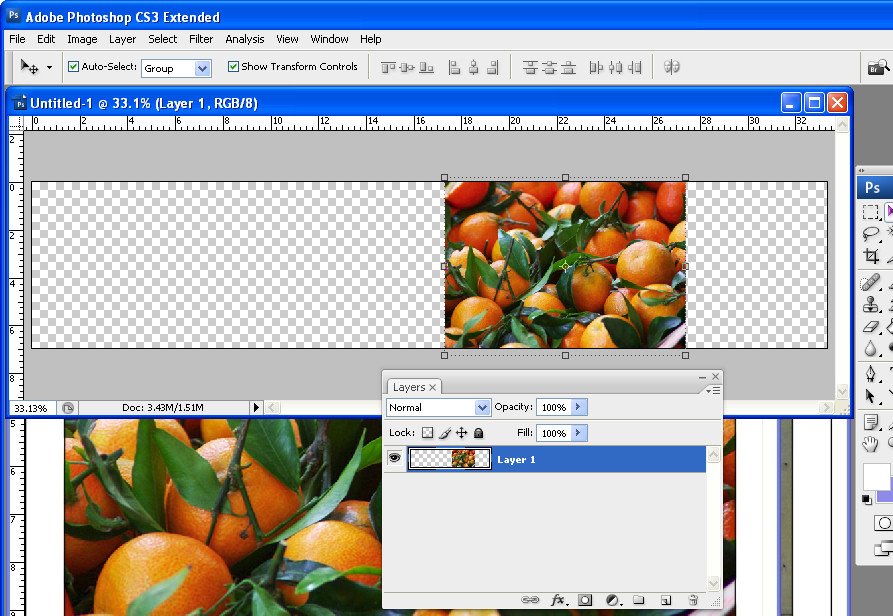
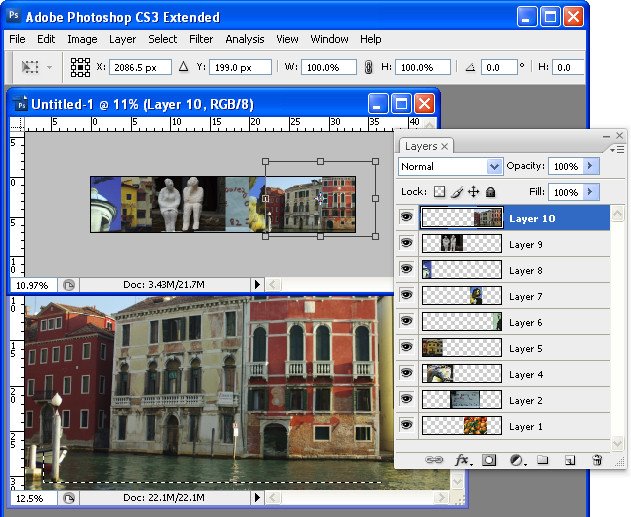
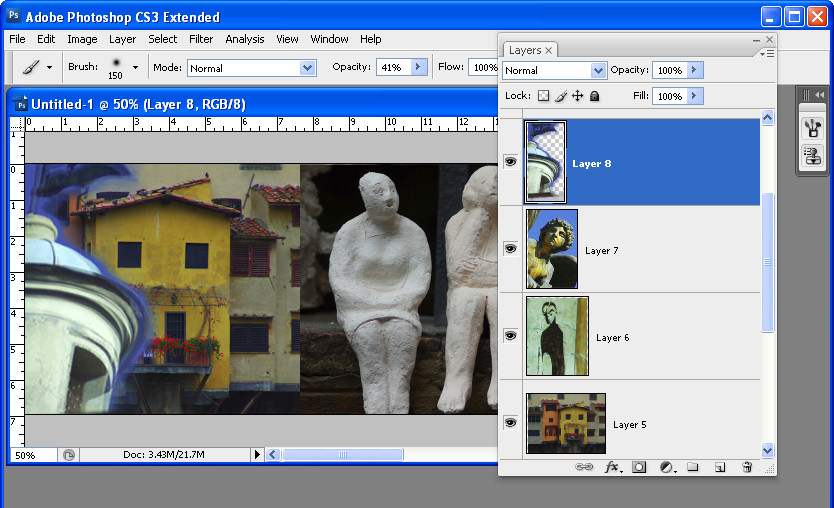
So I’m going to open the images. I’ve got a couple here open already. I’ve got the milk cans and the hay and let’s just go and get the cow. And I’m going to create an image that these will all going into. I think a thousand pixels is a bit too big so let’s try 800. And to start off with I’ll just drag and drop these images in. But this cow needs to be flipped first of all because I had her flipped in the original. So I’m going to flip her there and then just drag her in here. I’m just dragging on the layers and then just pressing V for the move tool so that I can move her into position. I’m holding Shift as I scale her up to full size. I don’t want to save the cow image. I want the hay image now so I’m going to drag and drop it into position. And I’m going to make sure I’ve got a fairly hefty overlap here because the overlap is going to allow me to blend these images together. And finally the milk cans and drag and drop them into position. And that’s a pretty big image too. I think actually it’s much bigger than the others. I’m pressing Ctrl T and then Ctrl 0, that’s Command T, Command 0 on the Mac, to just re-size these milk cans and just drag them into position.
So I’ll start off with a collage like this by just grabbing my images and just pulling them into position with a nice hefty overlap. And in this case I’m going to crop these images so that we don’t have anything extra hanging around. And now let’s go ahead and do the blending. And I’m going to do this by first looking at this layer here the cow and the hay. So I’m going to zoom into this area so that I can see what I’m doing, move the image across, and I need to mask this hay layer.
So to do that I’m going to click the Add Layer Mask icon here and that adds a mask to the hay layer. I need to have that mask selected. I need to select a brush to use. I’m just going to make sure that I have a brush here. I’m looking for a sort of solid-ish brush. This is a hard mechanical 38 pixels. Now it’s too hard but I can soften it by just taking down its hardness to make it nice and soft. And then I’m going to make sure that my mask layer is targeted and I’m going to set these colors here to their defaults by pressing the letter D.
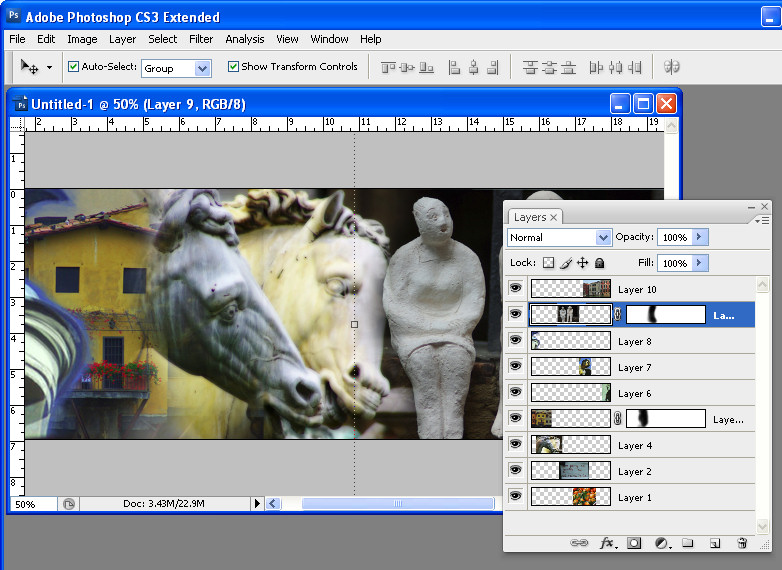
Now we can already see that if this mask is white we’re seeing the hay. So that means if I want to see the cow I need to paint on it with black. So I’ve got black paint now. I’ve got the mask targeted and I’m painting on the mask where the cow is to bring the cow back in through the grass. Now I’m not going to be a 100 percent fussy at this stage because one of the benefits of using masks is that we can come back later on and edit it. So I’m looking for the edges of the cow but I’m not worried that I’m getting a bit of extra green here because I want to know where her edges are so then I can get a little bit closer to her in a minute. So I’ve got her pretty much there.
Now I just need to neaten it up. And to neaten it up I’m going to switch to white being my foreground color. I’m going to get a much, much smaller brush, make sure I’ve got my mask targeted and I’m going in close to the cow’s face here to make sure that I get an edge that gives me none of this green because it’s a really, really bright green that she’s standing on. And it’s not really doing a lot. The hay image I think is the prettier image. So again I’m just going to get close in to her here. Now this might take me half an hour to do to get a really nice result and the sort of result that I want. And I can also start working with a larger softer brush so I can make sure that I have it even softer. And I can work with a lower opacity if I want to and I can even paint in mid gray because with masks you can paint in black or white or any shade of gray because a mask is a gray-scale image. Now I’m just having a look at these milk cans. And I think that probably there’s one too many. So before I go much further I’m going to select the milk can layer and get rid of this first one because I don’t really like it that much. Now I’m going to grab the next three, I’m just going to move them over a bit.
There’s a bit of excess image hanging around but I’m not too worried about that. I’m going to add a layer mask to this layer. So now we have the overlap. And I want to bring the grass through the milk can so I’m going to paint on this layer again in black and white. So again a nice big brush, I’m going to switch colors by pressing the X key because I want to blend these images in together. I want to sort of suggest that there’s a seamless transition from one image to the other. And I’ll do that with a very soft edge so we almost can’t see where the grass image ends and the milk cans begin. And with this particular image I found that there was enough shine on the milk cans that we could perhaps even suggest that the grass image was showing through the milk cans. And I’m doing that by just adjusting down the opacity of the brush. So I’m not painting it full opacity and I’m just tapping where I want perhaps a little bit of the grass image to appear, again to really blend these images together. And if I’ve made a mistake and if I want to go back then all I need to do is change my paint colors and I can go back and paint out the effect that I’ve just painted in. And I can do this over and over again until I get the exact effect that I’m looking for.
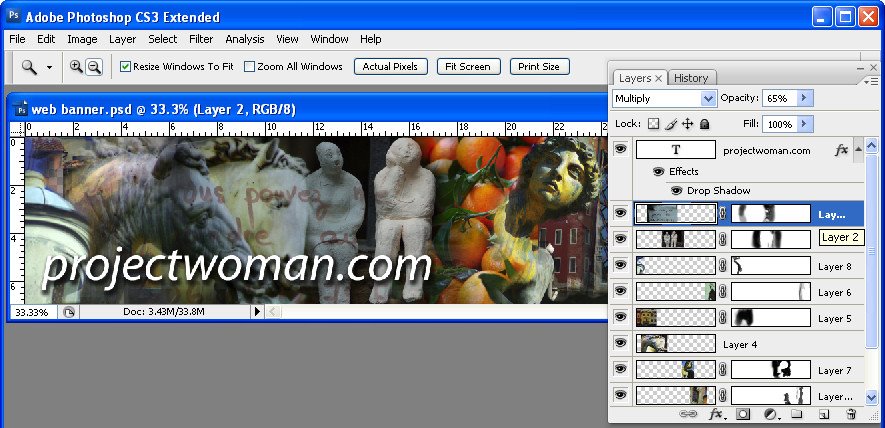
Masks are a handy way of blending images in a way that allows you to come back later on and make changes to it. If I were saving this masked image because I want to make changes to it later, I want to come back and work on it a little bit later, I would do so by saving this as a PSD file. So I’d choose File and then Save As and make sure that when I’m saving it, it’s being saved as a PSD image. That will ensure that the masks and the layers are all there when I come back next time. The biggest mistake you’re going to make when you’re working with masks is when you actually work on the image instead of the mask itself. So if you start seeing that you’re painting in black, that’s telling you that you have the image layer selected not the mask layer. If you’re working on a mask you really need to have that mask layer selected.
I’m Helen Bradley. Thank you for joining me for this video tutorial. Look out for more video tutorials on this YouTube channel and visit my website at projectwoman.com for more tips, tricks and techniques with Photoshop, Photoshop Elements, Lightroom, Illustrator and lots more.


