Continuing our look at revving up your photo editing workflow we look at keywording and adding copyright metadata
Keywording your images
One step that takes time now but will save time in future is keywording or tagging your images. The process involves adding descriptive words to your images that you can use later on to find images in your collection. For example you might add keywords for subjects’ names and the contents of the images. If you are selling images for stock you will need to use lots of keywords for each image to maximize the chance that someone looking for an image of this type will find it.
While some programs let you add keywords to images as you import them this isn’t always the best time to do so. The reason is that if you are importing a variety of images that all have different content you’ll only be able to include generic keywords at import. In most cases you will need to add detailed keywords to a few images at a time so you will need to add keywords after importing images.
To add keywords in Picasa, for example, select the images that you want to apply a keyword to and then select to display the Tags panel. Here you can type keywords to attach to the images. If you configure Quick Tags you can add them to an image or series of images by simply clicking on the image and then on the tag. Quick tags can be changed at any time so you can create a set of quick tags that are useful for a particular folder of images, use them to keyword those images then create a different set to use on another folder.

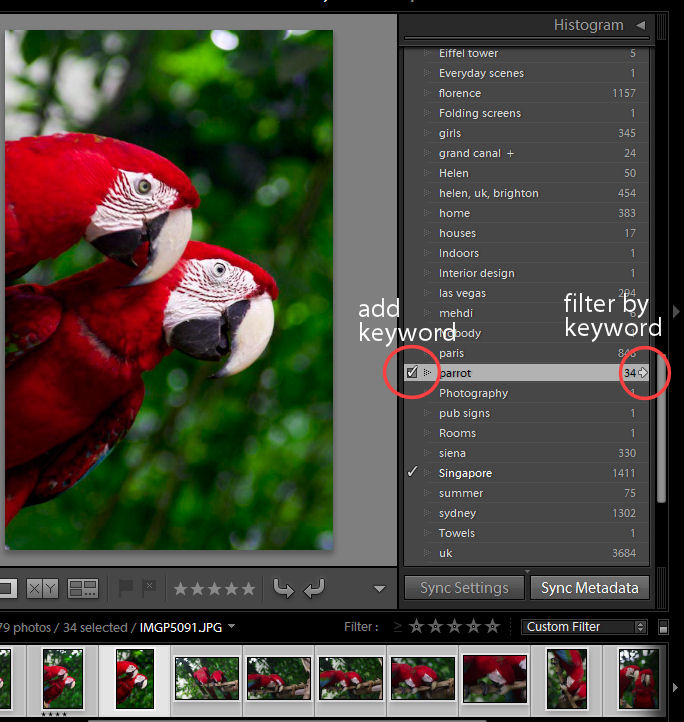
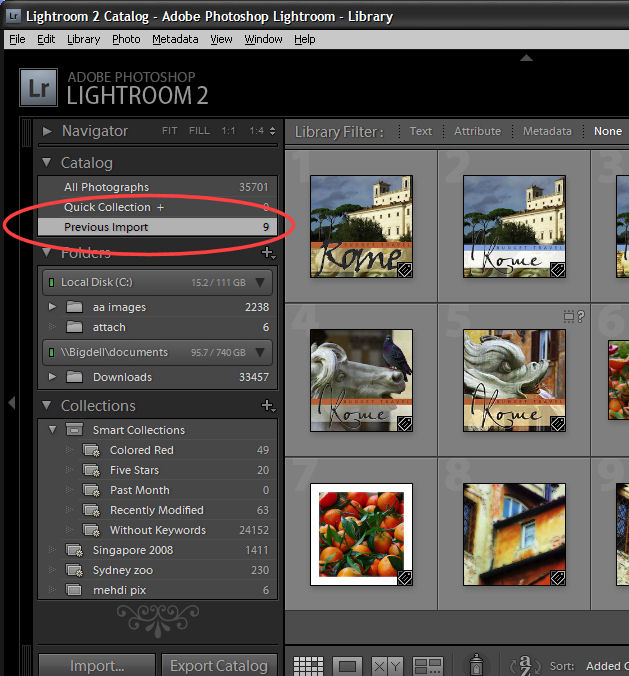
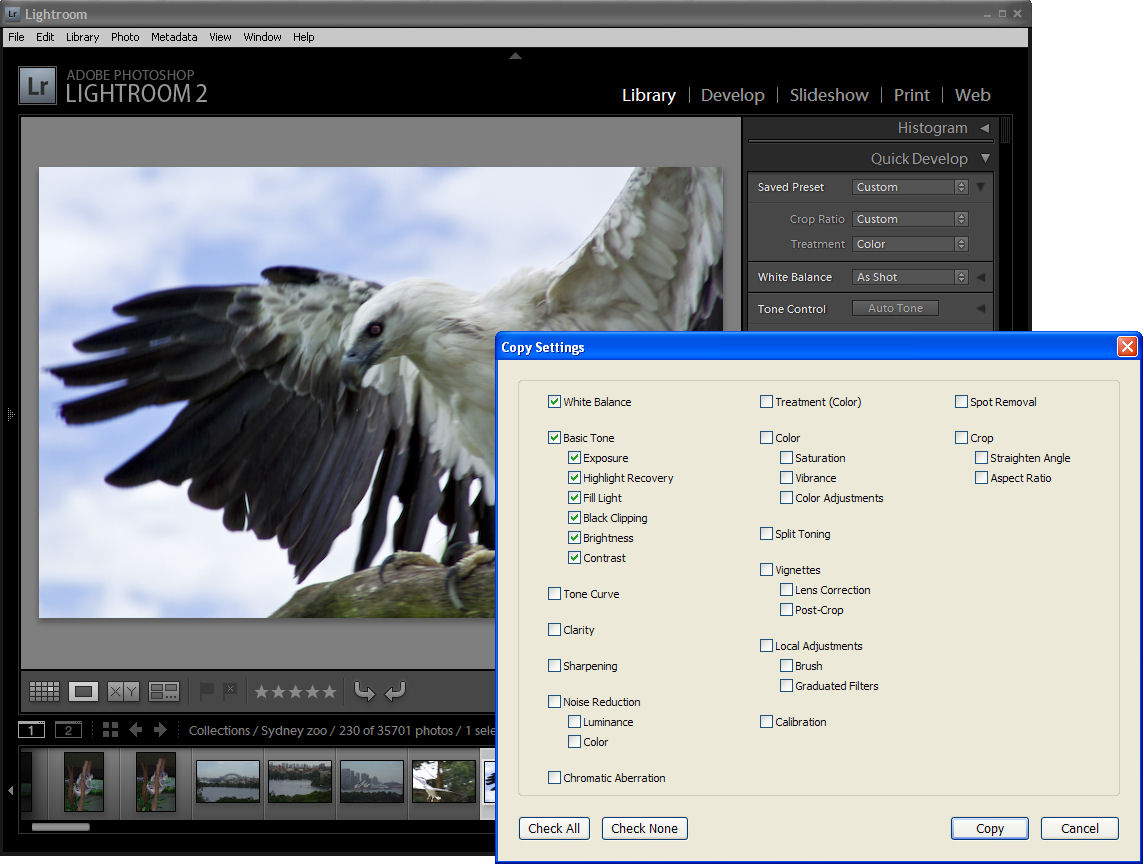
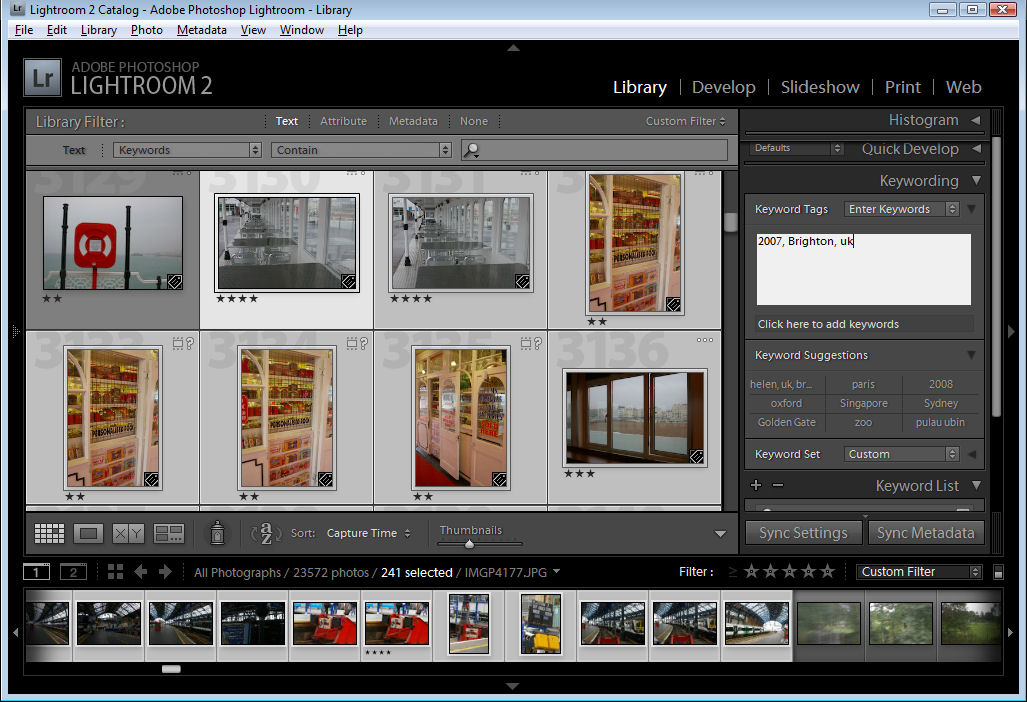
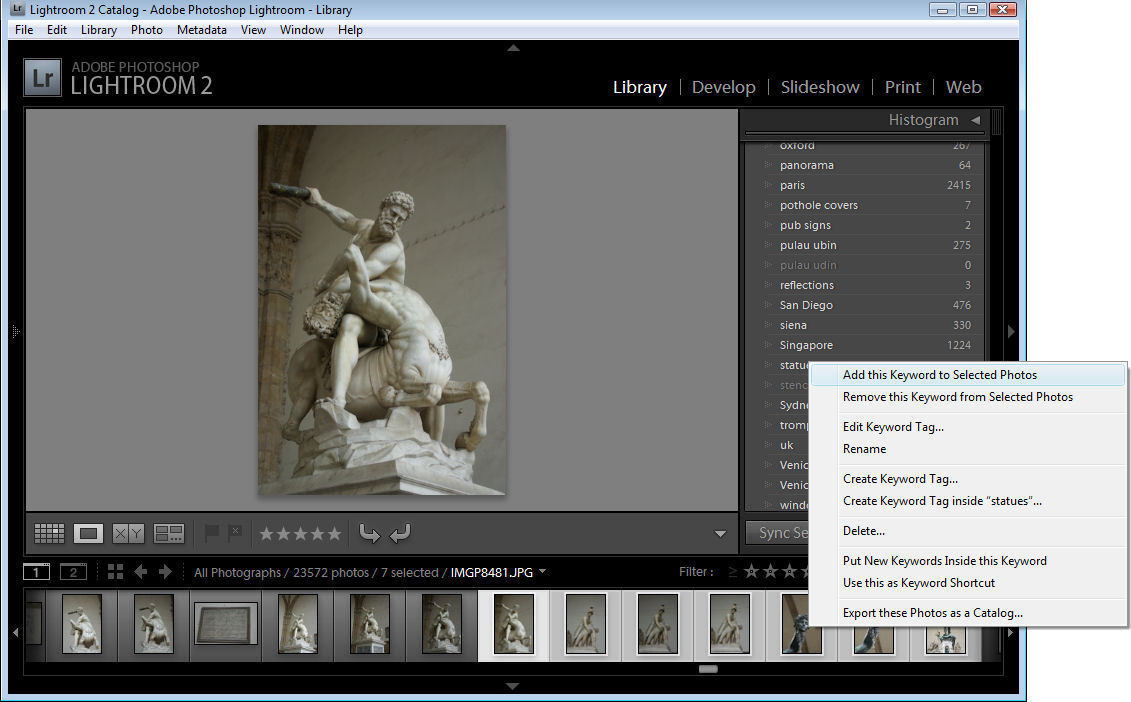
Lightroom offers a similar feature in its Library panel – here you can select the Keywording panel and then select images and apply keywords to them from the keyword suggestions list. You can also create keyword sets that are saved with Lightroom and which you can select to make it easier to add keywords to your images. By selecting multiple images at a time in Grid view you can apply selected keywords to those images all at once.
In Adobe Photoshop Elements, you can keyword images manually and, in some cases automatically. For example, if you have a folder of images of people, select the images and click the Start People Recognition button in the keyword tags area. The program will attempt to recognize faces in your images and you can then double click the purple icon that appears on the image to open and type the name of the person in the picture. Over time Photoshop Elements will offer a subset of likely names to choose from and it will get better at recognizing people. You can also apply Smart Tags to an image by clicking the Auto-Analyze button on the status bar. The program will auto-analyze your images for a set of predetermined characteristics such as faces, blurred, high contrast, motion and so on. This lets you quickly and easily isolate images that are blurred or low contrast images. In the Keyword Tags panel you can also create custom tags for your images grouping them in various categories such as people, places, events and other. Once a keyword is created you can drag and drop it onto an image or multiple images you have selected.

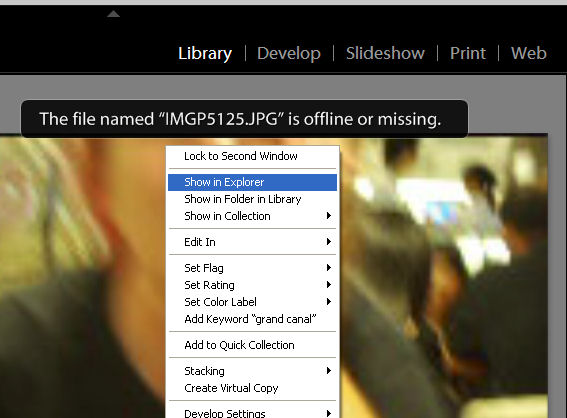
When adding keywords to your images it is important that the keywords are written to the files so that they will be available in other programs. For example, in Photoshop Elements, you can select a group of files and choose File > Write Keyword Tag and Properties Info to Photos to write the keyword data to the files. In Lightroom, this can be done through the Lightroom Catalog Preferences or you can select the images and then choose Metadata > Save Metadata to Files.
If you don’t manually save the keyword metadata to the files and if the program doesn’t do it automatically then, when you open the image in another application, the keywords and metadata that you have applied to the images won’t be visible. If you only ever use one program for working with your files this is less of an issue than if you use multiple applications. However, it is always a good idea to write the metadata to your files so that you won’t lose all your work if your program’s catalog becomes corrupt.
Most software that includes a download tool and other tools for organizing your images will contain a tool for adding keywords or tagging your images. While it takes time to define the keywords that describe your images and apply these to those images the benefit is that it is a very simple process later on to view images tagged with a particular keyword so you can find images even in very large collections very quickly.
Copyright Metadata
In some situations, you may want to add metadata to your images such as IPTC metadata indicating the creator of the image and copyright details. Some programs allow you to do this easily and others do not. For example, Photoshop Elements will let you add a Creator name and copyright details as you import your images but once the images have been imported you can only view this information in the Properties panel by choosing Window > Properties. The only metadata that can be changed is the data you view by selecting the General tab in the properties panel.
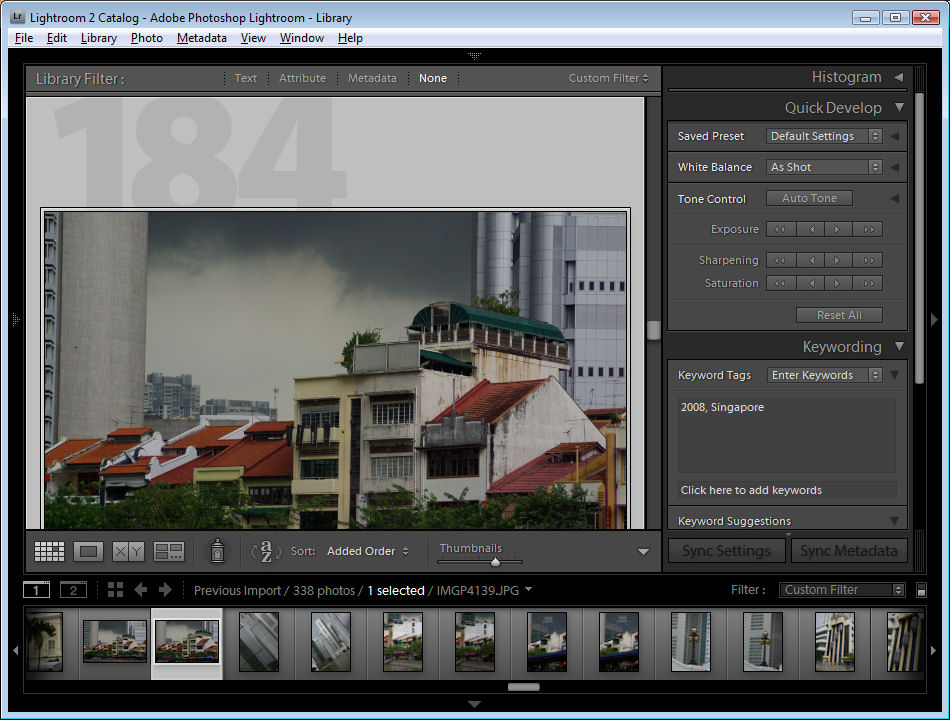
In Lightroom, you can add metadata to a file by opening the Metadata panel in the Library module and select the type of metadata to view, for example IPTC. You can then type your own details into the boxes that appear in the panel. You can also create a preset by clicking the preset dropdown list and select Edit Presets and create a preset with the data that you want to apply to all your images. You apply this to one or more images in your catalog by selecting those images in Grid view in the Library module and then select the preset to apply it to those images.
In Photoshop, you can apply metadata in Adobe Bridge by choosing Window > Workspace > Metadata to view the metadata panel and select one or more images in the preview area. You can now type the metadata details for those images and click the Apply button to apply the data to those images.
If you are capturing in the jpg format you can add some IPTC metadata to your images using the free program IrfanView. Download, install and launch the program and select a range of images from the Thumbnail view. Right click and choose JPG Lossless Operations > Set IPTC data to Select Files. Here you can set copyright information, keywords and other details to be applied to the selected jpg images.

Coming up in the final part of this series: organizing images, fixing and sharing them.